How to Make a Ticking Stripe Fabric Heart Wreath
Thanks for coming by today! Today, let’s learn how to make a ticking fabric heart wreath (but, you can do it in any shape you want, and it will be gorgeous)! This ‘rag wreath’ is a fun watch-a-Hallmark-movie type of craft!
HOW TO MAKE A TICKING STRIPE FABRIC HEART WREATH
As featured at Farmhouse Style Extra!
Inspiration for Making a Ticking Fabric Wreath?
I first saw this project done by Jen at Noting Grace. Her blue ticking fabric and denim wreath stops me in my tracks every time I see it on social media. SO pretty! Thanks for the inspiration, Jen!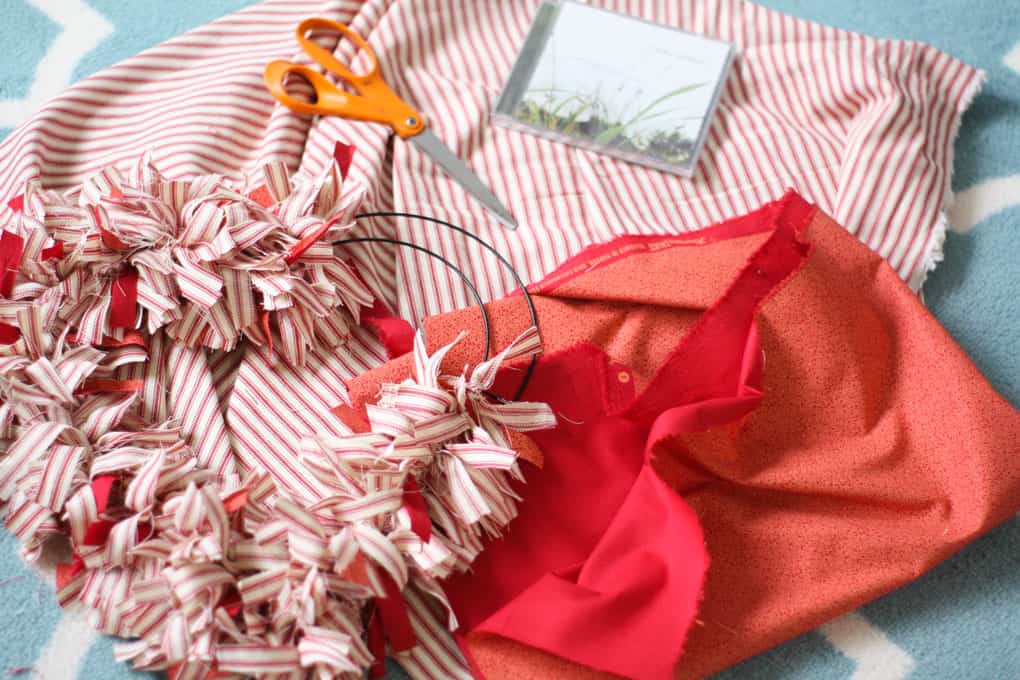
This post may contain affiliate links, at no additional cost to you.
For more information, see my complete disclosure HERE.
What You Will Need to Make Your Ticking Fabric Wreath:
- 1-2 yards of ticking fabric in your color choice (I only used 1 yard, in red)
- ½-1 yard of 1 or 2 contrasting fabrics (I used a double-sided fabric which resulted in looking like I was using TWO additional fabrics)
- Fabric Scissors or Update: Rotary Cutting Kit (This is my go-to now for quick and precise cutting… seriously, it will change your life! LOL!)
- Wire form (heart or round, or whatever!) (Link supplied for your convenience, however, I bought mine at Dollar Tree, but you can also find them at Hobby Lobby)
- Wire cutters (optional)
- CD holder (CDs aren’t just for listening to!)
(Just sayin’: This wreath is meant to have a rustic look… don’t worry about being perfect… AT ALL!)
How to Make a Ticking Stripe Fabric Heart Wreath
A CD cover is about 5.5” long, so I used the CD cover to measure how long to cut each strip. You can “eye” the ½” width (remember, this is supposed to be rustic, no one will ever know that the strips aren’t cut perfectly.) Cut a full length of the fabric (double layered), and use the strips before cutting another length of strips. (I hope that makes sense!) Do this for both the ticking and contrasting fabric. (Update: Since originally making this wreath, I discovered the Fiskar Rotary Cutting Kit… It’s amazing, no joke… and I will definitely be using this for future rag wreath projects.)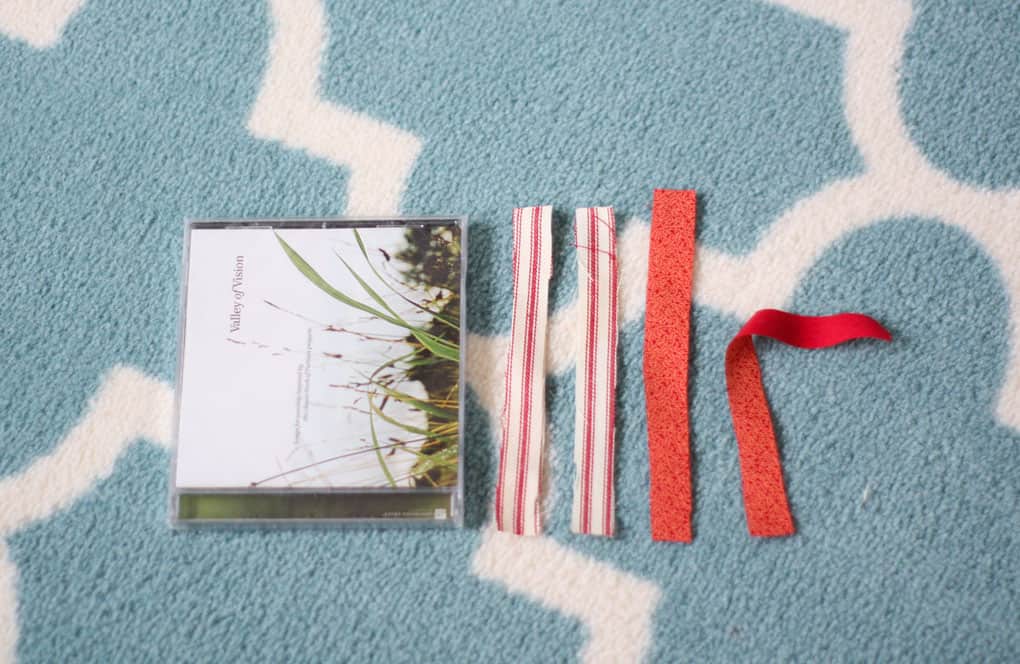
Bump in the Road
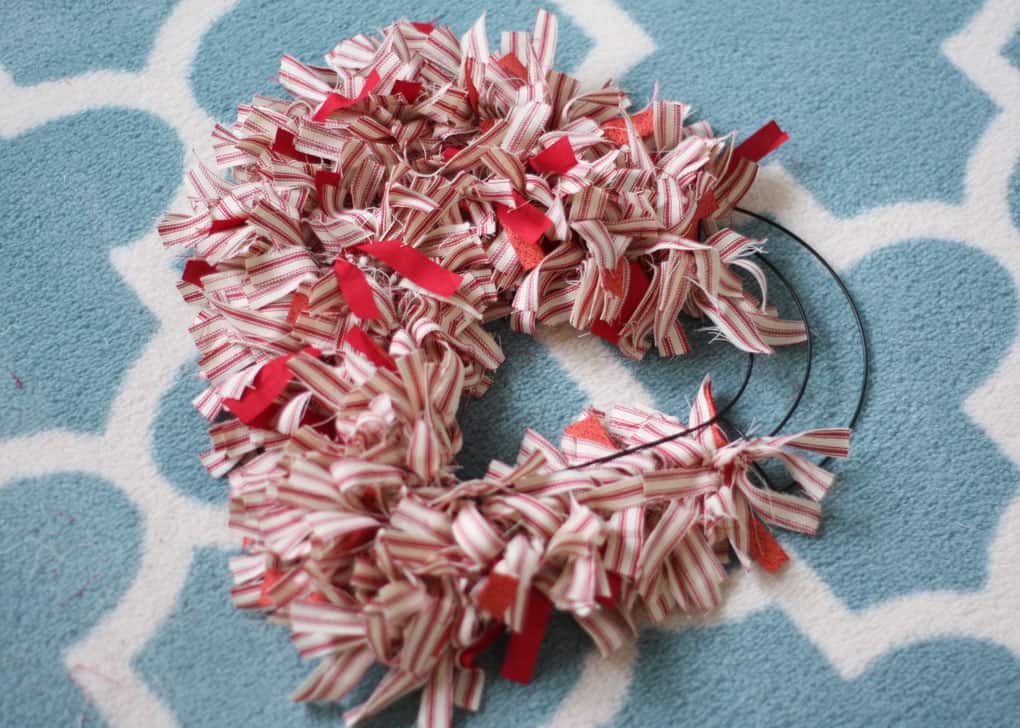
I started tying the pieces around the form, (just one tie… no knot needed), when I realized the form was getting too ‘full’ and that I couldn’t decipher that it was a heart (I really didn’t want a triangle wreath!). This wouldn’t happen with a round wreath, but any other shape, it might. So, I took wire cutters and cut out the middle portion of the heart, leaving two wire layers. Perfect (I know, I know… this is supposed to be rustic, not perfect. Give a girl a break! ;-))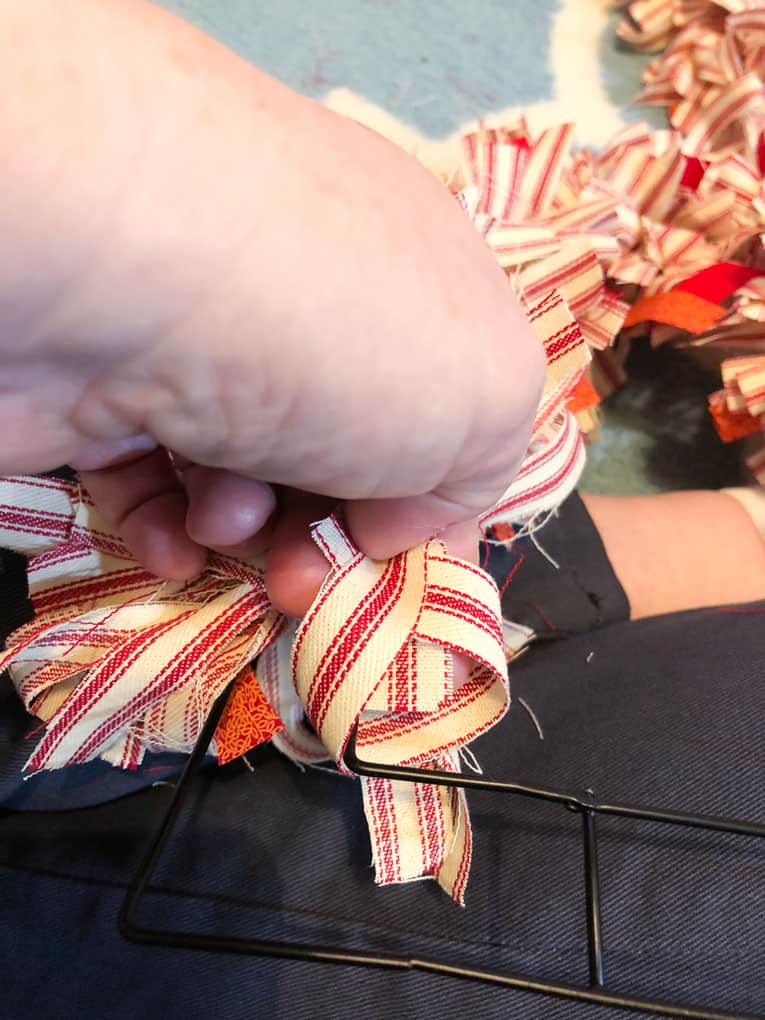
Easy fix… snip off the third heart (the one closest to the inside of the frame).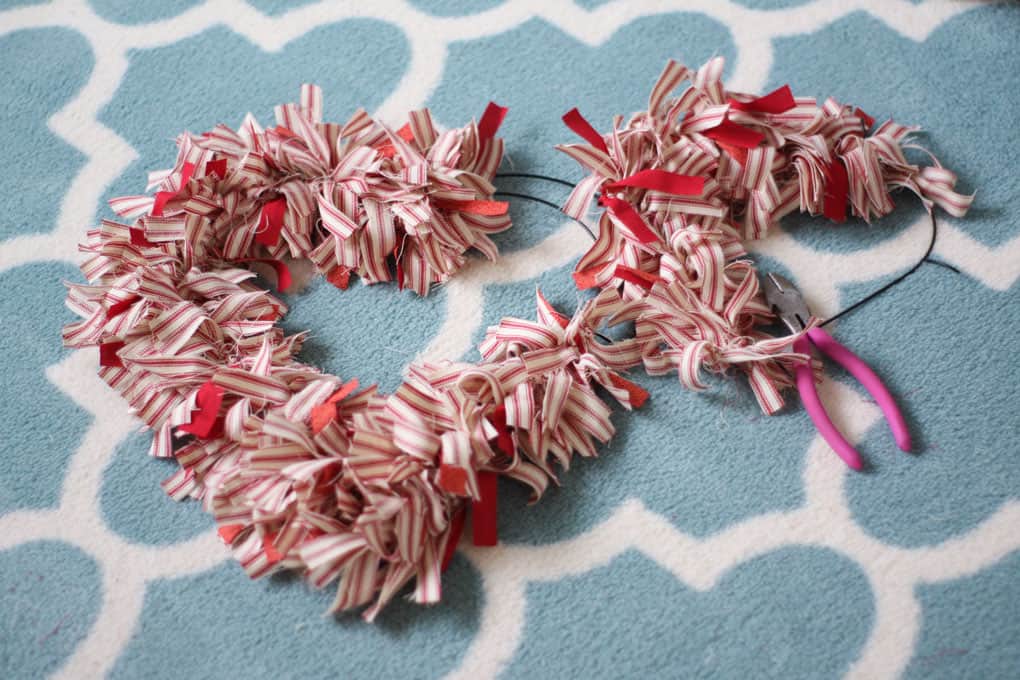
Continue tying the strips around, sporadically tying in a strip of contrasting fabric as you go. When you’re wreath is complete, tie in some additional contrasting fabric wherever you think it is needed. After that, shake-out the wreath (LOTS and LOTS of threads, people… I’m still finding them after vacuuming!), and then make sure all the strips are turned outward from the wires, and the ‘knots’ are facing the back. (Again, hope that makes sense.)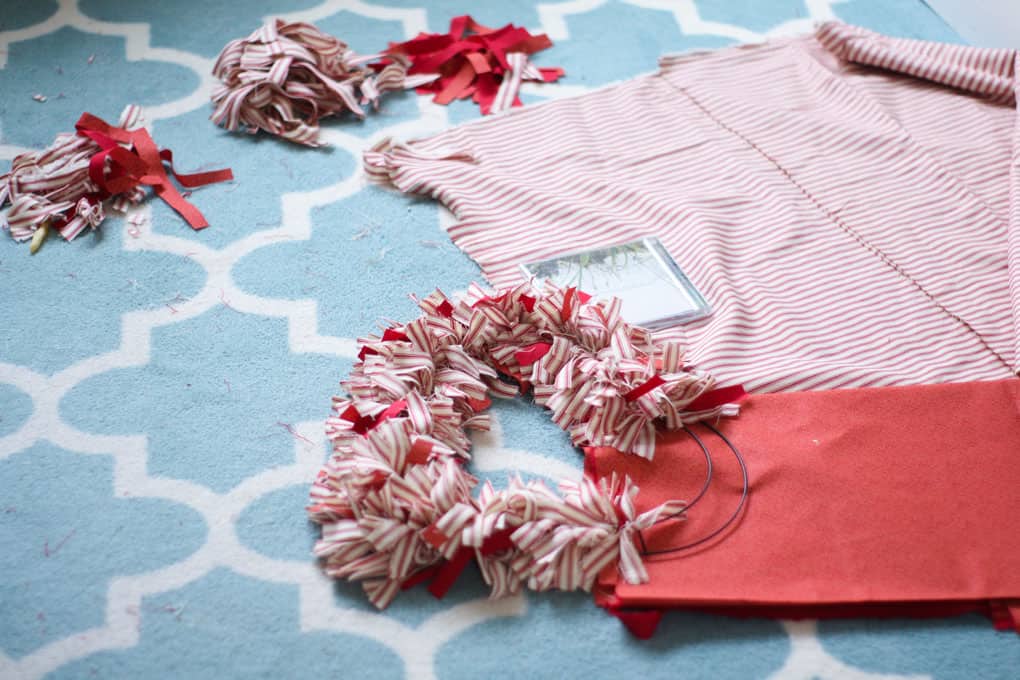
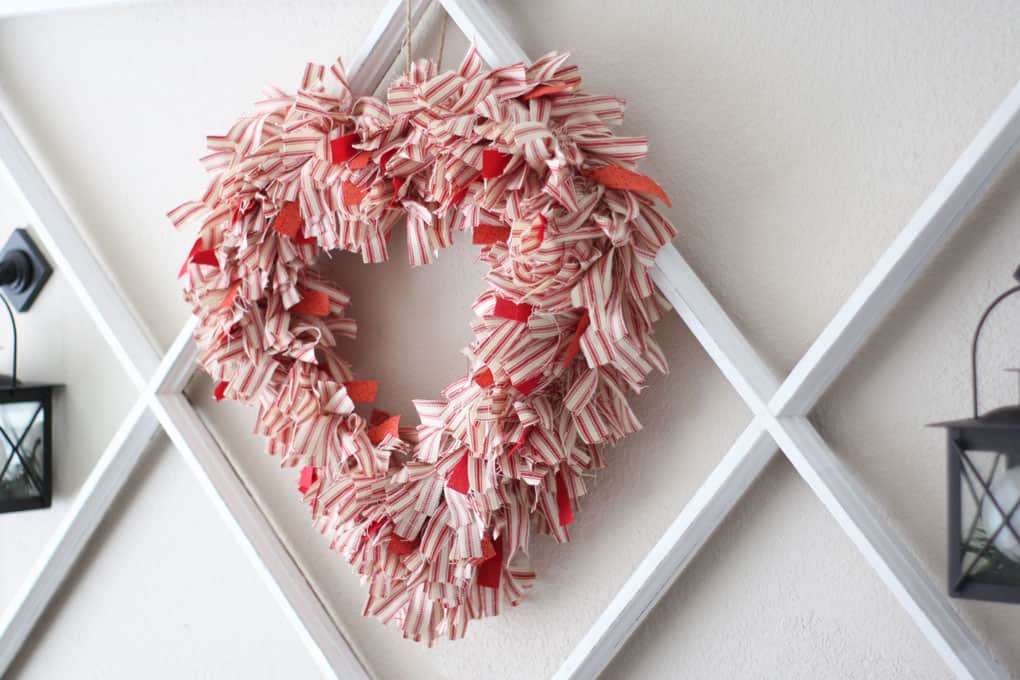
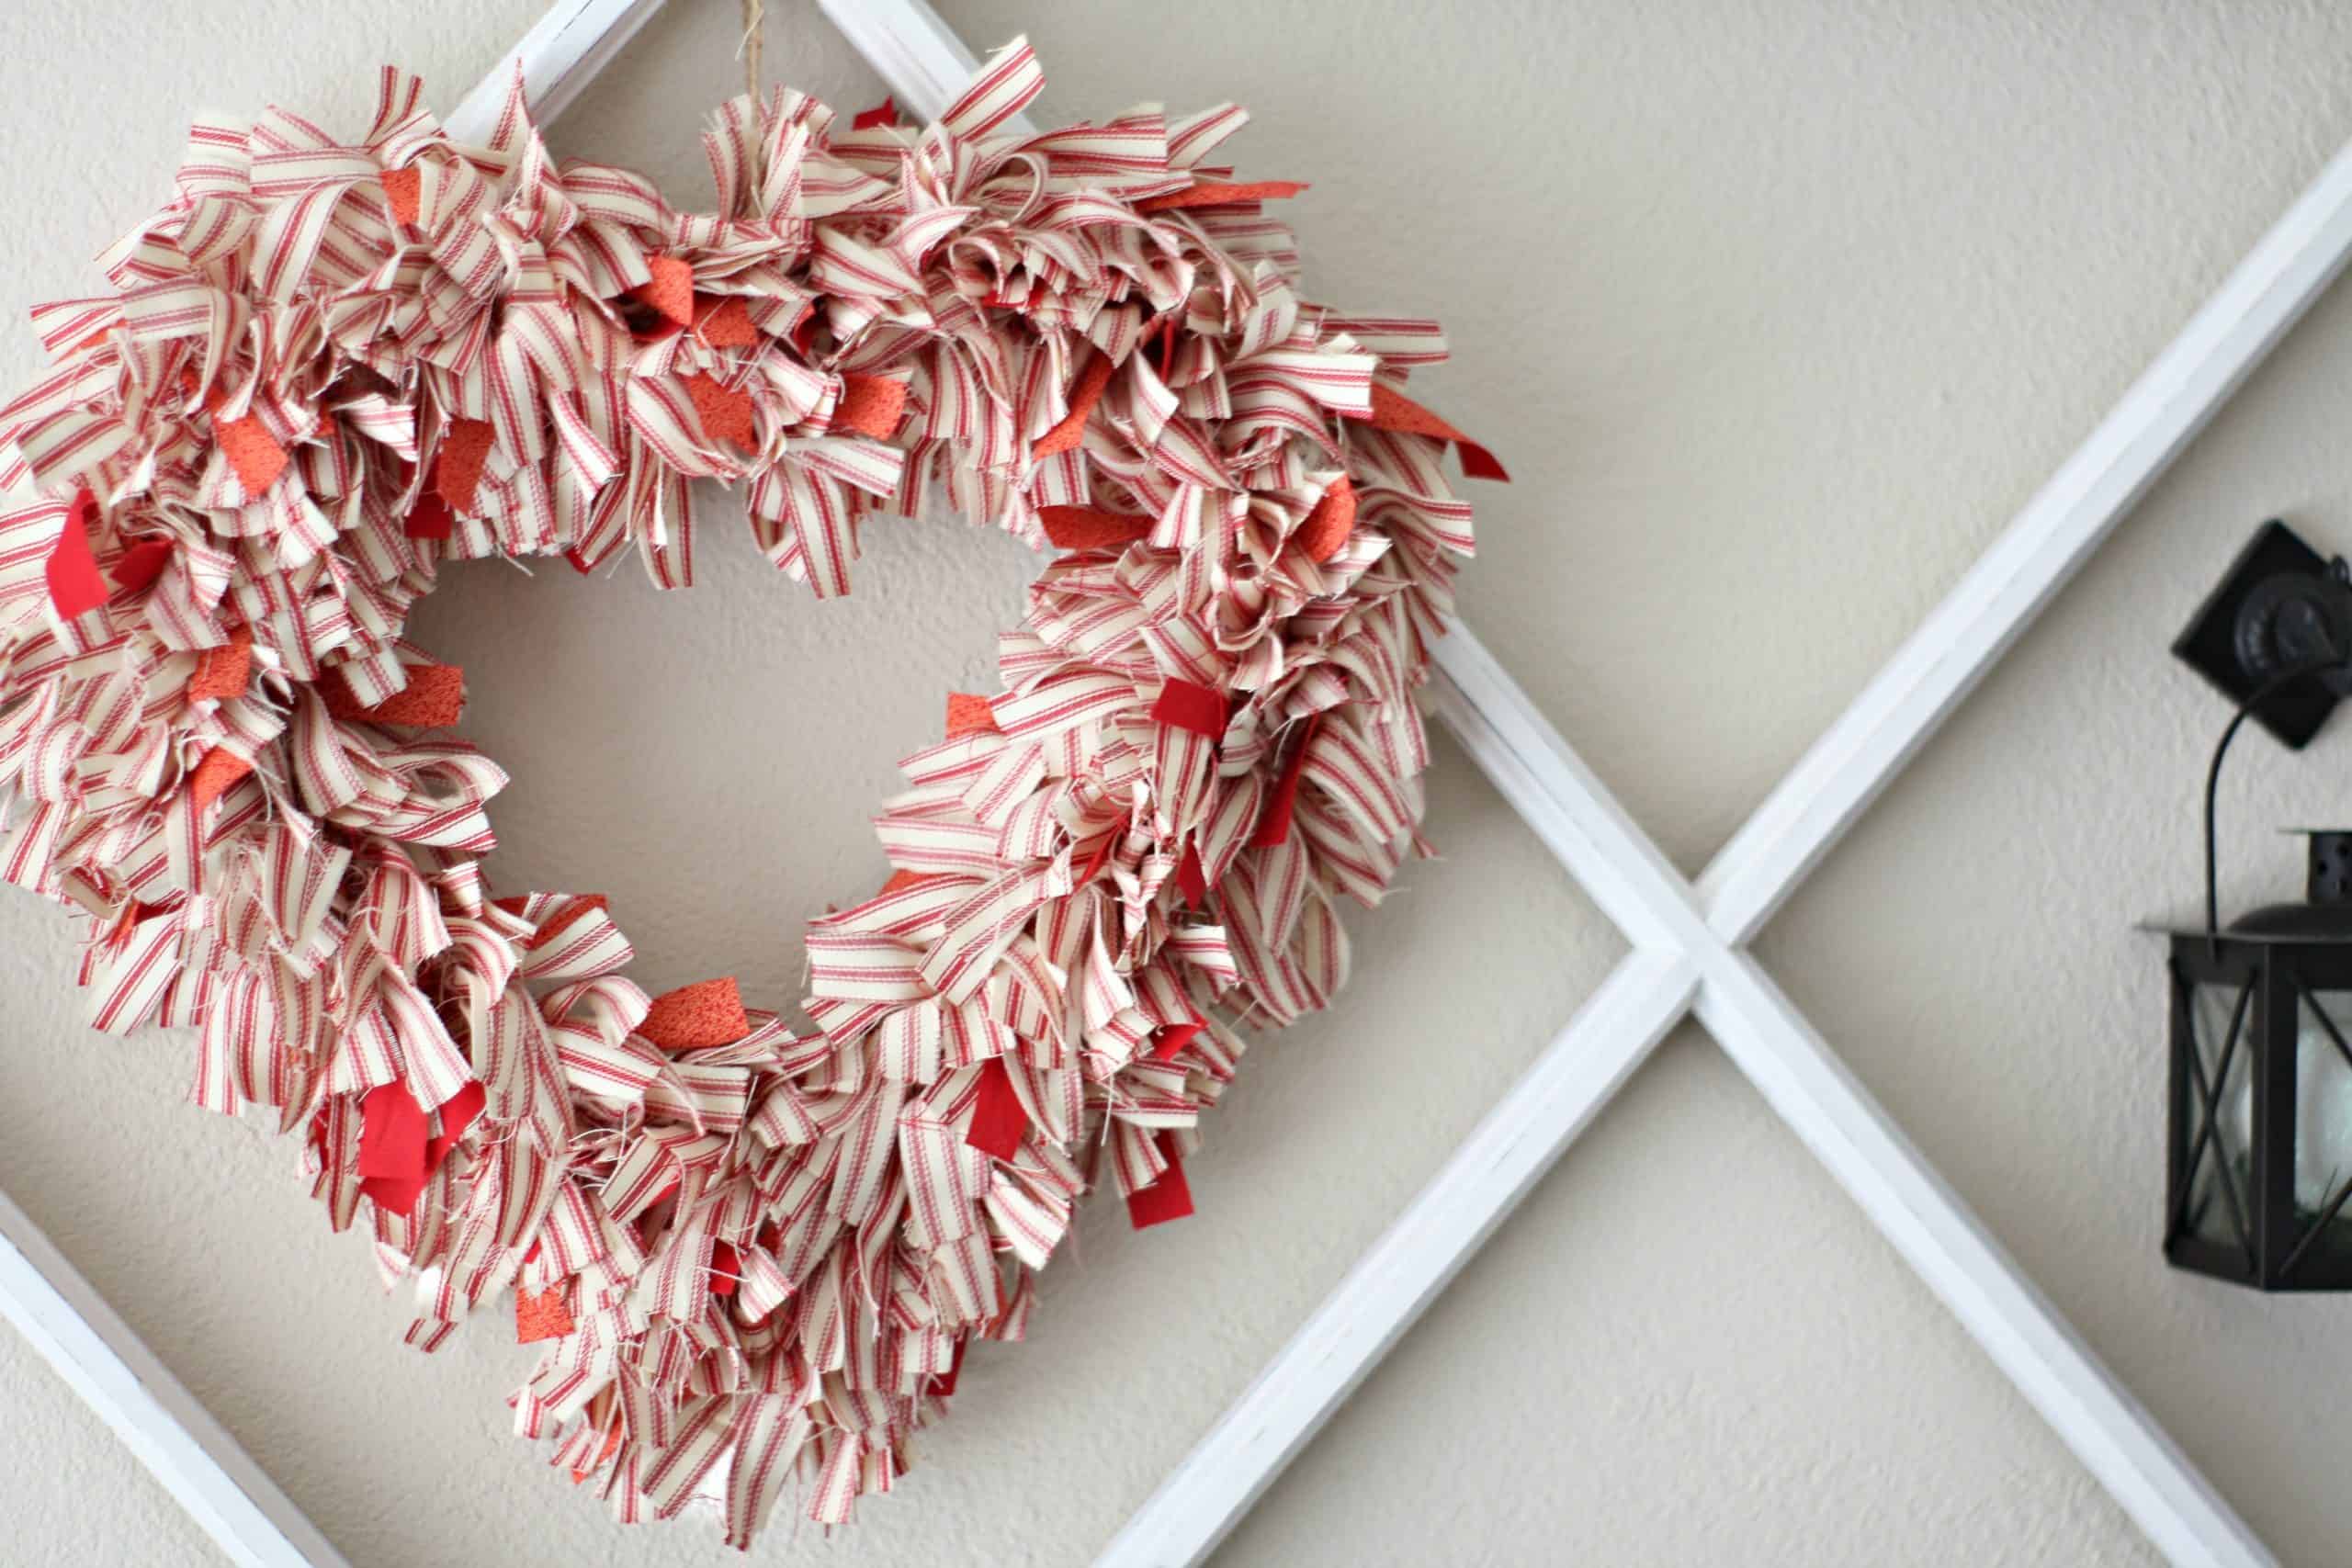
Finished Ticking Fabric Wreath
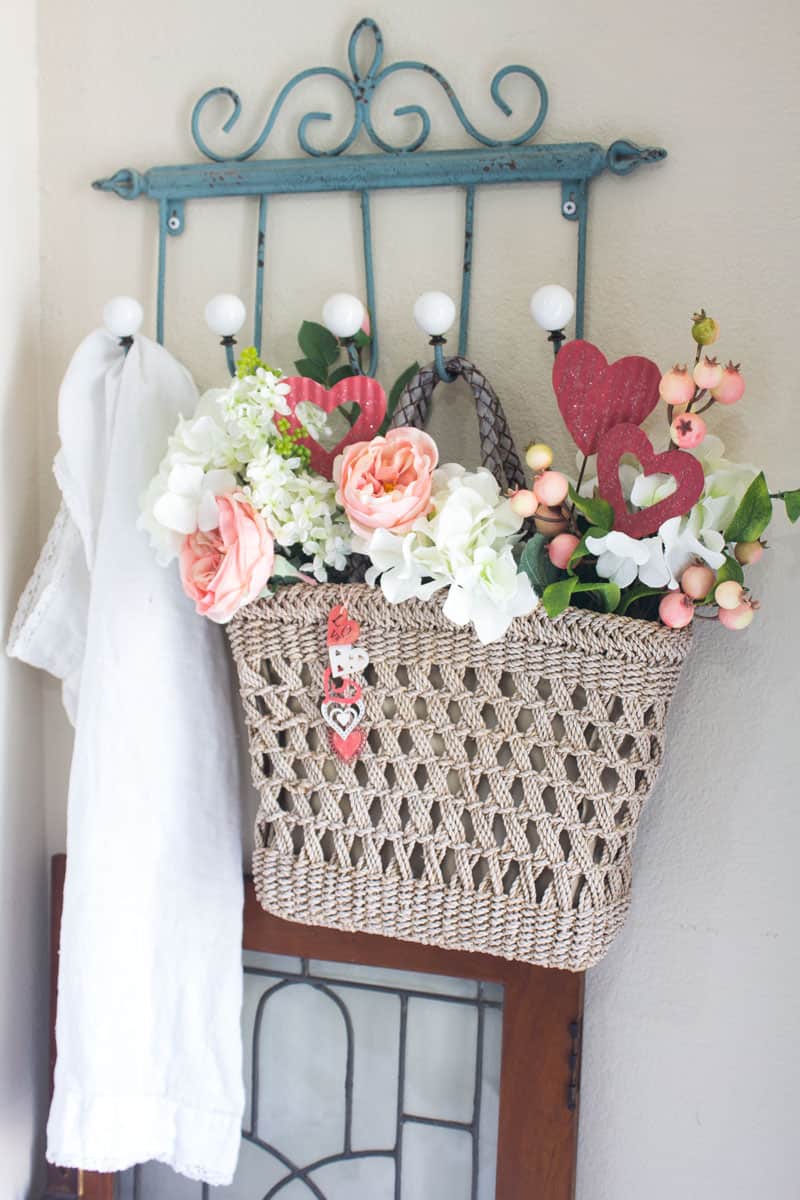
I hung the rag wreath in several different places, and I think I’m going to leave it on my door for this week, and then maybe put it on my windowpane above my media console for the rest of the month!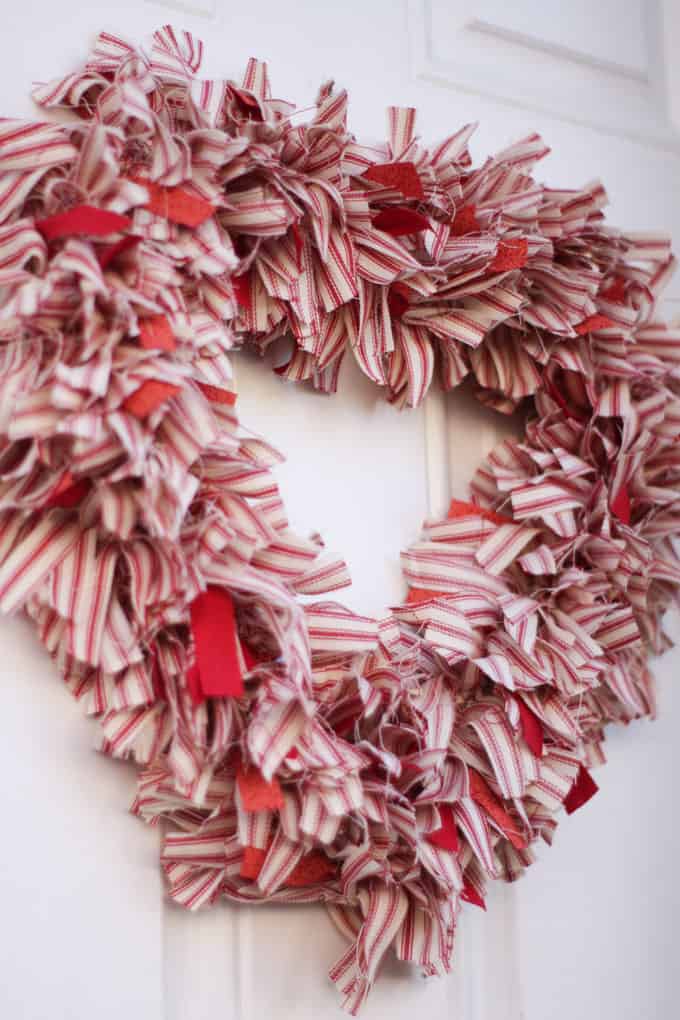
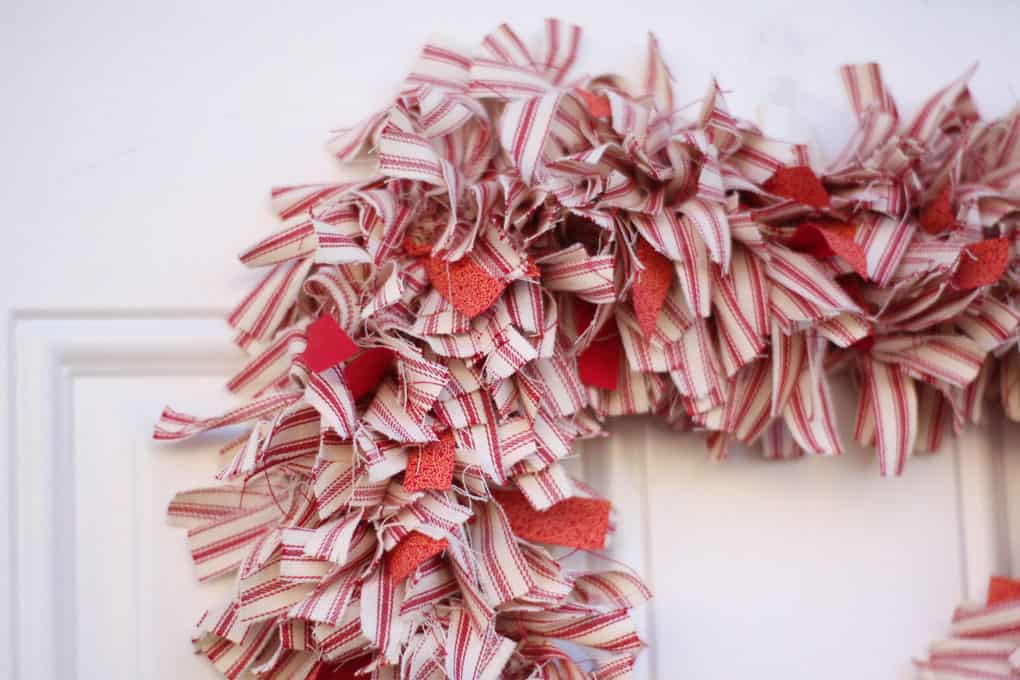
This is the back of my Hoosier cabinet… I was looking for a bit more rustic location to photograph. 😉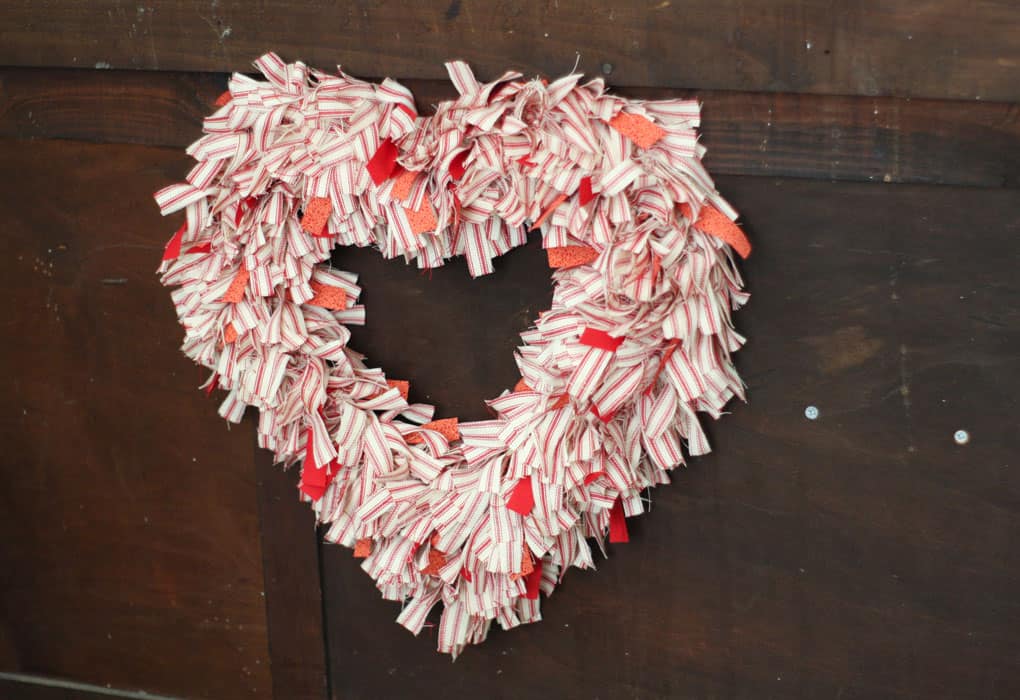
Now It’s Your Turn
What do you think? It was super easy and fun to do while listening to the TV (because you can’t watch and tie at the same time… at least I can’t!).
Now that you’ve learned how to make a ticking stripe fabric heart wreath, what other shape do you think would look pretty to use? Remember, I love reading your comments, so make sure to leave one (or two)! See you soon!







So cute! What a great idea. I really liked the look in the last shot.
Thank you, Teresa! Yes, I was pretty happy with that last pic! 😉 (I’m “larnin'”!)
Using a double sided fabric is such a great idea!! Also, where did you get your wire frame?
WHAT?!!! I feel more than honored and loved that you commented, Peg! (Now where IS that happy-dance Bitmoji?! You know what, I thought about noting where I got the wire form, then forgot. I’ll fix that. However, I got it at the Dollar Tree near my house… last year!!! LOL! I would think they would still have them at this time of year though. Fun fact… I didn’t even REALIZE that fabric was double-sided until the lady at the cutting table showed me! I was all set to purchase three fabrics! Saved $$$$! LOVE!
I absolutely love this Julie!! It turned out so cute! I may have to copy this idea myself! Thank you for your sweet words and for linking back to my blog.
Oh, thanks, Jen! LOL! Well, we can just go back-and-forth on this project, huh?! 😉
Hello Julie, saw you on FB Blogging 50. I adore the combo of red and white, and this is just too cute! I added you to my Lovely Reads on my blog, and hope I send you some traffic on your new venture. I too blog about small space living.
Brenda
Oh, Brenda… Thank you for adding me! What a lovely idea to have a page on your site like that! I think I may just have to add something similar! So glad to ‘meet’ someone that is on the same adventure, in so many ways! Looking forward to getting to know you!
Hey, Julie. This is such a great project for children learning how to tie or seniors and dementia patients needing to pass the time productively. Even a whole group of people could “tie one on” (in a good way 😉 ) as a group gift for someone who is sick to show their love. Awesome tutorial. You made me laugh!
That is a GREAT idea, Darlene! You are really helping me to think in more that direction! God is good to have given us this friendship! (“tie-one-one”… you are so funny!)
Amen, Julie!
This is such a cute wreath … and I have red and white ticking fabric on hand!
Oh, I would LOVE to see it if you do one! Thanks for coming by, Jennifer! (Love your site!)
I love this project!! I love the classic ticking stripe and then the cute twist of making the wreath into a heart shape is just adorable. You could do this for other times of the year but it’s super special at Valentines Day! Your tutorial was super helpful too! Thanks for sharing for Friday Friends Parade Linky party!
xoxo Jodie & Julie
Thank you so much… your words mean so much to me! And, again, thanks for the opportunity to link up!
This is such a versatile craft! I would love to try it in all different shapes and colors 🙂
Yes! You could actually use this for July 4th… or even add blue to make it even more patriotic!
I made one of those for Peg when she was first married.what goes sround, comes sround, I guesd. You can also dangle little charms in the centet.
Doesn’t it always come around again? LOL! Charms would be so cute, as well as pine cones, or a little sign, wooden stars in RWB… lots of possibilities! Hugs, Glenda!
I love these types of wreaths and this would be great for Valentines Day too. Please stop by Thursday Favorite Things since you are one of my features.
https://eclecticredbarn.blogspot.com/2019/01/welcome-to-thursday-favorite-things.html
Hugs,
Bev
Thank you, again, for the feature, Bev. Hope your new year is grand!
This is SO CUTE!! I’ve featured it at Thursday Favorite Things today. Thanks for sharing!
Thank you for the feature, Pam. Always appreciate you co-hosting at TFT! Hugs!
This is so pretty Julie! I need something new for my front door now that the holidays are over. This is perfect. Pinning!
Thank you so much, Patti! I hope I get to see what you do with this on YOUR blog! 😉 Hugs!
Hi Julie,
This looks really cute and I’d love to try it, but I lost you when you talk about how to deal with the triangle shape. Can you please clarify? First, how many wire shapes are you using in this project? If you cut it, what do you do with the wire ends? Maybe, I’m missing your instructions.
Thanks for the extra help.I really look forward to trying this soon.
Penelope
No problem, Penelope, and thank you for asking. If you notice, the wire form that I started with had three heart shapes, one inside the other, inside the other. So, when I noticed it was getting too full with the three hearts, I simply cut out the smallest heart shape (closest to the inside of the wire frame). You can see it in the photo where I have the two pieces next to each other (I discarded the smaller heart piece). I cut it out as close as possible to the large hearts, in order to leave the least amount of sharp wire exposed. However, when I added more fabric strips, I just made sure to cover the wire that was rough. I hope that helps! Let me know if you need more clarification. Hugs and hearts, and happy crafting!
Really cute! Saw it on Morning Cup of Joe Linky!
Thanks, so much, Kristie! It took a while to make, but was fun to do while watching TV! 😉
This is so cute, and I love how simple it is to make! Perfect for Valentine’s Day. Thanks for the inspiration!
So glad you like it, Amy! It was very easy, though it did take a bit of time. But, watching a Hallmark movie while tying the knots made it even more fun! Thanks for stopping in! Would love to have you join our link party, Homestyle Gathering… it just opened yesterday! Hugs!
Julie, such a special, wonderful wreath! Love it! Thanks for the great tutorial too. Pinned.
Thanks, Debbee… that’s big praise coming from you!
Such a pretty Valentine rag wreath, Julie! Love the farmhouse charm it has using ticking fabric. Pinned 🙂
Thanks, Marie! It’s a fave of mine. 😉
Adorbs project, Julie! And so versatile and easy…great project to do with kids too…
Thanks, Janet… hoping to make another one with a bit more ‘glam’ to it… just a wee bit, mind you!
Gorgeous DIY Valentine’s Day wreath. I love it and I got out some pillow ticking to make hearts this morning. I will share the hearts later.
Happy weekend,
Kippi
Super fun! Can’t wait to see your project… I think ticking fabric is so fresh and lovely!
Your take on the inspiration wreath turned out to be the perfect Valentine wreath! Pinned! One of those sticky clothes rollers works great on getting those stubborn strings up off the carpet. That’s what I use in my sewing room. I’m visiting from Silver Pennies Sunday. If you are interested, I shared a let it snow printable, #43. Just thought you might find it of interest, you were the first blogger to follow me on Pinterest so I always pin your stuff when I see it LOL.
Oh.. you just make my day, Allyson! I’m so glad was your first follower on Pinterest! Too fun! Love your winter printable! Feel free to link-up with us at Tuesday Turn About on Tuesdays! We’d love to have you each week! Going to visit your blog again now! Hugs! (And thanks for the clothes roller tip! Genius!)
This Valentine wreath is absolutely ADORABLE, Julie! I love the texture and material you used. Pinned!
Thanks, Pamela… I think it may get some extra attention, soon! 😉 I’ll let ya know!
Gorgeous wreath and I like any project that I can do while watching Hallmark movies and still feel productive too. This post will be one of our features this week on the #HomeMattersParty. Thanks for sharing.
Wonderful, Donna! Thank you so much. Looking forward to linking up!
This is gorgeous! I love ticking stripe fabric. It always reminds me of my grandparents.
Thanks, Michelle! It was a fun project, for sure!
Hi! Do you think this project would work for a church ladies gathering or would it take too long to do all the ties? We only have an hour or so…..
Thanks!
Hi, Connie… Great question. I think this size of wreath would probably take too long to complete in an hour. But, if you were able to find some smaller wire frames, like 8-inch (you could use the inside of the 12-inch wire frame), you could do something similar that maybe would have one layer of strips instead of this big and full one. 😉 Hope that helps!
So cute. I remember doing embroidery while I “watched” TV as I couldn’t snack at the time–I’d leave grease spots on my work! Worked for me at the time. Have never done a heart shaped wreathe–yet. Today I put an empty (last year’s) Valentine’s candy box inside a wreathe with “cherries” inside my tobacco basket! 30 second project!
Very smarty, Kathy! 😉
this looks like really fun and easy projects. Great way to use up some fabric scraps!
It IS easy, Helen… but takes some time tying ALL those knots! LOL! But it’s fun to do in front of the TV! 😉
So old fashioned looking and lovely! Your directions are wonderfully thorough.
Oh… thank you. I do love some vintage here and there in my home! Thank you for the kind words, Michele!
This is my kind of wreath Julie! I love that you changed up your original plan. The red ticking is perfect for Valentine’s Day! Pinning😊
Thanks Cindy! It was fun to make!
It’s adorable!! I love ticking stripe fabric in any color…what a simple project. I love that you can display it in a variety of ways and places. Thanks so much for sharing!
Thank YOU, Rachel!
I adore this wreath! I wonder if I can find ticking fabric in pink?! I’m featuring this cutie at Farmhouse Friday tomorrow. Thank you for linking up. Hope you link up again soon. Happy Valentine’s Day friend.
Woot-woot! Thanks so much, dear friend!
Such a sweet project for any time of year Julie. ♥
Thank you for sharing your gorgeous ticking fabric heart wreath at Create, Bake, Grow & Gather this week. I’m delighted to be featuring it at tonight’s party.
Hugs,
Kerryanne
Thank you SO much, Kerryanne! You are such a blessing!
Julie,
This is so cute. I’d love to share a link to your post on Sunday’s Dirt Road Adventures.
Oh, thank you, Rachel! Feel free to share! BIG hugs and thank yous!
Hi Julie! Pinned! Found this via Cindy’s link party feature!
Happy Friday!
laura in Colorado
Thanks so much for pinning, Laura! I was blessed by Cindy’s feature!
Always love your projects. I won’t be able to do this this year as I have to go to the city and pick up supplies. But you did say you got the heart wreath last year so maybe next year I can get this done as it is so cute and looks easy enough for even me.
Yes, I KNOW you can do this project, Fernie! And you could even make it in a round form to use all year! 😉
What a fun wreath, Julie!! Simple and easy, just what I like 🙂
Me, too! 😉
Now that wreath is absolutely ADORABLE!! I love how you combined solid fabric with the ticking print; what a beautiful and easy DIY!
Oh, well thank you so much! It was really fun to make!
I love this wreath. This is awesome.
Ah… thanks so much, Betty… It’s one of my faves!
Love this Julie. So cute. I’m envisioning green and white for a fun spring wreath. Came from Creative Crafts Link Party.
That would be SOOO pretty!
LOVE this Rag Wreath, Julie! We will be featuring you starting Wednesday at the Creative Crafts Linky Party! Pinned and shared!
Creatively, Beth
Thank you so much, Beth! Always excited to be featured!
Julie this is so cute! I’m so happy to be featuring you in this week’s link party! Thank you for sharing your DIY <3
https://www.ourtinynest.com/2023/01/25/weekly-link-party-332/
Julie,
I love any wreath made with ticking. This is beautiful. Congratulations, you are being featured on TFT. I hope you stop by.
Hugs,
Bev
Julie, this is great. I had been wanting to make a rag wreath. Thanks bunches for sharing this tutorial with Sweet Tea & Friends this month dear friend.
Thanks, Paula! Looking forward to linking up this month, too!