
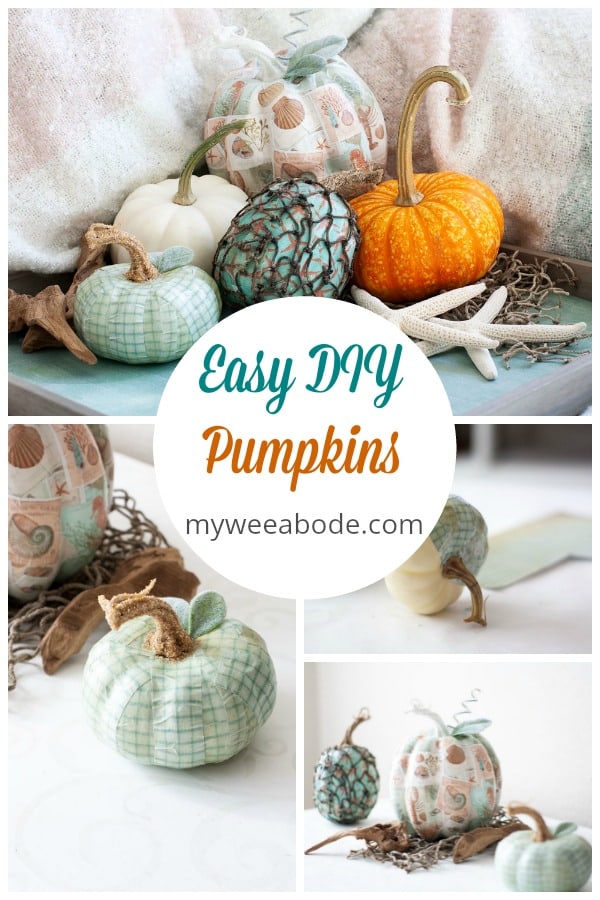
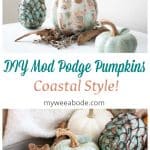
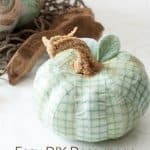
DIY Mod Podge Pumpkins Coastal Style
When you’re on a budget, creating fall décor on-the-cheap is always a good idea! Today, I’m going to show you how to DIY Mod Podge pumpkins coastal style that not only look beautiful, but are thrifty, too!
Today I’m sharing my very first post for fall décor!!! My head has been spinning with all the projects I want to do… just not enough time to get them all done for this year! But, I should have quite a few to share with y’all this fall season!
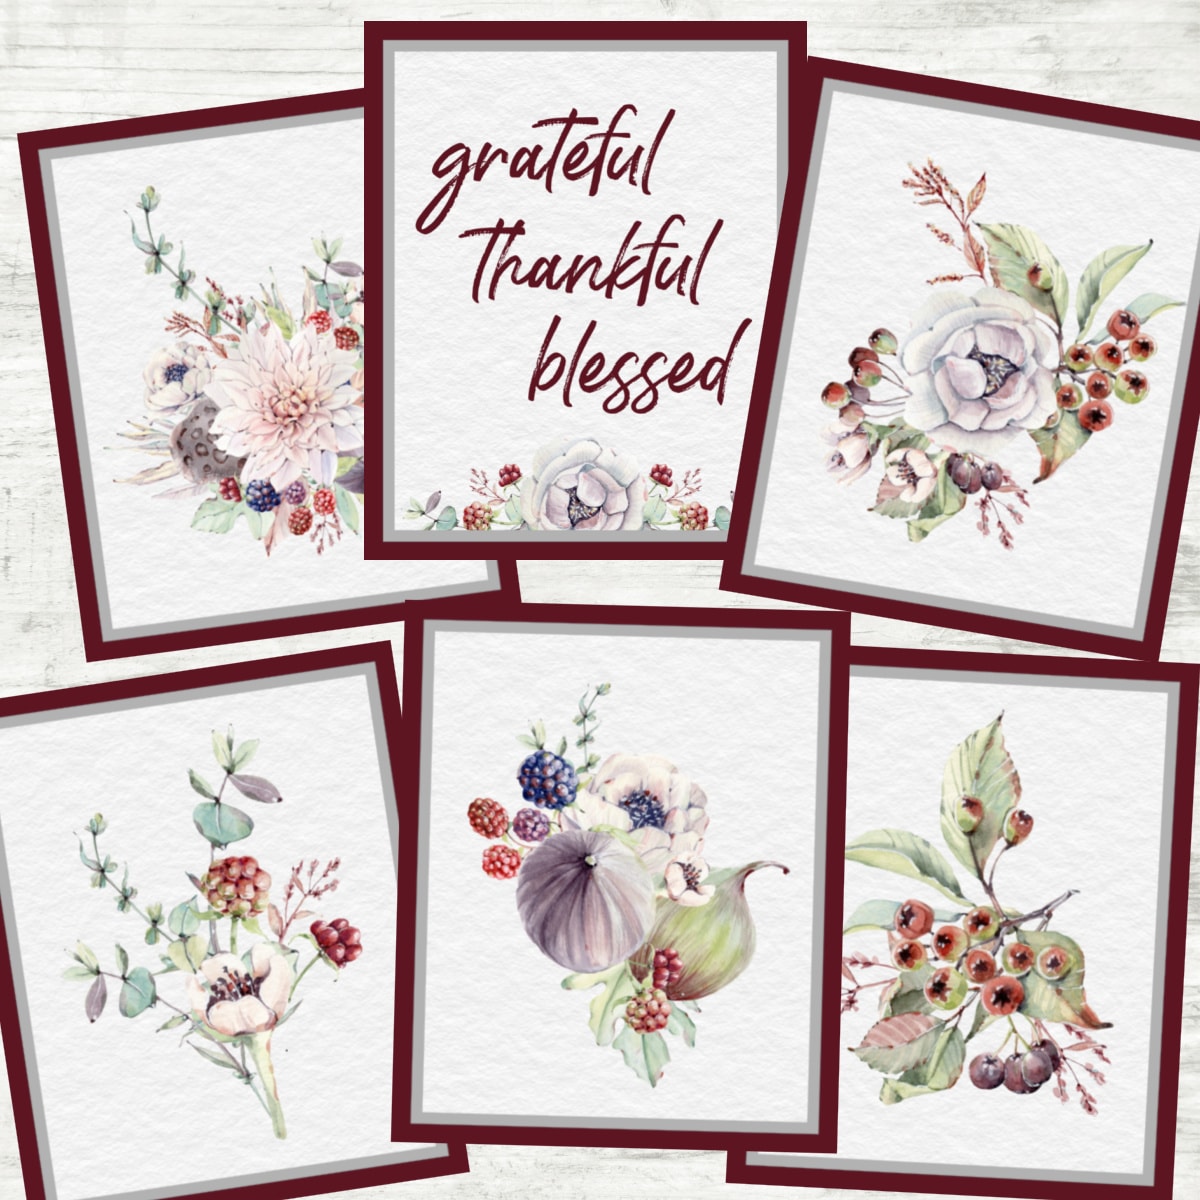
Get my FREE fall printable (and full access to my printable library) by simply subscribing to the blog (at the top of the page).
Decorating your home on a budget is pretty much always an adventure. Creating that décor with your personal style makes the adventure that much more fun! I was recently perusing Pinterest (remember to hop on over and follow My Wee Abode for lots of ideas!), and I came across a post from Crafts by Courtney for Mod Podge pumpkins and fell in love! I ended up doing my pumpkins almost EXACTLY the same, without even realizing it! So, I decided to put a couple of my own coastal twists on them!
One of my fave coastal projects (that you can create with your own style), is my Wooden Bead Garland!
DIY MOD PODGE PUMPKINS COASTAL STYLE
This post may contain affiliate links, at no additional cost to you.
For more information, see my complete disclosure HERE.
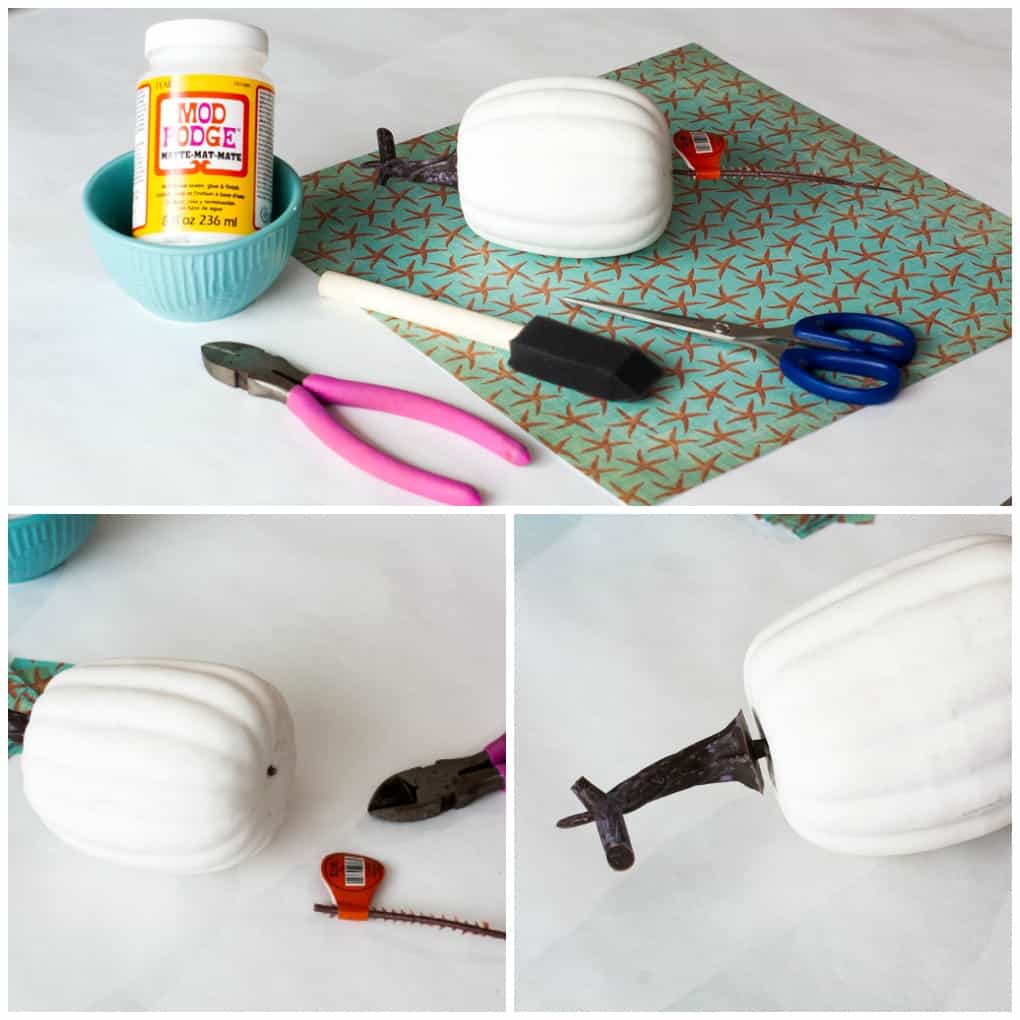
What You Will Need
- Variety of smooth surfaced pumpkins (I’m linking these for your convenience, but I got mine from the dollar bins at Target, and for the smaller ones, I actually used floral picks from Hobby Lobby)
- Scrapbook paper (this is what I used) or printed paper napkins (there are some gorgeous paper napkins available at specialty stationary stores)
- Mod Podge Matte Finish
- Sponge brush
- Faux Leaves (I used Lamb’s Ear… my foliage of choice this fall!) (Also, you can get this for less using a coupon at Hobby Lobby 😉 )
- Floral wire
- Floral tape
- Decorative Sand
- Wire cutters
- Scissors
- Bowl
- Hot Glue Gun
You can create your own style of pumpkins by simply changing-up the print of the paper or napkins!
Prepping Your Pumpkins
- If you use floral picks, take your wire cutters and clip them off as close to the pumpkin as possible.
- Pull the pumpkin stem out to expose the top of the pumpkin (I didn’t pull mine all the way out, as you can see… it was just easier that way for me.)
- Make sure your pumpkin is clean and free of any debris that might get stuck under the paper.
- Cut your paper into strips and/or squares. This will make it easier to manipulate the paper and get it to smooth down with less wrinkles.
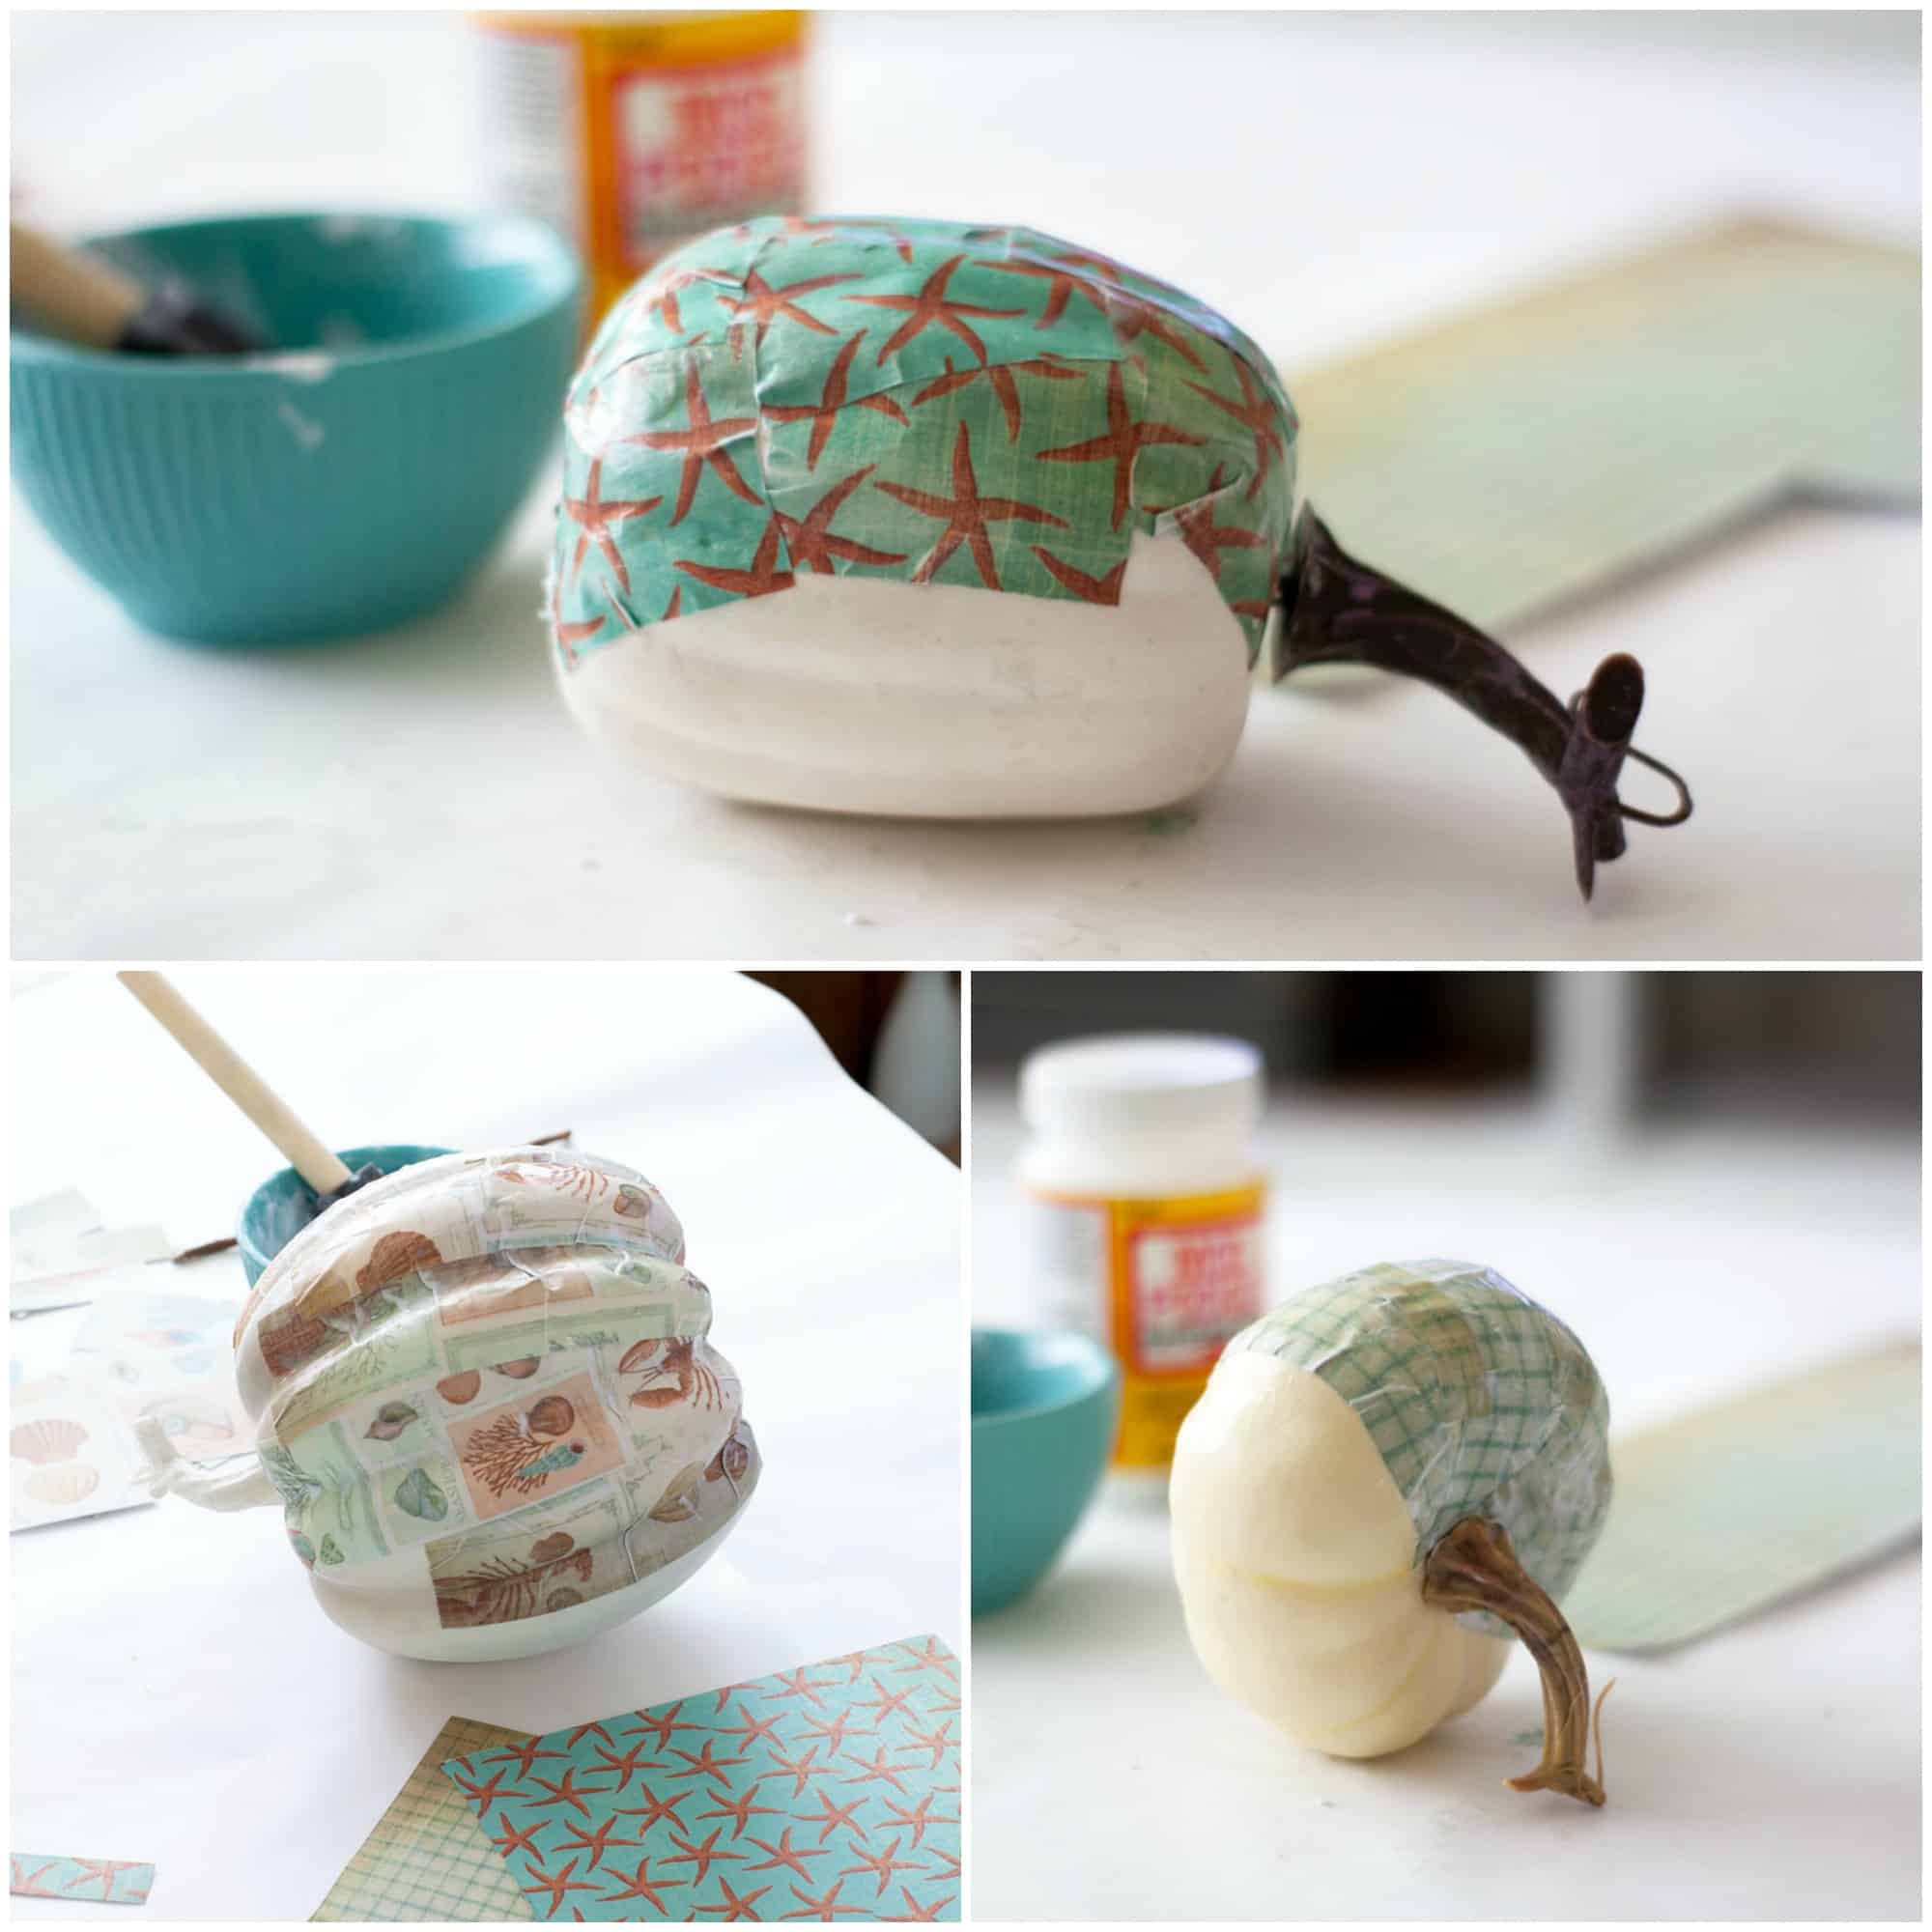
Covering Your Pumpkins
- Using the sponge brush, take your Mod Podge and cover the bottom of your pumpkin.
- Apply one square of paper, and smooth down (using your finger) onto the pumpkin. Some crafters like to put down several pieces, but I prefer to do one at a time. The paper will not completely smooth until the next step.
- Using your brush, apply more Mod Podge to the top of the paper and smooth down again with your fingers. You have to work a bit quickly here, as the paper can ‘lift off’ when it starts drying… and this dries pretty fast. I bet you can figure out how I know this! It helps if you have “fresh” Mod Podge on your fingers.
- Repeat steps 1-3, covering the bottom first, then start from the top and work back down to the bottom. (I let sections dry for 1/2 hour to an hour before doing the next section).
- As the pumpkins get close to being dry, wet your finger with some Mod Podge and gently go over any lifted areas or wrinkles that may need additional smoothing.
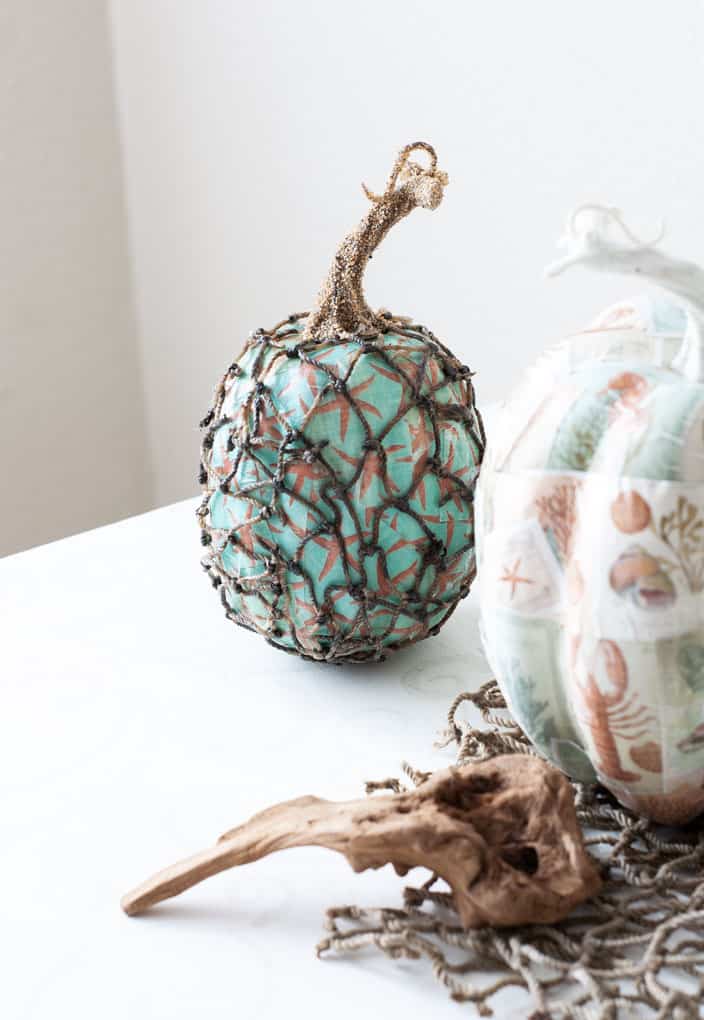
Adding Your Own Style
As I said before, I wanted to add some details to the pumpkins to make them my own.
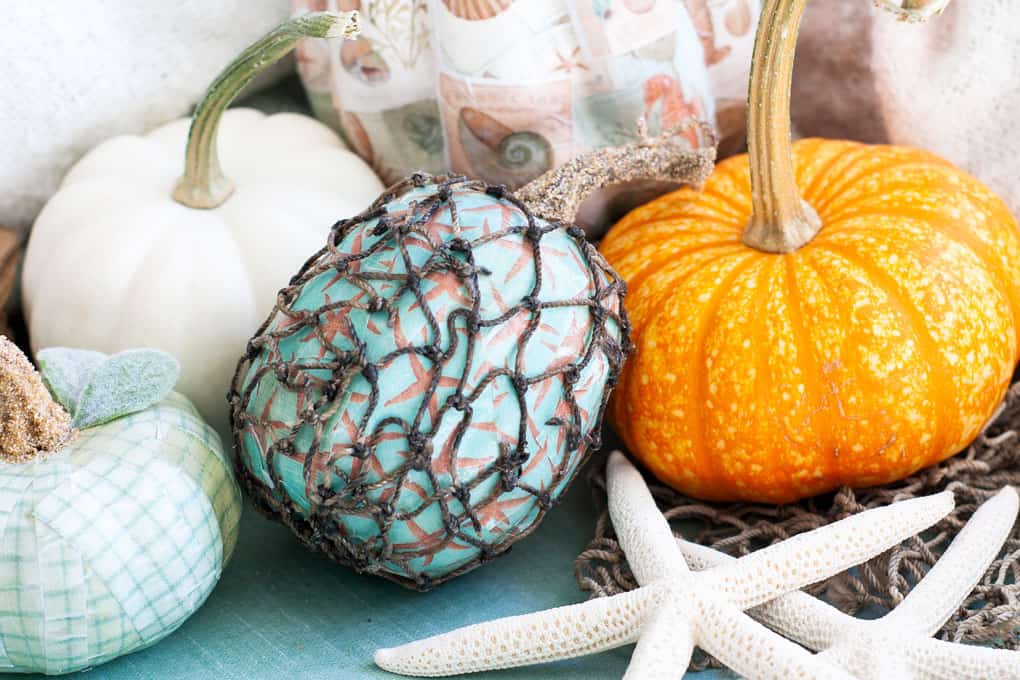
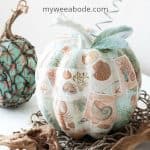
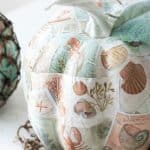
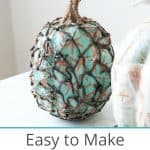
Adding some fishnet to a pumpkin makes it look like a day of fishing resulted in a huge catch of starfish! Just add some more Mod Podge, lay the net over in sections, and Mod Podge over the net!
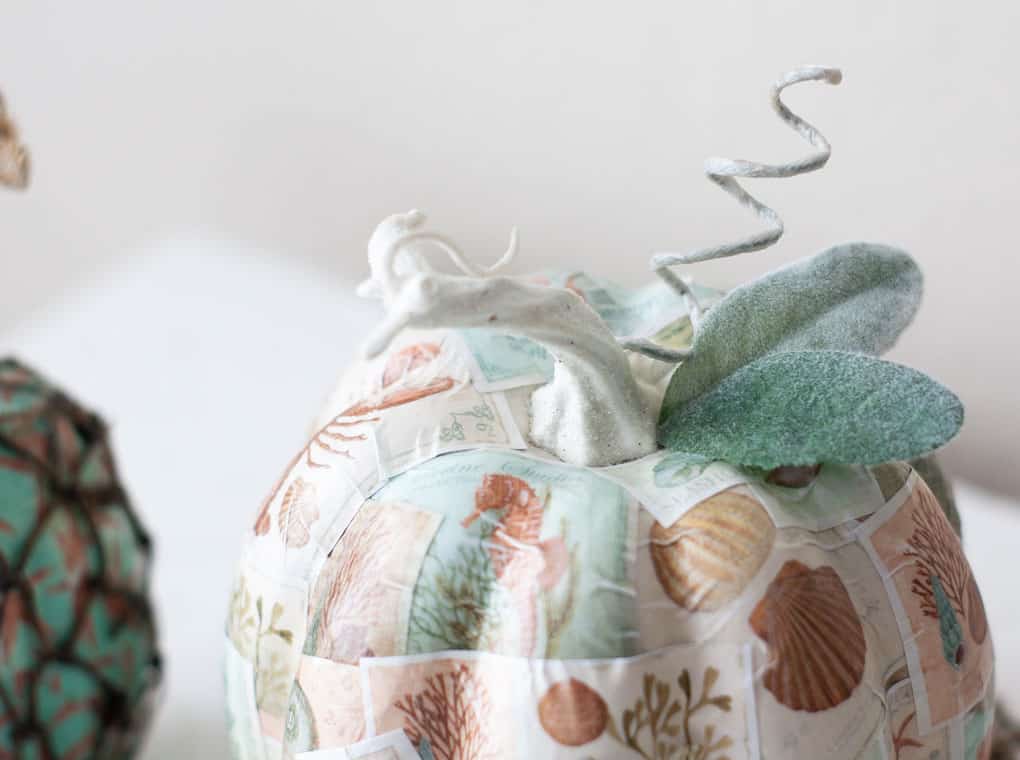
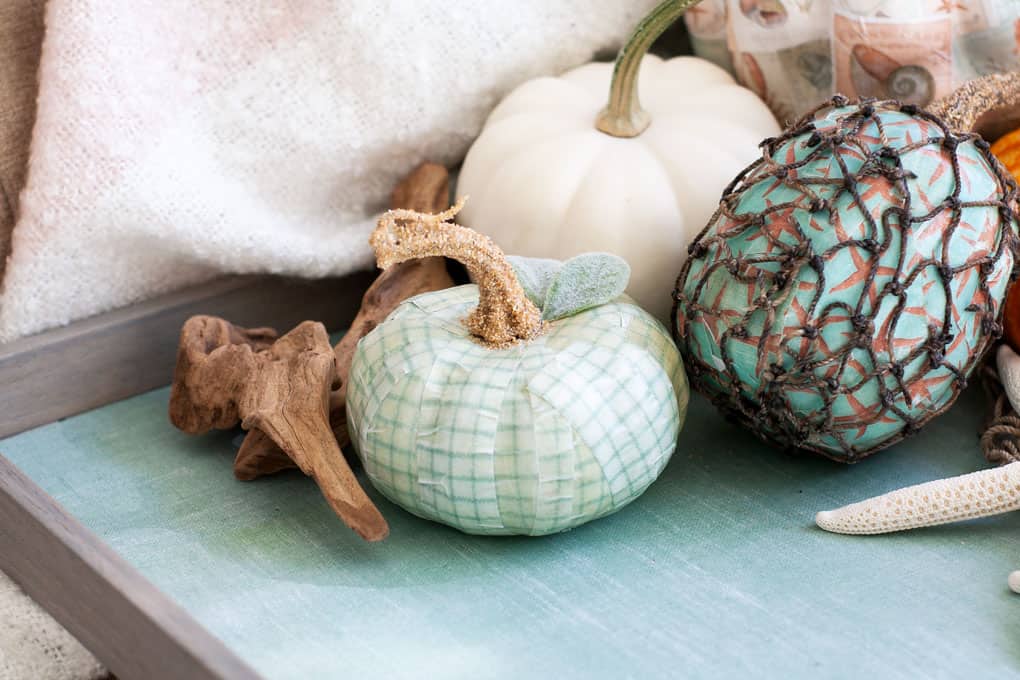
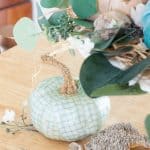
A couple of sweet fuzzy Lamb’s Ear leaves gives even more whimsy to these sweet little gourds! Just trim a couple from a branch (leftover from my Lamb’s Ear Topiary Tree), and attached with hot glue.
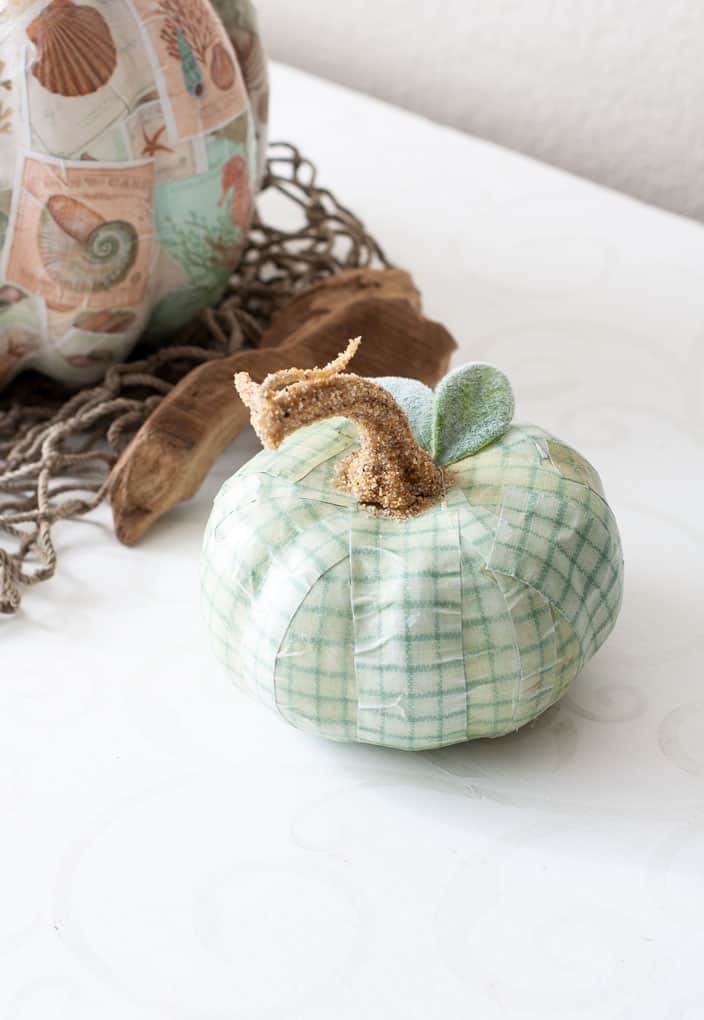
And how do you like those sand stems?! I thought it was a nice coastal detail. Swipe some Mod Podge on the stem, and sprinkle some sand on it! This could even be done with colored sparkle dust.
The large one already had a sparkly white stem. Adding the Lamb’s Ear leaves to this one, plus a sweet little ‘vine’, makes this one the ‘star’! Simply take a piece of floral wire and wrap it with white floral tape and give it a twist with needle nose pliers! Again, just apply with hot glue!
Versatile Styling
You can place the pumpkins in lots of different settings… here’s just two!
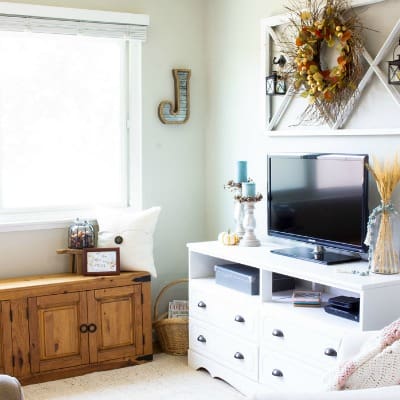
On my TV console… this area gives the pumpkins an overcast coastal look….
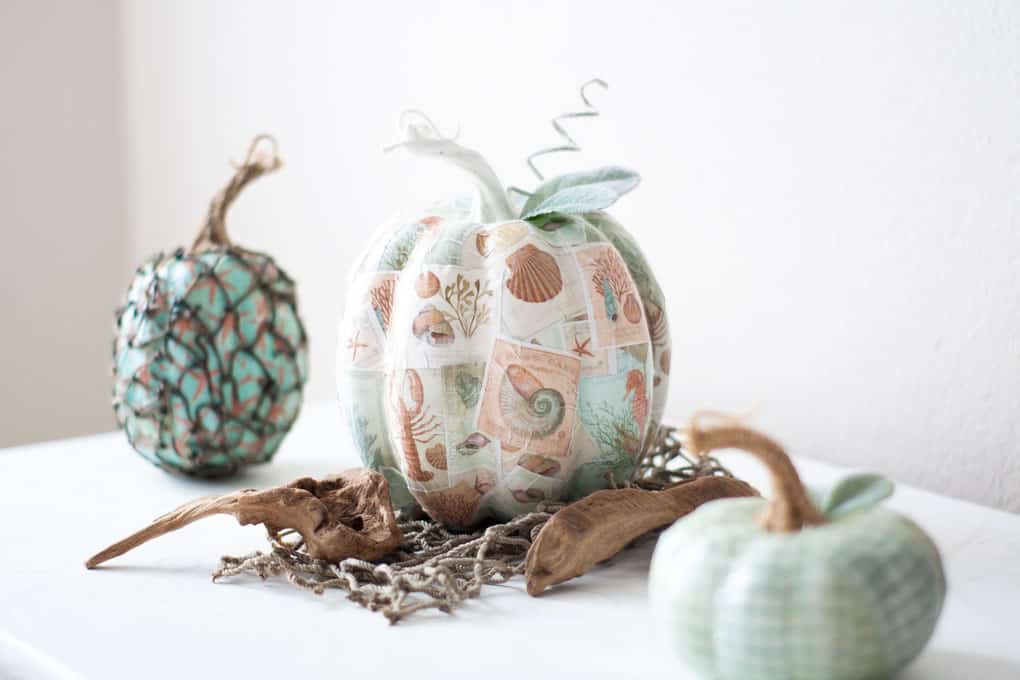
I think this one was my fave… can you tell?

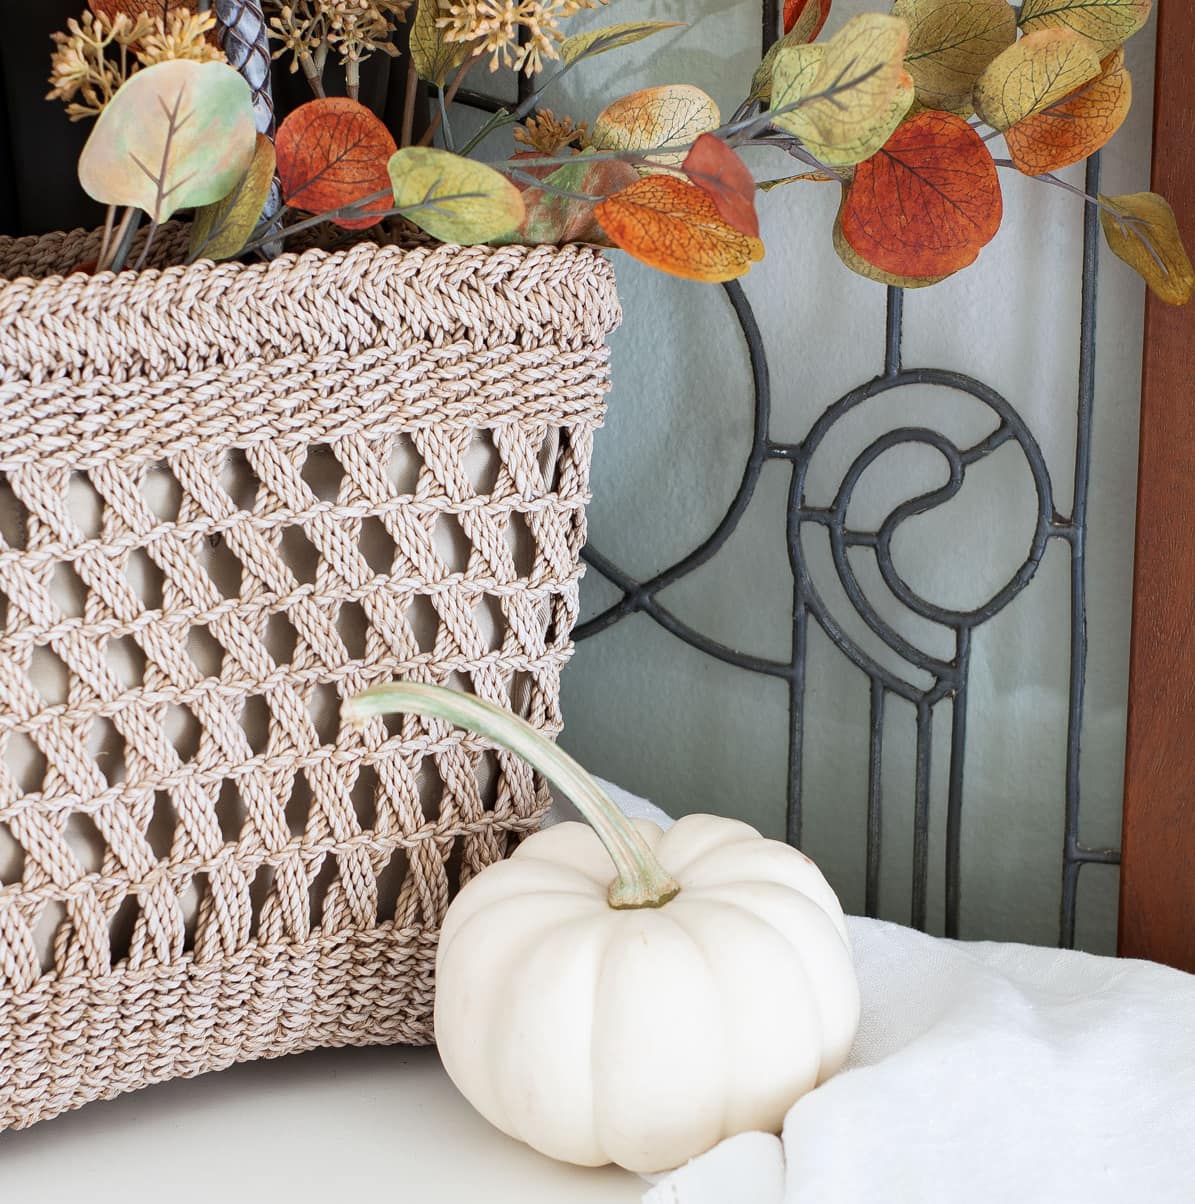
And then on a tray with a warm blanket… gives more of the coastal farmhouse look!
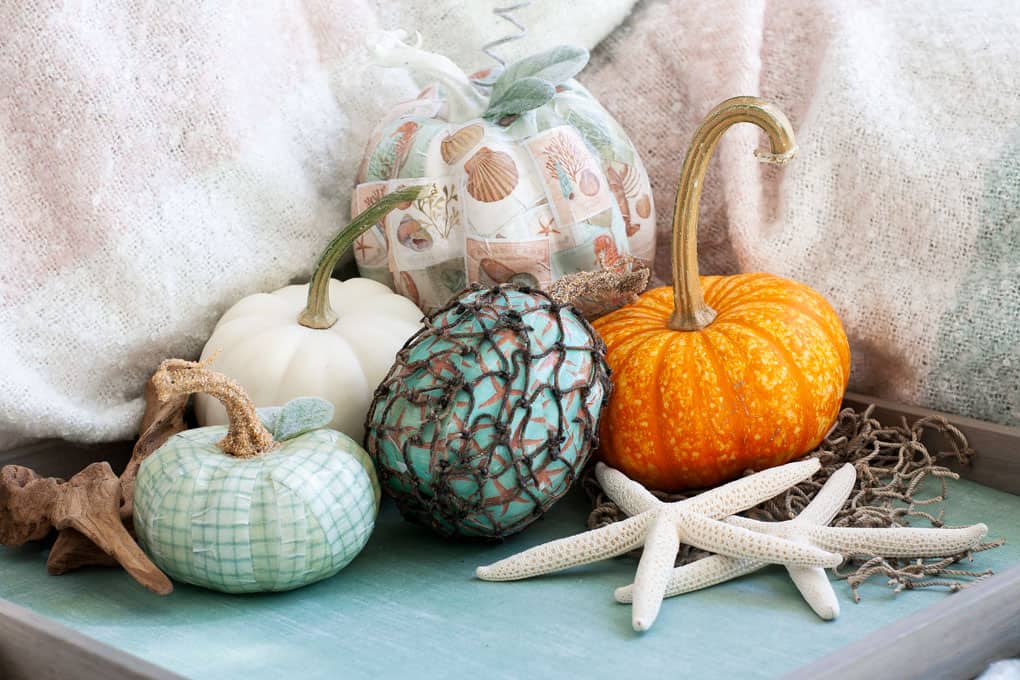
The starfish look so pretty with them, don’t you think?
And the sweet little plaid one… love those sand stems!
These sweet little pumpkins were so fun to make, and will add some coastal fall touches to My Wee Abode! What about you? What style or paper print would you add to your pumpkins?

Lovely and easy to follow directions
😀 Thanks, Donna! You’re sweet to take time out from your vacation to comment! See you soon!
These are so cute that I can’t even stand it!! What a great tutorial Julie!
Thanks, Holly! We definitely have some differences in our styles, but I’m so thankful that we both can appreciate and see the beauty in each others homes! Hugs, sweet friend!
LOVE!!!!!
Thanks, sissy!!! Love YOU!
Smart girl Julie! Love the pumpkins and the stems are too cute!
Hehe… thank you, Michelle! 😉 We gotta sometimes be a little clever, right?! Love ya!
These are so ridiculously cute. Pinned!
LOL! Thank you, Laura! For the kind words, AND the pin! Hugs!
Love the netting around the pumpkins! The Lamb’s Ear is a cute touch, I wish I had some laying around here 😉
Thank you, Marissa! I’m actually surprised how much I’m using the net, and Lamb’s Ear! Talk soon, dear heart!
Great tutorial Julie, I love these little coasta pumpkins.
Thanks so much, Sonya! Glad you stopped by in the midst of your clean-up after the hurricane! You’re a lovely friend! BIG hugs!
These are SO lovely and unique. I really love how you added some fish net around some of them. The colors are def. giving me coastal vibes. SO pretty!
Carrie
curlycraftymom.com
Aw, thank you, Carrie! You sweet words mean the world to me! Hugs to you!
The details that you add is what takes this project over the top! You present the project in a way that encourages individual creativity. I think I will look for some cactus print paper!
Oooooo! Teresa, if you do some, you make sure to send me pics! I would love to put them on my FB page! Thanks for always being such an encourager, dear sister!
So pretty Julie and your directions are great. I will be trying this soon….I hope. 🙁 So many things going on these days.
Have a wonderful week.
Kari@meandmycaptain
I agree, Kari… so many fall projects, and Christmas is just around the corner for us, right? Ahhhh! 😉 Let me know if you make some, and I will feature them! 😉
Sweet! I had never thought about decoupage for pumpkins! I learn so much from bloggers. Love the coastal vibe.
🙂 gwingal
Thanks, Nikki! They were super easy, and so fun! Thanks for commenting, friend! <3
Hi there Julie! WOW…these are so adorable… you sure have the whole Coastal Farmhouse Thing going on!!! LOVE IT : ) Pinned!!! Sending hugs and wishes for a fabulous day!
Oh, thanks so much for the sweet words, Andrea! And thanks for taking time to drop in! You are a dear! Hugs back! (Oh and just went back and linking to Morning Cup… thanks for the ‘reminder’!)
These are so cute, Julie! I like how you’ve done your own thing here and your pumpkins don’t look just like all the rest. You go girl!
Oh, THANK YOU, Stacey! That means the world to me! Hugs and hearts… all over the place! 😉
May I say this really opens up a new window of creativity at least in my mind. Who knew pumpkins could be decorated to fit quite nicely into a coastal theme? Thanks for the inspiration.
Oh, thank you, Deborah! I hope you create some with your own twist! 😉 Hugs and hearts!
These are so adorable. I haven’t done this before but have been meaning to try it. Thanks for the great tutorial!
Thank you for dropping in, Angie! I would love to see your finished product if you decide to make them! Hugs!
These are gorgeous! I love the sand on the stems! Sharing! Thank you for sharing on Merry Monday! Hope to see ya next week!
Kim
Thanks, Kim! They were very fun to make! Yep, I’ll be back next week! 😉 Hugs!
Julie I’m loving the addition of the netting on the pumpkin. Who would have thought that coastal and pumpkins could look so good!
Aw, thanks so much, Mary! I agree! The peaches and aquas actually are reminiscent of the heirloom pumpkins, so it looks perfect to me! 😉 Thanks for the kind words! Hugs!
These are beautiful, I love the mix of colours and textures.
Thank you so much, Julie! Your words are so kind, and I LOVE your name! 😉 Glad to meet you!
These pumpkins are wonderful, using scrapbook paper means the variety is endless. I especially love your idea of adding sand to the stems. Pumpkin stems are always the hardest part and I think your idea is beautiful.
Thanks, Leanna! Those sand stems were very last minute, but I think they are quite unique, too! Hugs!
Can I tell you how brilliant you are to use lamb’s ear?
I never thought of that! The pumpkins are adorable!
Happy day friend!
karianne
Oh, you made my day, girlfriend! And you can tell me how brilliant I am anytime! LOL! (And do you know how many times I have thought the same thing reading YOUR blog?!) Hugs and hearts!
I can’t tell you how many bottles of Mod Podge I’ve gone through. Mostly to decoupage or something like it. Your pumpkins are super cute and what a fun idea to take them coastal.
LOL! I think we bloggers keep MP in business! 😉 Thanks for the sweet words! I love the coastal look, too!
Hey Julie! Where’d you get the fish net to go around the pumpkin? 🎃
Hi, Peg… thanks for asking… I don’t know how I missed listing this (probably posting late night, as always!) I bought a small package at Michaels in the floral supply department… I tried to find a similar product on Amazon, but I can’t (in good conscience) recommend it because I can’t figure out if it’s the correct size (most fish net has very large knot openings.) Sorry I couldn’t help more!
I’m thinking they could be found at a party supply store – they always have luau decor!
That’s a great idea, you would just need to make sure the weave was small enough. I’m finding that most fish net has a weave where the pumpkin would slip through it. 😉
Your pumpkins are so cute! My favorite one is the one with the vintage sketches ( I think it is the one you said is your favorite too!) Thanks for sharing with Thursday Favorite Things – I’ll be featuring you tomorrow!
Yes… the large one is my fave! Thank you for featuring me, Angelina! Looking forward to linking up again! (I’m loving my new velvet pumpkins!) Hugs, and see you tomorrow!
This vignette is so pretty and coastal! Great idea for a coastal fall display.
Happy Fall!
Hugs,
Kippi
Thanks, Kippi! You are so sweet! Hugs and hearts, dear friend!
These are so pretty, Julie! Loving the coastal vibe, pretty colors, and textures. Pinned 🙂
Thanks, Marie! They are so easy to make, too!
thanks so much for sharing this again. LOVE LOVE these. one more project with pumpkins I need to try!!!
Well, thank you, Debra! I need to create some that will go with my colors this year. 😉
Thank you for sharing at #ThursdayFavoriteThings. Pinned and shared. Have a lovely week. I hope to see you at next week’s party too!
Thank you! Already linked up! 😉
These are so cute, Julie! I love them, and they will be featured at TFT tomorrow. Thanks for sharing!
Thank you! I saw your feature before I saw this comment! Hehe! Have a great week, Pam!
What a fun and adorable project Julie. I needed these when I lived at the beach!
Thank you for sharing your amazing projects at Create, Bake, Grow and Gather this week. I’ve pinned your coastal pumpkins to our party board.
Hugs,
Kerryanne
Thanks so much, Kerryanne! I appreciate the Pin! 😉
Julie,
I love your pumpkins and what a great tutorial. No matter how many pumpkins you see, there are so many new ideas. Congratulations, your are being featured at Thursday Favorit e Things. https://www.eclecticredbarn.com/2019/10/thursday-favorite-things_17.html
Hugs,
Bev
Thank you so much, Bev! I actually saw the feature before I saw this. 😉
Julie,
Sometimes I get behind in sending congrats. Have a great weekend.
Hugs,
Bev
So clever and cute Julie! I especially like the one you added fishnet to. Pinned!
Oh, thanks for the kind words AND pin, Debbee!
I like that big one! Reminds me of stamps.
Yes… me, too! I think that’s what the paper may have been. 😉
Wowza, how clever to do sand stems and add netting too! Love the colors and paper you used. So cute!
Thank you, girl! Hugs!
I never would have thought of coastal pumpkins–and I live near the coast of Maine. EVERYTHING here is nautical! I have a piece of driftwood that would look lovely with a combo like yours! Love the sanded stems! I make my vine tendrils (or ends of wire on hanging placques) by curling the wire on a pencil or smaller knitting needle, pushing the curls together, then pulling them out to the length I want. I have some gorgeous sunflower napkins I want to try, too.
Oooo! I would love to see your sunflower pumpkins! Great idea for adding vines and leaves! 😉
Fun project! It would be fun to make these with my daughters. Thanks for sharing!
Fun to put your own style on them, too! 😉 Thanks, Lauren!
Love these, Julie. Easy directions.
Thanks, Wendy! Glad you find the tutorial easy! 😉
Your coastal-style pumpkins are so pretty! I love your idea of adding sand to the stems.
Thank you, sweet friend!
Really cute and a great idea if you live in a warmer climate (which I do)!
Thank you so much, Kim! Hugs and hearts!
super cute. I love the pumpkin with the fishing net!
Thanks, Meagan… these are still faves of mine!
🙄
oops … didn’t read before I hit publish!
this coastal grandma is loving these shades of fun pumpkins!
Oh, I’m so glad you love them! They are some of my fave!
Julie,
Love all of your pumpkins. Congratulations, you are being featured on Thursday Favorite Things. https://myweeabode.com/diy-mod-podge-pumpkins-coastal-style/
Hugs,
Bev
Thank you so much, Beverly! #delighted!
Julie,
Wrong link. https://www.eclecticredbarn.com/2022/09/its-thursday-favorite-things-party.html
Bev
This is such a fun project Julie and I’m so happy to be featuring it this week at my Create, Bake, Grow & Gather party #535.
Happy fall to you sweetie,
Kerryanne
How fun! Thank you so much, Kerryanne!
Those are so adorable! Love these ideas!
Thank you, Melan! Miss you. Hoping to see you on Sunday!
Such a fun take on pumpkins for the season, Julie! What a fun way to DIY these for Fall, especially if you live near the beach! Thanks for sharing at Home Imagined this week!
These are just beautiful Julie!
Thank you so much, Melanie!
Julie, you know how much I love your pumpkin and fall projects!!
Thank you for sharing your DIY pumpkin project at Create, Bake, Grow & Gather this week. I’m delighted to be featuring it at the party [again] tomorrow and pinning too.
Hugs ~ Kerryanne
You are so sweet, Kerryanne! Be sure to pop in at TTA! I’m featuring your fall decor items!