
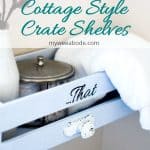
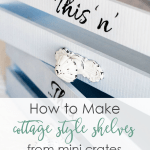
DIY Farmhouse Crate Shelves
Hi, all! This past week, I’ve kind of been MIA as I’ve been battling a flu bug. As I’ve gotten older, I’ve realized that when I feel an illness coming on, if I stay home and sleep for 24 hours, I usually can kick the booger out of my system, without much damage. So last Monday, I stayed home and slept and have only had to deal with some lingering exhaustion, which I’m okay with! So, rather than tackle a big DIY, today I’m going to share how I took some little wooden boxes and made some easy DIY Farmhouse Crate Shelves!
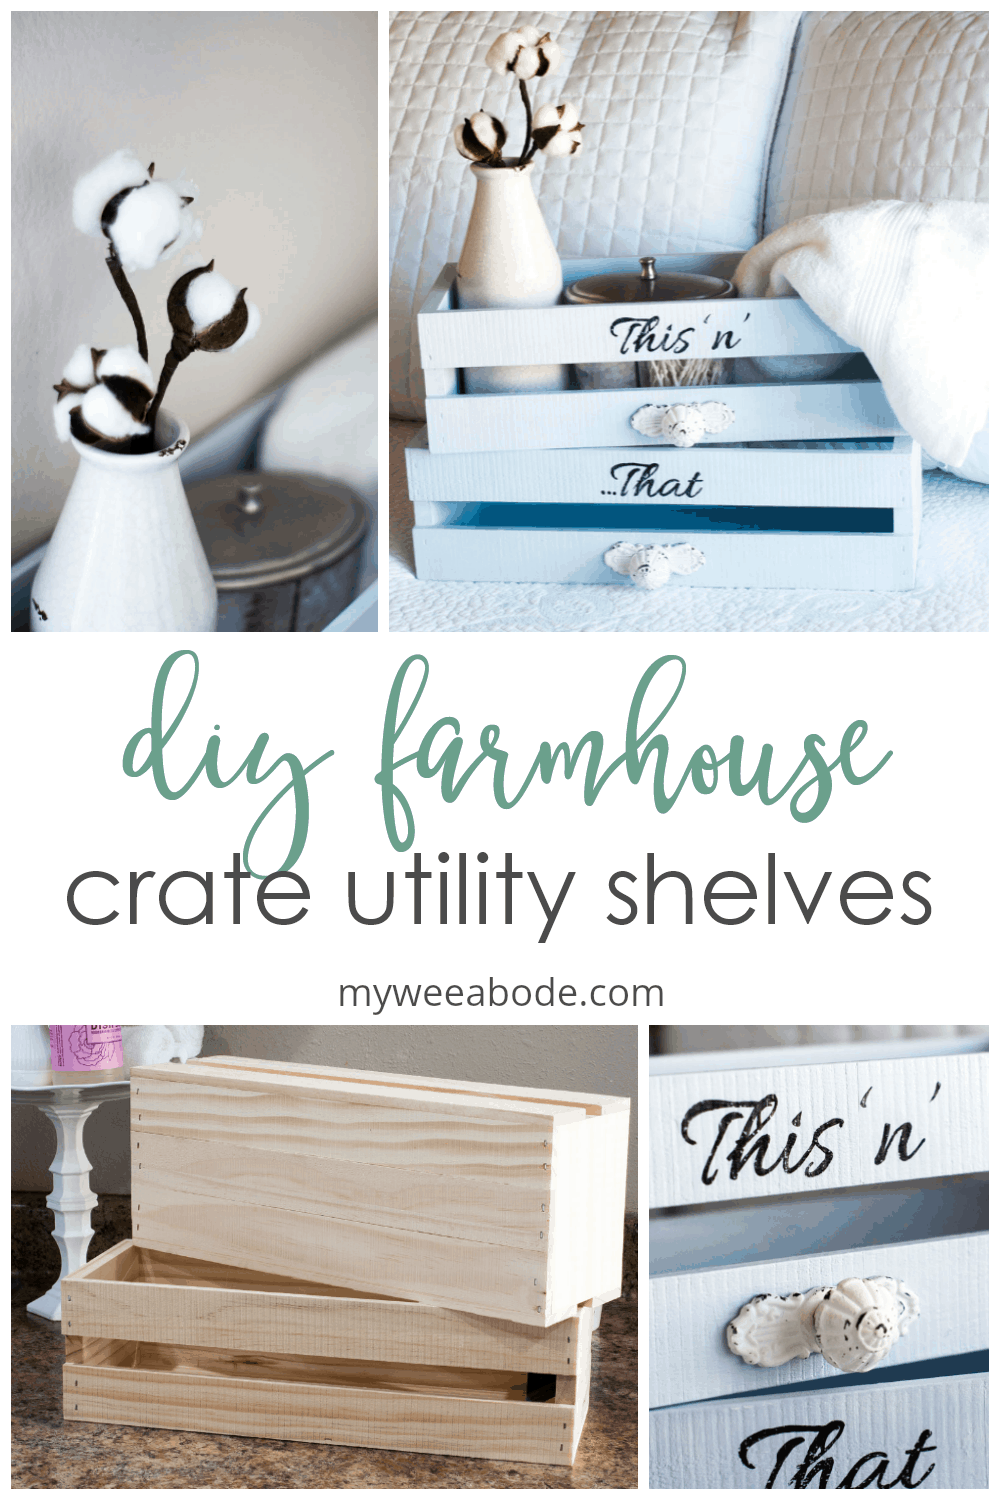
DIY FARMHOUSE CRATE SHELVES
So… I’ve created these little cuties for a very special purpose that I will be revealing next week. But, for now, I thought I would give you the tutorial in case you want to use them in your own special way. These crate-type shelves are pretty versatile!
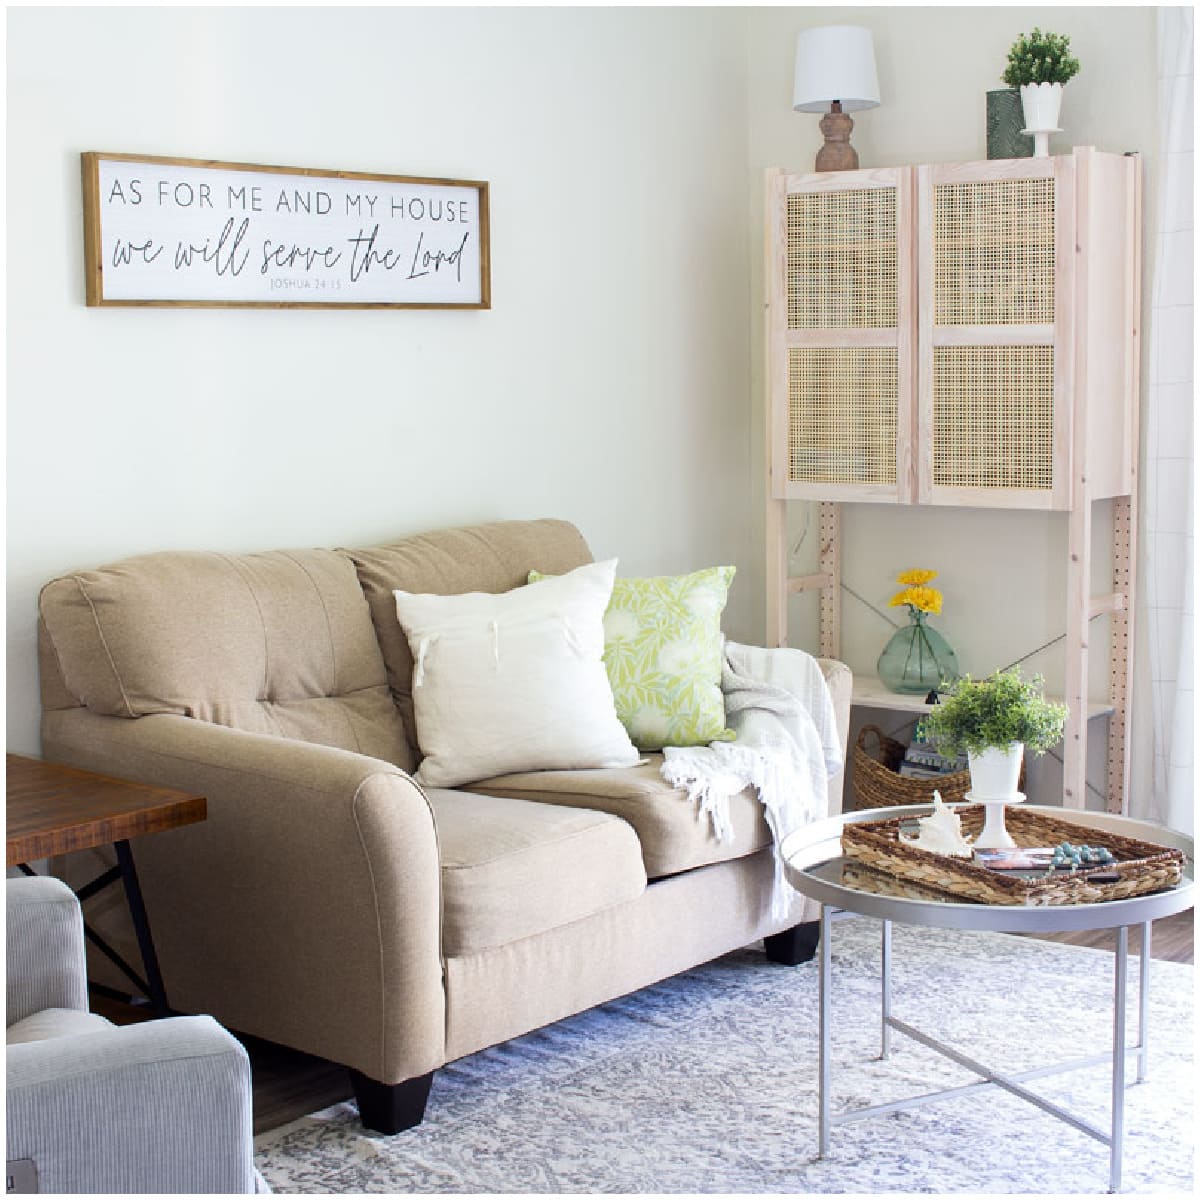
Oh, and just so you know… lots of blue and white coming your way, as these little ‘helpers’ are going to be used in my bedroom which is in the process of being decorated in a blue and white palette (always been a fave of mine!).
(Update: You can see how I used the pretty farmhouse crate shelves HERE!)
What You Need
This post may contain affiliate links, at no additional cost to you.
For more information, see my complete disclosure HERE.
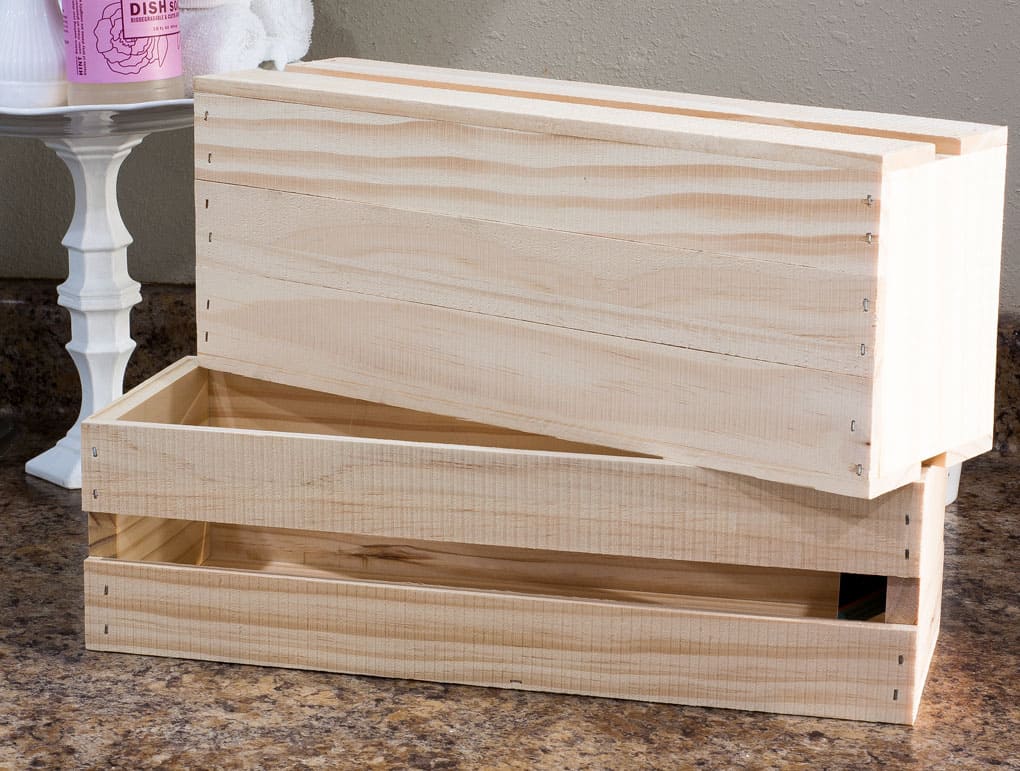
- Unfinished crates (I got mine at Hobby Lobby, 30% off, HERE)
- Sand paper, 220 grit and 320 grit
- Lint free cloths
- Base chalk paint in your color choice (I used my homemade chalk paint using Behr’s Ice Drop)
- White chalk paint for dry-brushing (again, I used my homemade chalk paint using Behr’s Ultra White)
- Large paint brush (I love Zibra brushes, and I used their chiseled wedge brush for this project)
- Fine art paint brush (1 inch wide… always use the Hobby Lobby coupon)
- Fine art detail brush
- Printable of your wording choice (I’ve included mine at the end of the post)
- Wax for sealing (At this point, my favorite is Americana Décor clear liquid wax)
- Hardware of your choice (Hobby Lobby is my fave spot for hardware)
- Large Picture Command Strips (16 pound weight limit)
Bumps In the Road
Bump 1
Okay… let’s just get these “bumps” out of the way, shall we? I tried painting these sweet-things FOUR times… count ‘em… FOUR times! (These are the times I sometimes want to hide in the closet and let out a scream… just a little one. LOL.)
I think my biggest issue was that the blue I used is so pale (which is what I wanted), that the white I wanted to accent with just wouldn’t…. accent! I won’t bore you with the details of the different techniques I tried, but, in the end, I decided that I liked the subtle finish that the dry brushing gave, and I REALLY like how the lettering gave them a little ‘umph’.
SO, if you want more distinction in colors, I would suggest going with, at least, a slightly darker base color.
Bump 2
Bump number two… when I tried to install wall-mounting hardware on the back of the crate, the wood split. I actually had a sinking feeling that this would happen… I should have gone with my gut! Command Picture Strips to the rescue! Okay… let’s get on to the good stuff…
DIY Farmhouse Crate Shelves
Prep
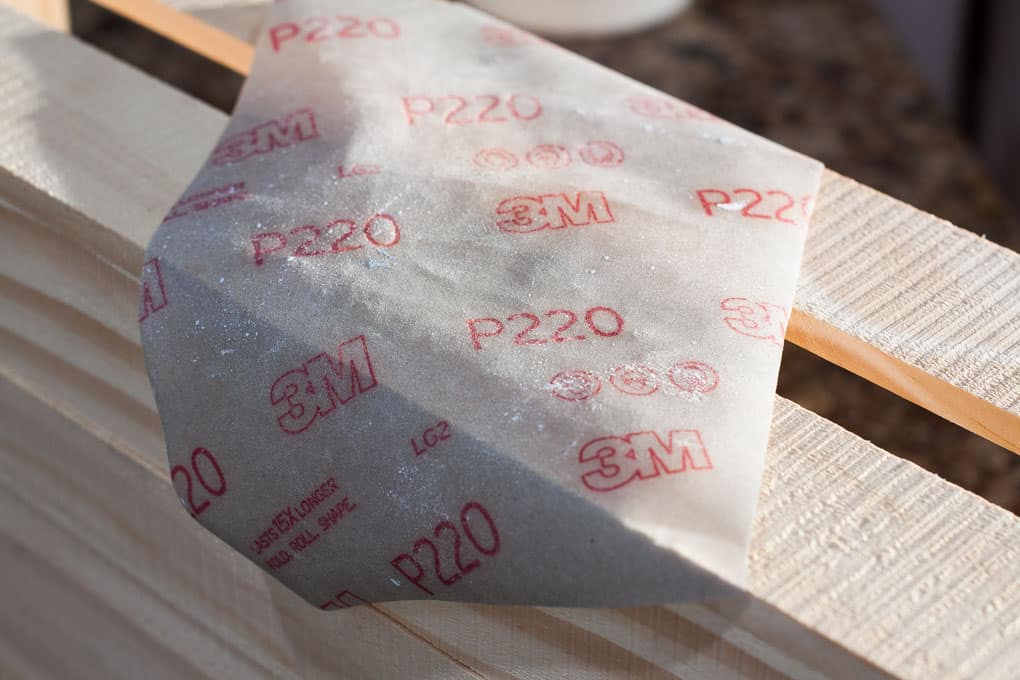
- Sanding: I used the 220 grit sand paper and gave the crate a light sanding all over in order to remove some of the roughness on the wood. I was especially careful about the splinters that were between the front and back slats (I had a near miss with death a couple times)! After sanding, I took a cloth and wiped down the crate to remove any dust.
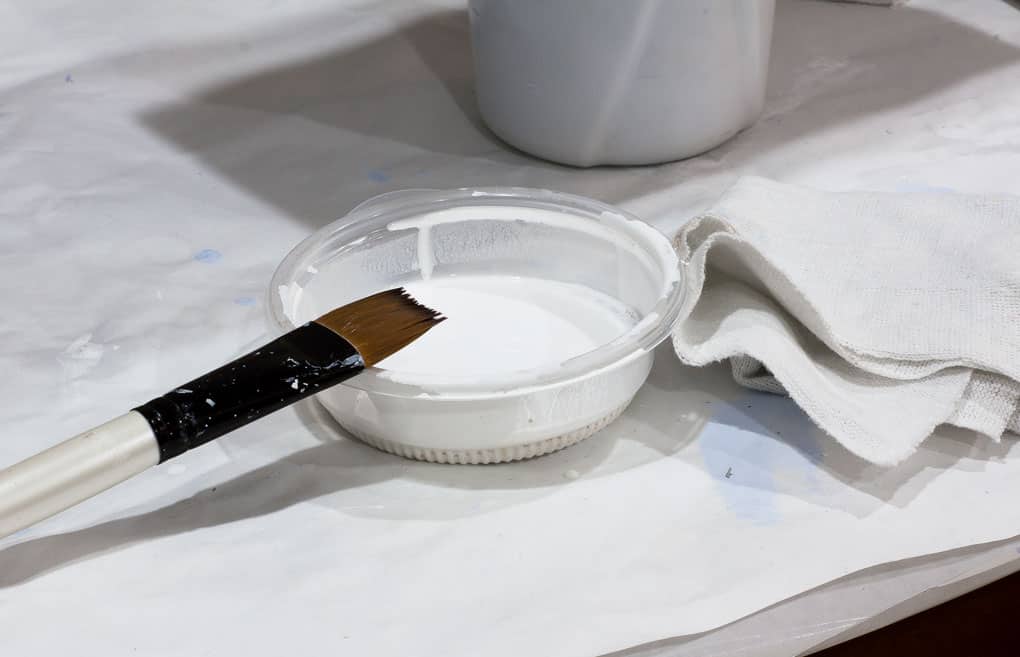
Paint
- Using my Zibra chisel brush, I covered the whole crate in the Ice Drop chalk paint, making sure to catch drips and dribbles of paint on the corners and edges… that’s always a little tricky for me. I used two coats to get solid coverage.
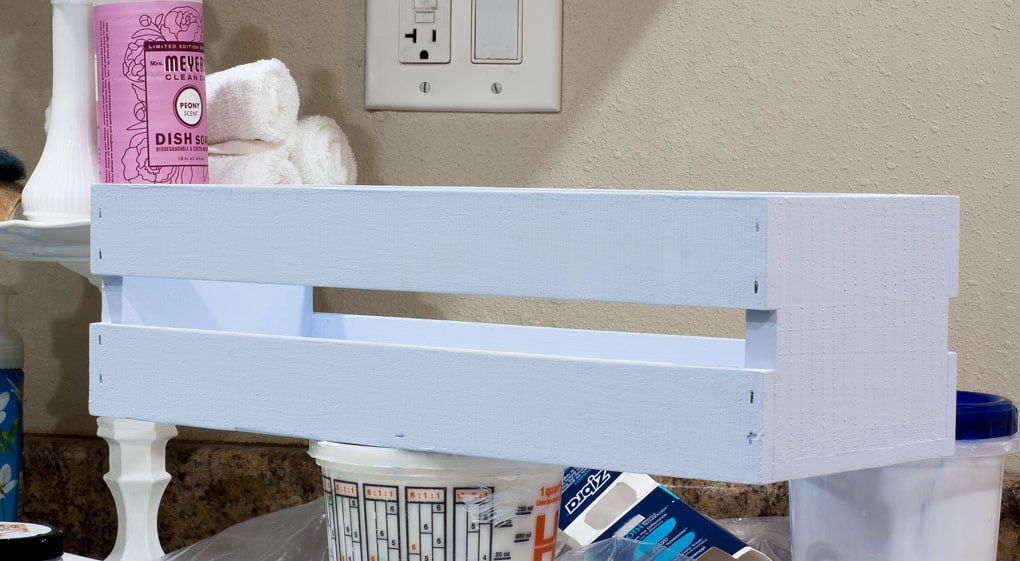
Whitewash
- Taking the white chalk paint, I mixed two parts paint with 1 part water. I then dipped the brush in the paint/water mixture, dabbed my brush on a lint-free cloth until it was almost ‘dry’, and then brushed white across the areas of the crate where I wanted a subtle difference in color. If you don’t like where the white is brushed on, you can always re-paint and do it again, or even add more (I had LOTS of practice on repainting, remember?!)
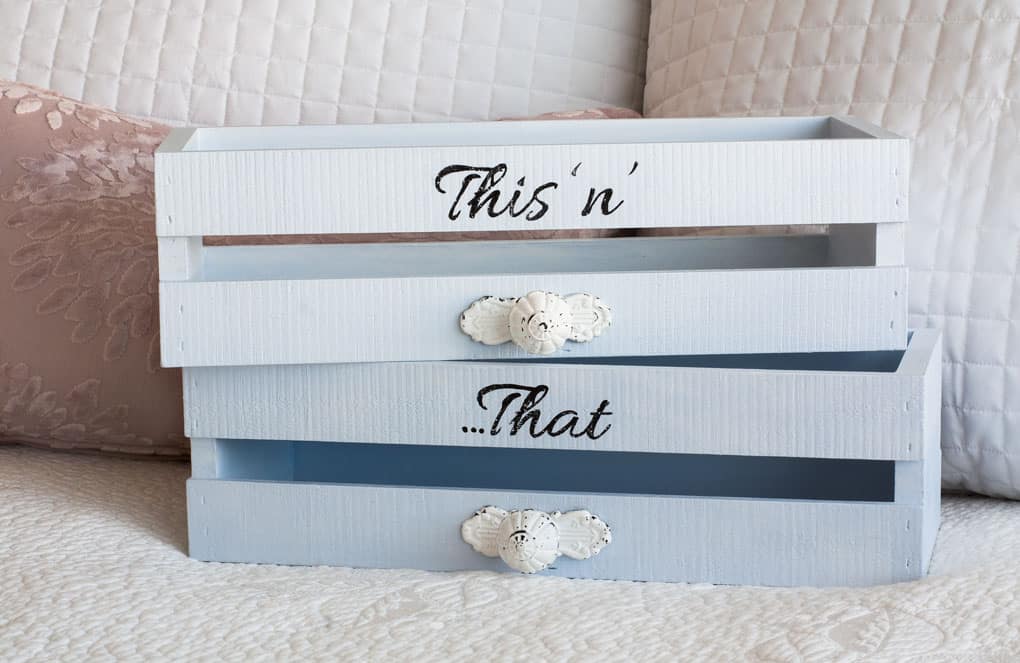
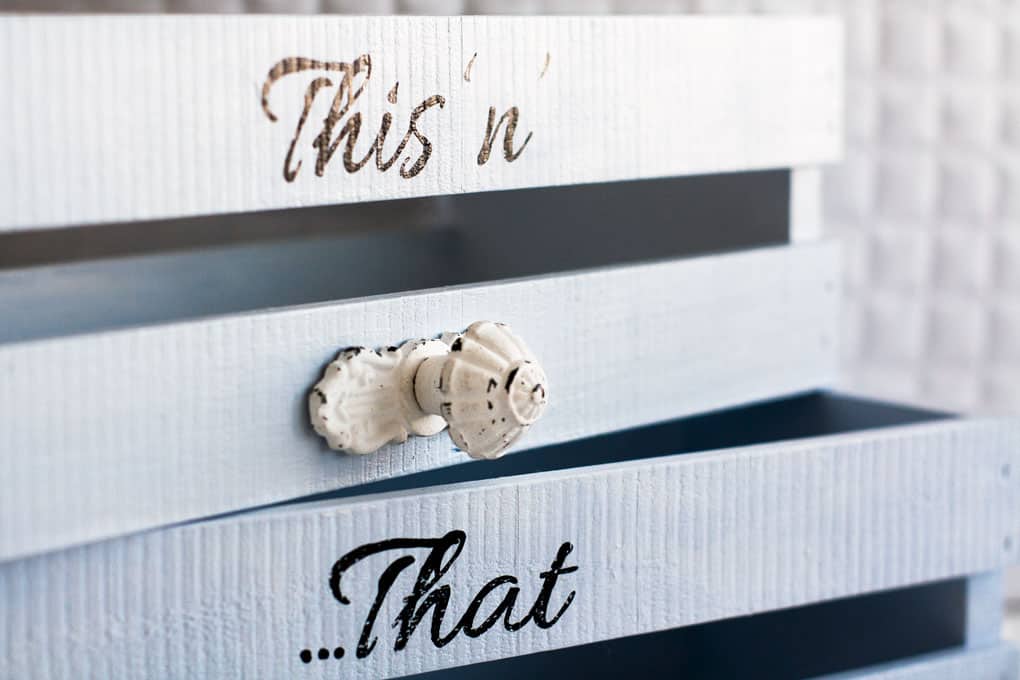
Lettering
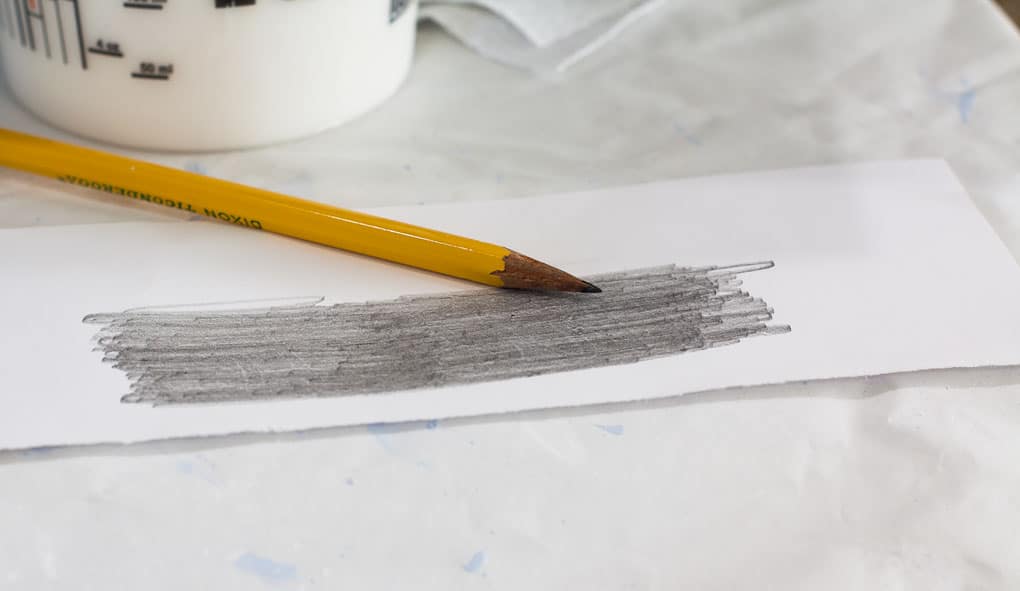
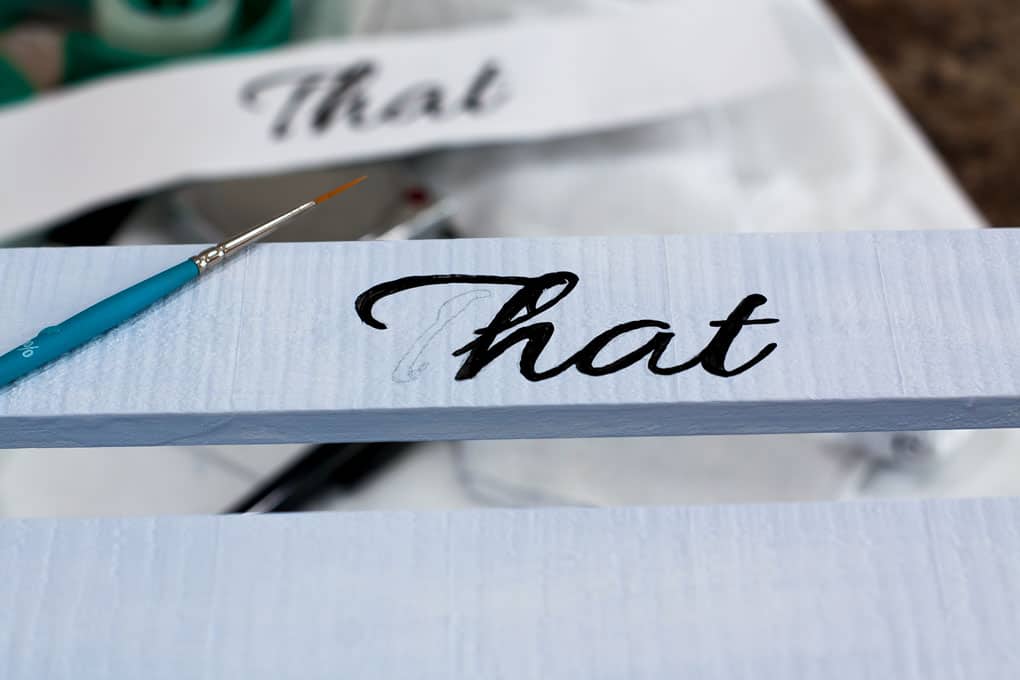
- After the paint dried, I printed out the “This ‘n’ That” wording. I took a pencil to the back of the lettering and ‘scribbled’ across it. I then cut the wording down to a size that could easily be aligned on the center of the top slat and placed the wording with the pencilled side down. Then, I traced the lettering with a sharp pencil. This transferred the outline onto the crate! 🙂
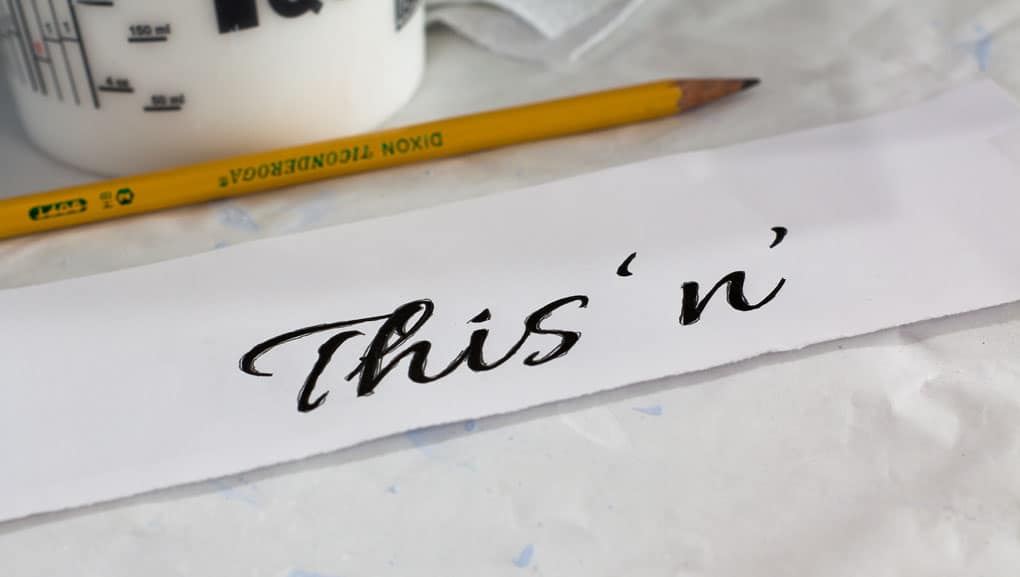
- Next, I painted in the lettering lines with black paint. I enjoy painting detail like this, as I did free-hand painting for a living many moons ago. 🙂 Artist tip: When painting any kind of ‘line’, let your hand and brush follow where your eye is leading. I always look ahead of my brush by about ½ inch, and my brush naturally follows. Make sense?
Distress
- After the lettering paint had completely dried, I took 320 grit sandpaper and lightly distressed the lettering. It left a bit of a black smudge when I did this (which I thought might be another bump-in-the-road!), but it easily wiped off with a damp cloth. 😀 Whew!
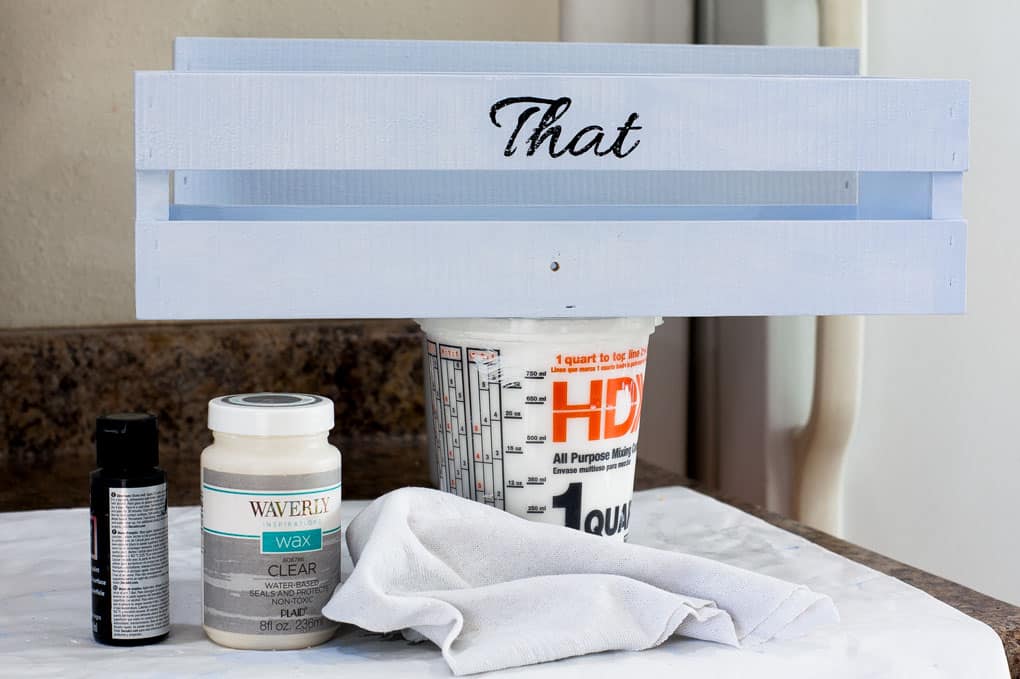
Seal
- I used a clear liquid wax to seal the crates. I didn’t have my favorite on-hand, so I used some very inexpensive product I had purchased to try-out. In the future, I will probably only use it on small items like these crates. I dipped a lint-free cloth in the wax and put an all-over even coat on the crate. After 24 hours (yes, the directions said 24 hours, believe it or not), I took a clean lint-free cloth and quickly buffed the wax to a subtle sheen.
Finishing Touches
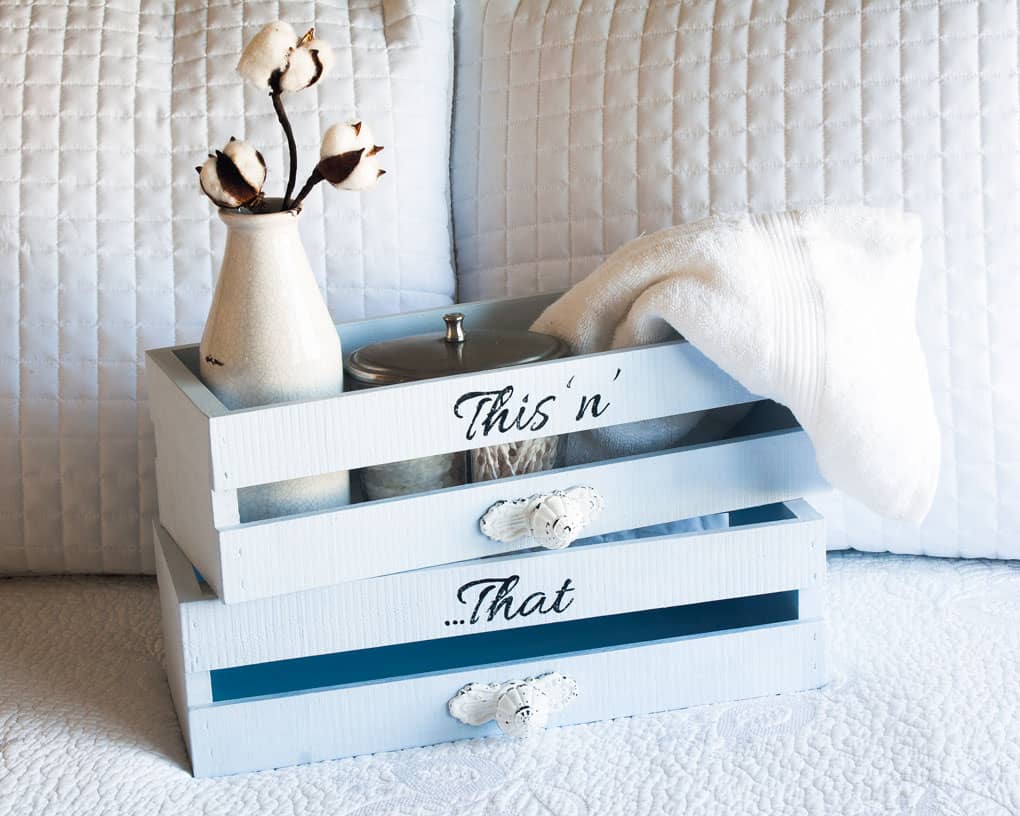
- Almost to the final step! At this point, I drilled holes in the middle of the bottom slat of each crate and inserted the knob. (Oh… I did hit a bump here… “That” wasn’t centered correctly on the slat, so I had to add my favorite punctuation to the front “…”. Kind of fitting, huh?) These knobs not only look pretty, but will be able to serve another purpose, as well! More on that next week!
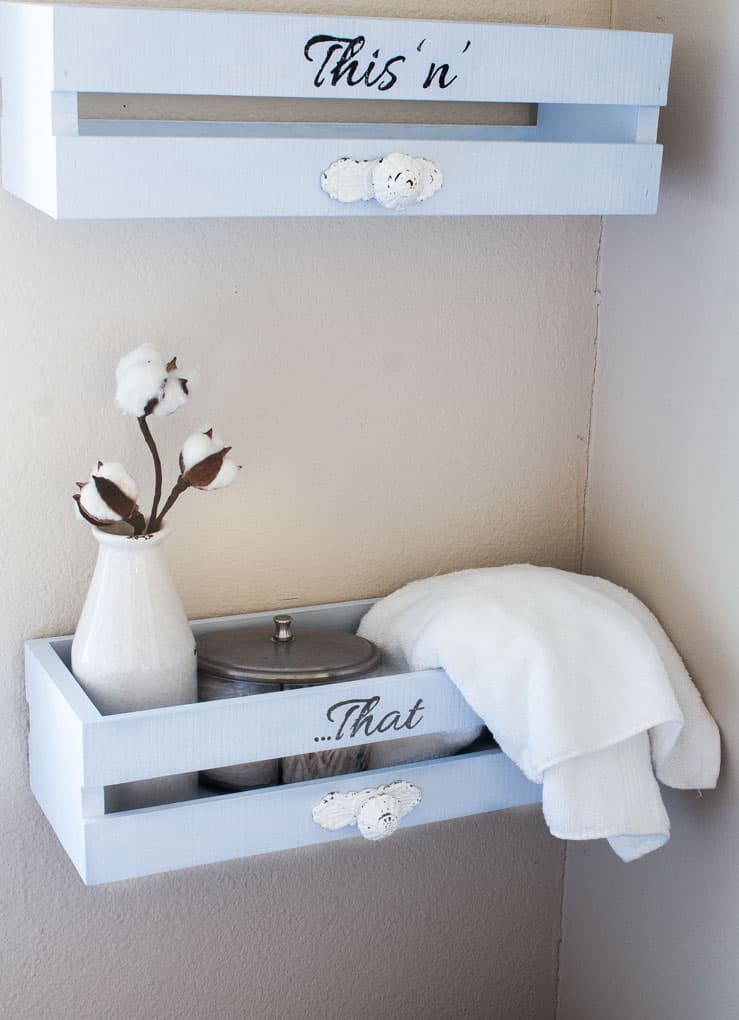
- The final step was attaching the Large Command Picture Strips. (Be sure to read and follow the directions on the back of the package before proceeding.) I placed the strips horizontally on the back of the crates… one on the top slat to the left, and one on the bottom slat to the right. In order to mount them on the wall, please follow the rest of the instructions on the package. (Remember, this can’t hold more than 16 pounds.)
- Oh… one more step! Come back next week to see what my special ‘duty’ is for these “farmhouse utility crate shelves”! (I’ve given y’all a couple hints!)
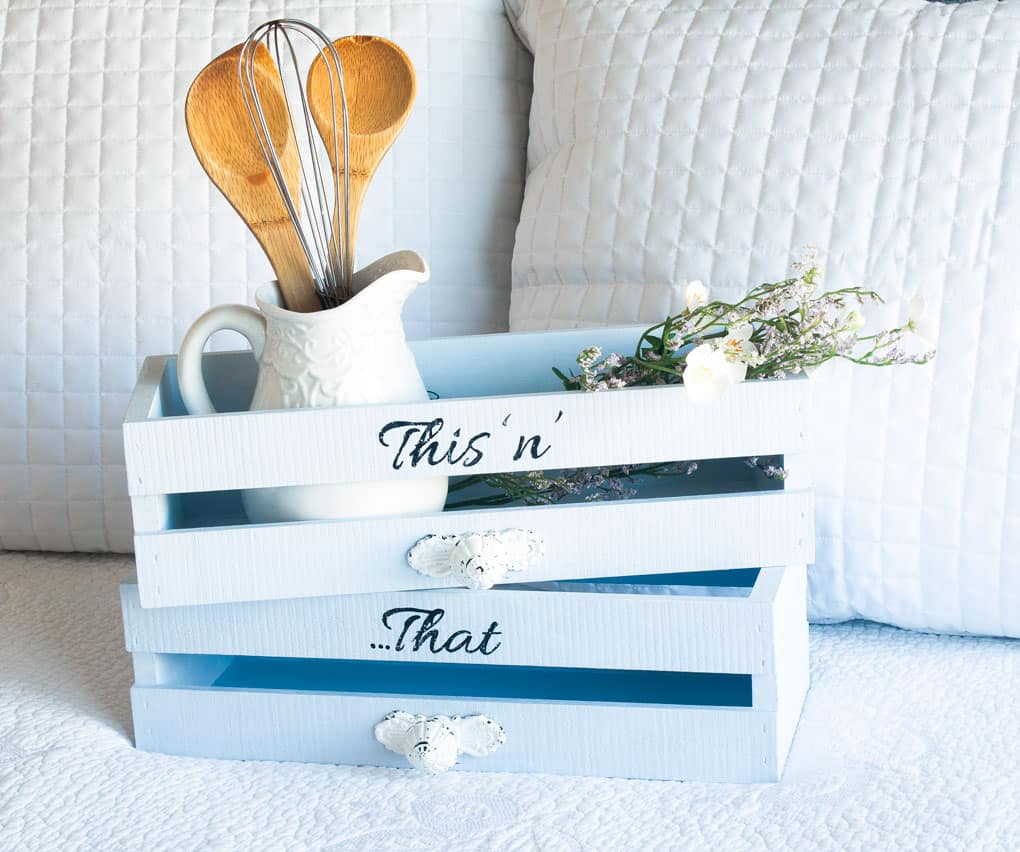
I thought you might like to see how these can be styled a couple ways for differen
The Finished Product
t areas in the home. But, mine will not be used this way, though I’m tempted! I love how soft and pretty these are!
What do you think? Would you like to make some of these and use them for something special? What would you do with them? Let me know in the comments… I love hearing from you , and I answer every comment!
(Ooooo, that’s a pretty big crack in the corner! I need to fix that when I paint! 😉 )
You can see how they are being used in my home in my utility closet hack! It’s pretty nifty, and just a small part of a larger (and easier) DIY!

Oh… almost forgot the printable! Just click on the image or link to download. 🙂
![]()

Julie, these shelves are adorable! You are such an artist. These cuties could be used so many places.
Oh, thank you so much, Kim! I’m really excited to share next week on how I’m using them! Going to your site right now… I think I may not be getting your newsletter. =/
Wow these turned out fantastic! I like how you told us all the hiccups along the way, rather than just showing us the beautiful “after” product 🙂
I am scared to death of hand lettering anything, because I have horrible handwriting!
Thanks, blogging-buddy! 😉 Free-hand lettering would be scary… but filling-in just takes a bit of practice! 😉
I wish you could do it for me…I have shaky hands 😑
My family will laugh at this comment!
I love blue and white!! Can’t wait to see your room when it’s done❣️
You can come over anytime! We’ll watch dramas! 😉
The pencil outline was genius!
LOL! Thank you, son! (I learned it from another genius!) 😉
Oh I really love this idea! This makes storage look so pretty! Definitely need to try that.
Thanks for coming by, Joelle! Yes… it is so pretty and light and airy! Next week, I’m excited to show how I will be using them in my home! Hugs and hearts! Glad to ‘meet’ you!
Lovely, thanks for sharing x
You’re so welcome! Thank you for coming by, Kim! Have a great week!
Very well done Julie, and if you hadn’t pointed out the problems we would never have guessed. I’m glad you did though, I’m one of those people that likes to know about potential pitfalls. I think the addition of the handles in the front makes the shelves really, rally special. Can’t wait to see what you do with them next week.
Thanks so much, Mary! Yes, I agree… I always wanna know what I might run into any perspective issues! Looking forward to hearing what you think about the ‘mystery’ post. LOL!
Julie, your new shelves turned out sooo cute!!! Of course I pinned them to my DIY Projects and Crafts and Sewing boards ~ great project! I love how you added the decorative hardware. I’m always buying hardware and hanging onto it for a future project idea. 🙂
Enjoy your new shelves,
Barb 🙂
Oh, thanks again, for pinning! Yes, give me all the hardware! Wish I had more room to store it, but it’s probably good that I don’t! Heehee!
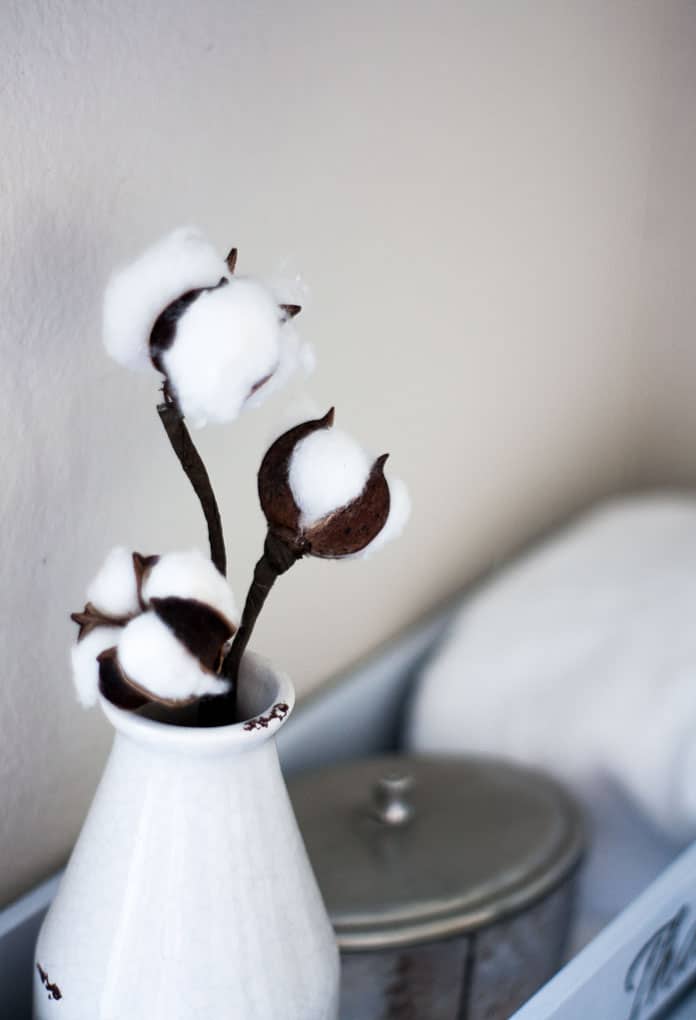
Very cute project! Love the cotton stems too.
Thanks so much, Pam! Encouragement is so helpful to us newbies (as I’m sure you remember!) Love me some cotton stems! 😉
Those are really cute. I like the subtle wash of colors, but you’re right, a darker blue underneath would give you a bigger pop of color. You may not have liked it as well as these though. Now you’ve created a mystery for us…what are you going to do with them???
Thanks, Florence… I actually really like this pale blue, especially for my room! I will show what’s happening with them in my next post! 🙂 (Easier, but bigger impact DIY coming!) 😉 Thanks for coming by!
Julie, I love the way this turned out! Pinning. 🙂
Thank you, Stacey, for the kinds words… and the pin! Means SO much to me! Hugs and hearts!
I love this, you are doing such a great job with working full time. Your posts are beautful.
Maria
Thank you SO much, Maria! You made my day… truly! Hugs!
You did such an amazing job on these cute little crates. And they could be used for so many things. Your lettering turned out perfect. My shaky hands would just make a mess of it. I can’t wait to see how you use them I your bedroom. I adore blue and anything, so its right up my alley!
Thanks so much, Nancy! So funny, you and Marissa both commented on your shaky hands, and, again, I will say my family would laugh at this (my daughter actually DID). I have the SHAKIEST hands around… no joke. I get teased all the time about it. I have just learned how to move my brush with my shakes! LOL! And, that tip about letting the eyes lead the brush REALLY helps! Thanks for stopping in! Love that new chair you posted about. <3 Hugs!
Your shelves turned out super cute!! I saw those drawer pulls yesterday at hobby lobby. I was looking for white handles and I found some that have a similar vintage vibe for a tray I’m working on. Also, I know what you mean about white on pale blue. I just made a sign that will post next week with an aqua chalk base and used a white chalk pen on top. I decided to keep it, but the black on your shelves does offer a better contrast. Anyway, I love the way your shelves turned out, and what a nice plus that they are so functional.
Thanks, Patti! I actually was thinking the same thing, about using white for the writing… but I saw how the dry-brushing worked and thought I needed a little more ‘pop’. 🙂 Looking forward to seeing your aqua sign! Give me all the aqua!!! 😉 And all the HL hardware, too!
These are really adorable and handy. I like that they are small because you could sneak them in on any little wall, or even in a closet or pantry. Very cute. Pinning
Oh, Leanna! Thank you… for the encouragement, and the pin! Hugs, friend!
What a great idea to use these crates as shelves. I’m going to be working on a family command center and these would be perfect for it. Your shelves are beautiful, I love the color.
Oh, Jenny… thanks for coming by, and for the kinds words! Yes, these are pretty nifty little helpers in my utility’closet’. I love them! 😉 Have a great weekend!
I wanted to let you know I am featuring this great project at #merrymonday this week. I hope you will check it out when you have a chance! Hope you will link up with us again! https://ourcraftymom.com
Oh, thank you, Michelle!!! Of course I will link up again! Always! 😉
LOVE LOVE LOVE! And the colors would fit right in with my house… Great job Julie.
🙂 gwingal
Thanks, Nikki! You’re so sweet! I love the blue for my blue/white bedroom (even those these are hidden in my ‘closet’ 😉 ) Thanks for the encouragement, friend!
Super cute and great for a small bathroom! Love it!
Aw, thank you so much, Holly! They were fun to make! Hugs!
I love how these boxes turned out and all of the tips. The color is great and you make free hand lettering look so easy.
Isn’t it amazing how paint can make something so adorable?
Please stop by Thursday Favorite Things since you are one of my features.
Hugs,
Bev
Beverly, thank you so much for the encouraging words… and the feature! Woot! I always come by, and link, too! 😉 Thank you!
Wow ! I could never pull off that handwriting hahaha. I get so scared when I have to write on fresh paint. I absolutely love the cotton flower detail. It’s just the perfect balance between vintage and modern. And I love DIY s in general so this looks like my type of project!
Hey, Delia! Thanks for coming by! You know, I am a naturally ‘shake-y’ person… my hands TOTALLY shake when I am doing this type of painting. The nice thing is, you can go back with the other color and paint over your mistakes! With you being a DIY lover, I bet you really could pull this off! Thanks for the kind words, and making my day! Hugs!
These are so cute! I’m planning to make something similar for my guest bath this Summer!
Very fun! Can’t wait to see them!
Thanks for sharing this oldie-but-a-goodie post with us. I love it and am featuring it on Farmhouse Friday tomorrow. So glad you linked up. Pinned
Thank you so much, Cindy! #blessed
BRILLIANT use for some ordinary wooden crates, Julie!!
We will be featuring you starting Wednesday at the Creative Crafts Linky Party! Pinned and shared!
Creatively, Beth
Thank you, ma’am! Always a pleasure to be featured at your party!