
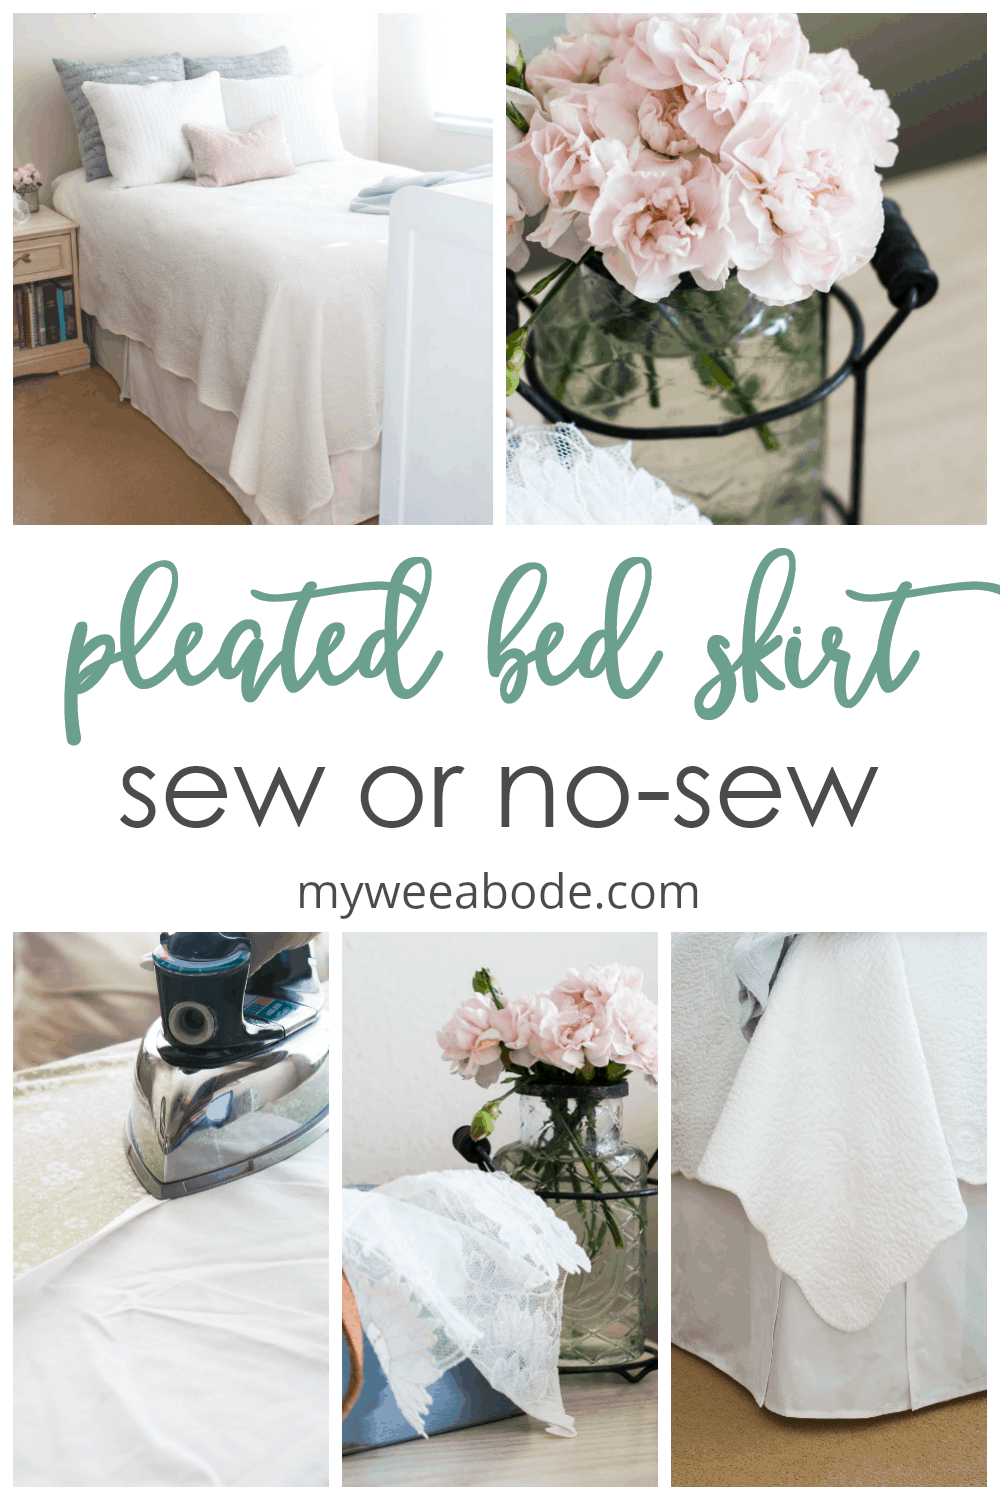
Easy Sew or No-Sew Pleated Bed Skirt
Hey everyone! How’s your week gone? Mine has been busy, as usual, but I did manage to get a project in this past weekend! This DIY was even easier than I expected… I KNOW that anyone can make this easy sew or no-sew pleated bed skirt! Why don’t we take a look?!
EASY SEW or NO SEW PLEATED BED SKIRT
The bottom of my bed has been naked for far too long!
I would say just about 5 years!
Can you believe it?!
I was given my beautiful matelesse (aka a coverlet) by my “favorite first niece”, Bekka. I had fallen in love with it when I first saw it in the store, and put it on my Amazon Wishlist, not expecting to get it (it was a bit pricey).
That year, when I opened my Christmas present from Bekka, (doh, that makes it 5.5 years!!!), I cried! My sweet niece had blessed me with my lovely coverlet! (BTW, you can ‘meet’ Bekka, along with more of my fam, by visiting her Youtube channel, TimeWithBekka 🙂 )
Before the Easy Sew or No-Sew Pleated Bed Skirt
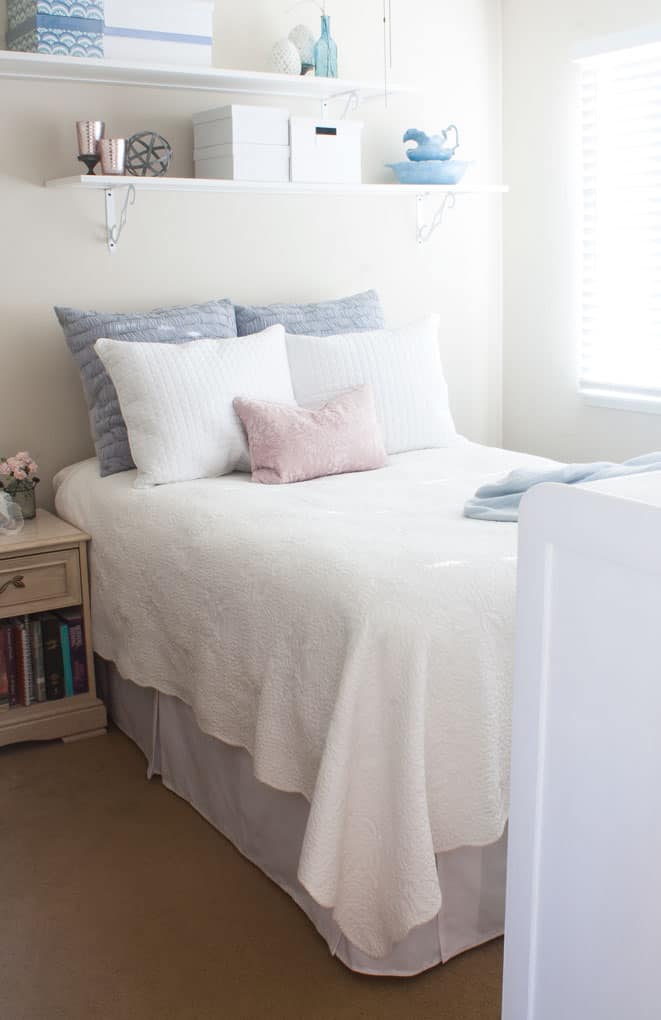
Keeping it real here, people… my bedroom, just like the rest of My Wee Abode, is a work in progress! Do you feel the same about your home? Oh good! Let’s be friends!

See that nightstand? It’s begging to be painted… white. And those shelves? Yep, totally still brain-storming about storage on those!

Can you believe I had these boxes showing for so long?
Do any other procrastinators want to start a club?
Hmmm, maybe tomorrow.
But, I must say, using storage boxes under the bed is a small-living-space 101 tip! (And just sayin’…Oh, how I love my gold carpet… NOT!)
Shopping for a Bed Skirt
Shortly after receiving my lovely gift, I realized I wanted a bed skirt that was simple, and would let my coverlet ‘shine’.
I started cruising Pinterest (don’t forget to give me a follow) and found LOTS of different DIY tutorials on how to make one, but the skirt that impressed me the most, and was the style I was looking for, was from the Biscuits and Burlap blog.
The Biscuits and Burlap tutorial made it look super easy, and it was because they showed you how to make the bed skirt without having to create the insert that goes across the box spring! You simply make the panels and pin them directly to the box spring! BUT, I was able to make it just a wee bit easier!
This post may contain affiliate links, at no additional cost to you.
For more information, see my complete disclosure HERE.
What You Need
- Fabric of your choice. I used a heavy white muslin, which was quite affordable on sale (maybe a total of $10). (The yardage will depend on the size of your bed, and if you want pleats or not… more on this below)
- Ironing Board and Iron
- Fiskars Rotary Cutting Set (or Scissors)
- Sewing Machine, (optional)…or…
- Fusing Tape, something like this (optional)…or…
- Aleene’s Fabric Fusion Glue (well, you need to use something to finish the hem, people!) 😉
- T-pins Update: I have found that using upholstery twisty pins work much better in place of t-pins)
The Hard Part: Measurements and Yardage
Not all box springs are created equal… in size, that is! BEFORE you go shopping for fabric, be sure to measure your box spring. Measure the sides and the end, as well as from the top edge of the box spring down to where you want your bed skirt to hit the floor. Measure twice, and buy fabric once… or something like that. After you have the measurements, this is what you will do…
Width
- Add three inches to the height of the panels (measurement from edge of box spring to the bottom of the floor) One inch will be for the hem, and two inches will allow the fabric to lie nicely on top of the box spring to pin. For example, my box spring height was 18” + 3” = 21”. And, because you will need two side panels, you will multiply it by 2… 21” x 2 = 42”. In my case, the fabric needed to be at least 42” in width because the whole piece of fabric will be cut down the middle in order to create panels that were each 21″ high (the width of the fabric is listed on the end of the fabric bolt… fyi. 🙂 ) BTW, my fabric was 56” wide, so I had plenty of wiggle room!
Length, or How Many Yards
Now that you know the width of your fabric, you need to know how many yards to purchase. You will need: two side panels, one end panel, and two corner panels.
WITHOUT PLEATS
- Side Panel: Add two inches to the length (for a finished hem on each end). For mine, (a full bed) it was 75” + 2” = 77” (remember, the material will be cut down the middle, so you only have to count the length one time, even though you will need two side panels).
- End panel: Add two inches to the length (for a finished hem on each end). 53” + 2” = 55”
- Corner panels: The corner panels (you will need two) need to be 18″ with 2 inches added for the finished hems, so 20″… However, you don’t need to include this measurement in the overall length of yardage. Why? Remember, we are cutting the material straight down the middle… you will have the second side to the end panel to cut out the corner panels. Trust me… it will work.
Total needed: 132” divided by 36” (one yard) = 3.66 yards… make it easy, just get 4 yards.
WITH PLEATS
- You are going to add 6” for each side and end panel, so that’s a total of 18”.
Total needed: 150” divided by 36” (one yard) = 4.16 yards… again… make it easy, just buy 4.5 yards.
Let’s Sew… or Not!
Now that we have the measuring out of the way, and you have your fabric, let’s get down to business!
Cutting
- Your fabric should have a nice crease pressed straight through the middle. All you need to do is cut straight down that crease, from one end of the fabric to the other. I recently purchased the Fiskars Rotary Cutting Kit, and I LOVE IT! I have used it on several projects already, and I can’t believe I did not purchase this sooner. It is so worth the money! I simply put the mat on my ironing board, laid the fabric on the mat, placed my straight edge along the crease and cut. Then, I slid the fabric through and repeated the steps until the whole length of fabric was cut. It took all of *maybe* 5 minutes! I was left with two long strips of fabric with a selvaged edge one side of each piece.


- Now I cut each panel length. Two panels I cut at 83” (remember, mine are pleated), then I cut the end panel at 61” (again, I added a pleat…or should have!), and the I cut the two corner panels at 20” each.
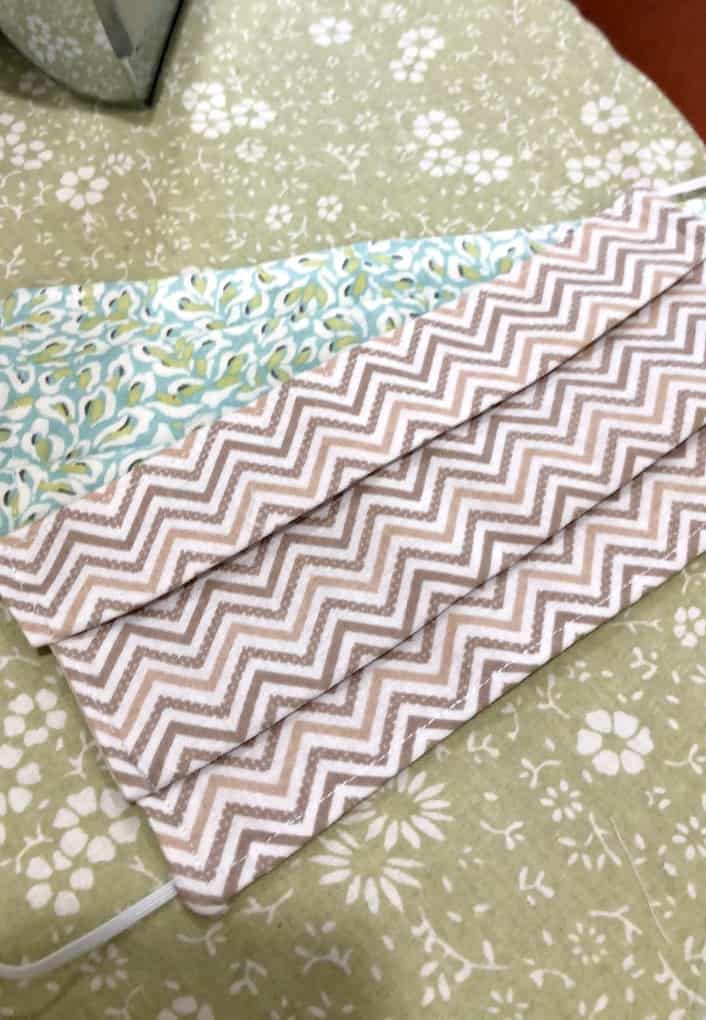
Ironing
- If you are going to use fusing tape (aka Stitch Witchery) read the directions because you will want to use it during this ironing time. At this point, I ironed in the hems on each panel. I’m pretty good at eyeing measurements, so I first ironed ½ inch all the way down the bottom edge, folding it down as I ironed, and then went back and folded it over another ½ inch and ironed it again. I repeated this step on the ends of each panel, as well.
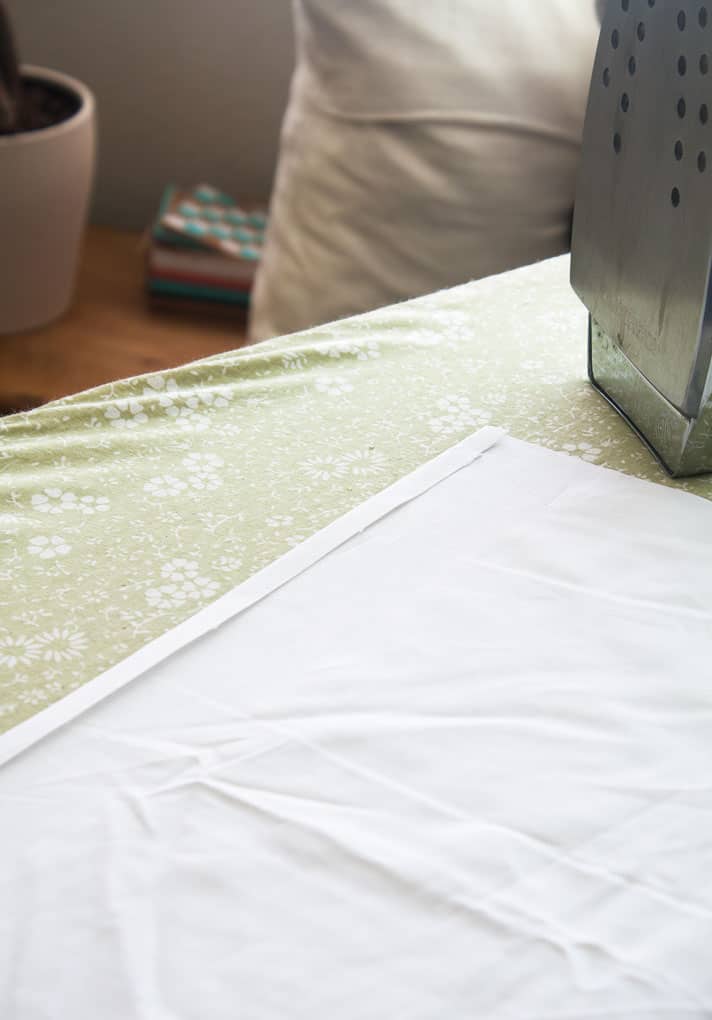
- Here’s the ‘easier’ part. The selvage edge is left alone. There is no reason to iron or hem this edge as it will get pinned directly onto the top of the box spring, and won’t fray during laundering. 😀
Sew or No-Sew
- At this point, if you prefer to use fabric glue instead of a sewing machine, you can take the glue and apply to the fabric, as directed on the bottle.
- If you would like to use a sewing machine, simply use a straight stitch and sew along all the hems. I also chose to fold in the corners (see pic below), in order to make them look a bit more finished.


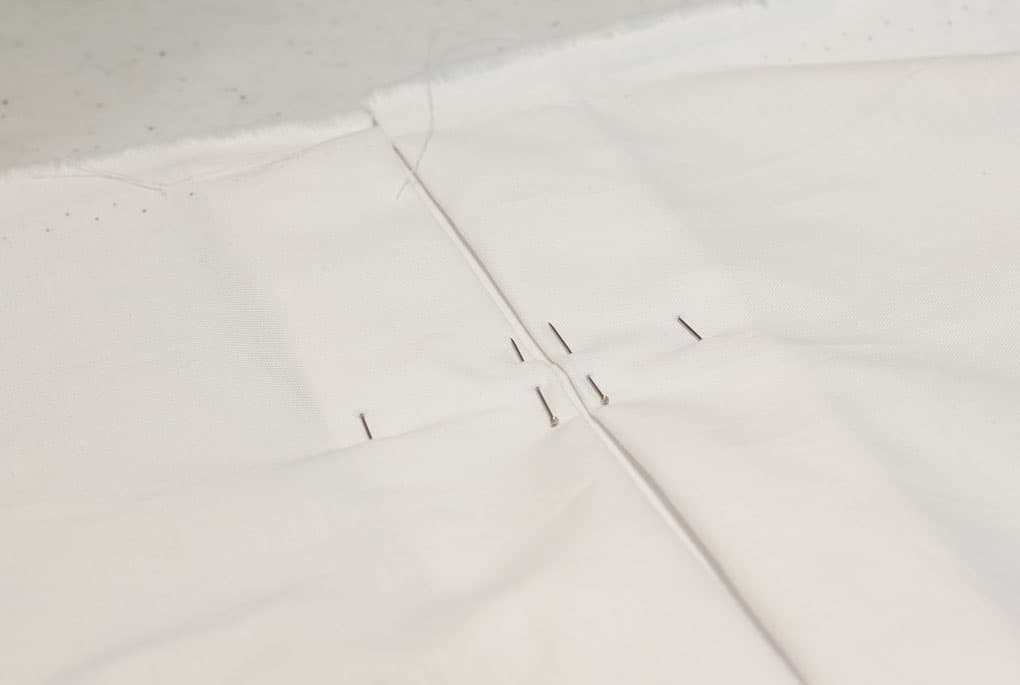
- If you want to add pleats, find the middle of the panel by folding the two end together. Then place a straight pin at the middle. Measure 1.5 inches on either side of the pin and fold the material on either side to meet the pin in the middle. Pin the folds and sew/glue/fuse across at the top (I sewed mine at the very top, and then again where the pleat would meet the top edge of the box spring).
- Iron all your panels.
Go To Bed!
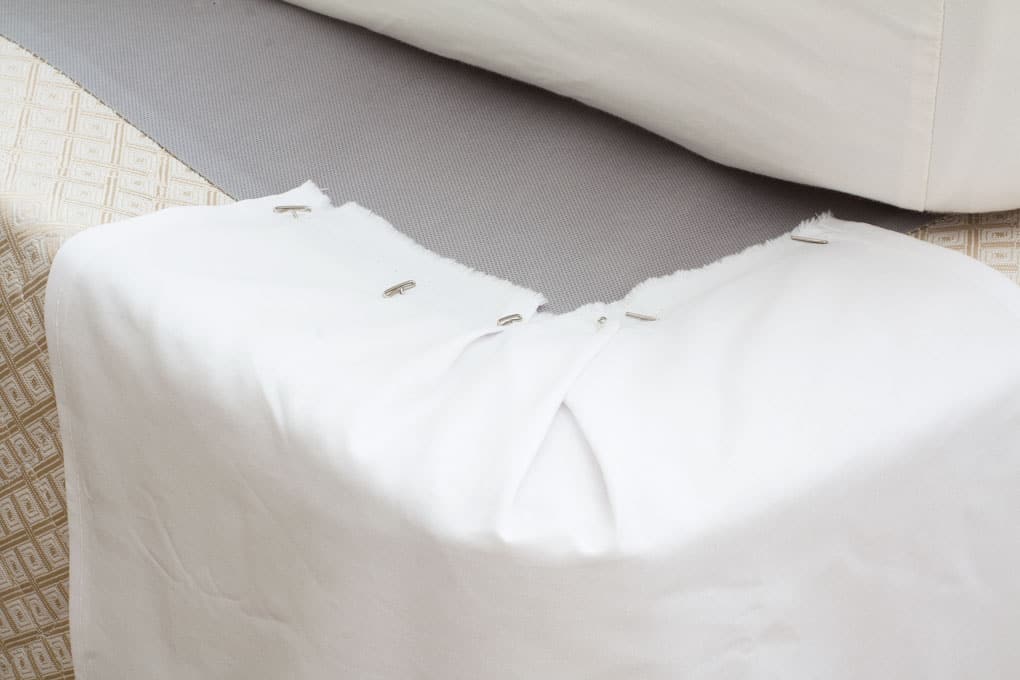
Congrats…You are ready to attach the panels to your bed!
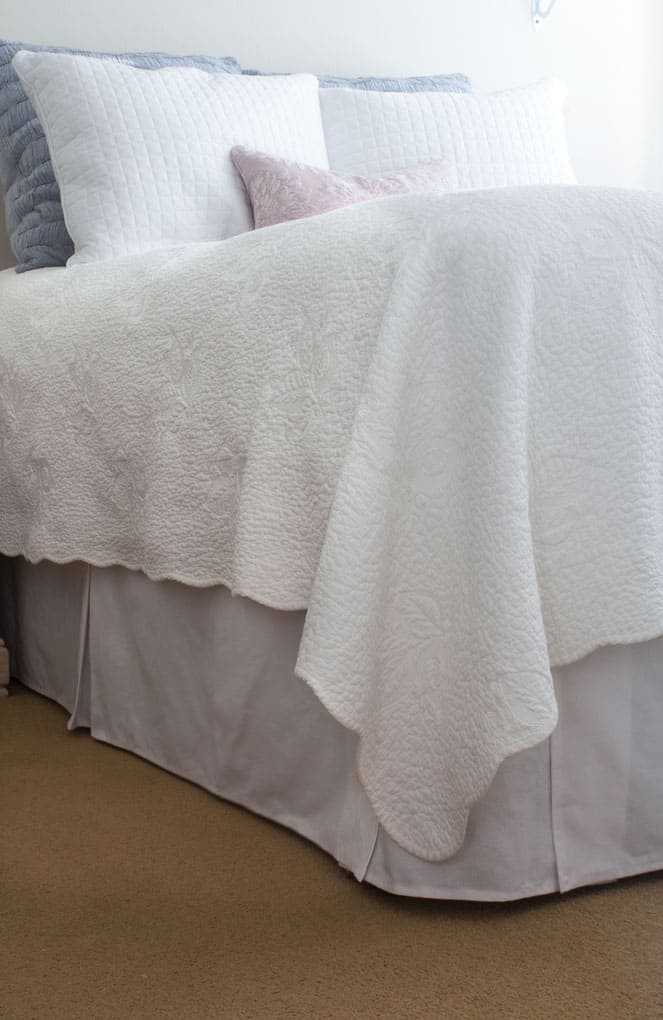
- First, attach the corner panels and adjust so that the bottom hem hits the floor evenly. Pin the fabric to the box spring with T-pins.

- Next, evenly attach the side and end panels. I started from the corners and then pinned back up toward the headboard, and then attached the foot panel. You will need to adjust and readjust until they are even. Again, use T-pins to attach to the box spring.

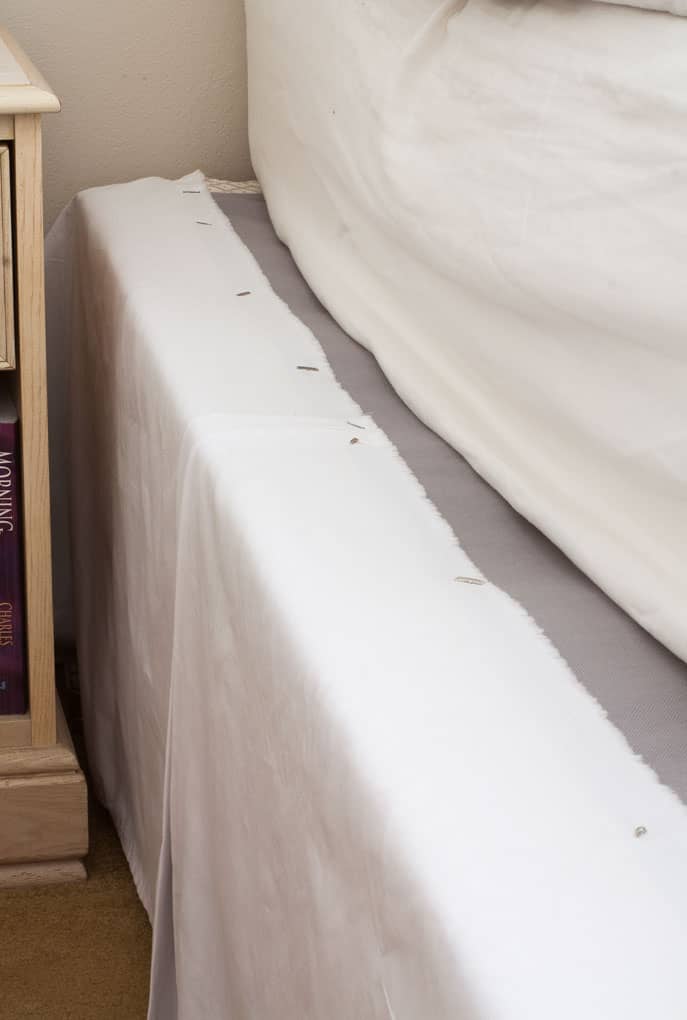
Oh… and I’m okay with the wrinkles. It kind of gives it a linen look. 🙂

Oh… how did this pic get here?…

The Finished Product
Stand back and let out a very happy sigh!
Oh, and just between you and me. Remember, if you plan on putting a pleat in each of the panels, make sure you do it in each of the panels before putting all your equipment away… or the end panel will end up being six inches too long. Yep… wonder how long I will procrastinate before I fix THAT! #fakeamistake

Stand back and let out another very happy sigh!
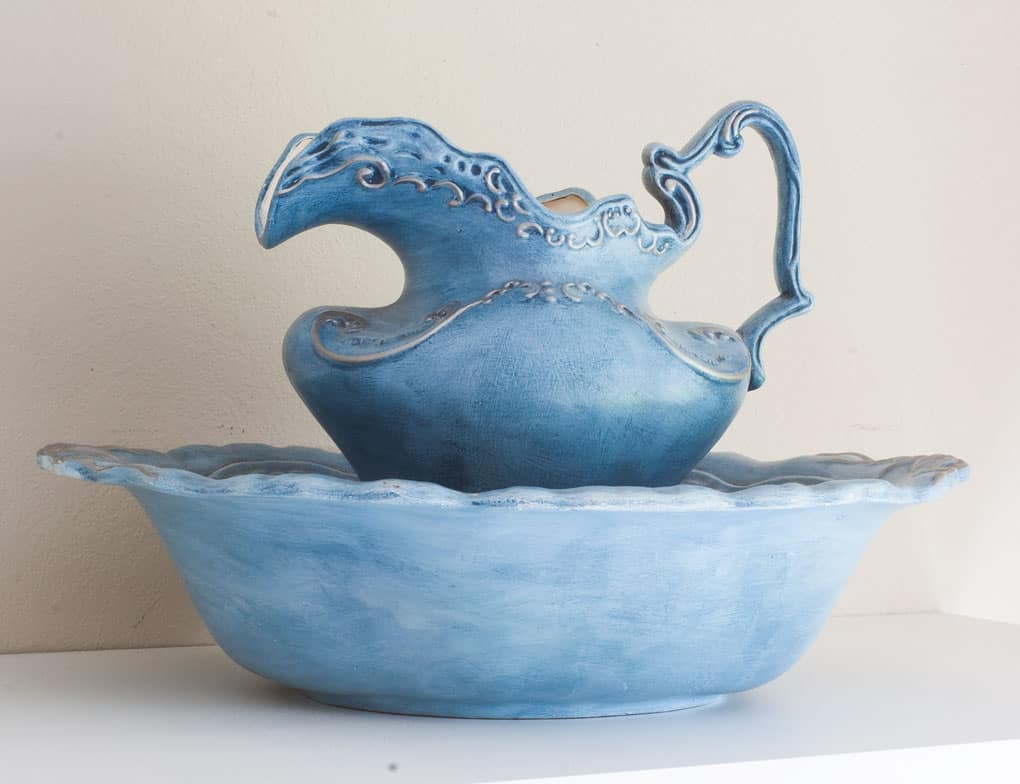
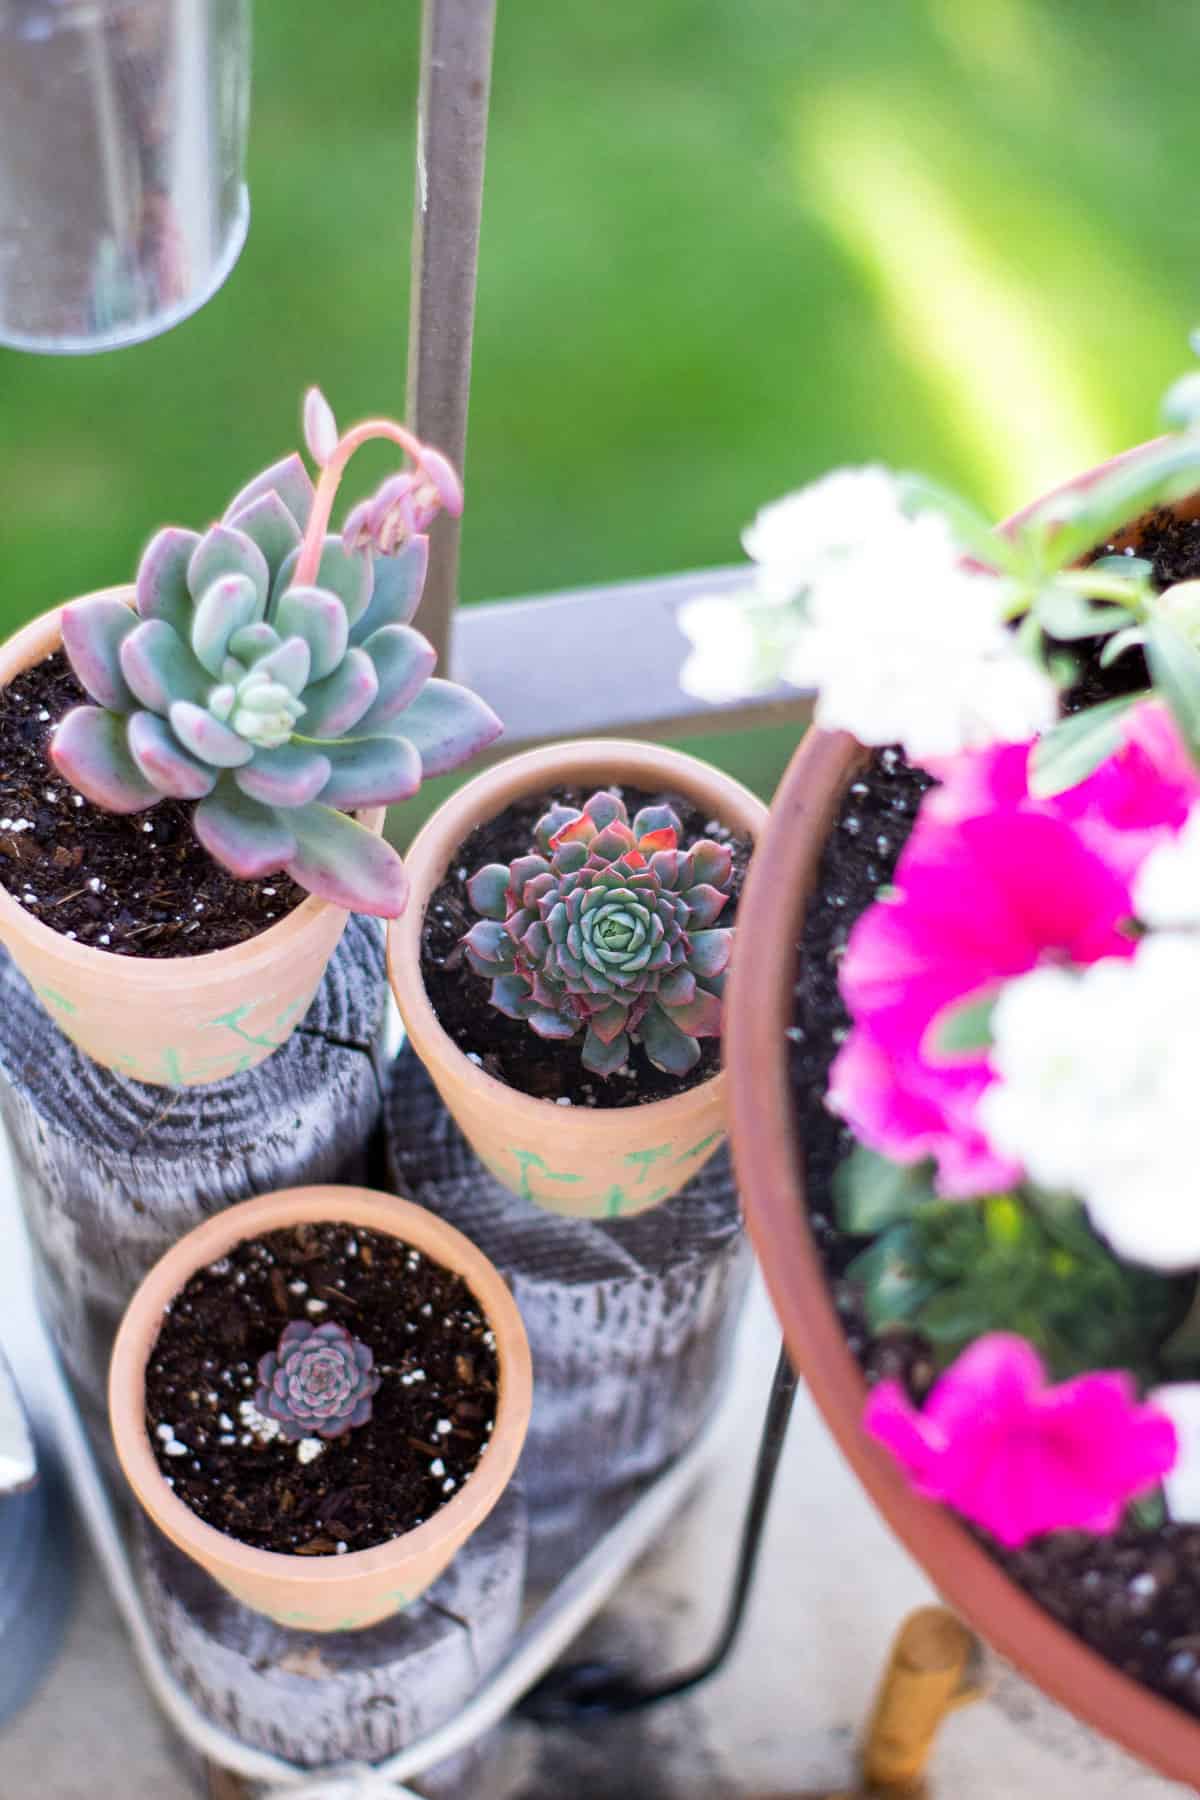
And, just for fun…

I made this pitcher and bowl when I was a teenager!

And one more time looking all finished and purdy..
So happy…
And you know… if you decide to sew this easy project, you might want to think about how to make money sewing! It’s worth a try, for sure!
Now It’s Your Turn
What about you? You think it’s time to do a quick project (like, we’re talkin’ less than 3 hours, here), and add some beauty to a bedroom? Maybe cover up some mess under the bed with this easy sew or no-sew pleated bed skirt? 😉 Let me know what you think in the comments!

PIN IT FOR LATER!


Hi Julie! 🙂
What a great looking bed skirt! Nice job! I’m glad you’re enjoying the fruits of your labor. You make your home so pretty and inviting! And the photos look wonderful 🙂
Oh, yes, my home is a work in progress. Probably always will be.
It’s been a crazy week here, too. The two-year-old ceiling fan light in the kitchen went out. My son’s car broke down (angels watching out for him, he would’ve been stranded by the road on a trip he was planning with friends for the next day if it hadn’t happened when it did), so I had to drive him back to college. The garden tiller also broke down and that needed fixed. Finally got the rest of the vegetable gardens tilled and mostly planted yesterday.
So weird, Kay… I replied to your comment this morning, but it didn’t post! Thank you so much for the kind words! You sound like you have had a SUPER CRAZY week! I hope this Mother’s Day weekend gives you some respite and relaxation! (My ceiling fan went out this week, too… right before summer, wouldn’t you know.) 😉
Great tutorial! How did you install the T pins so you’ll be certain not to snag your fingers on them when you change the sheets on your bed?
Thanks, Peg! De ja vu! I feel like I heard this question somewhere before! 😉 By pushing the T-pins in at an angle, the heads of the pins were almost flat against the box spring. I made my bed afterward, and I didn’t have any problem. Maybe pushing them in towards the center of the bed would be even better? 😉 But, I would definitely put them in at an angle, not straight down, as the heads will then protrude a wee bit and could cause some ‘catching’ of fingers/hands. Love ya!
I too have lots stored under the beds – your bedskirt looks great!
I think those of us that do DIY and decor have found the space under our beds to be invaluable! 😉 Thanks for coming by, Carol… and for the sweet words! Hugs and hearts!
So many nice things! Not just the bed pleat…we don’t have that kind of bed right now, but I will keep this in mind for later. I LOVE that blue pitcher and I can’t believe you made it??? Why are you not a professional potter 😉
Oh… I didn’t throw it, I simply cleaned the greenware and fired it and painted it! 😉 My fam used to have a ceramics business. I was an artist for a long time. Let me know if you ever make the bed skirt! Hugs, sweet friend!
Nice bedskirt! I always have a hard time finding a bedskirt that fits well to hide the base of our beds. Especially in the North House! Beautifully done and fabulous tutorial! Pinned 🙂
Thanks, Wendi, for the kind words and the pin! Yes, this type of bed skirt would definitely fit any size bed, and can even be ‘dressed up’ by using different materials. 🙂 Have a great weekend and holiday! Hugs, friend!
Nice job! I think this turned out beautifully!!!
Oh, thank you, Wendi! I’m really happy with how it came out! Hugs and hearts!
Wow what a difference a bed skirt makes! I used to sew way back in the day and when I see people on tv or online using that rotary tool I imagine how wonderful it must be.
I love your color scheme in your house. It is so pretty. And your pictures are also so gorgeous.
Great tutorial.
🙂 gwingal
Isn’t it crazy how much more complete and neat the room looks?! And, yes, I can’t sing the praises of the rotary set enough! Thanks for coming by, Nikki!
That is such a detailed tutorial! And your bed skirt looks perfect! Awesome post!
Have a day as wonderful as you are friend!
karianne
Aren’t you the sweetest to take time out of your busy schedule! Thanks, KariAnne! You have a super day, as well! (Waiting on pins-and-needles to see who my Haven mentor is!)
Julie, This is such a great project. I splurged and bought a bed with an adjustable base, which is amazing but you can’t use a typical bedskirt on it. This looks like the perfect solution to hide my stuff as I have a wee closet!
Ohhh, let me know if this works for you, Nancy! Would love to see a photo if you do! Thanks for coming by… hope you are having a great day!
Looks amazing Julie! And your coverlet is beautiful! You and Bekka have fabulous taste!
Thank you so much, Melan! 🙂 I’m quite pleased with it, and will be especially happy when I get that extra pleat sewn in! LOL! Yep… love my coverlet, too! Hugs, dear friend… let’s meet for coffee soon!
Looks great Julie!
Thank you, cousin! Hoping to get better pics at some point! 😉 Love ya!
A bed skirt makes such a huge difference. I love the way they soften a room and make it look not only neater but cozier. I made two bed skirts this year and have the material for the third one. Your post is motivating me to get on it, lately, I just want to be outdoors. Enjoy your weekend.
Thanks for dropping in, Leanna! Sounds like you ‘got this’! Lots of things to do in our lives, I totally understand! Have a great rest of your weekend!
I need one of these as we have an antique four posted brass bed, so its higher off the ground than you can buy in skirt length.
Thank you!
You’re most welcome to drop by for a cup of inspiration anytime!
Jennifer
Well, Jennifer… I hope you can use this idea for your room! Thanks from coming by, and I’ll be sure to stop by your blog, too!
Julie I am in the same boat as you. I have nothing to hide my mess under the bed. I really like your pretty pleated bed skirt. I will definitely be putting it on the long list of things to do!
Oh, thank you so much, Mary! I’d love to see your completed bed skirt when you get it done (literally, it took like 2.5 hours… I bet you could do it in less time! 😉 ) Hugs, friend!
Hi Julie!
I love this minimal sewing bedskirt idea ~ wish I’d thought of that when I made mine several years ago. I cheated a bit on mine for a Cal King/King size bedskirt by using my daughter’s leftover double bed sheet. That sheet made THE PERFECT piece to go across the top of the mattress frame! Then all I had to do was lightly gather and sew the sides ~ old linen tablecloths split and one piece on either side and another at the foot. A third Battenburg lace piece I cut two lacy corners from and that made my split for the bed ends.
Love yours for its easy of putting on the bed. Those T pins are great for hanging curtains and such, too! Very useful in the sewing arsenal of tools!!
Love how your home is turning out,
Hugs,
Barb 🙂
p.s. Pinned several photos to my DIY Projects and Crafts and Sewing boards. 🙂
Thank you so much, Barbara! It was “sew” easy! Love your process of your bed-skirt… using all the items you already had! Love the Battenburg lace idea, as well… may incorporate that into mine! 😉 Thanks for ALL the love! Hugs, friend!
Great job! I’m wondering what you would recommend to attach the skirt to a mattress as apposed to a box spring? Would we still use t pins? We’ve got 2 mattresses on top of our box spring, on our bed frame. I’m thinking the bed skirt should start under the top mattress. Do you agree? Any other ideas?
Hi, Clarisa, and thanks so much for stopping in and commenting. I think I would use ‘bedskirt pins’ for attaching to a mattress… here’s a link for your convenience. Quick question… are you adding the extra mattress to give height to your bed, or for comfort? If it’s for height, may I suggest getting risers for your bed? This would give you more room under your bed for storage, and give you height, as well. If it’s for comfort, I totally understand.;-) If it were for bed, yes, I would attach the bed skirt to the mattress, as I would want more skirt showing. If you attached it to the box spring, you would need to get a larger comforter/duvet/coverlet to cover both mattresses. Hope that makes sense, and helps! Let me know if you have any other questions! Hugs and hearts!