
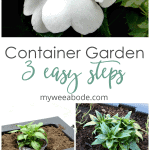
3 Easy Steps to Create a Container Garden
The weather here in So Cal has been lovely! Perfect for gardening! So today I’m going to share 3 easy steps to create a container garden for any size home!
3 EASY STEPS TO CREATE A CONTAINER GARDEN
Thank you so much for visiting while my posts have been a bit sporadic over the last few weeks. Family life has been crazy… crazy, but good!
Family Happenings..
My daughter’s last few weeks of pregnancy were rough, so I felt it would be helpful to focus on being with her.
Then, she gave birth on June 1 to a baby girl, so, of course, I’ve been spending lots of time being a G’ma! Praising God for a healthy baby, a healthy mommy, an amazing daddy, and a wonderful big brother that is adjusting well!
Feel free to check out my About Page for family updates and pictures!
But now… let’s get to the gardening, shall we? And maybe even explore a few container garden ideas!
3 EASY STEPS TO CREATE A CONTAINER GARDEN
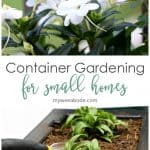
Container gardening is a beautiful addition to any home.
But even moreso, container gardening can provide a lovely solution for small homes, apartments, dorms, or tiny houses where regular gardens can’t be created.
Whether you use large terra cotta clay pots, small metal pails, or anything in between, they can bring a pop of color and charm to a porch, patio, step, or window.
So, let me share with you first, what I purchased, and secondly, the three easy steps to actually planting the garden!
Choose the Right Plant Pots and Gardening Containers
I knew I wanted to be able to have a ‘garden’ on my tiny landing-patio, so I did some brainstorming for a couple months!
Yeah… sometimes it takes me a while to figure, refigure, and then CONfigure what I want to do!
After looking at several options, I decided that the best container for my wee spot would be a window box that I could place on the floor. It gives the look of an actual garden, but still uses a small amount of real estate.
This post may contain affiliate links, at no additional cost to you. For more information, see my complete disclosure HERE.
So, using a gift card that I won through a giveaway from the ladies at the Decorating Tips and Tricks podcast (thank you, again, Anita, Kelly, Yvonne!), I purchased the Cape Cod Window Box from Jackson & Perkins, and it’s perfect!
UPDATE: Unfortunately, Jackson & Perkins is no longer carrying planters. But this large window box on Amazon is VERY similar!
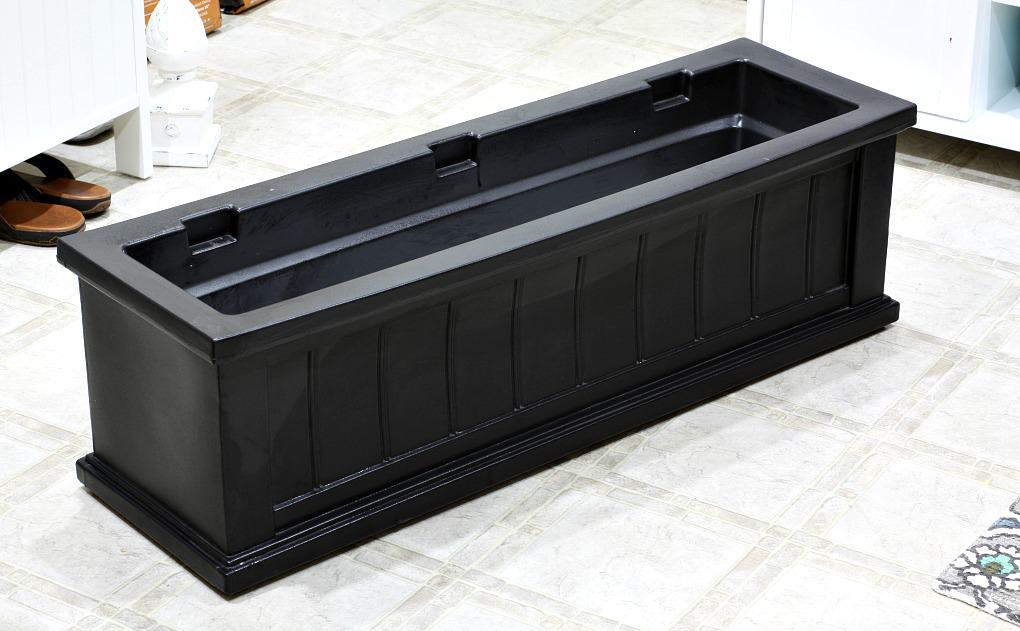
(Special feature: This container has a slow-watering feature which means I don’t have to water but maybe every two weeks!)
Additional Pots and Plant Containers
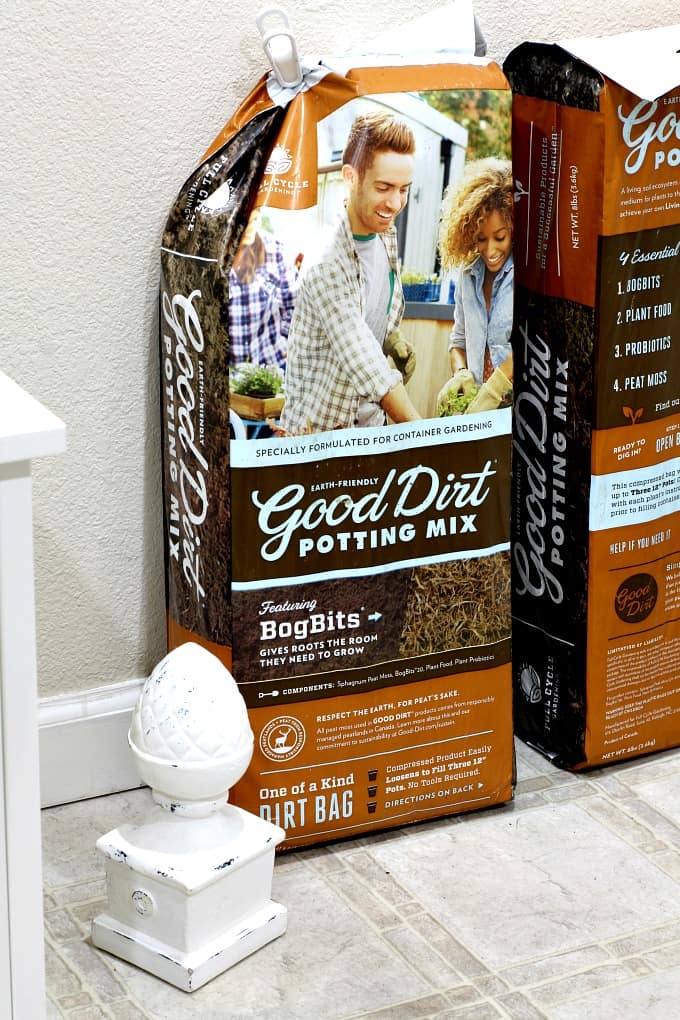
Purchase Quality Potting Soil
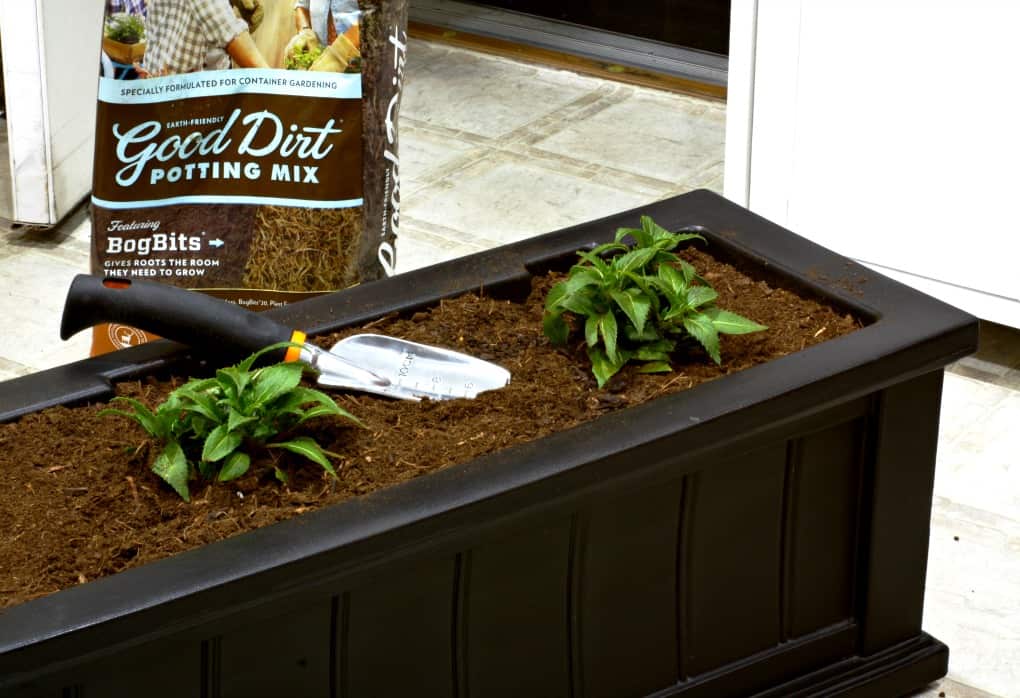
Along with the container, I purchased two bags of soil (but, I actually only needed one for the 3-foot container). Although the Good Dirt Potting Mix is no longer available, Miracle Gro Outdoor Potting Mix comes highly recommended and I use it all the time!
But, between you and me, if you ever need to give your plants some extra ‘umph’, Kelly has a great fertilizer recipe that she actually recommends you use when you first plant your container garden, but I think you can mix it in at any time, too.
Select the Perfect Container Plants
So… when you create container gardening you can use LOTS of different size plants, depending on the container shape and size.
You can use draping plants, tall plants, “full” plants… separately or all together.. . you get the picture! 😉
You also need to pay attention to the sun-exposure and what season you are planting in.
For my window box, I wanted to make it simple and ‘clean’. One thing that is wonderful about gardening of any type, you can change it up with the seasons, which I can see myself doing in the future!
I think I’ve shared before that My Wee Abode is a loft apartment. At the top of the stairs, leading to my front door, is small landing which is the only area I have to create a ‘garden’. Sort of like a balcony garden!
This area gets full sun for almost the whole day! So, after an online chat with a J&P garden consultant, I decided that I would purchase three white Sunpatiens along with a couple of miniature roses. (More about those in a minute.)
Sunpatiens do great in partial sun and shaded areas!
If you want more suggestions for full/partial sun perennials for California, check out these suggestion from Hydrangea Treehouse.
And here are some ideas for plants in fully shaded areas.
3 Easy Steps for Planting a Container Garden
So, when you don’t have a garage or yard to plant or garden, where do you do it? Why in your kitchen, or course!
Pfff, anyone knows that!
Most of my DIY projects, and now my gardening, happen in my kitchen. It’s the largest open space I have and has an easy-to-clean surface. 😉
Preparing Soil for a Container Garden
First, drag your window box into your kitchen planting area. It’s time to fill your containers with soil!
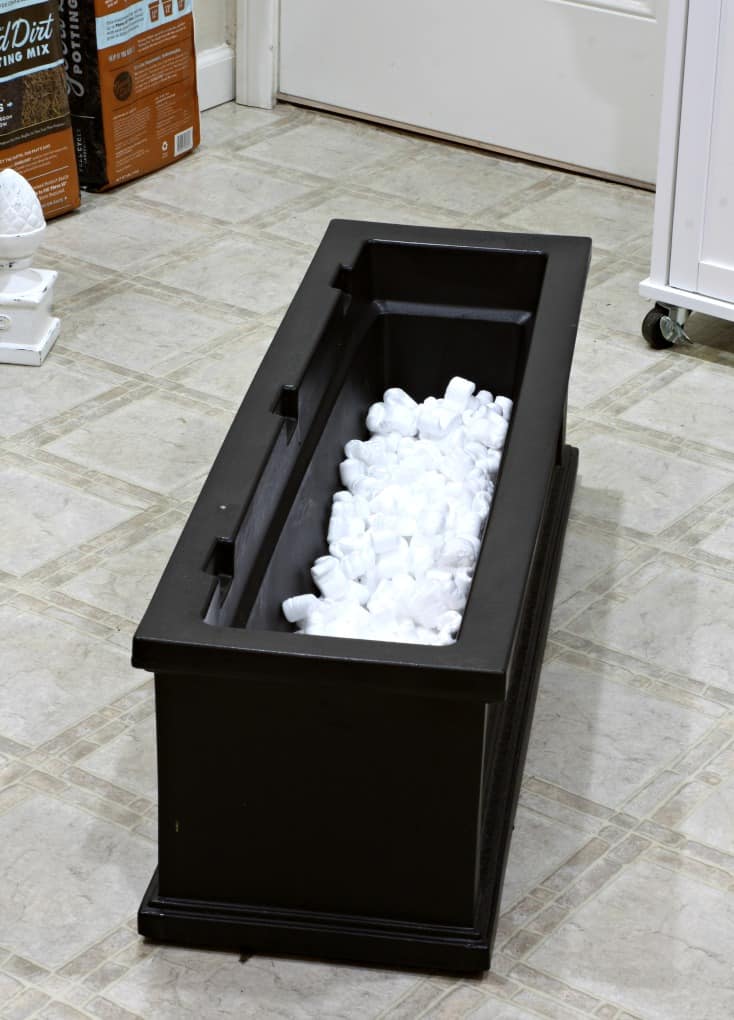
But first, J&P recommend filling the bottom of the container with several inches of a drainage-type material. They actually suggest using foam peanuts if you are planting non-edible plants, which worked out great, as this window box was packed in those little white thingie-wingies!
Re-use and recycle!
Next, fill the window box with soil, just about to the very top. No trick to this… just pour it in. (This is where you might want to mix in Kelly’s fertilizer recipe.)
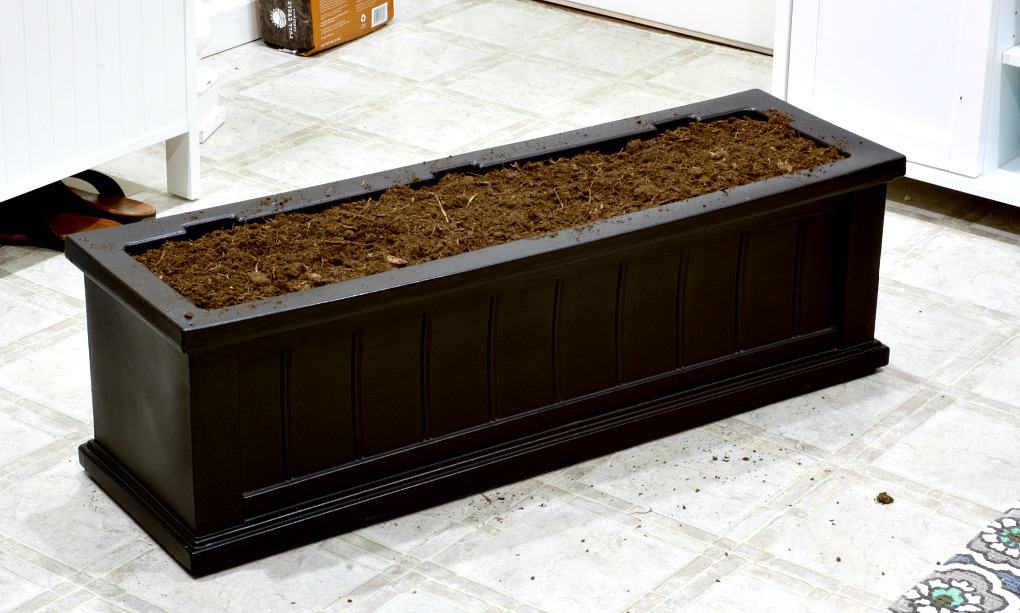
After the container is filled with soil (on top of the white foam disguised as nutty goodness), it is time to plant!
By the way, if you are using planting pots, only fill the soil about 1/3 of the way from the bottom of the container.
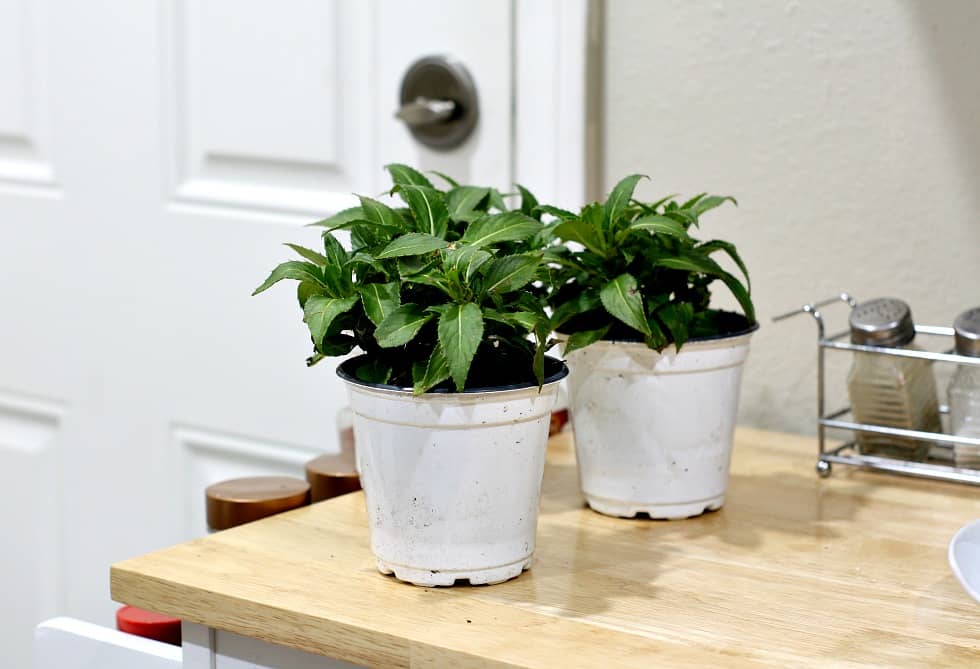
Arrange and Place Your Plants in the Container
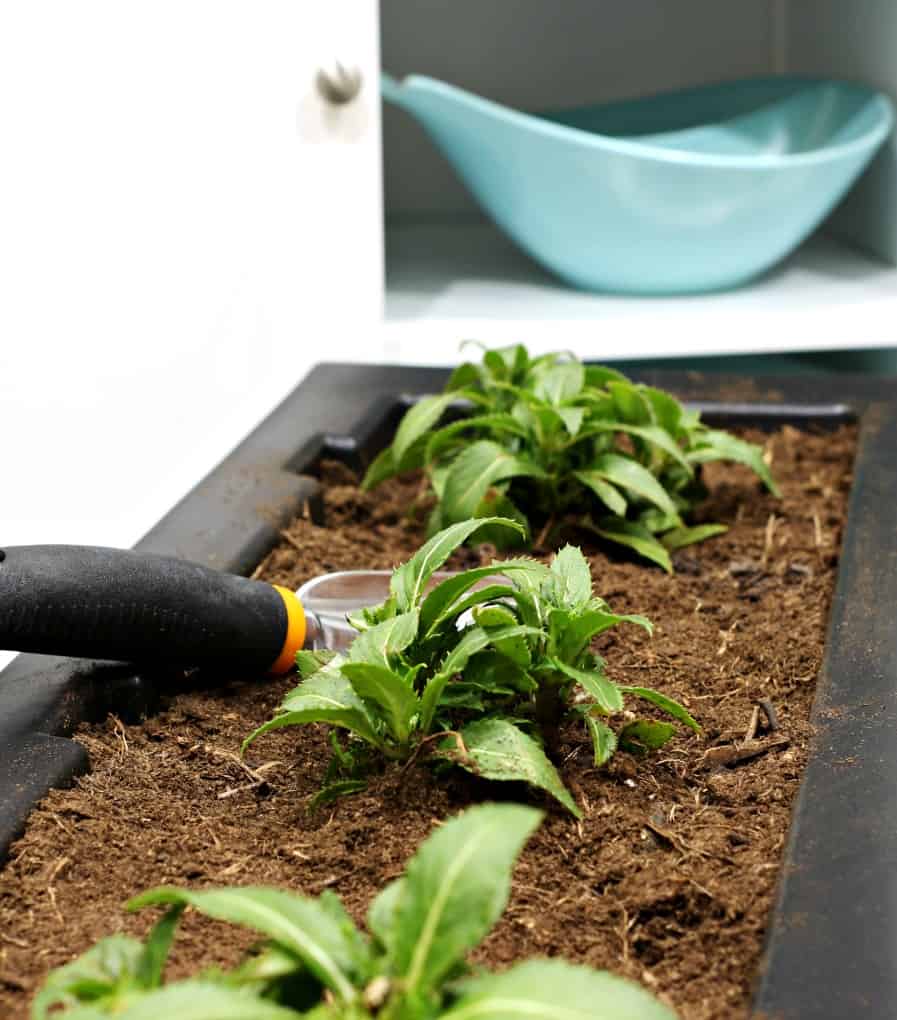
Arrange your potted plants in the exact spots of the window box, then dig-out the dirt in those spaces. This is the simple way to create your container garden design. 😉
Dig the holes deep enough for the pots to sit inside. This is to make sure that the plants fit nicely into the area once you take them out of the container.
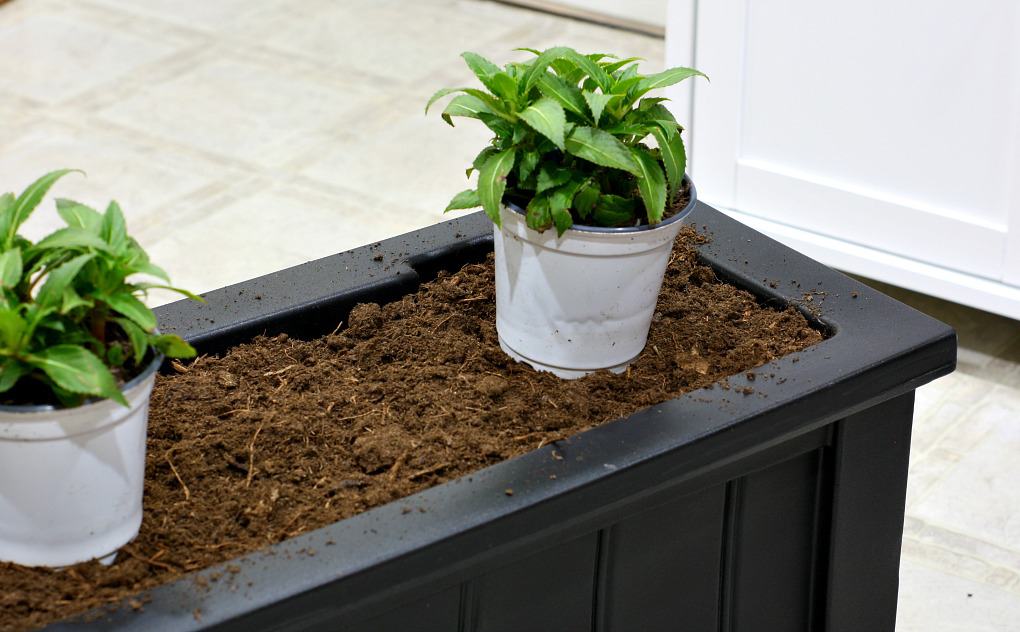
Also make sure that the topsoil of the pot and the topsoil of the window box are level with each other.
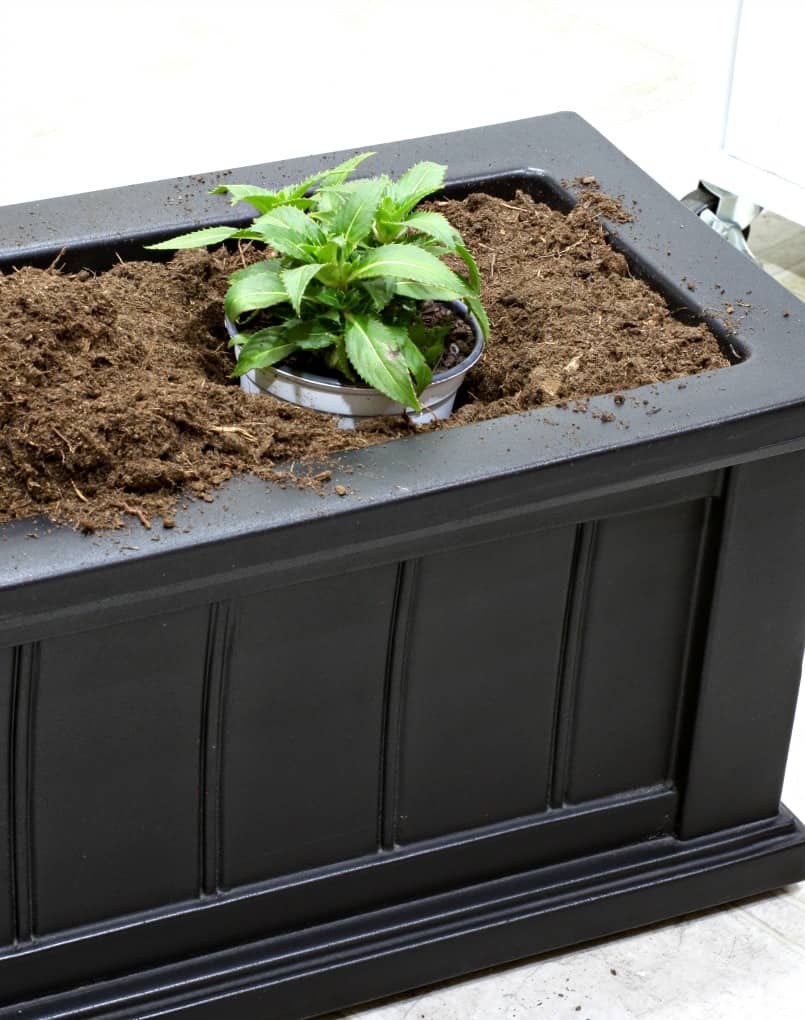
The plants are then ready to be placed in the container.
Take the plants out of the little plastic pots and remove most of the soil from the roots. Don’t worry… it’s pretty hard to hurt these plants. You can even remove some of the roots, and they will just keep going and going and going.
Place the plants in the holes and then fill the holes with the soil that was dug-out earlier, making sure to push the soil in a bit. You don’t want to pack it like brown sugar for a cookie recipe, but you do want to give the plant a nice snug home, especially at the very top.
Be sure that all the roots are in the soil, just as it was in the soil in the pot. (I hope that makes sense!)
Smart Watering and Maintenance
Now, slide the window box back outside (or in your desired place) and give the whole container a good watering! You might want to check again the following day, to see if more water is needed.
Container gardens require regular watering, but be mindful not to overdo it. Monitor the soil moisture levels and water accordingly, allowing excess water to drain away.
Self-watering containers (like this window box) or adding a layer of mulch can help retain moisture and reduce the frequency of watering.
Your plants need to be regularly check for pests, pruned as needed, and fertilized to keep them healthy and vibrant.
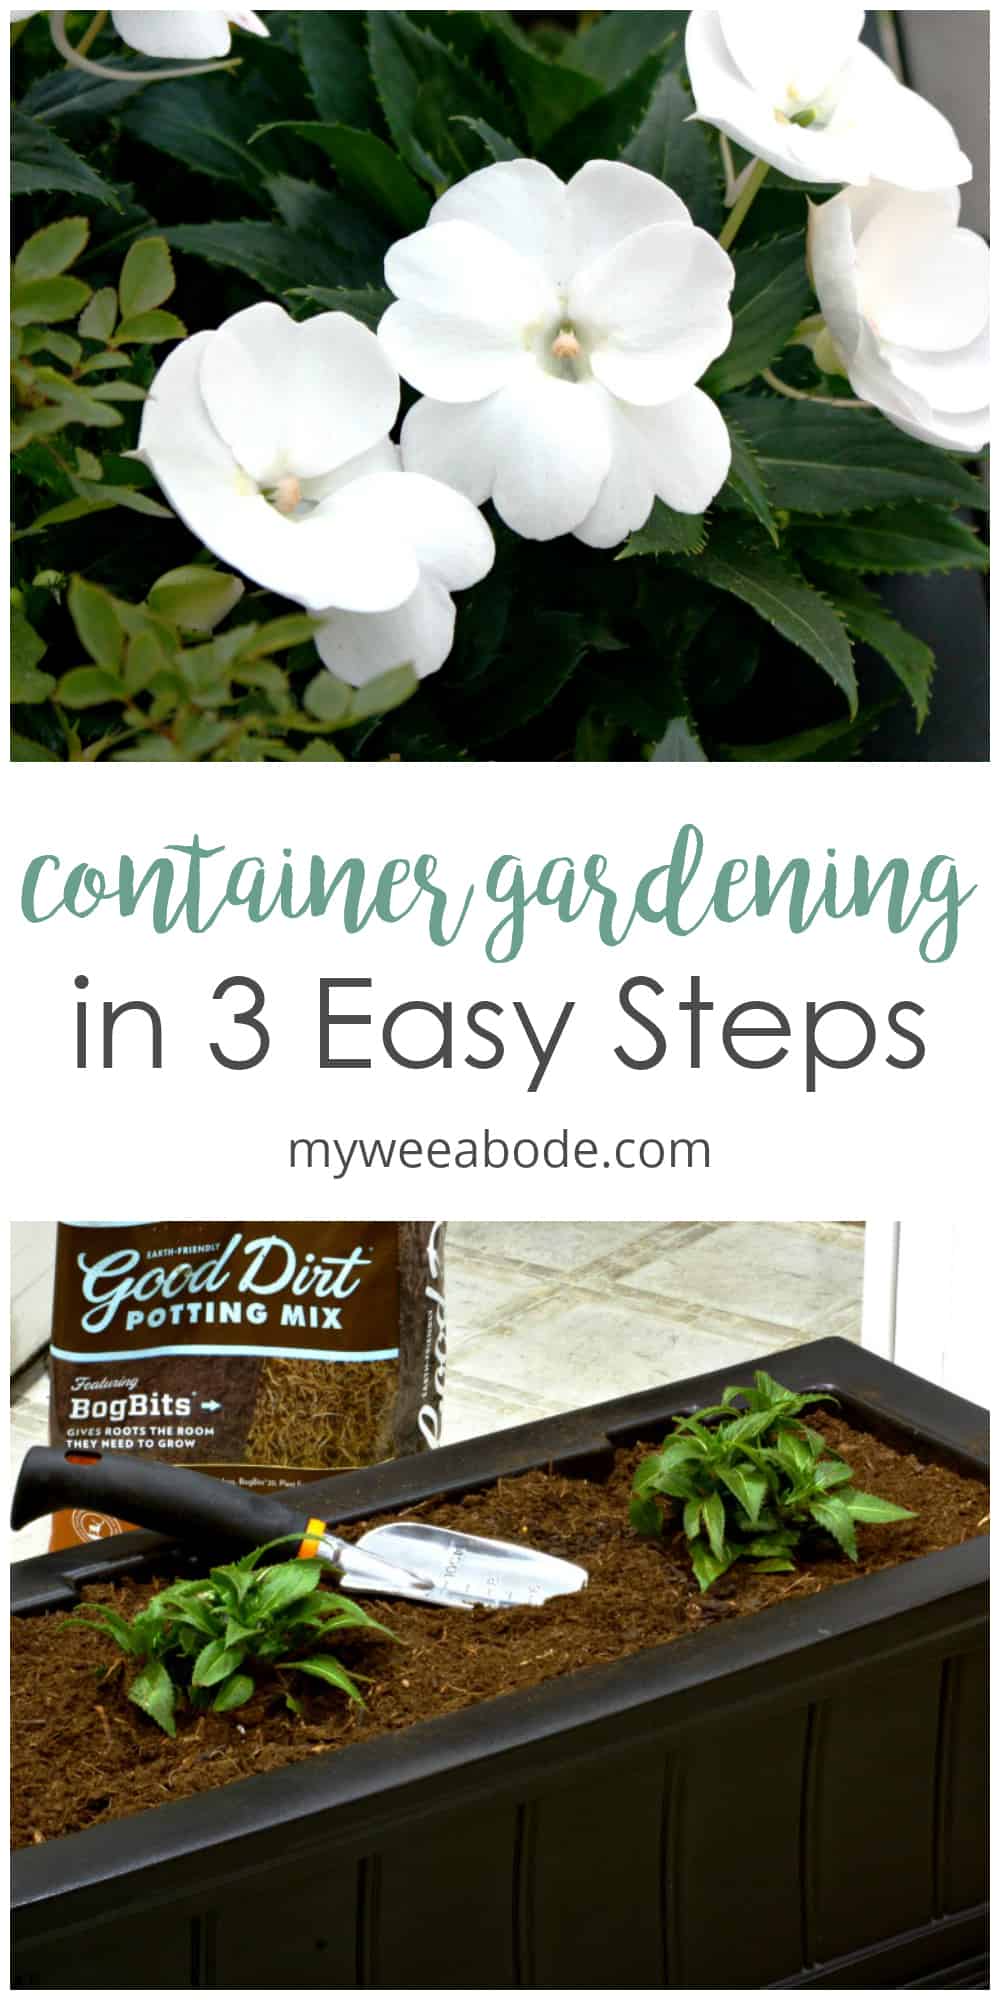
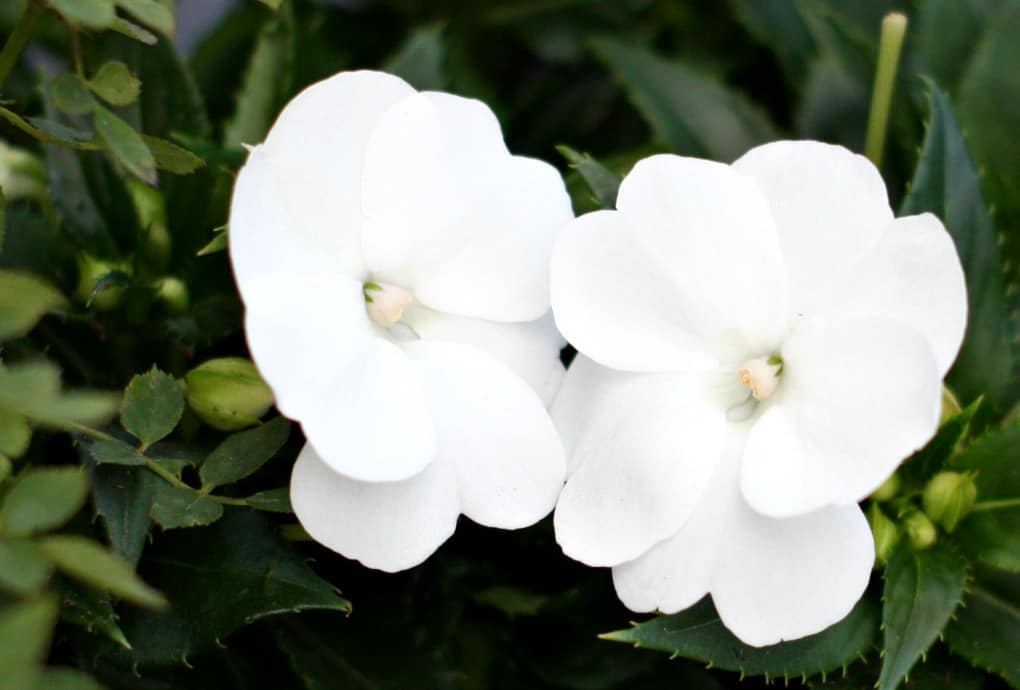
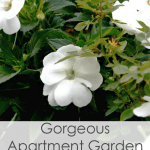
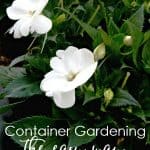
A Little About Sunpatiens
Now, I grew up planting impatiens in our family garden. They are easy to plant, hearty, and pest resistant. Plus, they come in an array of colors!

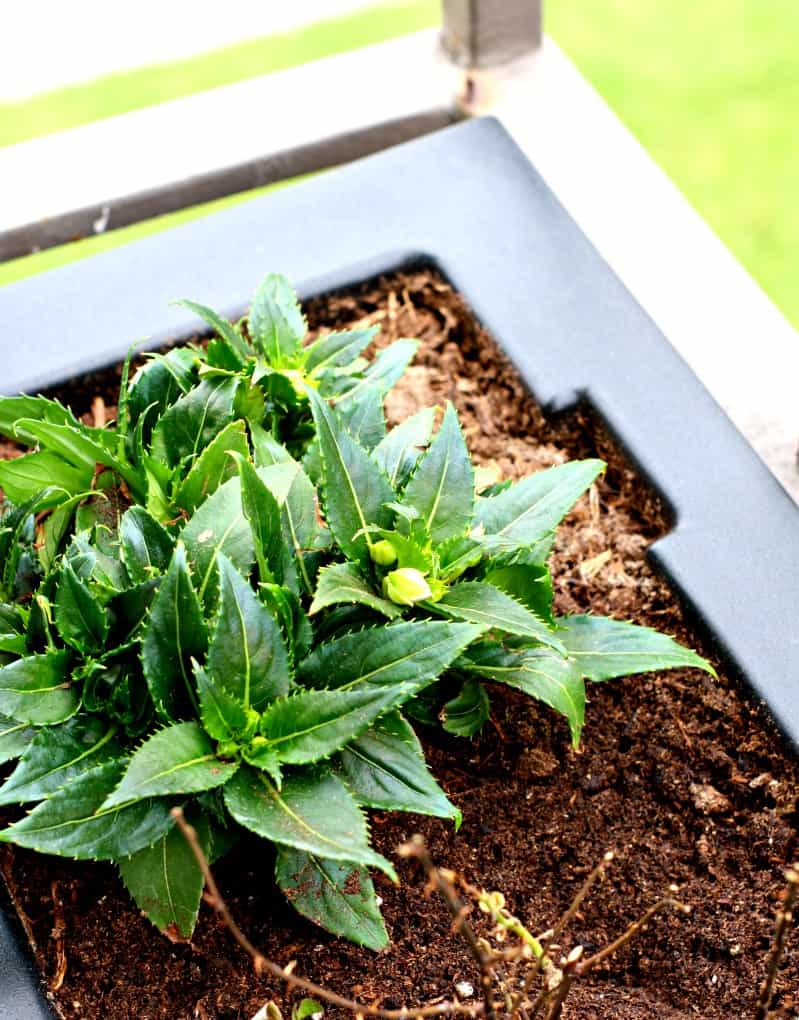
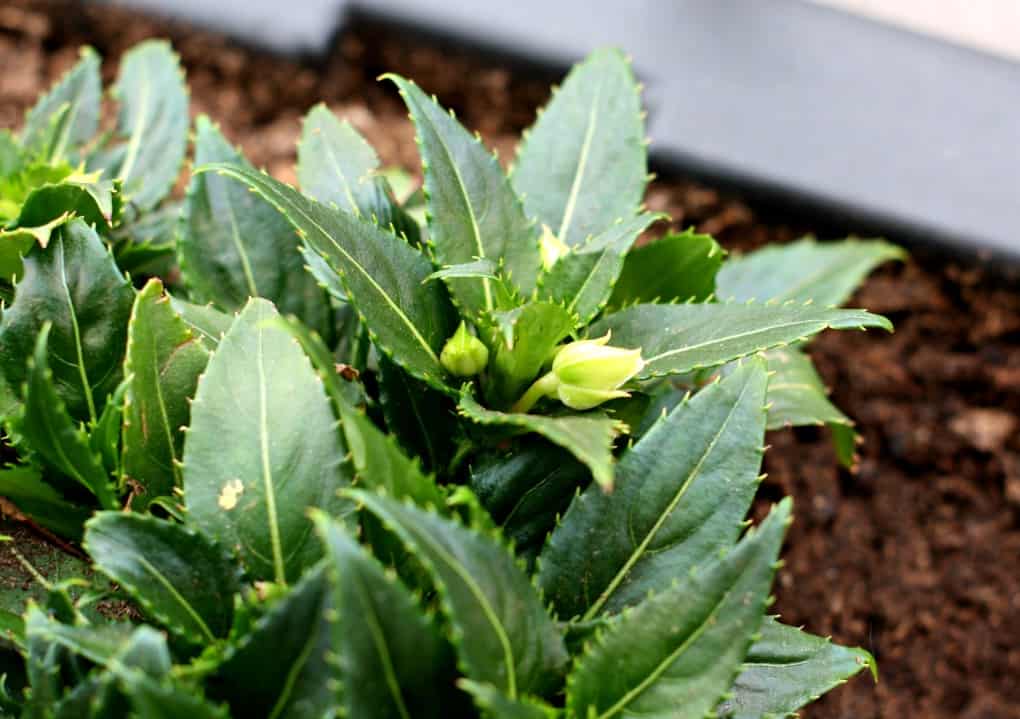
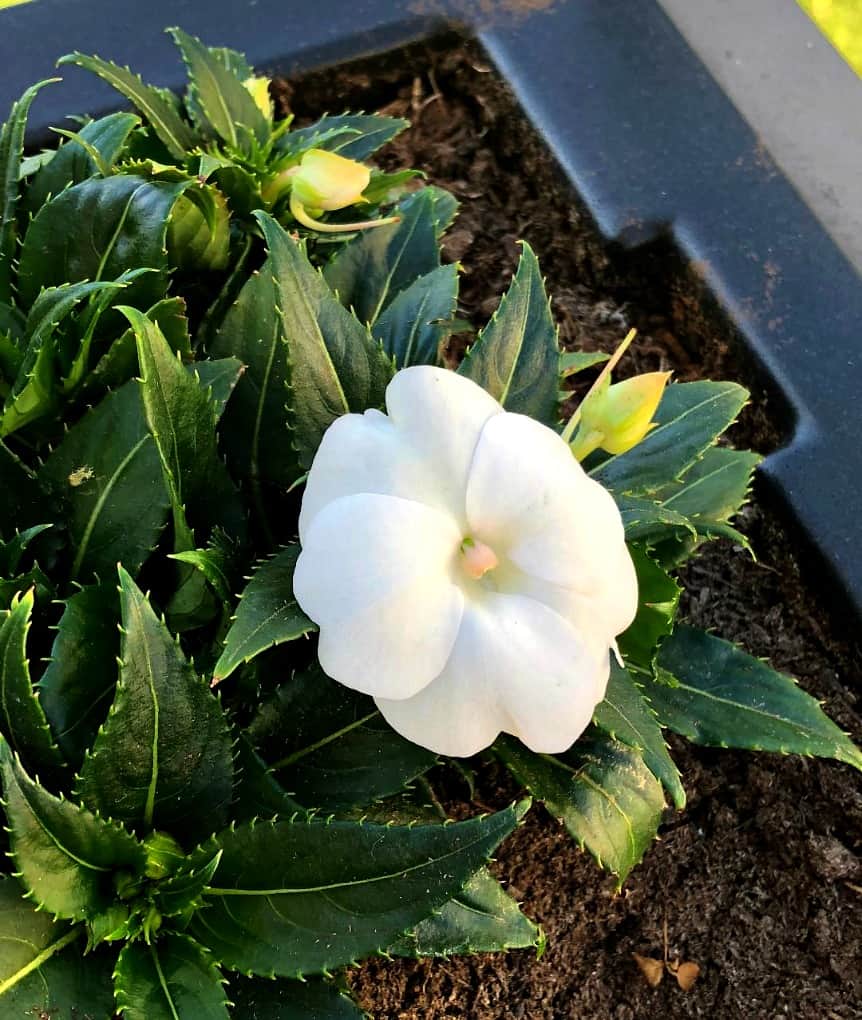
But, these Sunpatiens (part of the family of impatiens) are a bit different. These plants have been bred to withstand constant direct sunlight and have even more of a hearty ‘spirit’ than their sister plants.
The Sunpatiens’ leaves are dark and thick and are known for their thorny-like edges, but they are actually soft to the touch.
The white flowers on the plants I purchased (they also come in a variety of colors) were barely in the bud stage when I received them (in the mail!) And boy, did they get A LOT of buds!!!
The first flowers took almost 6 weeks to bloom!
And now!!!!
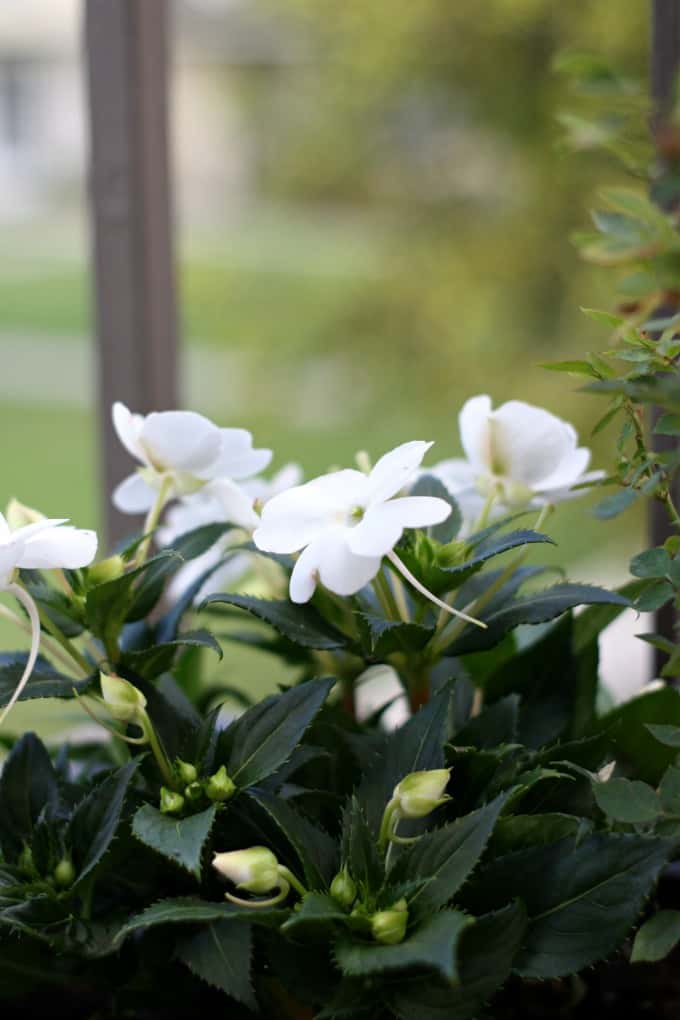
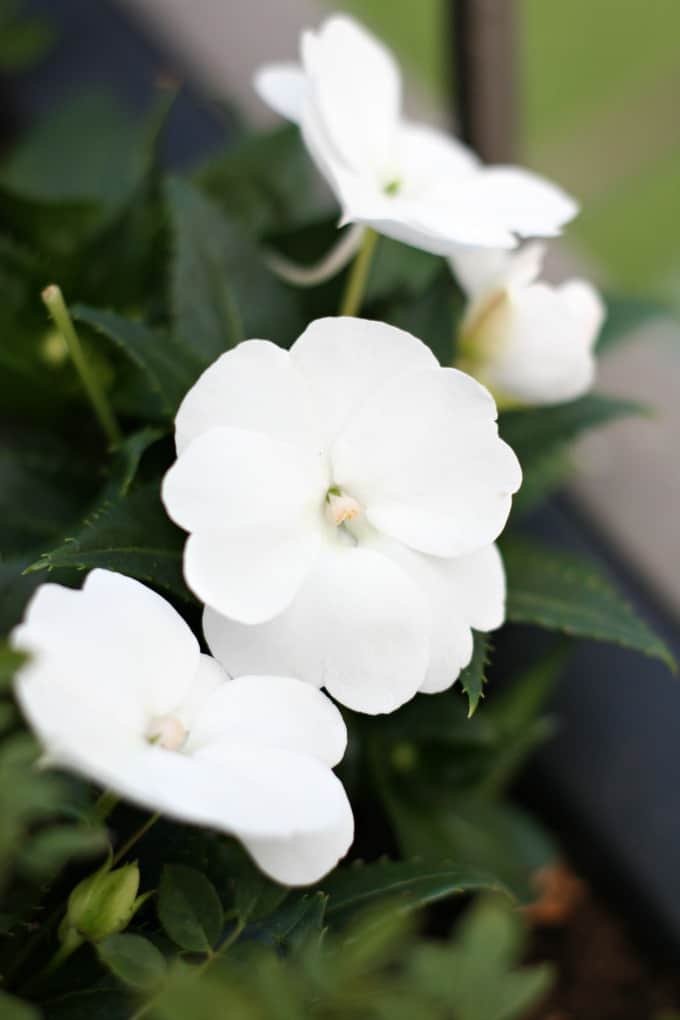

The blooms on Sunpatiens are quite large (most are at least 2.5 inches!), and the petals are quite a bit thicker than normal impatiens, too!
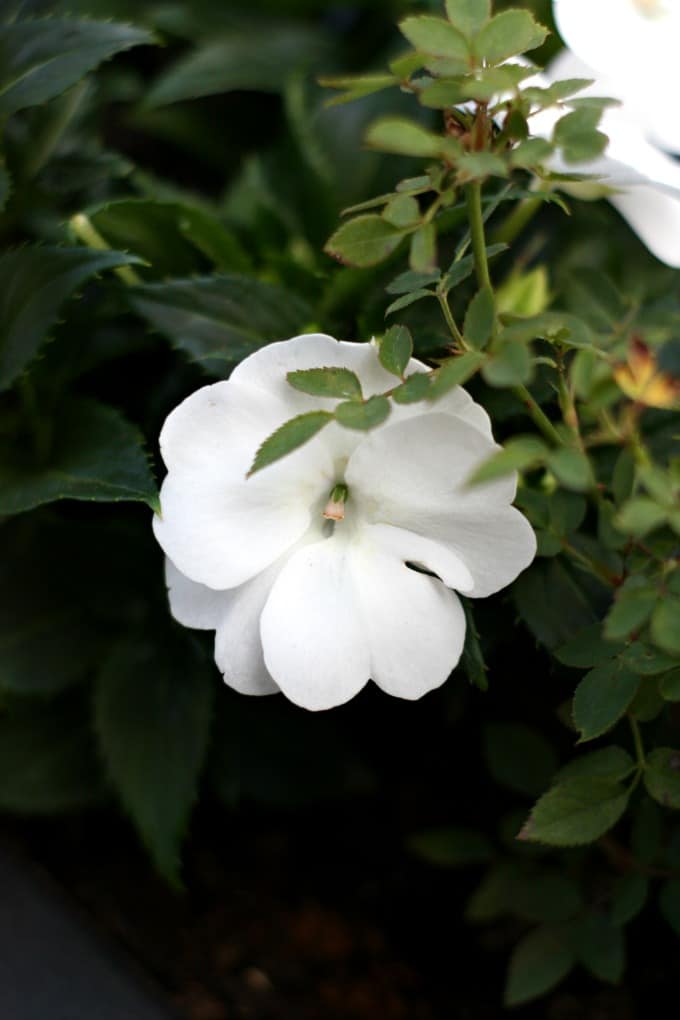
And these white flowers are REALLY white!!!
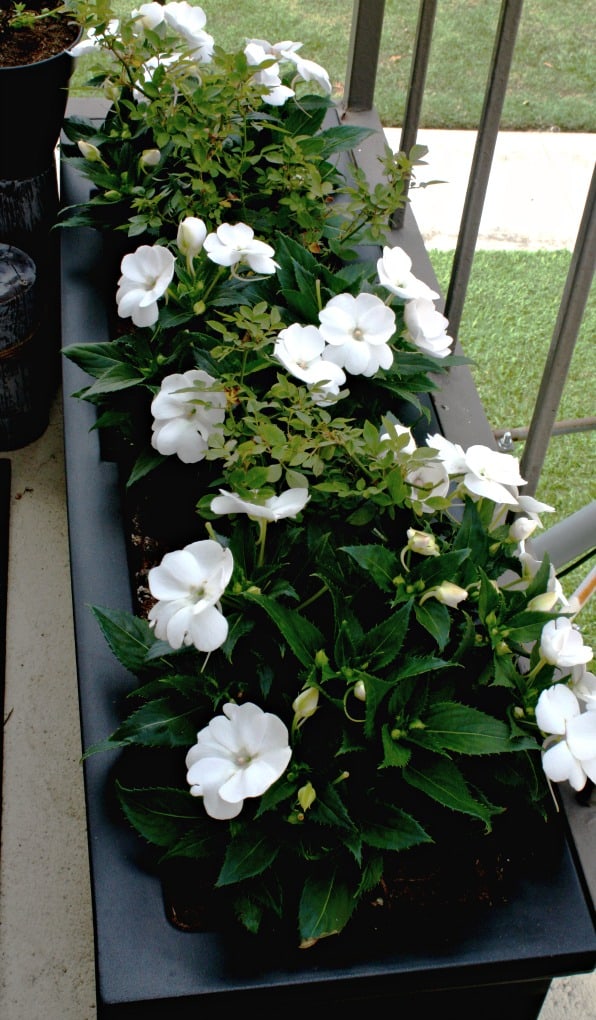
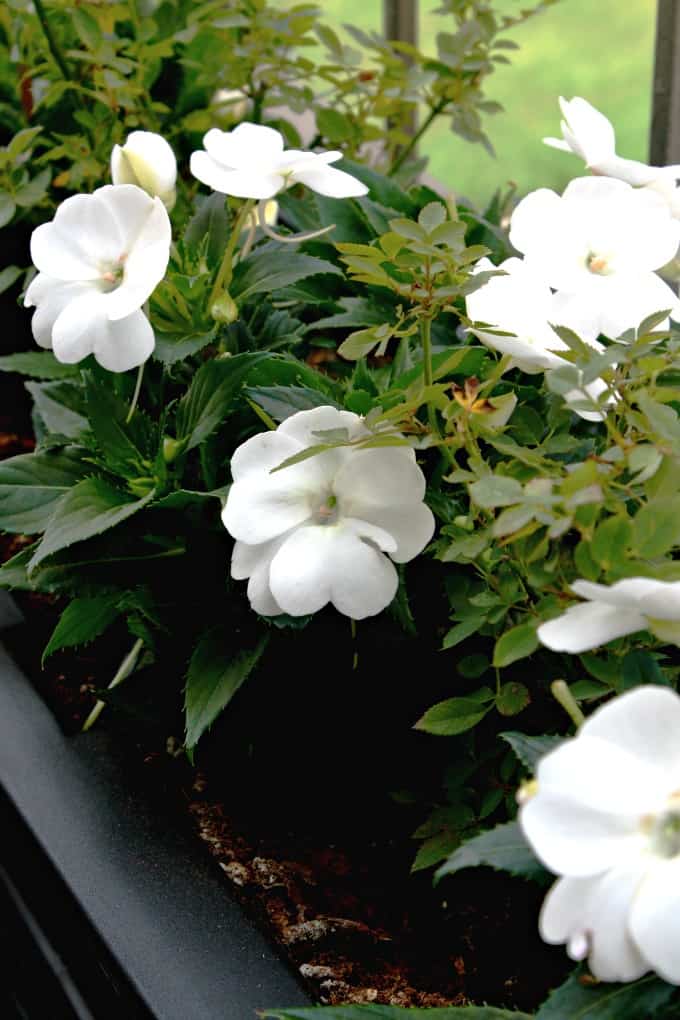
I even planted a couple miniature Boogie-Woogie roses between the Sunpatiens. I’m not sure I will see any roses this year… It may be even too crowded in the container for them to grow later, but we’ll see.
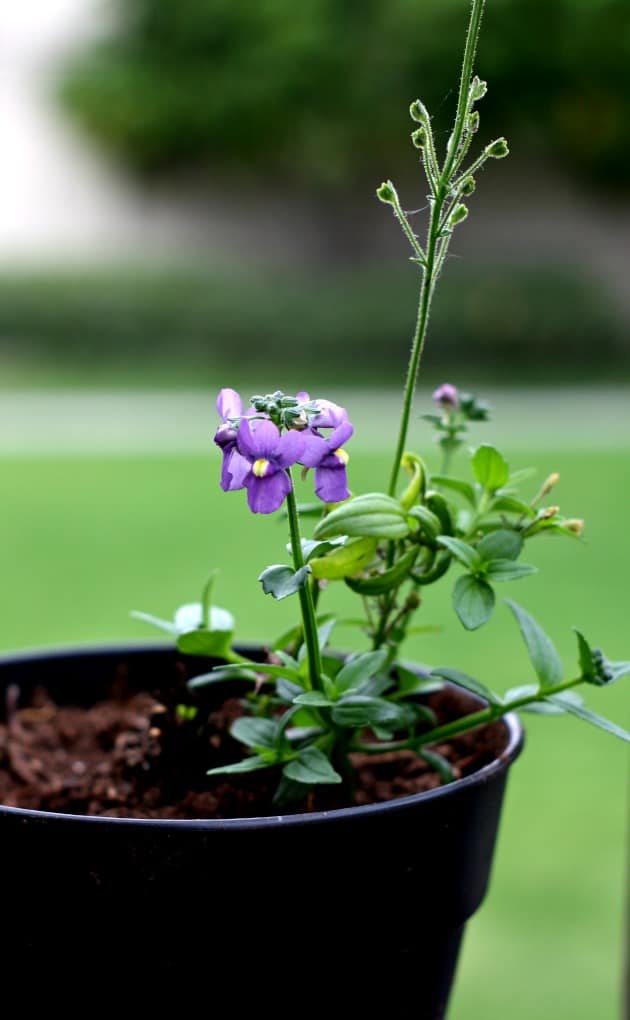
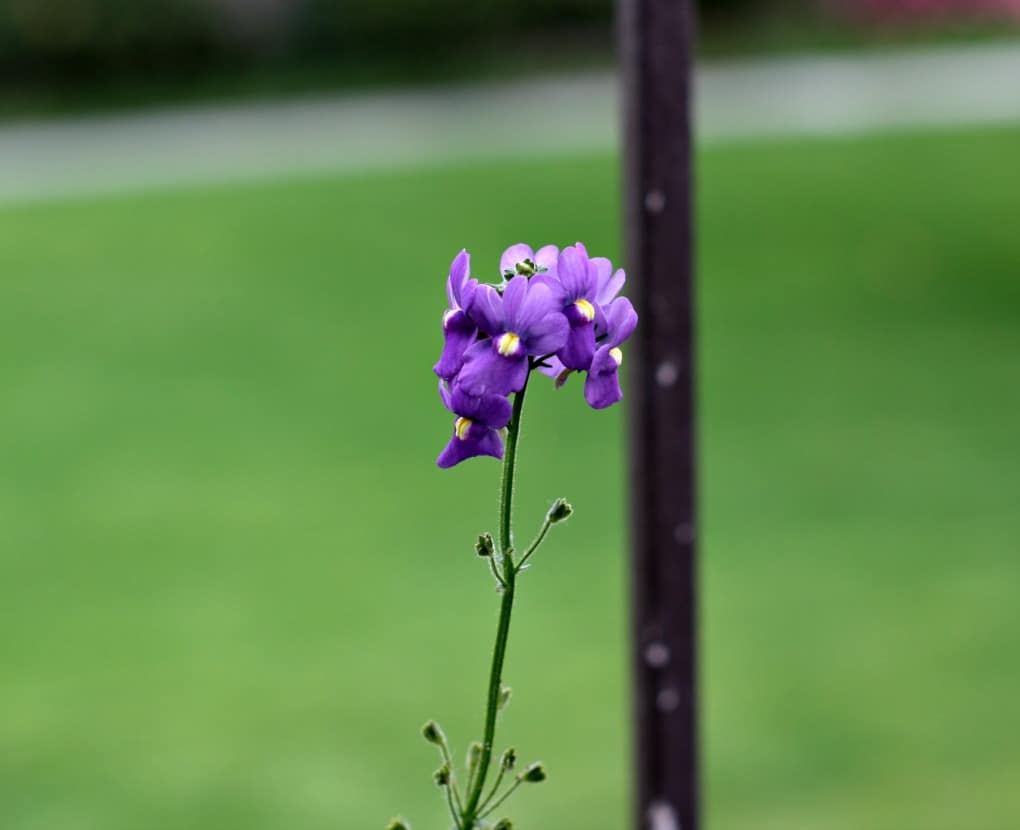
I have a tad bit of purple in my garden, too! I think I need to replant this…it’s looking a bit scraggly… or maybe I need to use Kelly’s recipe!!!
Just a couple more of the Sunpatiens…. Can you tell I’m REALLY happy with these??? I think these will be my go-to flowers for a while to come!
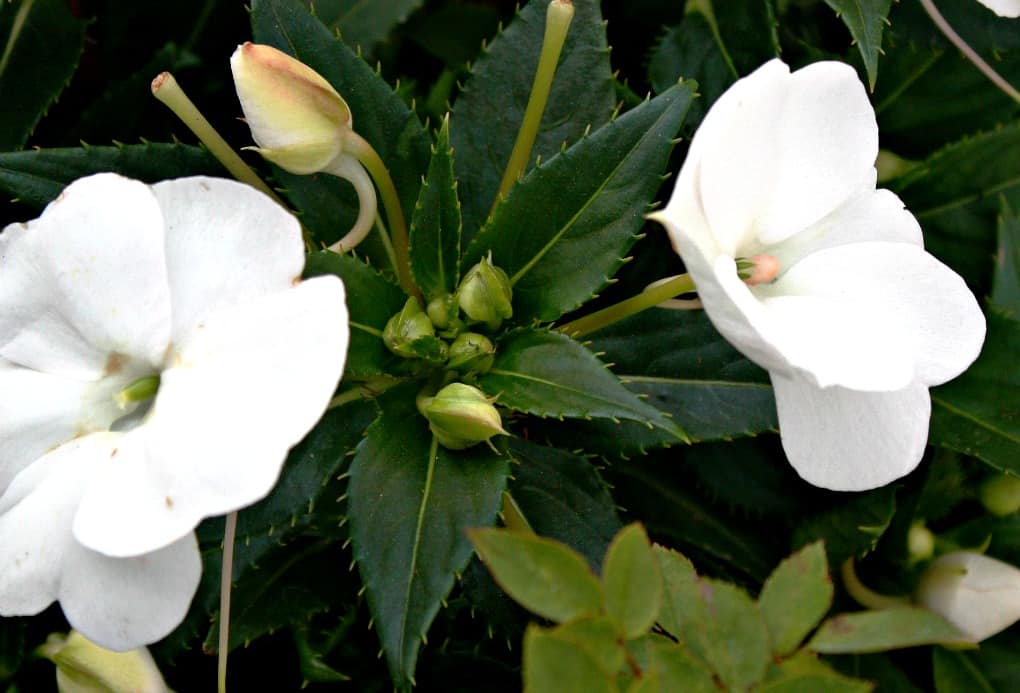
And the buds just keep coming!!!
3 Easy Steps to Create a Container Garden
So, are you sold on container gardening, just like me?
No matter how limited your space may be, container gardening opens up a world of possibilities. By selecting the right containers, choosing suitable plants, and providing proper care, you can create a lush and thriving garden in even the smallest of areas. So, don’t let space constraints hold you back—let your imagination run wild, get your hands dirty, and enjoy the joy of nurturing green life right at your doorstep. Happy gardening!
What are your fave plants to put in a container? Let me know in the comments! I read and reply to every single one!
And, as many of you know, bringing glory to the Lord through My Wee Abode is a priority for this blog. As a bonus, you might enjoy this short bible study for gardeners on reap what you sow from Apryl at Money Wise Steward.

Don’t forget to follow me on Pinterest, Facebook and Instagram… Follow buttons are at the top right corner of this page!


Wow, you did it without killing them! That is so great, those waxy white flowers are gorgeous. I would like to try and do edible plants in containers on our deck…but we never really get full sunshine. I wonder what shady plant I could try…
Sounds like an upcoming post on your blog! 😉 Hugs!
The sunpatiens are just so lovely! I wonder how they would do in Colorado!? Beautiful post Julie!
Thanks, Holly… So glad you dropped by! Yes, they are really SO pretty! The planting zones are for 7-11… are you in 5? You have so many lovely flowers in your home… do they come from your garden? Hugs and hearts, friend!
Julie you just solved a mystery for me. I had photographed these in another color but was not sure if they were impatiens or not because of the different type of leaf. But now I see that it is the same leaf with those jagged edges. Thank you for solving that one for me. I thought I\d never figure it out.
Your container garden looks fantastic!
Yes, Mary… when I saw them in your post, I thought, “Hey!!! Those are my flowers, only in lavender!” 😉 The color was SO pretty! Thanks for the kind words, too! <3
Sooo..pretty!!! I’ve never heard/seen about Sunpatients. Very cool!
Thanks for the ‘popcorn’ tip too! Never knew about that one either!
Thanks, sissy! I’m soooo happy with them… you need to come over to see them, and watch a drama and have a WW dessert! 😉
So beautiful. Sunpatiens remind me of New Guinea Impatiens but they grow even better in the heat. A great choice for sunny spots and I love that you planted all white. It looks great with the dark J&P planter. Since you live in CA you can grow just about anything for a long time. Love your packing peanuts tip. I have a few large plants that I stuff with old soda cans and empty plastic nursery containers to lighten the load and save on soil.
Ohhhh… that cans/plastic containers idea is GREAT! I’m running now to Google New Guinea Impatiens. I can’t believe how profusely mine have grown, and just keep going. Hoping my Boogie Woogies do okay… J&P said the would! We’ll see! Hugs and hearts, Patti… can’t wait for July!
Wow! Just WOW! Your container garden looks so pretty! I have the opposite effect on my plants. They look so cute at first and then—-yikes. 🙂
Happy day friend!
karianne
Oh, thank you, KariAnne! Hey, girl… you are just ‘so close to amazing’ with plants! I bet you have an amazing story behind your ‘yikes’! 😉 Thanks dropping in, and for the encouragement! Hugs and hearts, sister!
Wow, your flowers look amazing. I love container gardening as you can easily move your plants for decor reasons, or to give the plant the right amount of sunlight. Your flowers obviously have the perfect spot. So nice.
Aw, your words of encouragement mean a lot to me, Leanna! Yes, I think they are very happy where they are living… hope the roses warm up to the area, too! 😉 Hugs, friend!!! Haven is coming!
Great ideas! I especially liked the tip about using foam peanuts for drainage!
Thanks for dropping by, Sandy! Yeah… I wasn’t quite sure if using the peanuts was the best thing, but the plants don’t seem to be bothered by it at all! 🙂 Have a great week!
We’ve done container gardening for years and love it! So versatile because we can move them around easily. You’ve given a great tutorial for beginners to use and the styrofoam peanuts are an excellent idea without adding too much weight!
So happy you came by, Carol! Container gardening is wonderful, and pretty easy, too! Thanks for the encouragement. Yeah, that styrofoam tip is pretty nifty! 😉
Hi Julie! Love your container garden and look how lush it is in such a short time!!! Beautiful!!! Of course I pinned and tweeted because I love a good garden!
Thank you for bringing these lovely plants to my attention,
Hugs,
Barb 🙂
Hi, Barbara… Thanks so much for coming by and leaving a sweet note, as always! You are a sweet friend! Thanks for sharing, too! Hugs and hearts!
Wow! your container garden is so pretty. Thanks for the idea and tips.
Thank you so much! Glad the tips were helpful! Have a great week, and thanks for dropping in!
Thanks for sharing this simple and beautiful idea. This container is indeed very gorgeous.
Thank you so much for visiting, and your sweet words! Have a great week!
Thanks for such an amazing ideas. Make sure your pots are clean. Check your pots to ensure they have adequate drainage holes in the bottom.
Thanks! Great tips!
Love each photo! Makes me want to give it a try even though I KNOW THEY WILL DIE at the touch of my brown thumbs. Shared and Pinned.
Well, I have replaced these. I call them long-lasting cut flowers. 🙂
container gardening is my favorite and these look beautiful, Julie! I loooove the idea of self watering containers too, so much easier!
Thanks, Janet! I need to replant some of these amazing impatiens, as my patio is so much larger now! 😉
Great post, Julie!!
Container gardening is my favorite living in a townhome. There are so many options!! Those impatiens you chose are super lovely..I’ve never heard of them before!! Thanks for passing on knowledge!
I didn’t know you lived in a townhome! (Or maybe I forgot!) I hope you can find some of these next visit to your nursery!
Hi Julie – Sunpatients are some of the most reliable and rewarding plants to grow! I have a difficult time finding them here in NY but I am always looking for them. It feels a lit bit like finding gold when I find a nursery that carries them. Thanks for the tips and ideas. I too “garden” in my kitchen because it is spacious.
Oh, so glad to find someone who understand planting indoors! LOL! I saw some Sunpatiens at the nursery… I think I should have gone with them. The impatiens are not doing well. And my mint might not make it either! ARgh!
Julie, I love the way you show that some amount of gardening is possible even if you live in a small space. Digging in the dirt is good for the soul!
Thanks so much for joining the Grace at Home party at Imparting Grace. I’m featuring you this week!
Thank you so much, Richella! Hope you have a lovely holiday!
Your container gardens look beautiful. Flowers makes everything great!
I agree, Tammy! 😉
I find myself doing so much of my planting on my kitchen counters and cleaning up when I am done! I made them extra high as I am tall so I can plant a lot with no aching back 🙂 Your container garden is gorgeous and so healthy, you have a green thumb for sure! xo Tanya
Oh, so you so get me, Tanya! Thanks for the compliment, but I’m not convinced I have a green thumb. I can plant them and make them look lovely for a short time, and then, insects always get the best of ’em. So sad!
Such a helpful guide! I love how simple and approachable this makes container gardening feel — perfect for anyone short on space or just starting out. Breaking it down into easy steps makes it less intimidating, and those plant combos are gorgeous too! Definitely inspired to start one of my own.