
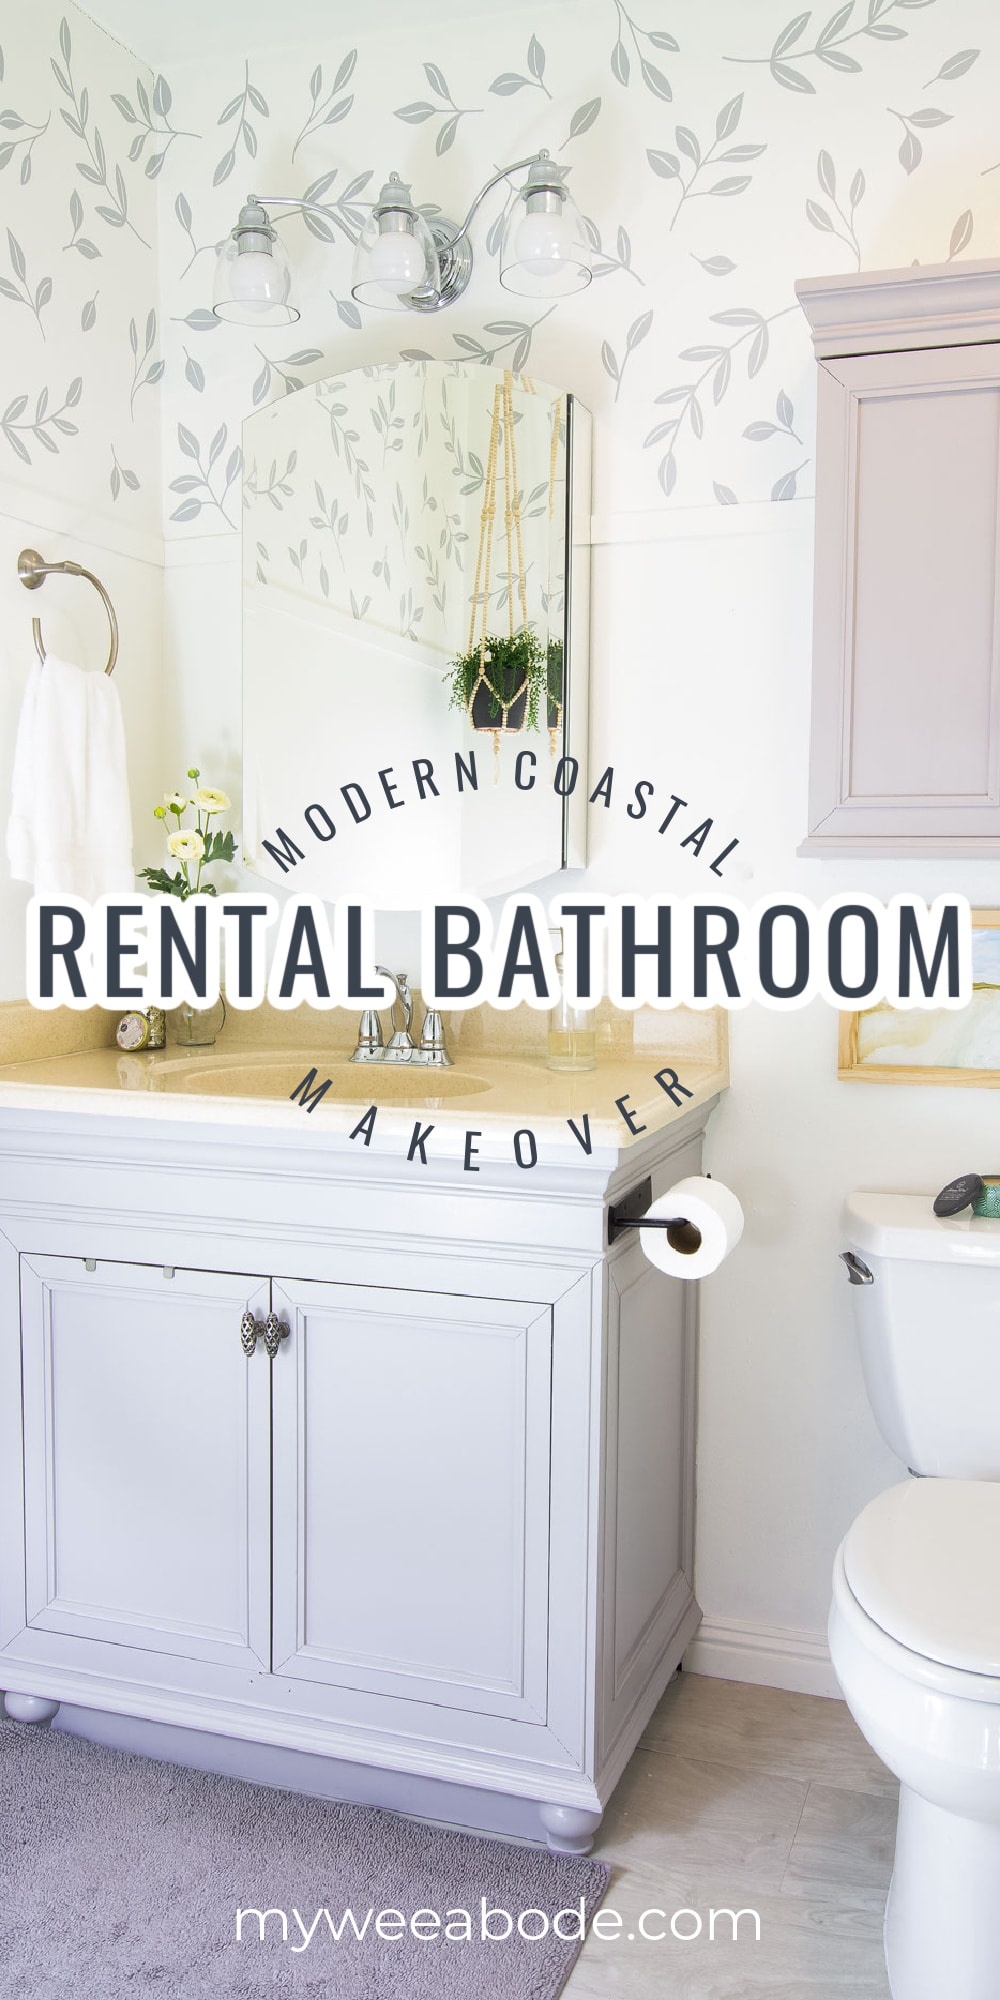
Modern Coastal Bathroom Makeover Reveal
Have you ever wanted to update a rental bathroom on a budget, but you weren’t sure how to do it? Today, I’m sharing my modern coastal bathroom makeover reveal.
MODERN COASTAL BATHROOM MAKEOVER REVEAL
Y’all, I can’t even believe it!
This reveal has been almost 1.5 years in the making!
Am I embarrassed to admit that?!
You betcha!
But, it always helps to laugh at yourself… kind of. 😉 And, THANK YOU for being so patient with me while I worked through DIY mishaps, a mom dealing with dementia, and working full-time while I finished this project!
But, I’m here to say… the modern coastal bathroom makeover reveal happens TO-DAY!
Every time I walk into my ‘new’ bathroom, I’m still surprised at how lovely it looks! And I can’t wait to share it with you!
Updating an Apartment Bathroom with Modern Coastal Elements
For today’s reveal, I’m just going to share the makeover and some shopping items. The DIYs will be shared in the coming weeks, and I promise it won’t be a year (or more) before I post them! (Really… you can trust me!)
If you haven’t seen the inspiration for this project yet, check out the design post for creating a modern coastal bathroom in a rental home.
Here’s a photo of the mood board I created for my apartment bathroom makeover.
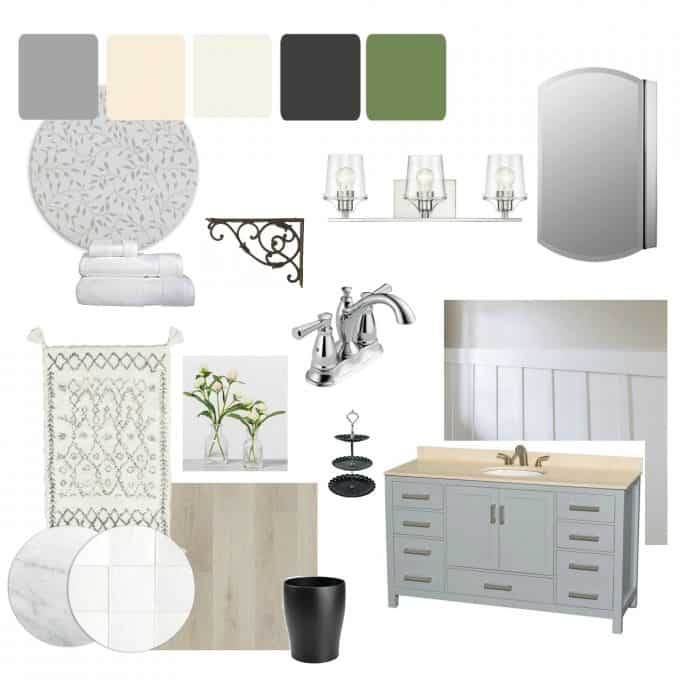
The elements on the design board include:
- Keep my current vanity, but repaint the ugly yellow cabinets in gray
- Adding a board-and-batten-type accent to the walls
- Use a “leafy-viney” wallpaper to add some pizazz to the upper 1/3 of the wall
- Update the light fixture
- Add open shelving for storage (I’m still pondering this.)
- Update the ugly beige tile shower surround
- Figure out a way to update the flooring that is rental friendly
- Find a new medicine cabinet that’s pretty, not just practical
- Replace the dated faucet
- Purchase new WHITE linens/towels
- Use a color palette that includes a creamy white, gray, green, and black
- Accent with decor in black and green
Now, let’s see how much of this actually was done!
Before and After Tiny Bathroom Update
Okay, there’s nothing like a couple before photo(s), am I right?
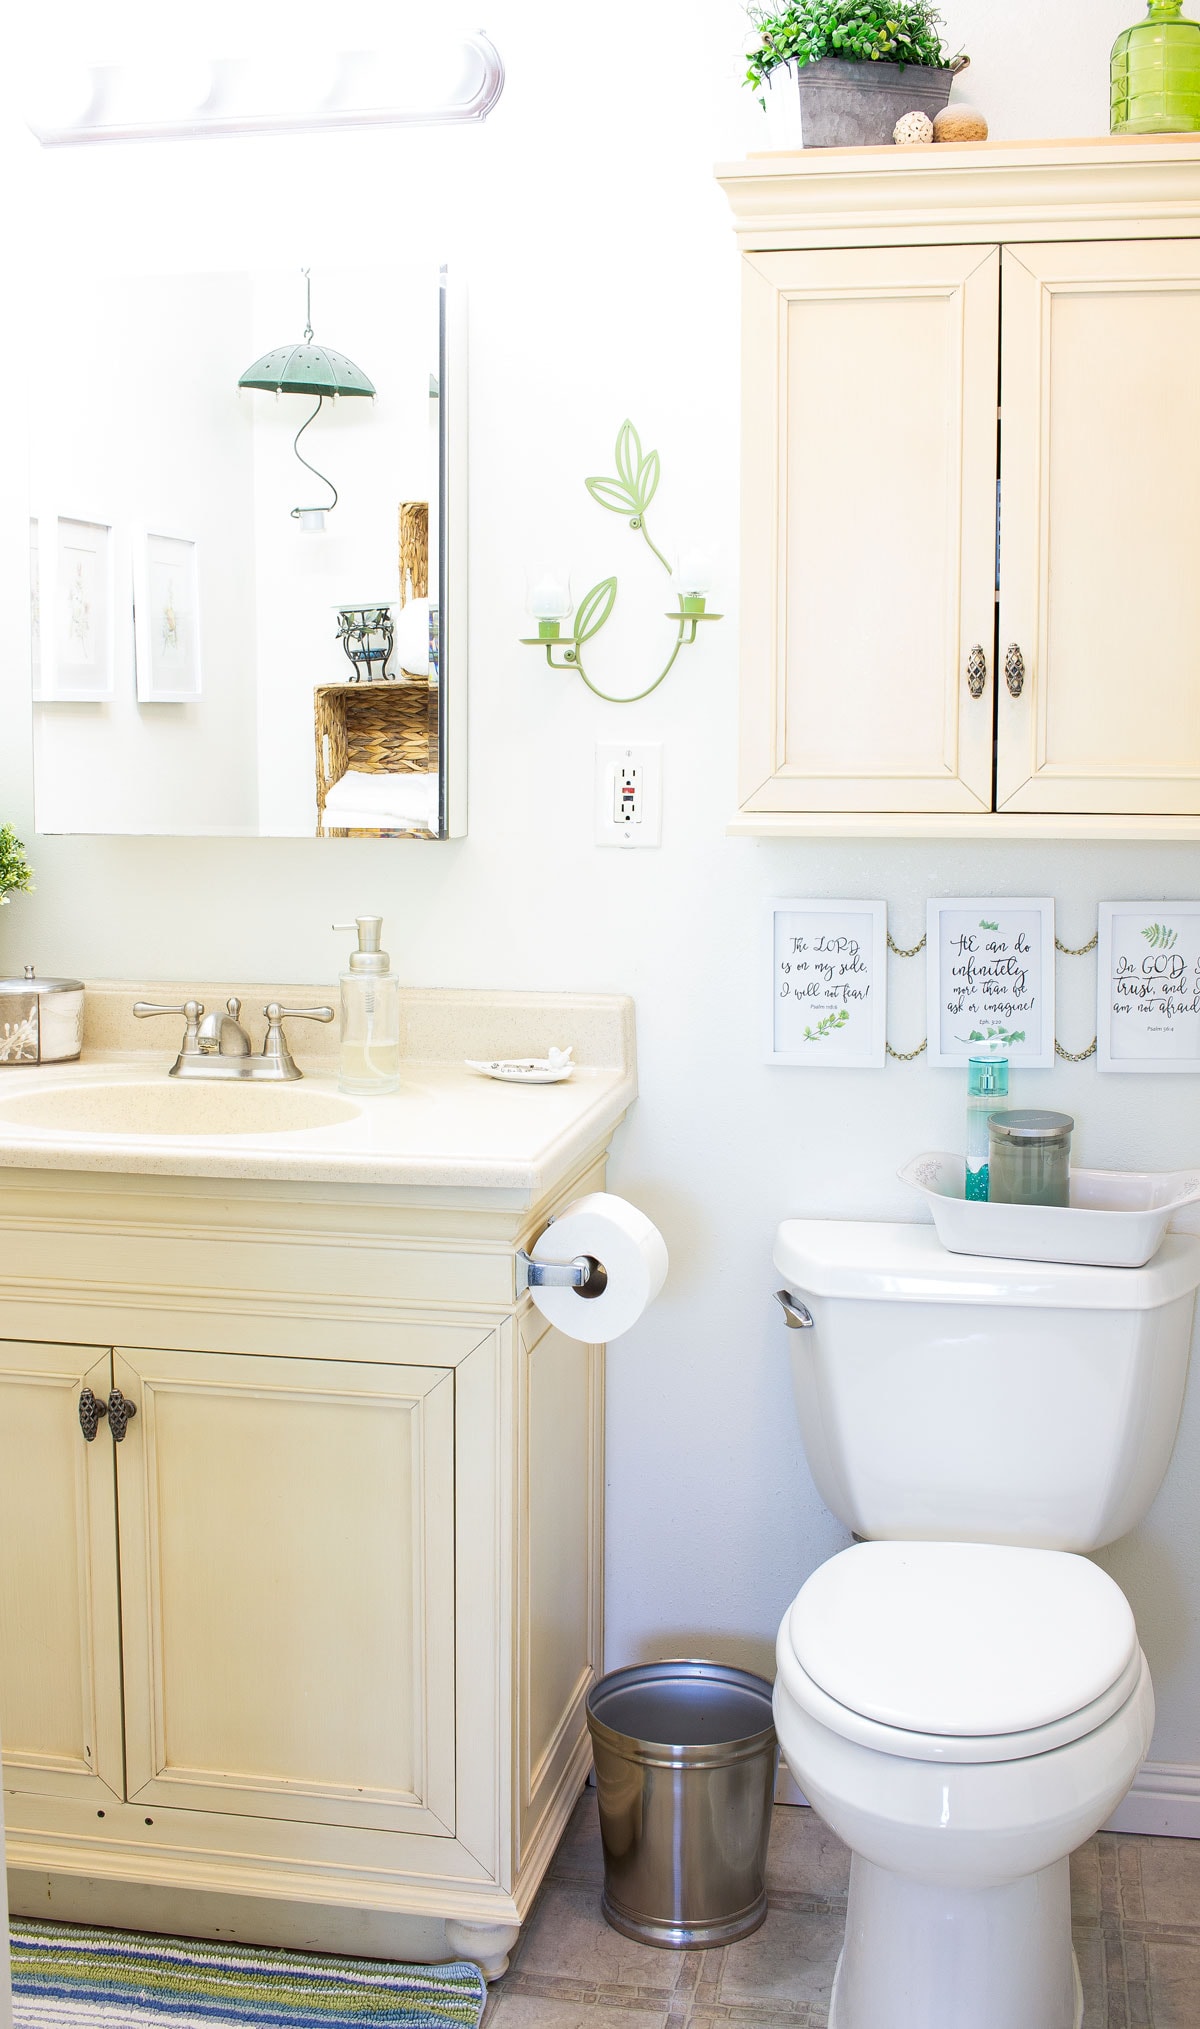
The bathroom included outdated vinyl flooring, yellow cabinets, and a ‘Hollywood’ light fixture with a brown plate.
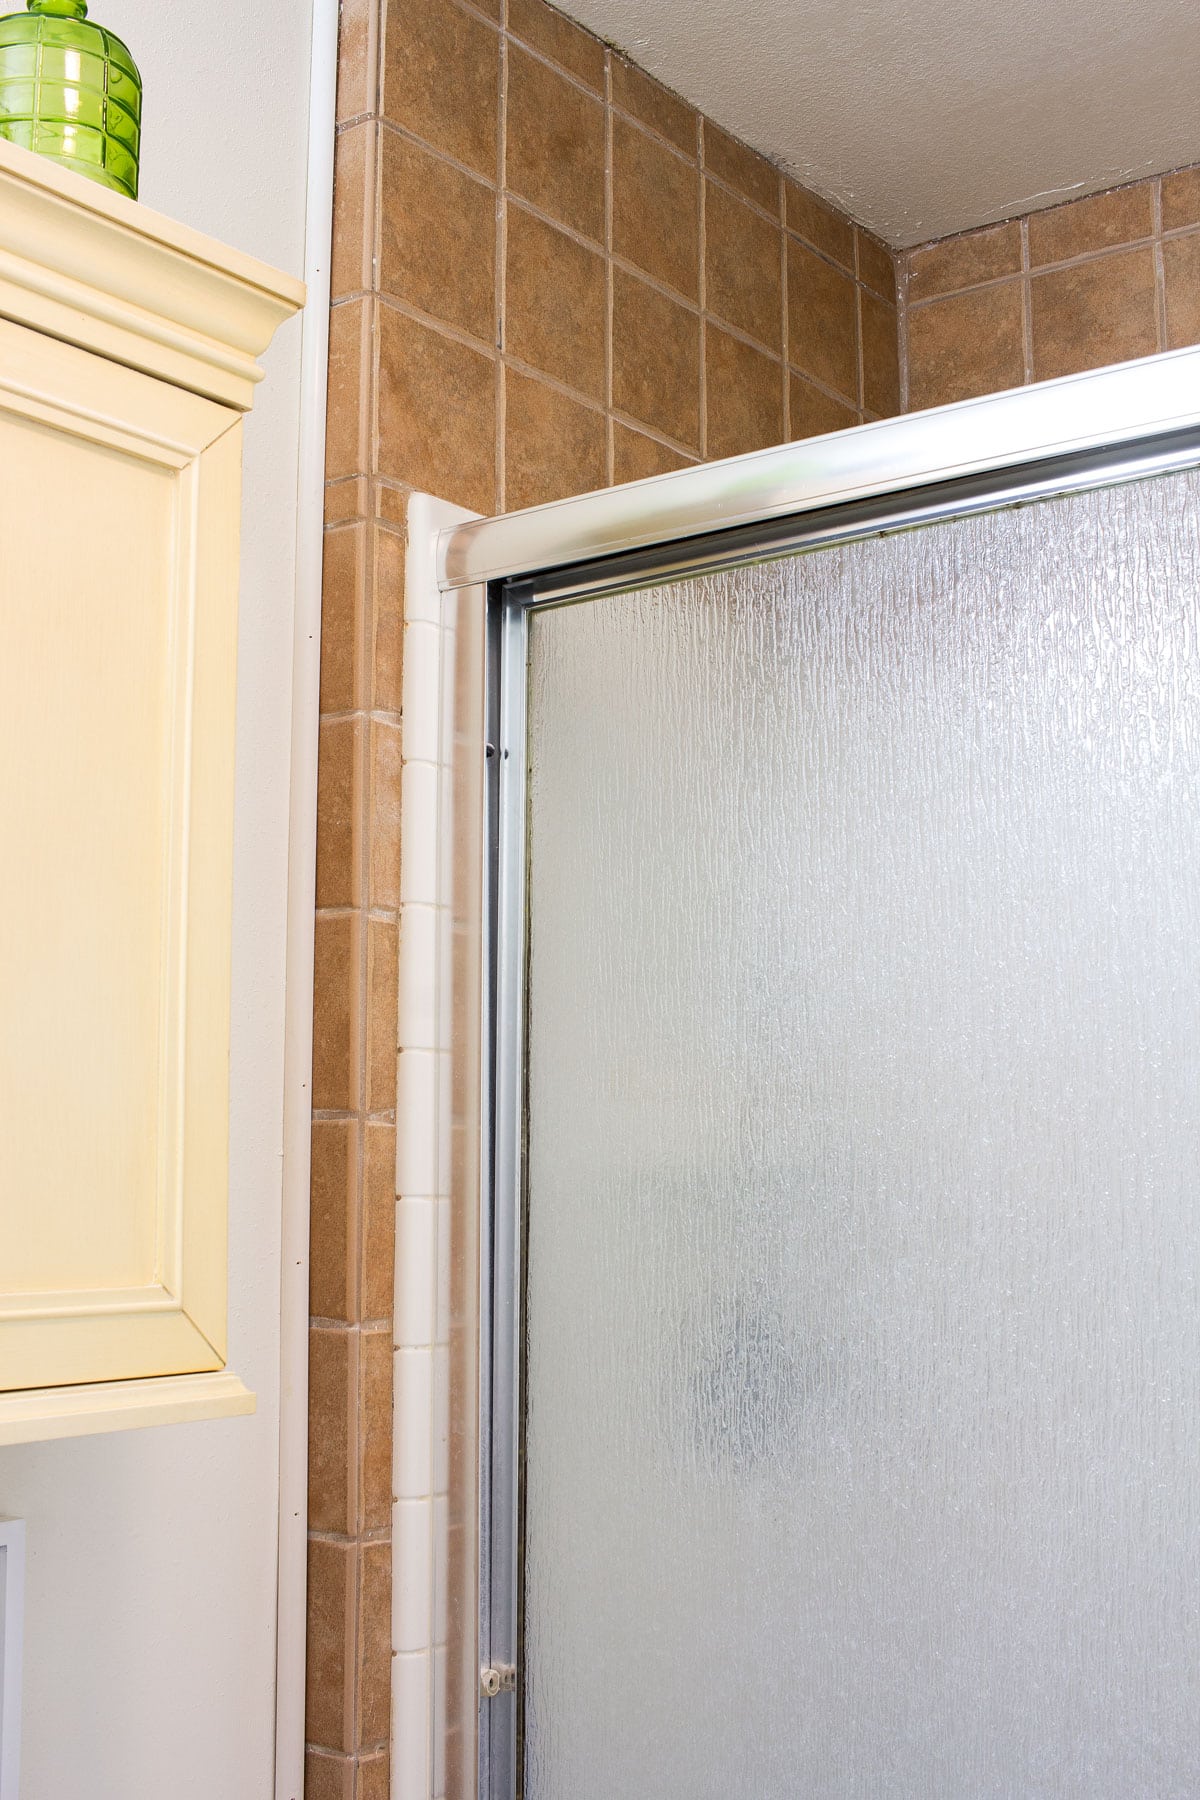
And let’s not forget this gorgeous tile surround and shower door! The shower tile surround definitely needed an update and was one of the first things that I DIY’d last year.
And now… this is what it looks like!
The fixture is a little hard to see in this photo… but more photos are coming up.
By the way, don’t go making your toilet overflow and messing up a new floor… What do you think… are flushable wipes REALLY flushable?
Okay… let’s take a look at what has changed!
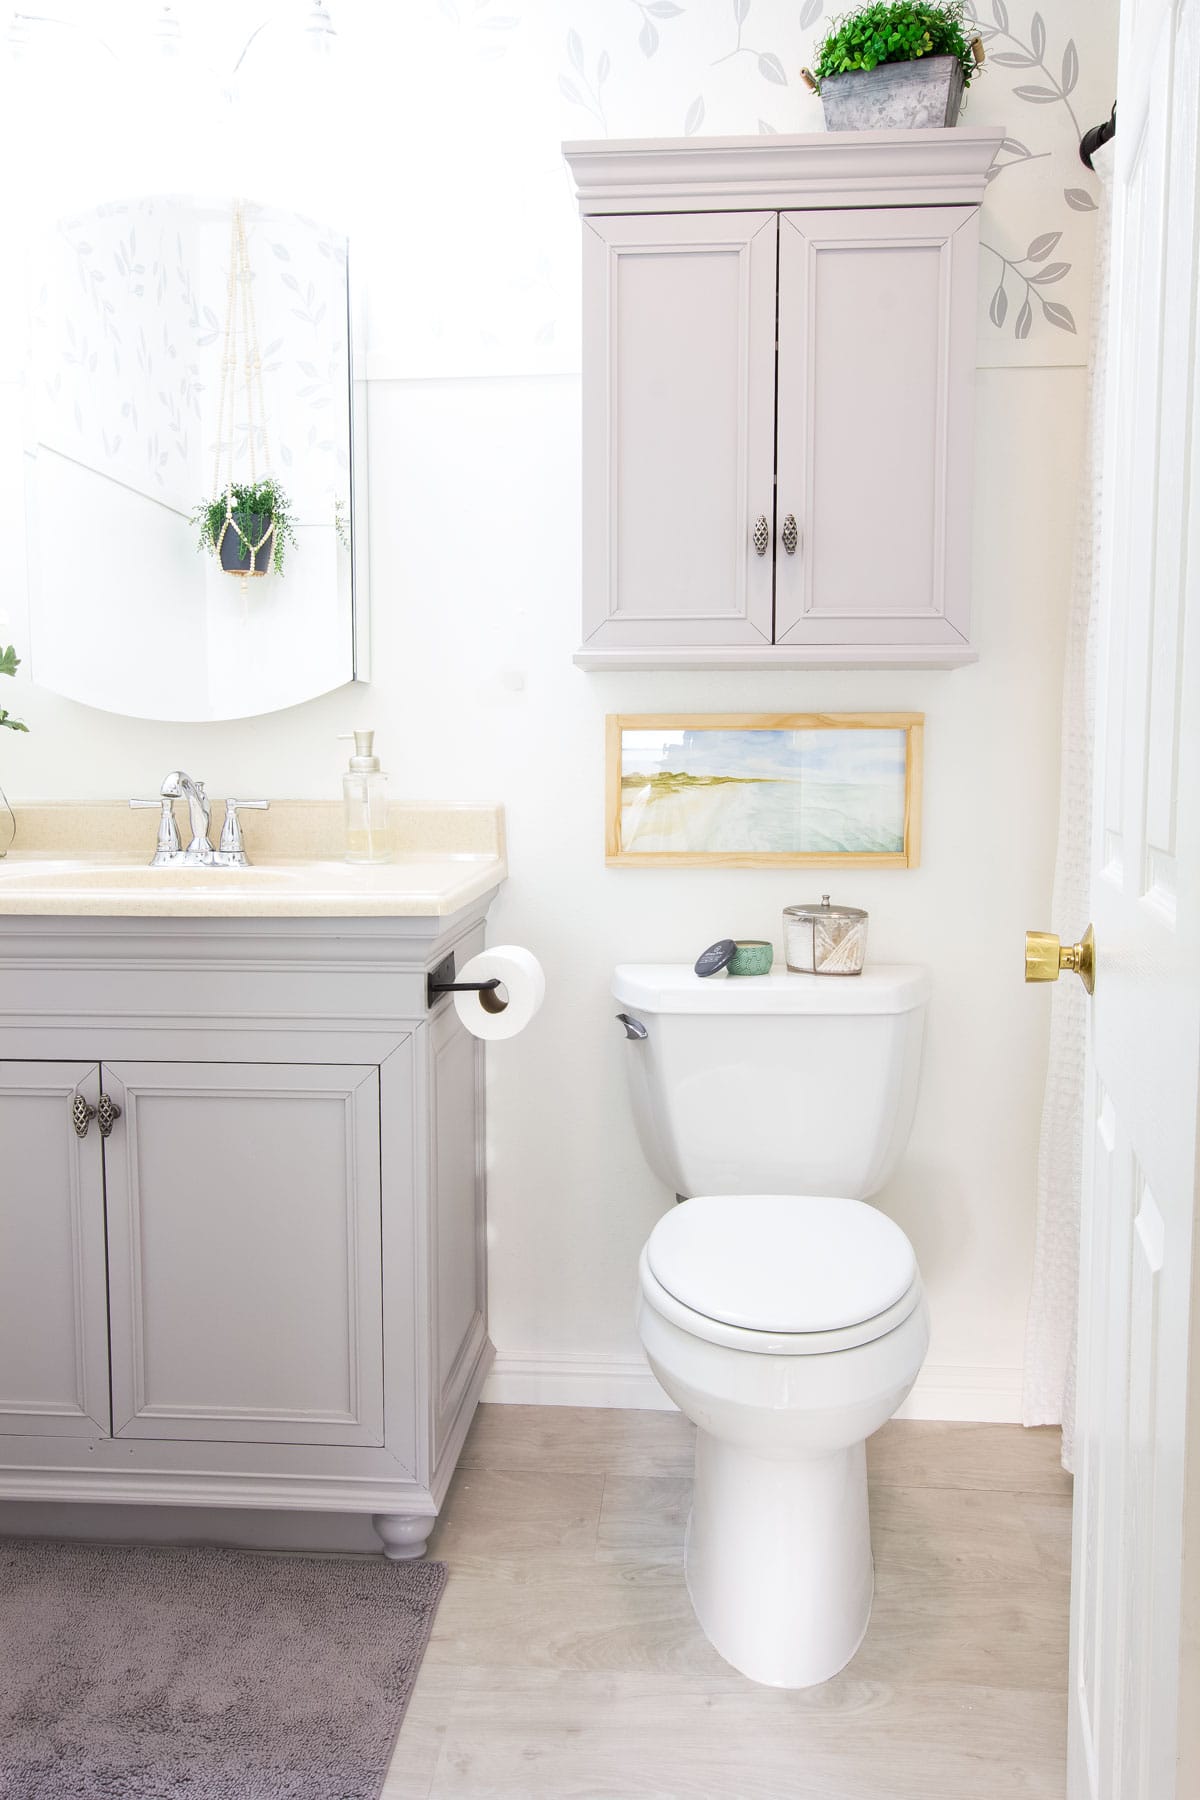
Modern Coastal Apartment Bathroom Elements
So… this picture shows A LOT of the items that were changed!
And here is the ‘checklist’:
- Kept my current vanity, but repainted the ugly yellow cabinets in gray The counter had to stay, so I worked the vanity color around that, as the counter has some taupe and gray flecks in it. (DONE!)
- I started to add a full board-and-batten, but it was just too busy. So, a simple ‘chair-rail’ style trim was added.
- Using a stencil was the original idea for the upper 1/3 of the wall… but it proved to be WAY too difficult… so another option was used. Can you tell what it is?
- Update the light fixture (DONE!)
- Add open shelving for storage (I’m STILL pondering this.)
- Update the ugly beige tile shower surround (DONE!)
- To update the floors, loose lay vinyl plank was installed. (DONE!)
- Find a new medicine cabinet that looks pretty, not just practical (DONE!)
- Change out the dated faucet (DONE!)
- Purchase new WHITE linens (DONE!)
- Use a color palette that includes a creamy white, gray, green, and black (DONE!)
- Accent with decor in black and green (Doing!)
Decorating a Modern Coastal Bathroom
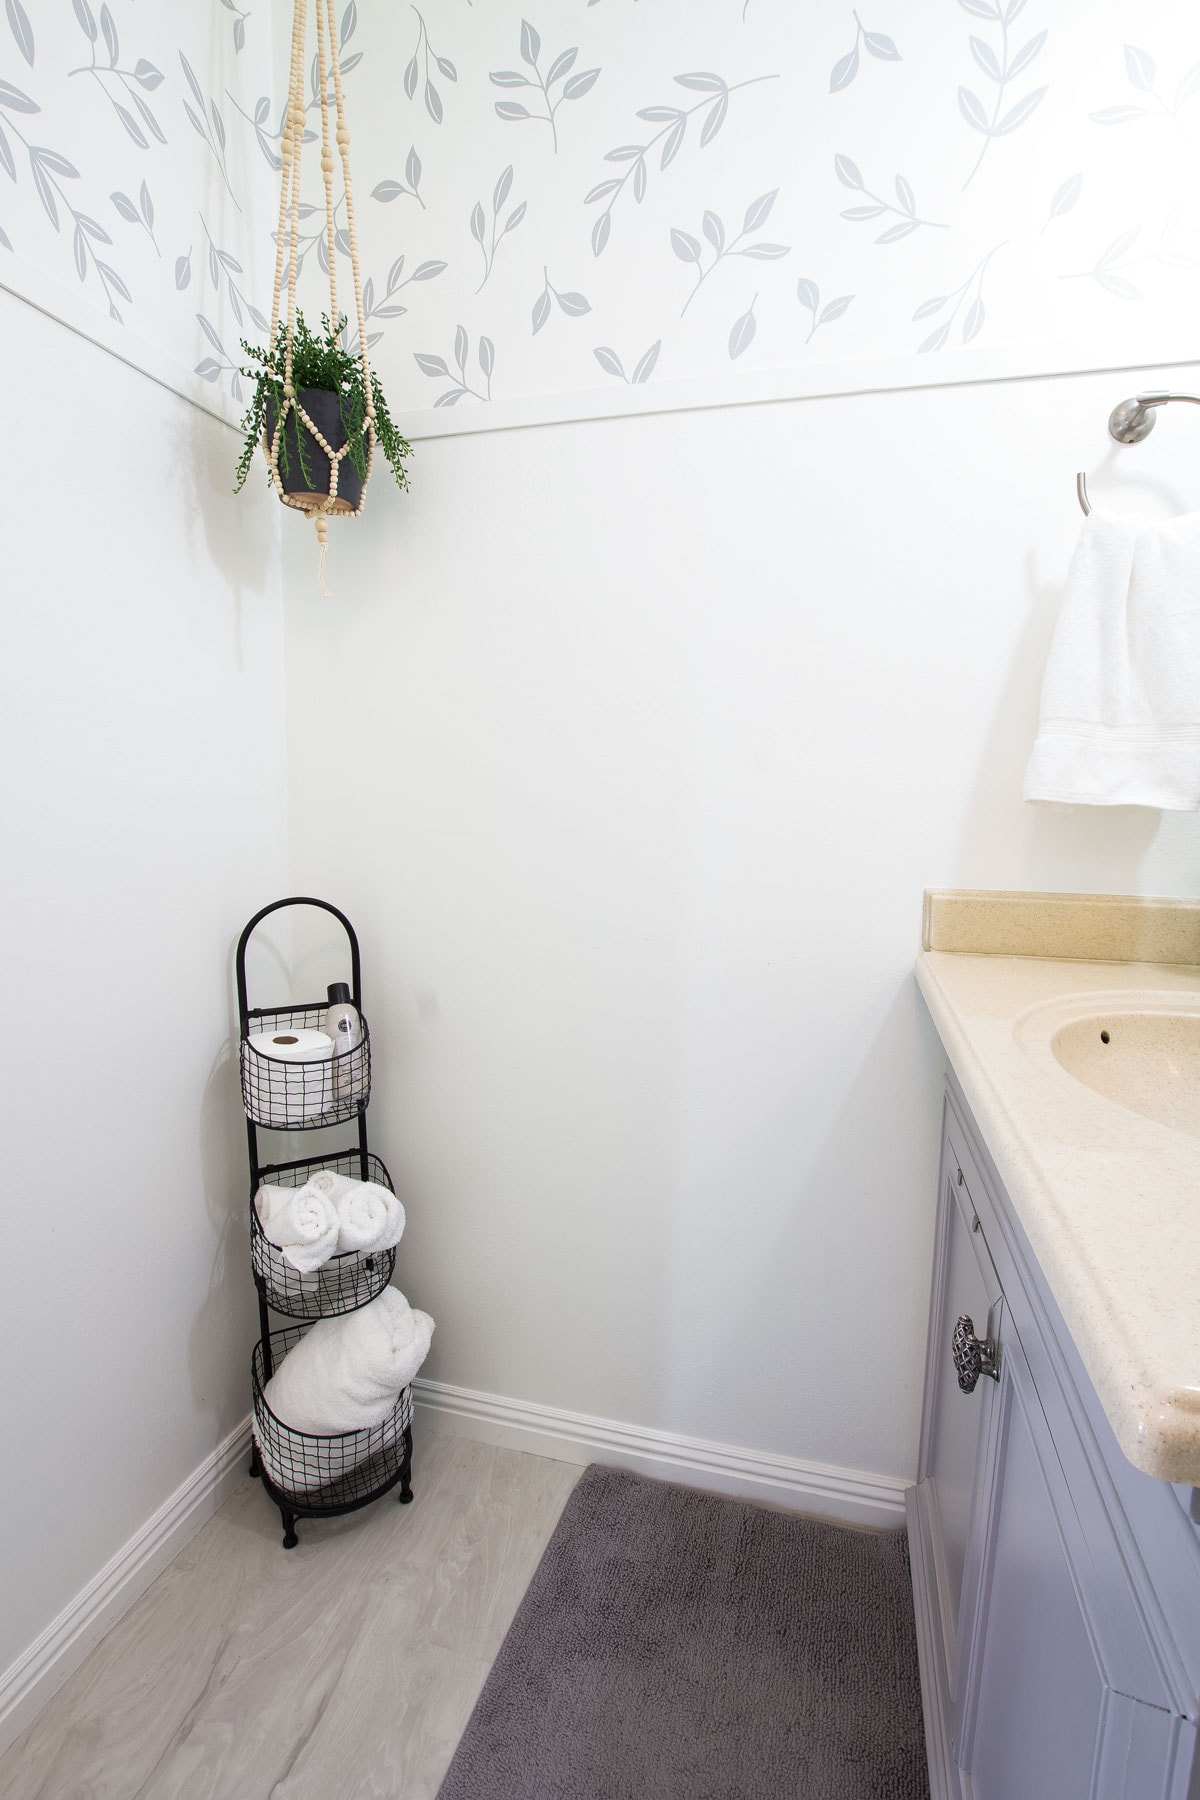
This corner is not finished. The little black basket shelf will go next to the toilet, and I have plans to hack an IKEA Rast for more storage on the left wall.
What do you think… Does the wall where the towel hanger is mounted need a little sumpin’-sumpin’? Maybe a hook rack for towels? Or a shelf above the rail???
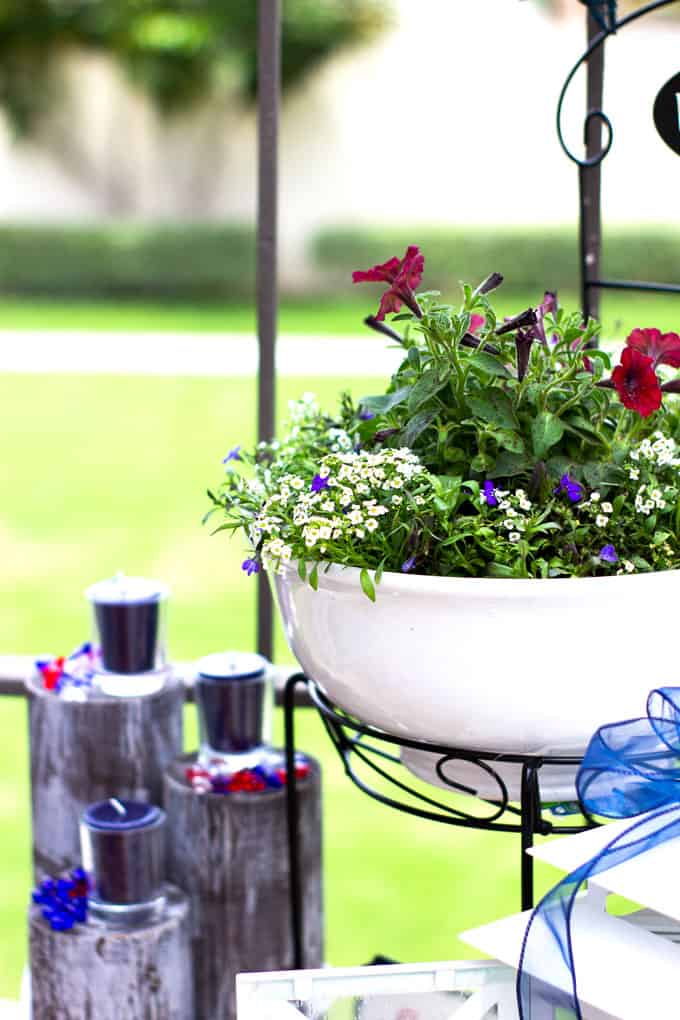
Do you love the hanging planter as much as I do?
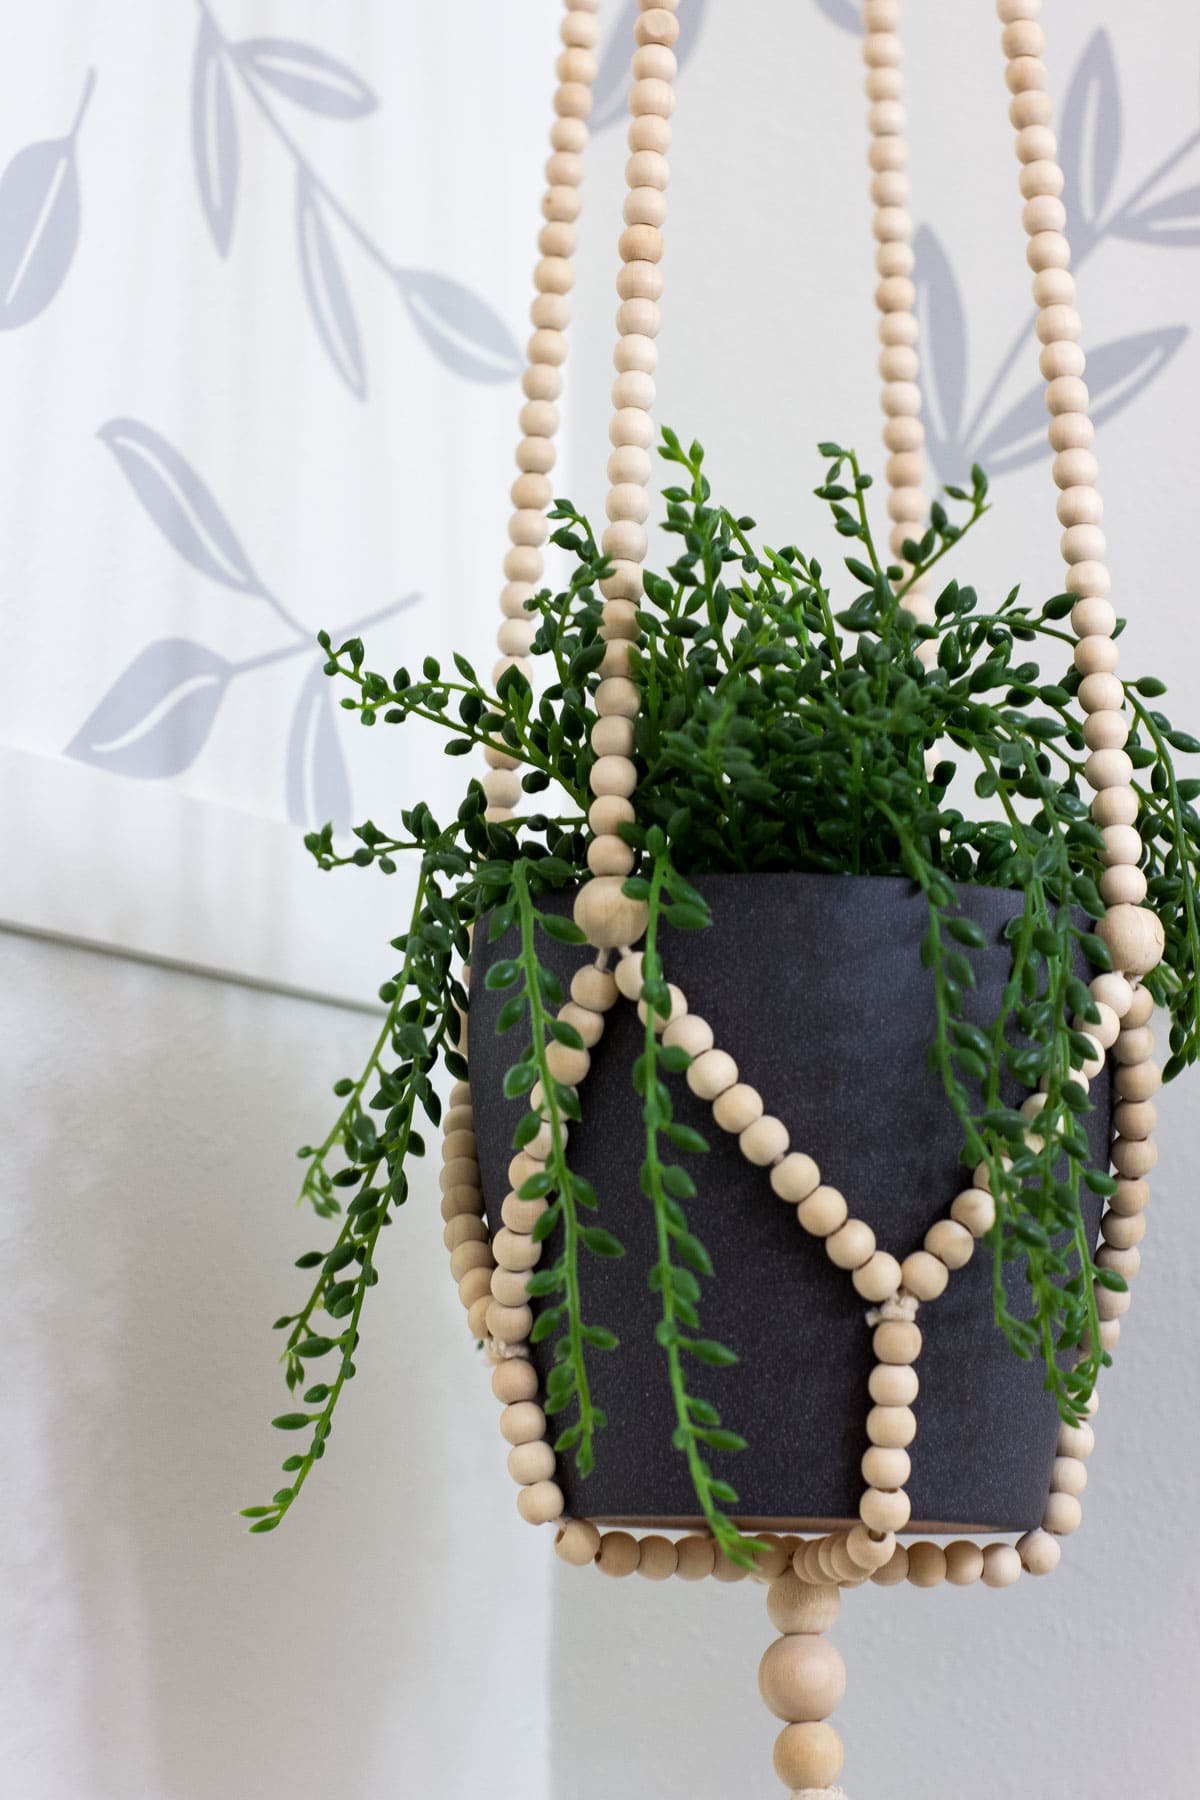
The beaded hanger is from Hobby Lobby and the pot and plant are from IKEA.
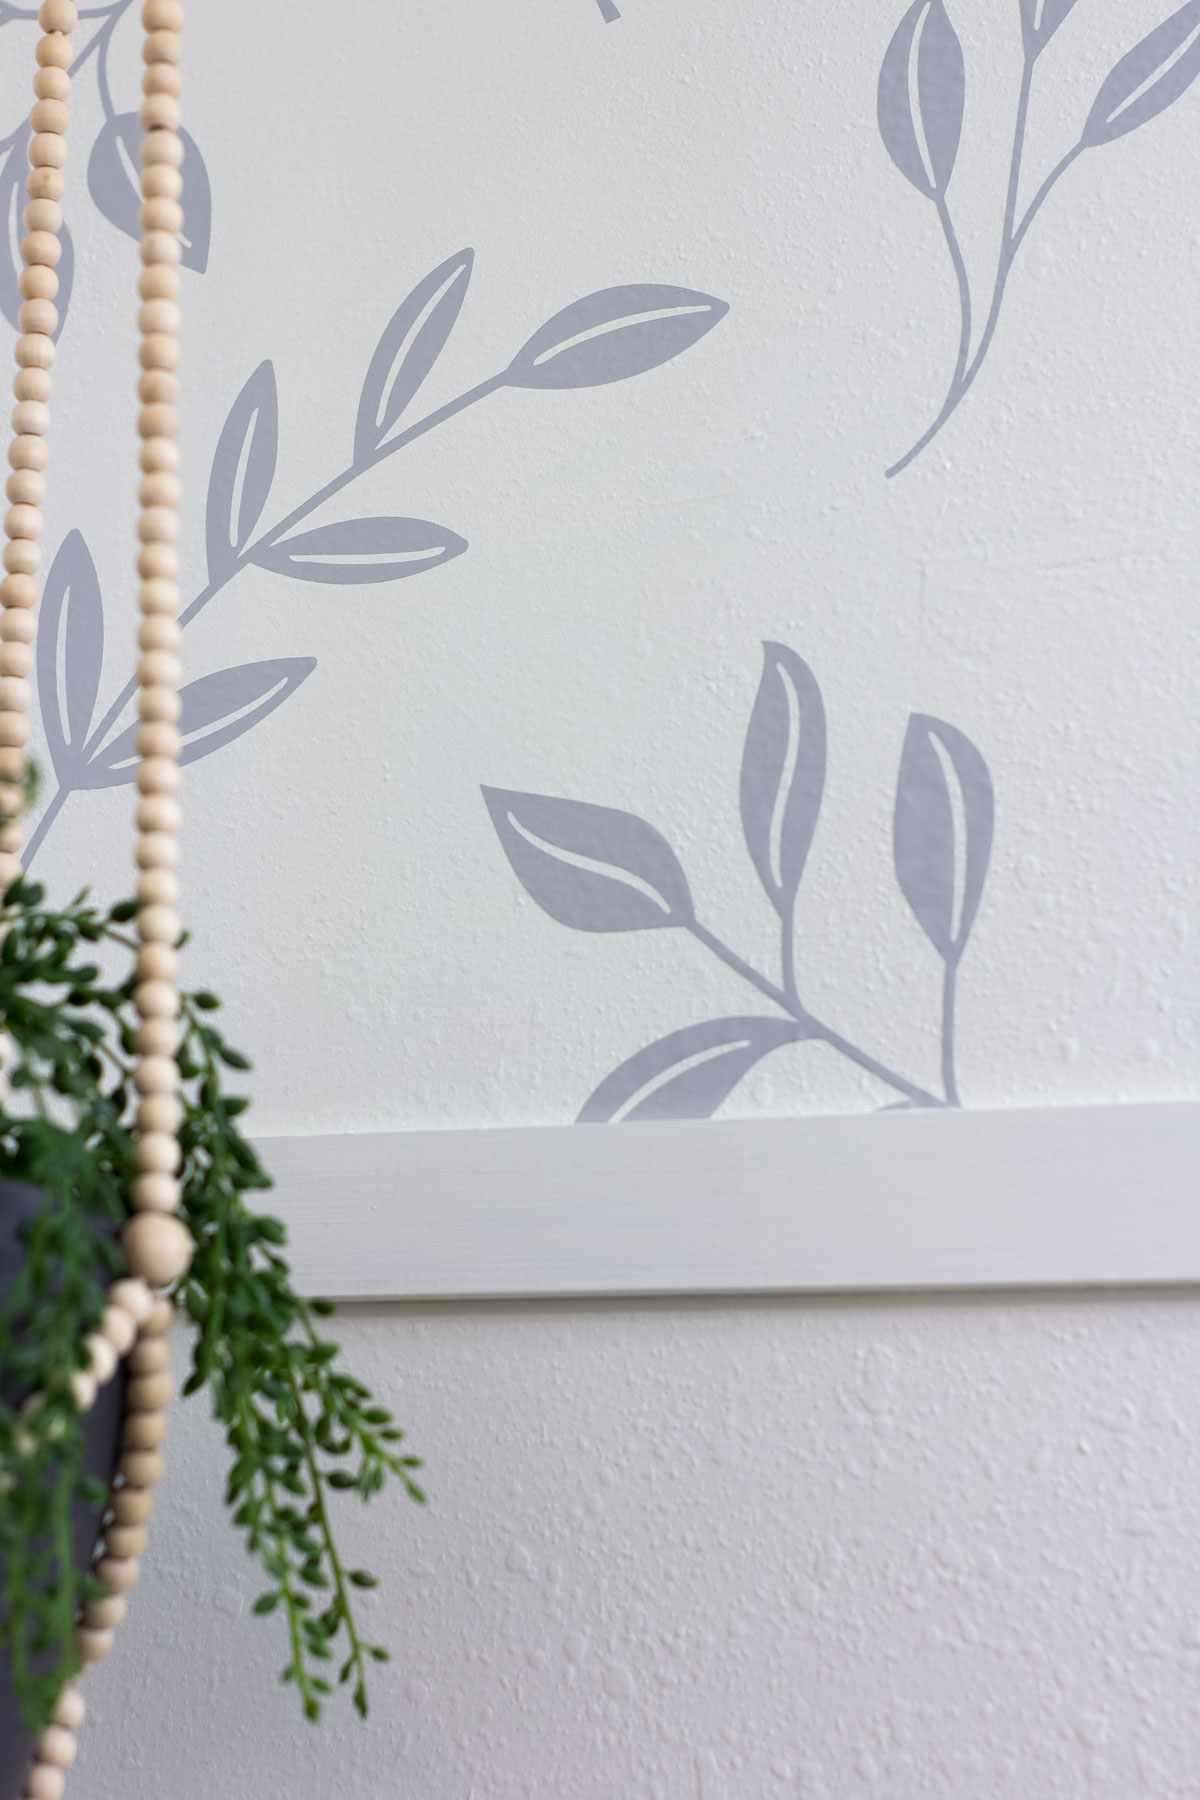
Here’s a close-up of the wall treatment… any guesses?
And here’s a clearer photo of the flooring… this is actually what it looks like… nice and light!
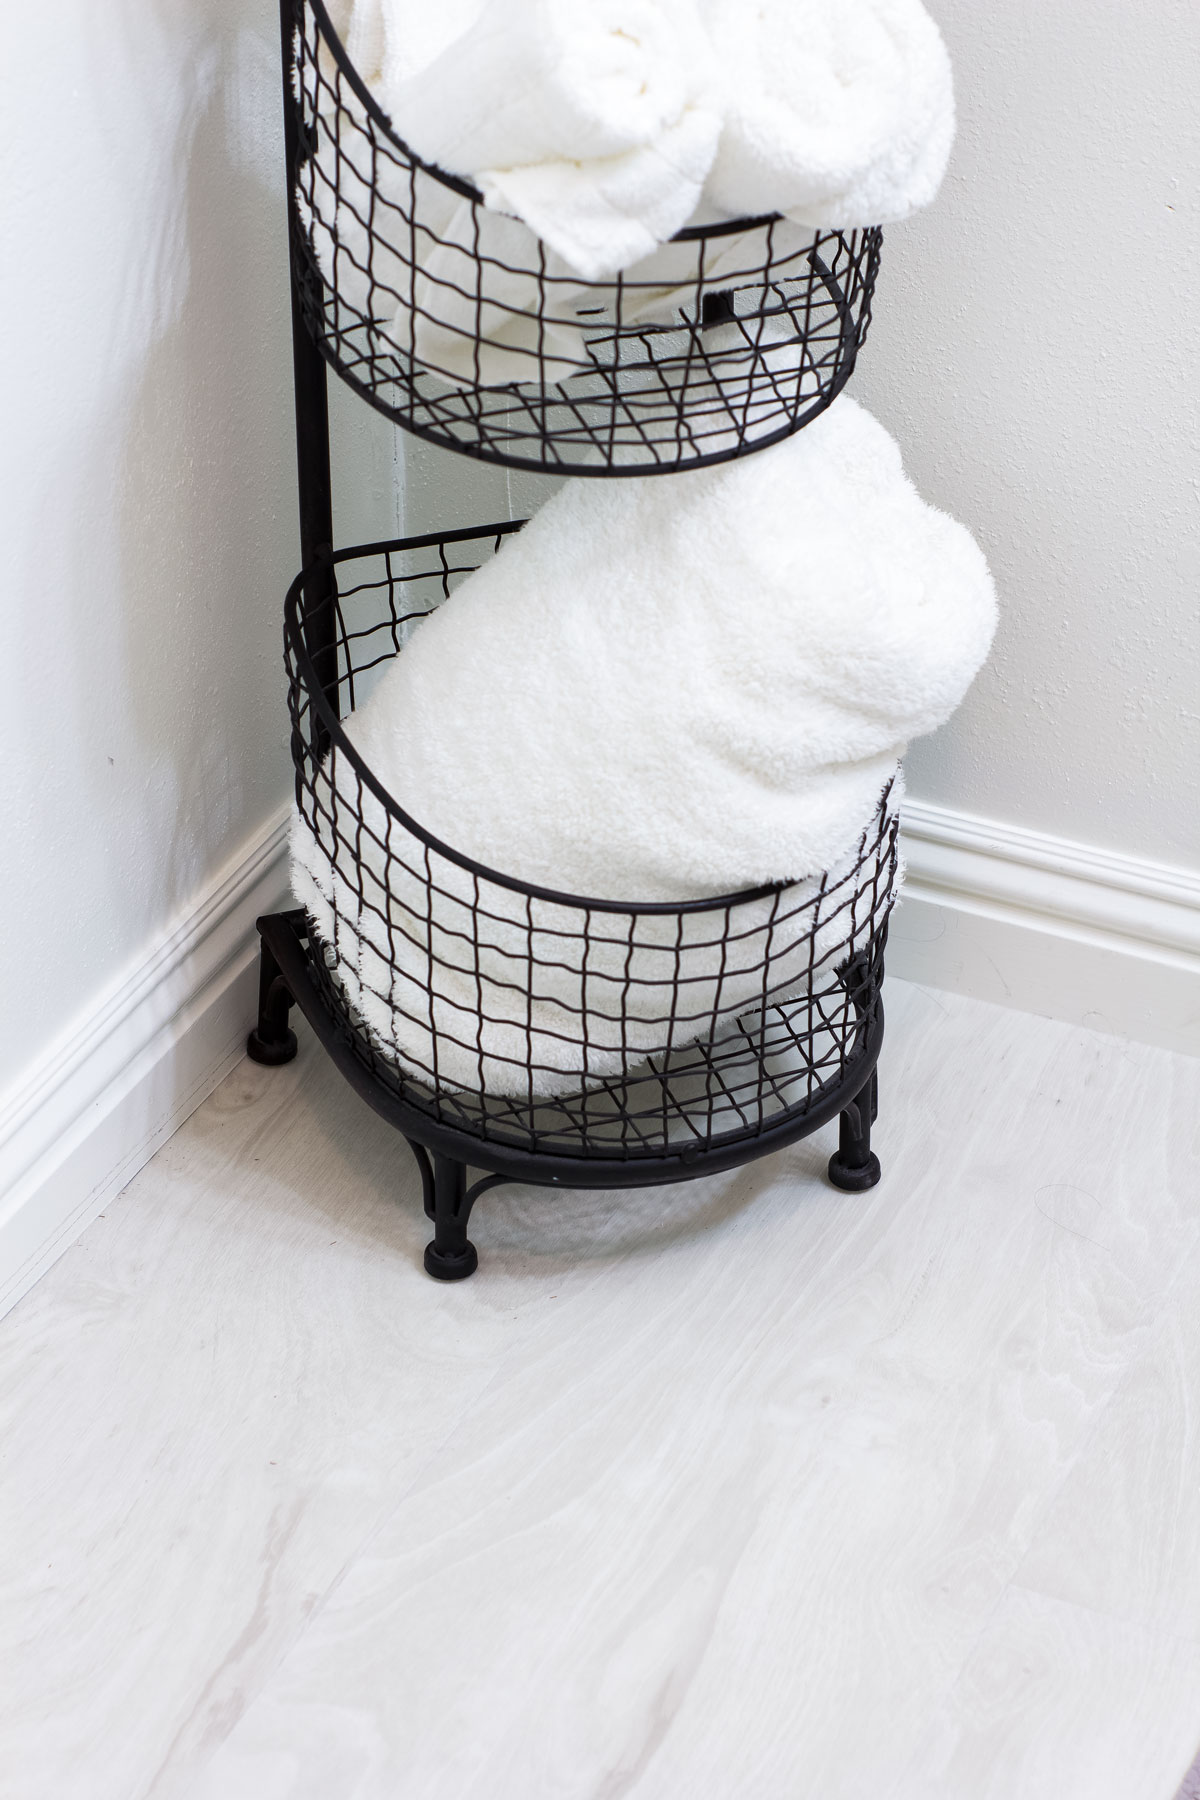
This is loose-lay plank vinyl. A dear friend from church actually installed it for me! It’s the perfect solution for a rental home or apartment, whether you use it in a bathroom, kitchen, or even through-out your living space!
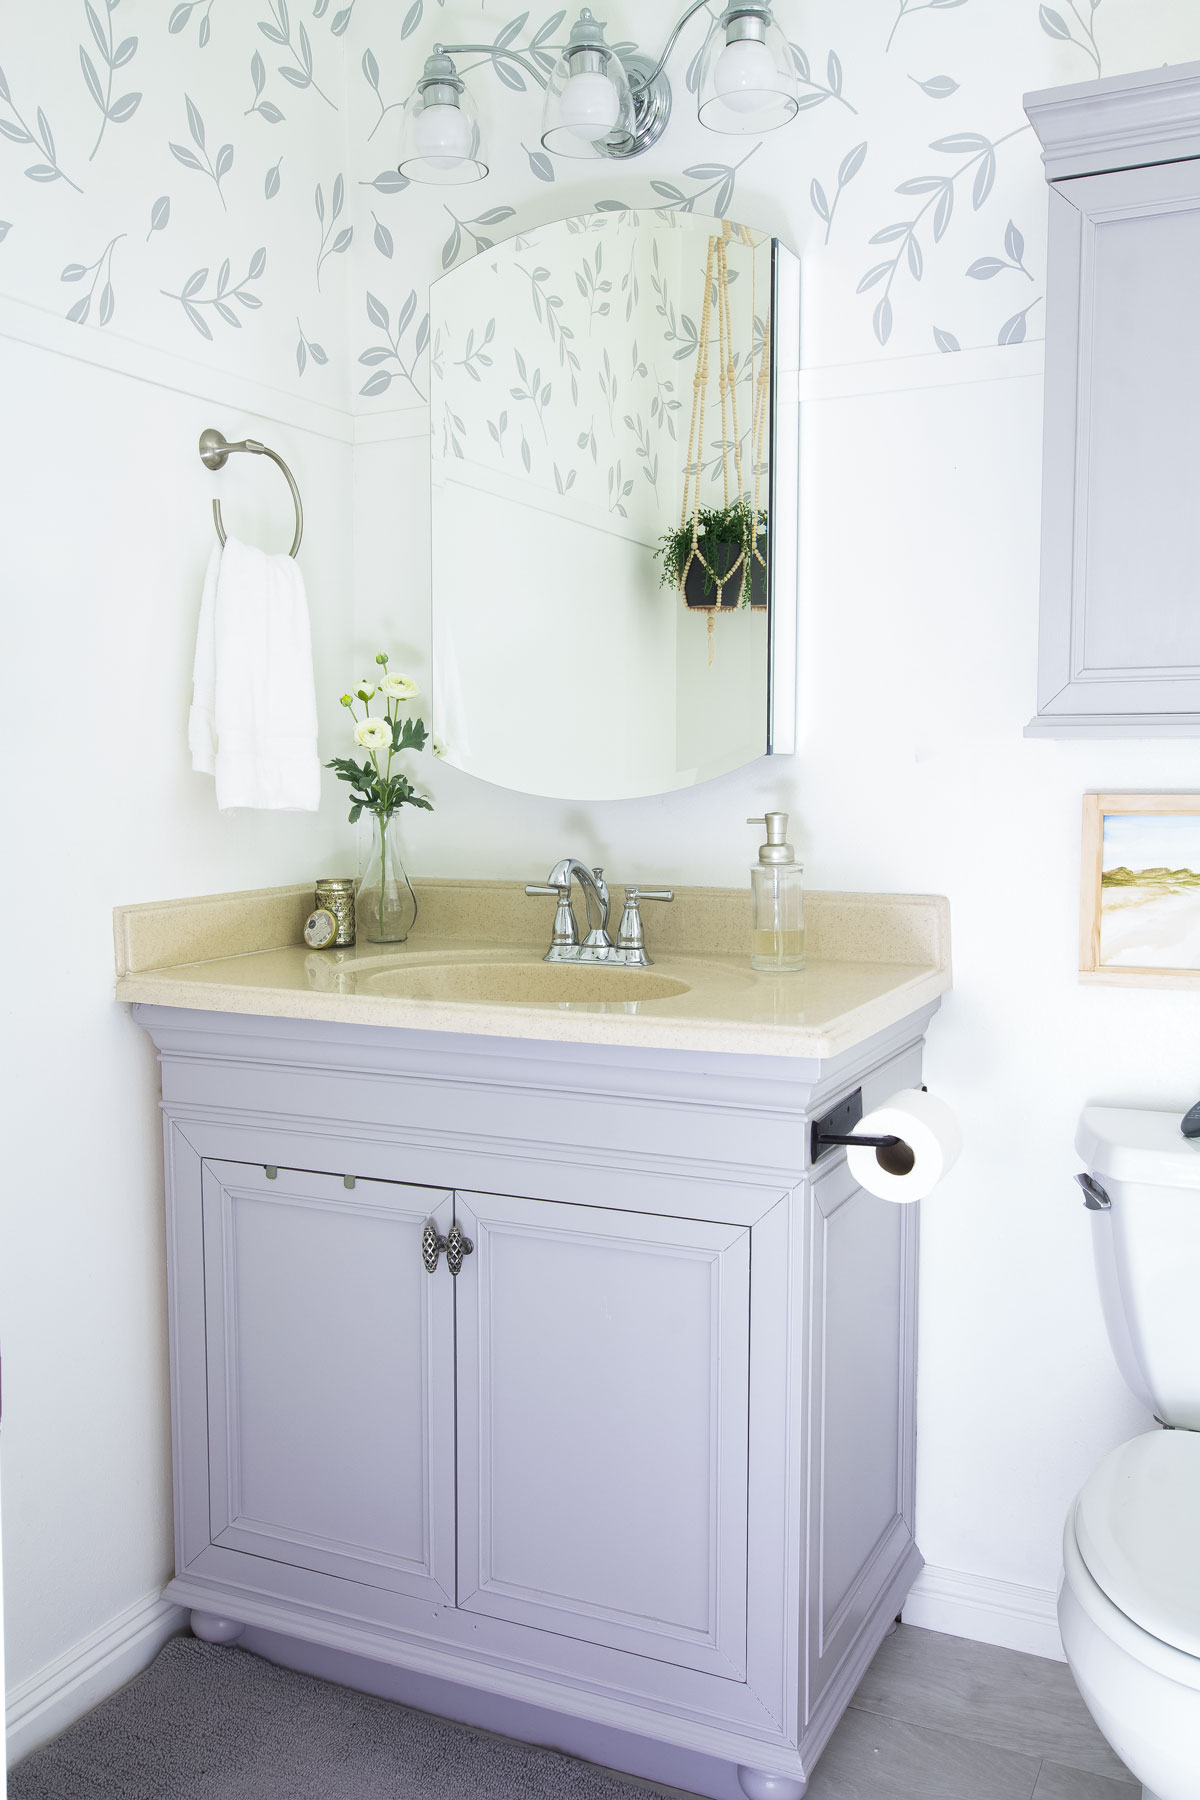
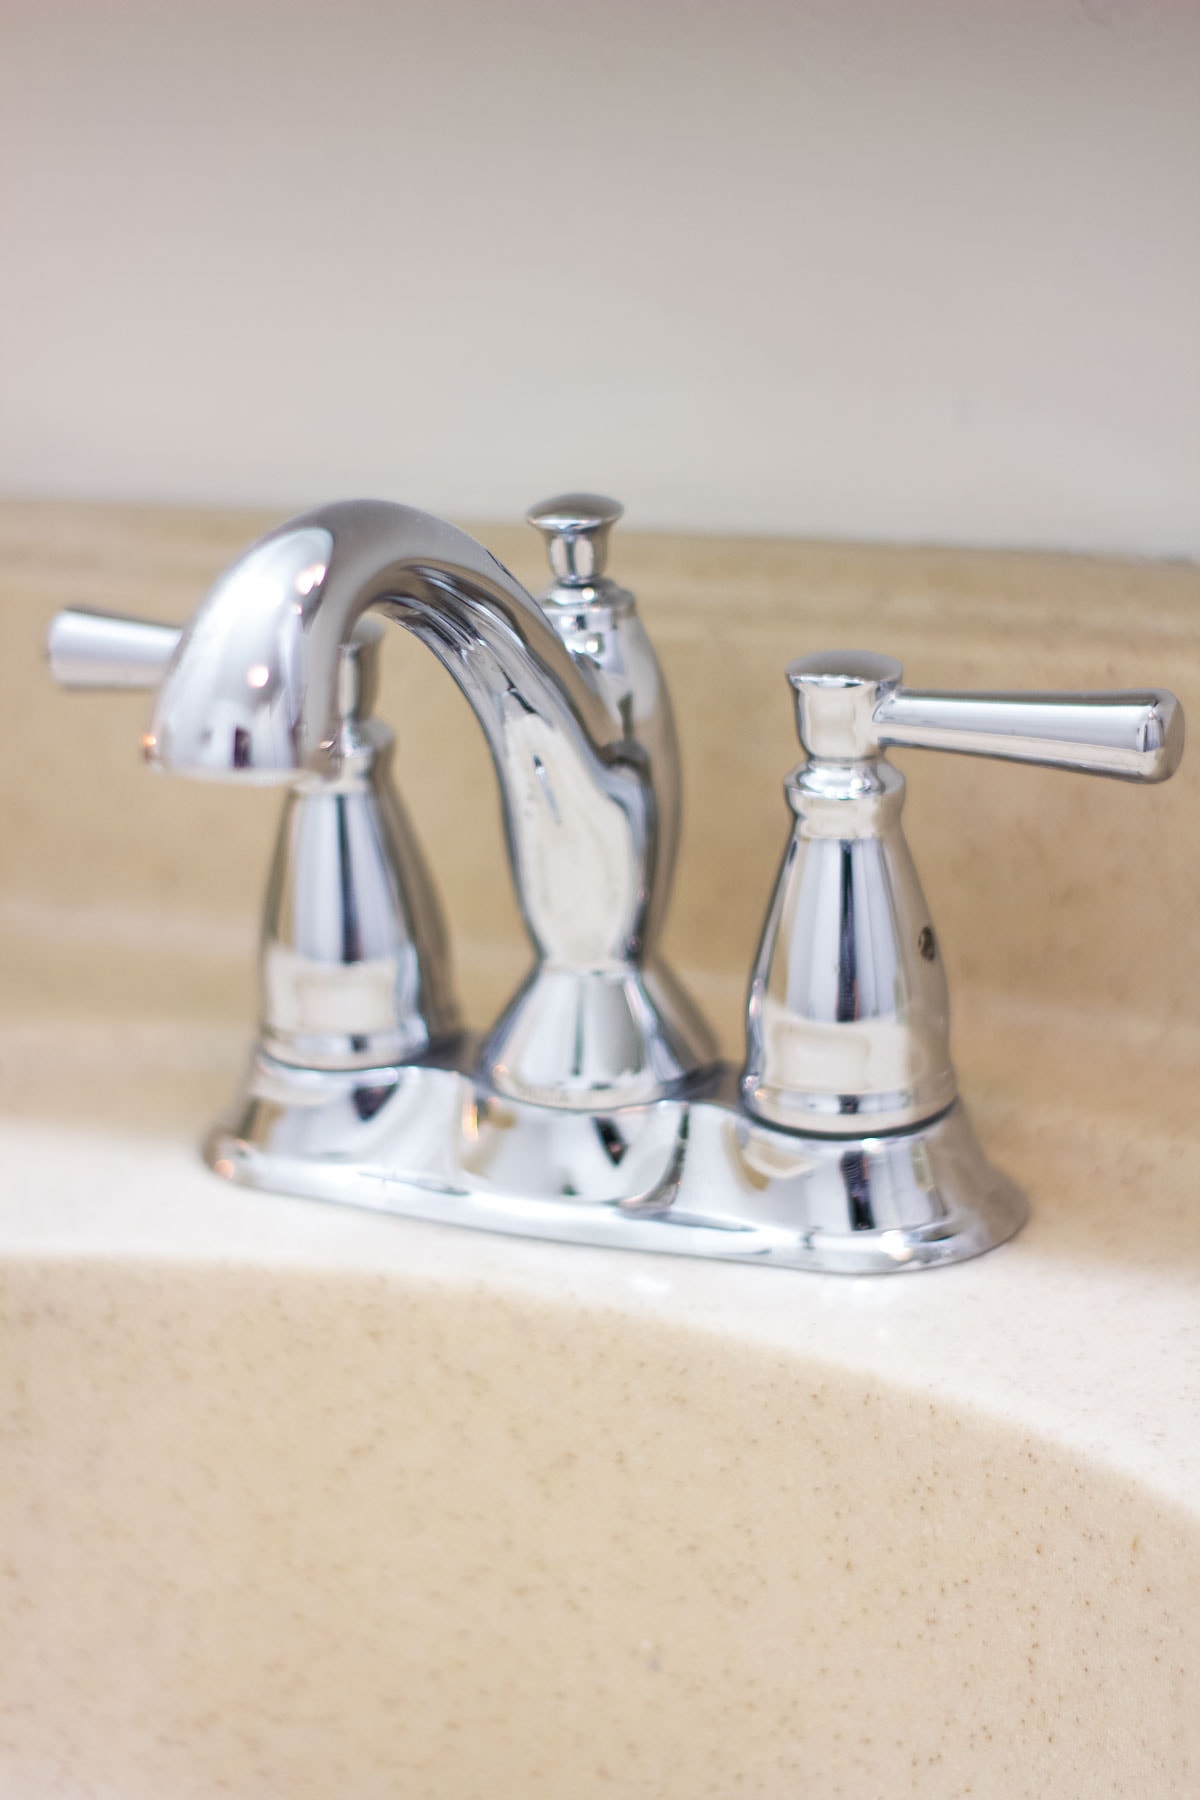
The chrome water fixture is actually the exact one I had on my mood board. And I installed it all by myself!
The medicine cabinet is the exact one that was featured on the design board, too!
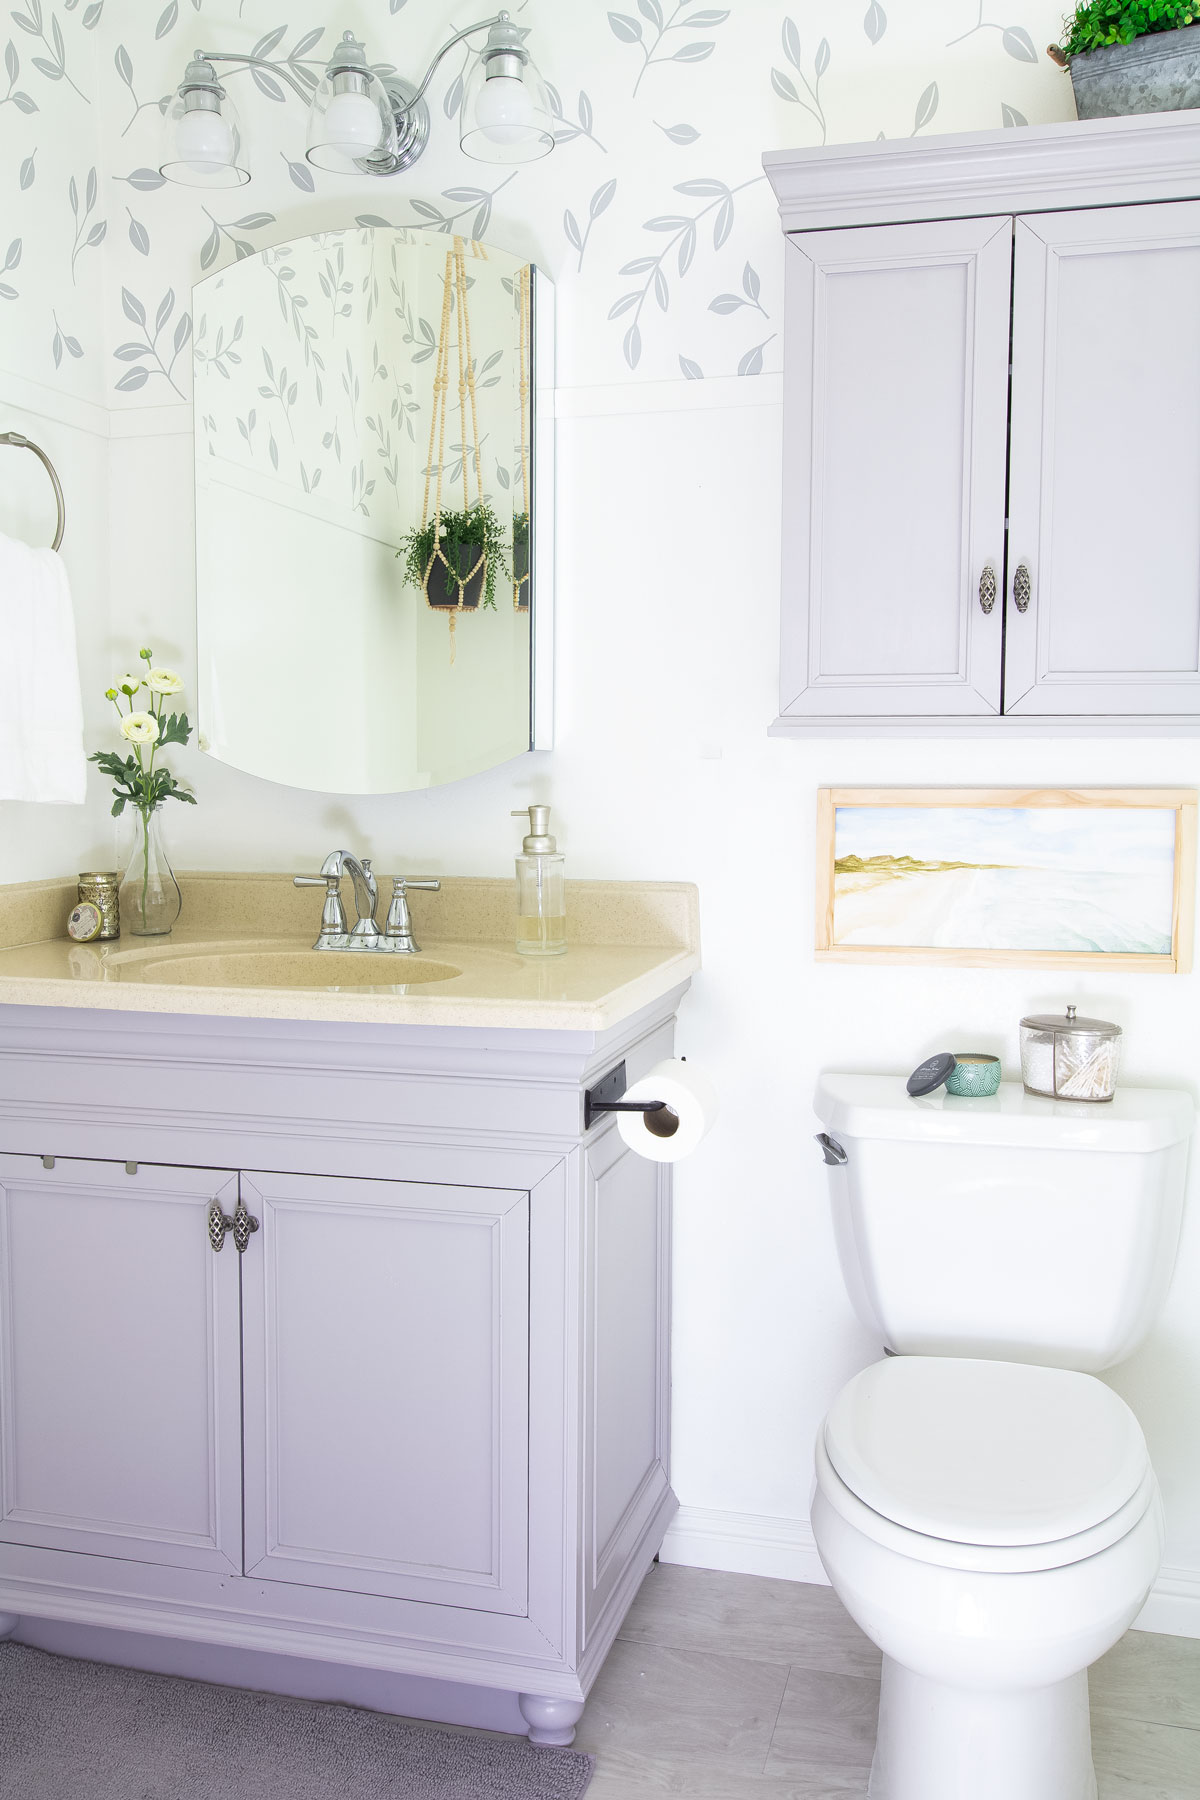
The watercolor painting created by my niece, along with my DIY rustic wood frame, is one of my favorite things in the bathroom! (And if you didn’t know, the frame is made with NO power tools!)
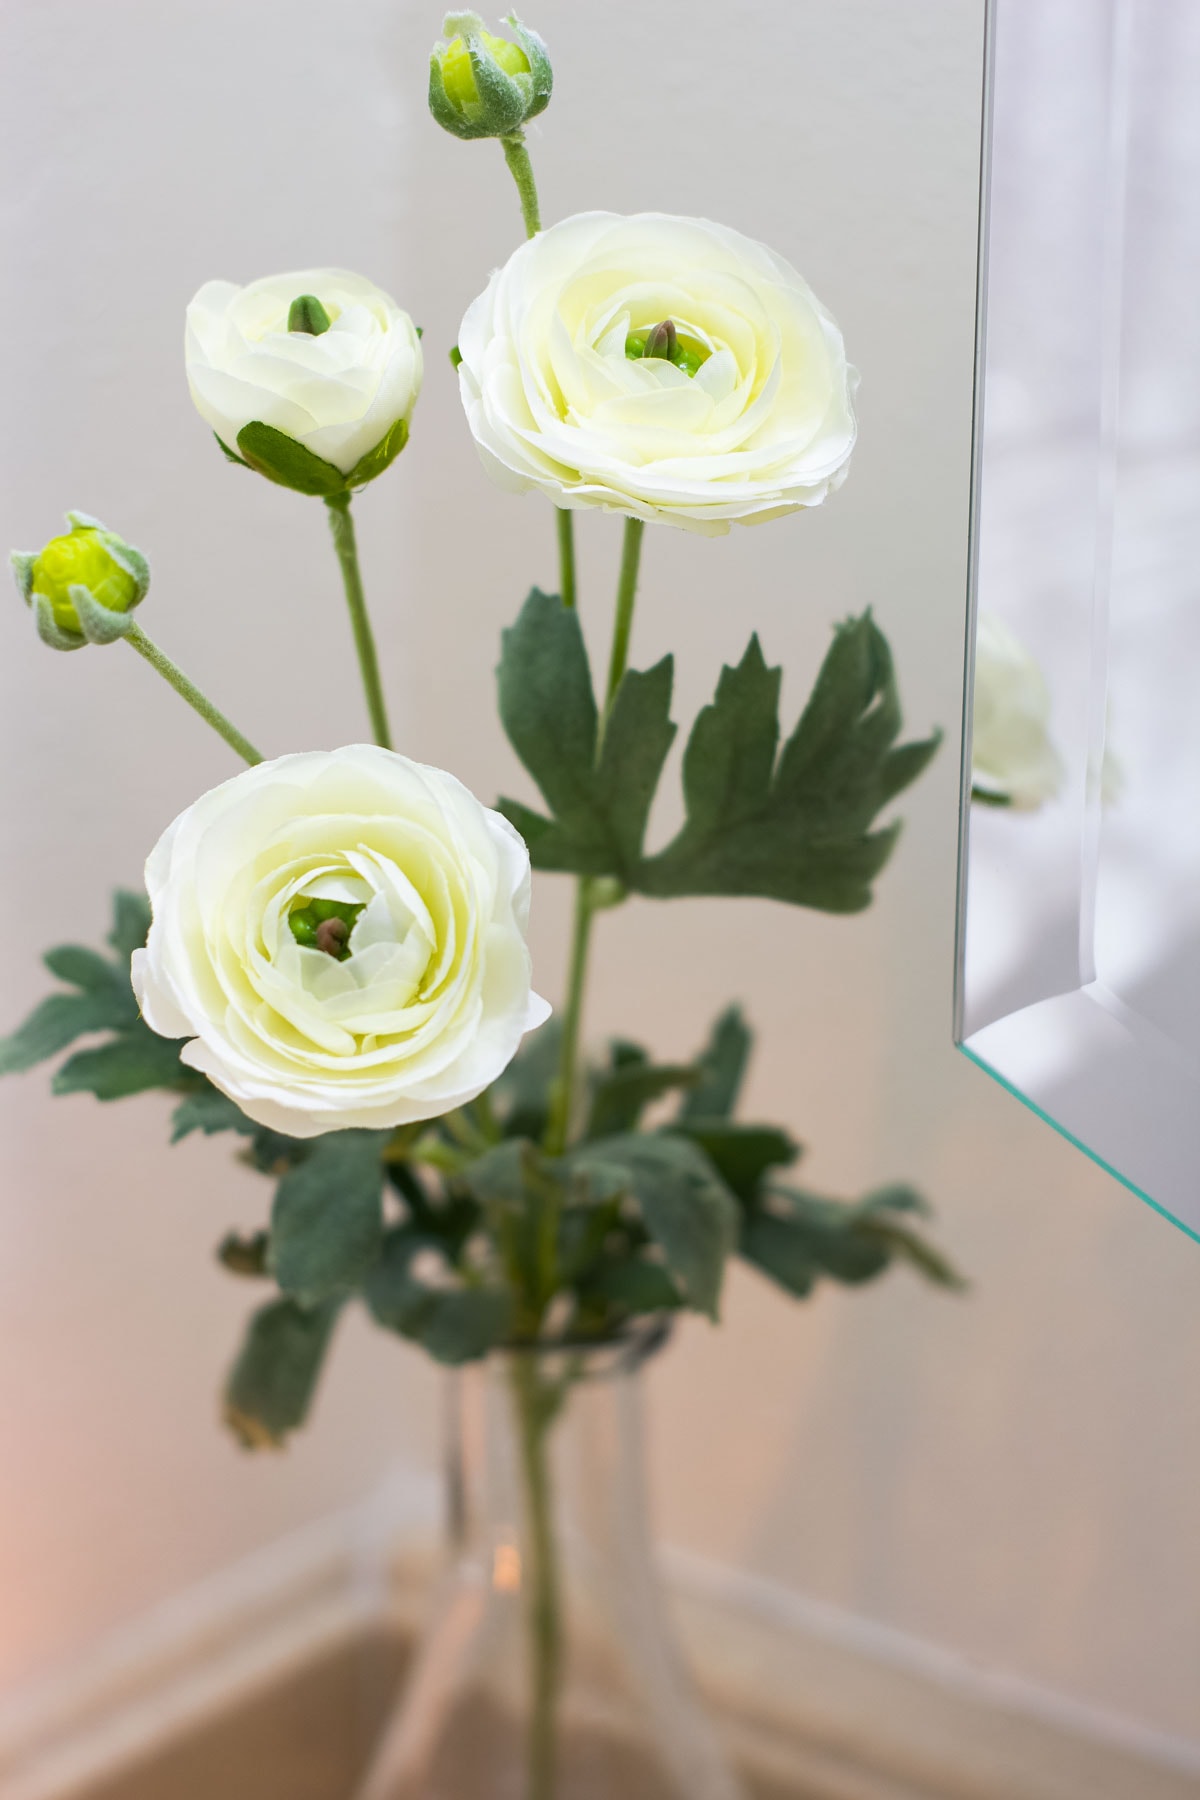
Adding some faux ranunculus to an inexpensive bottle-vase adds a pop of color!
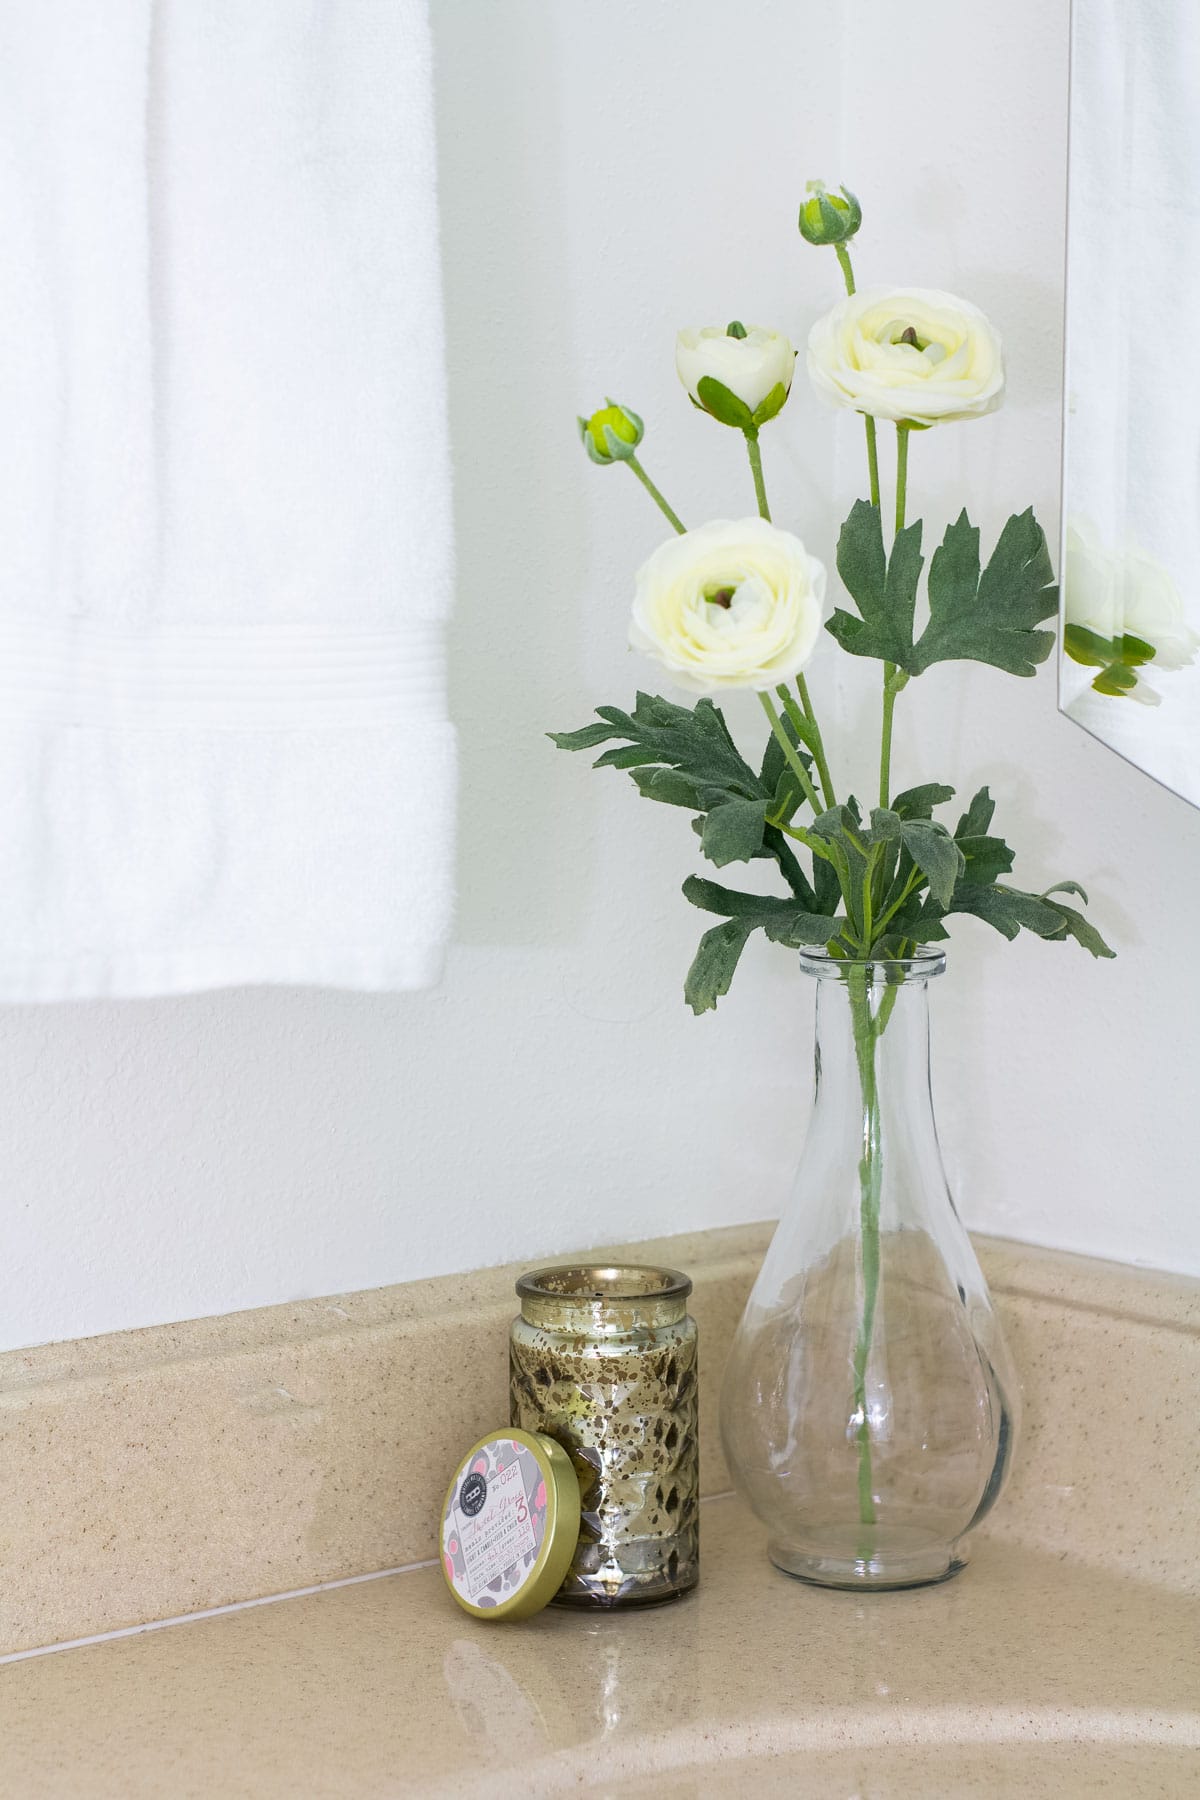
These faux flowers look so real! Got ’em at Hobby Lobby!
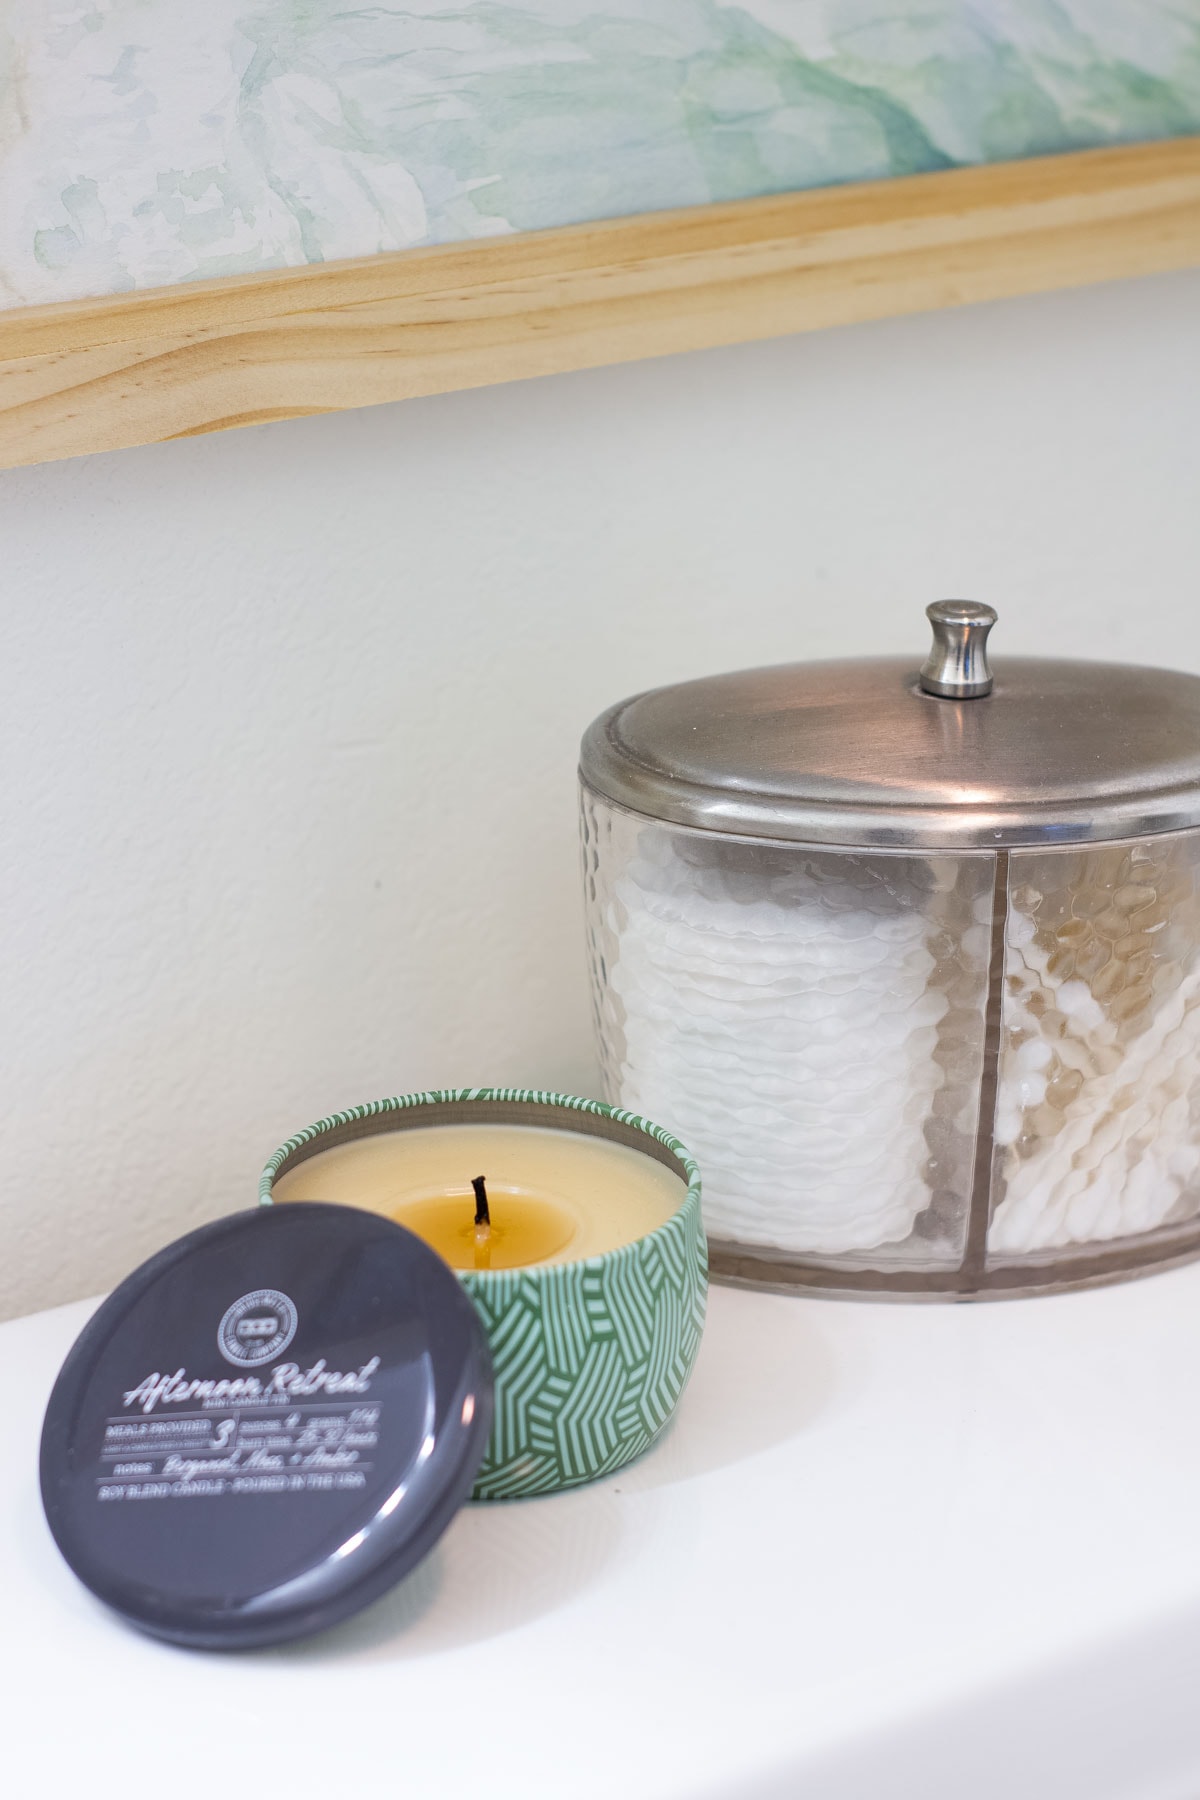
And, of course, Bridgewater candles are a must!
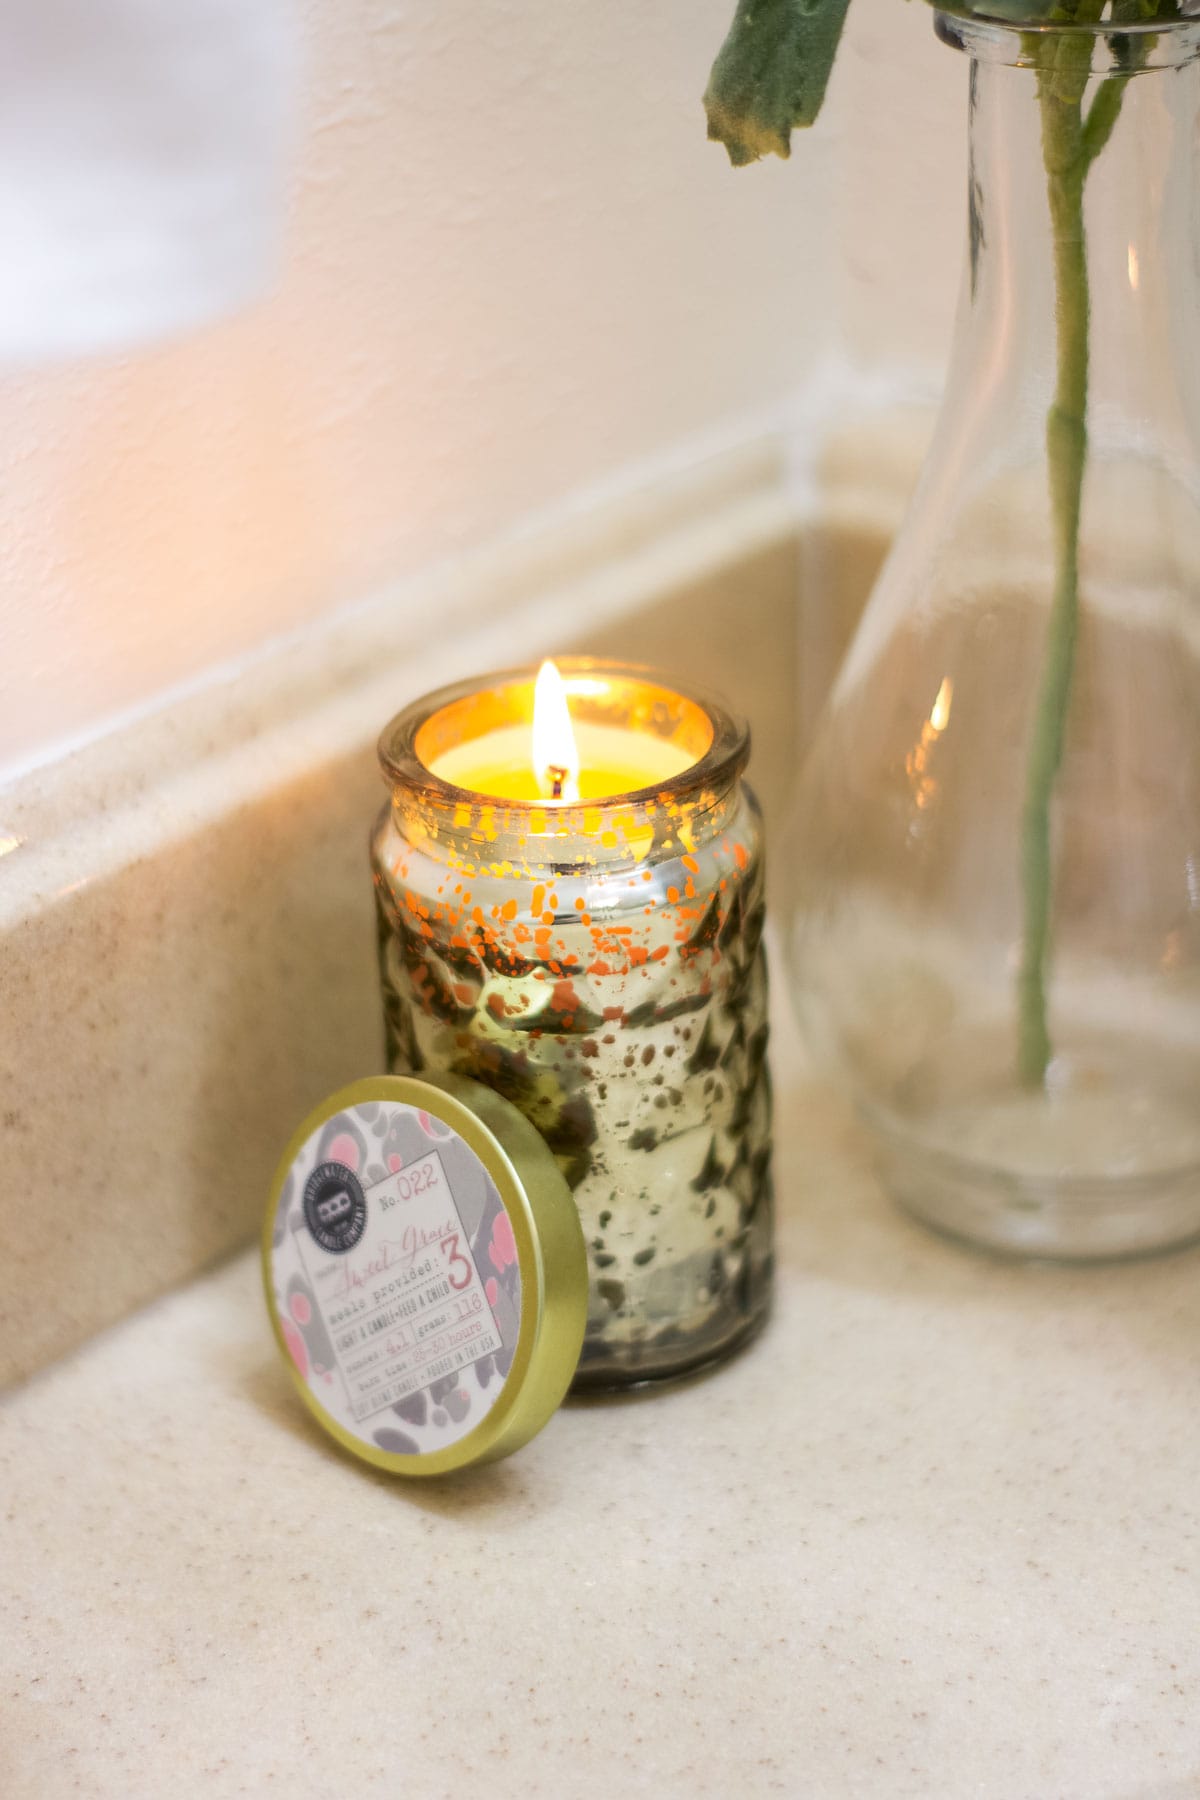
And, I decided to order this pretty green container in Afternoon Retreat. Even though it’s not my home signature scent, it smells amazing!
This made a HUGE difference in the my small apartment bathroom…
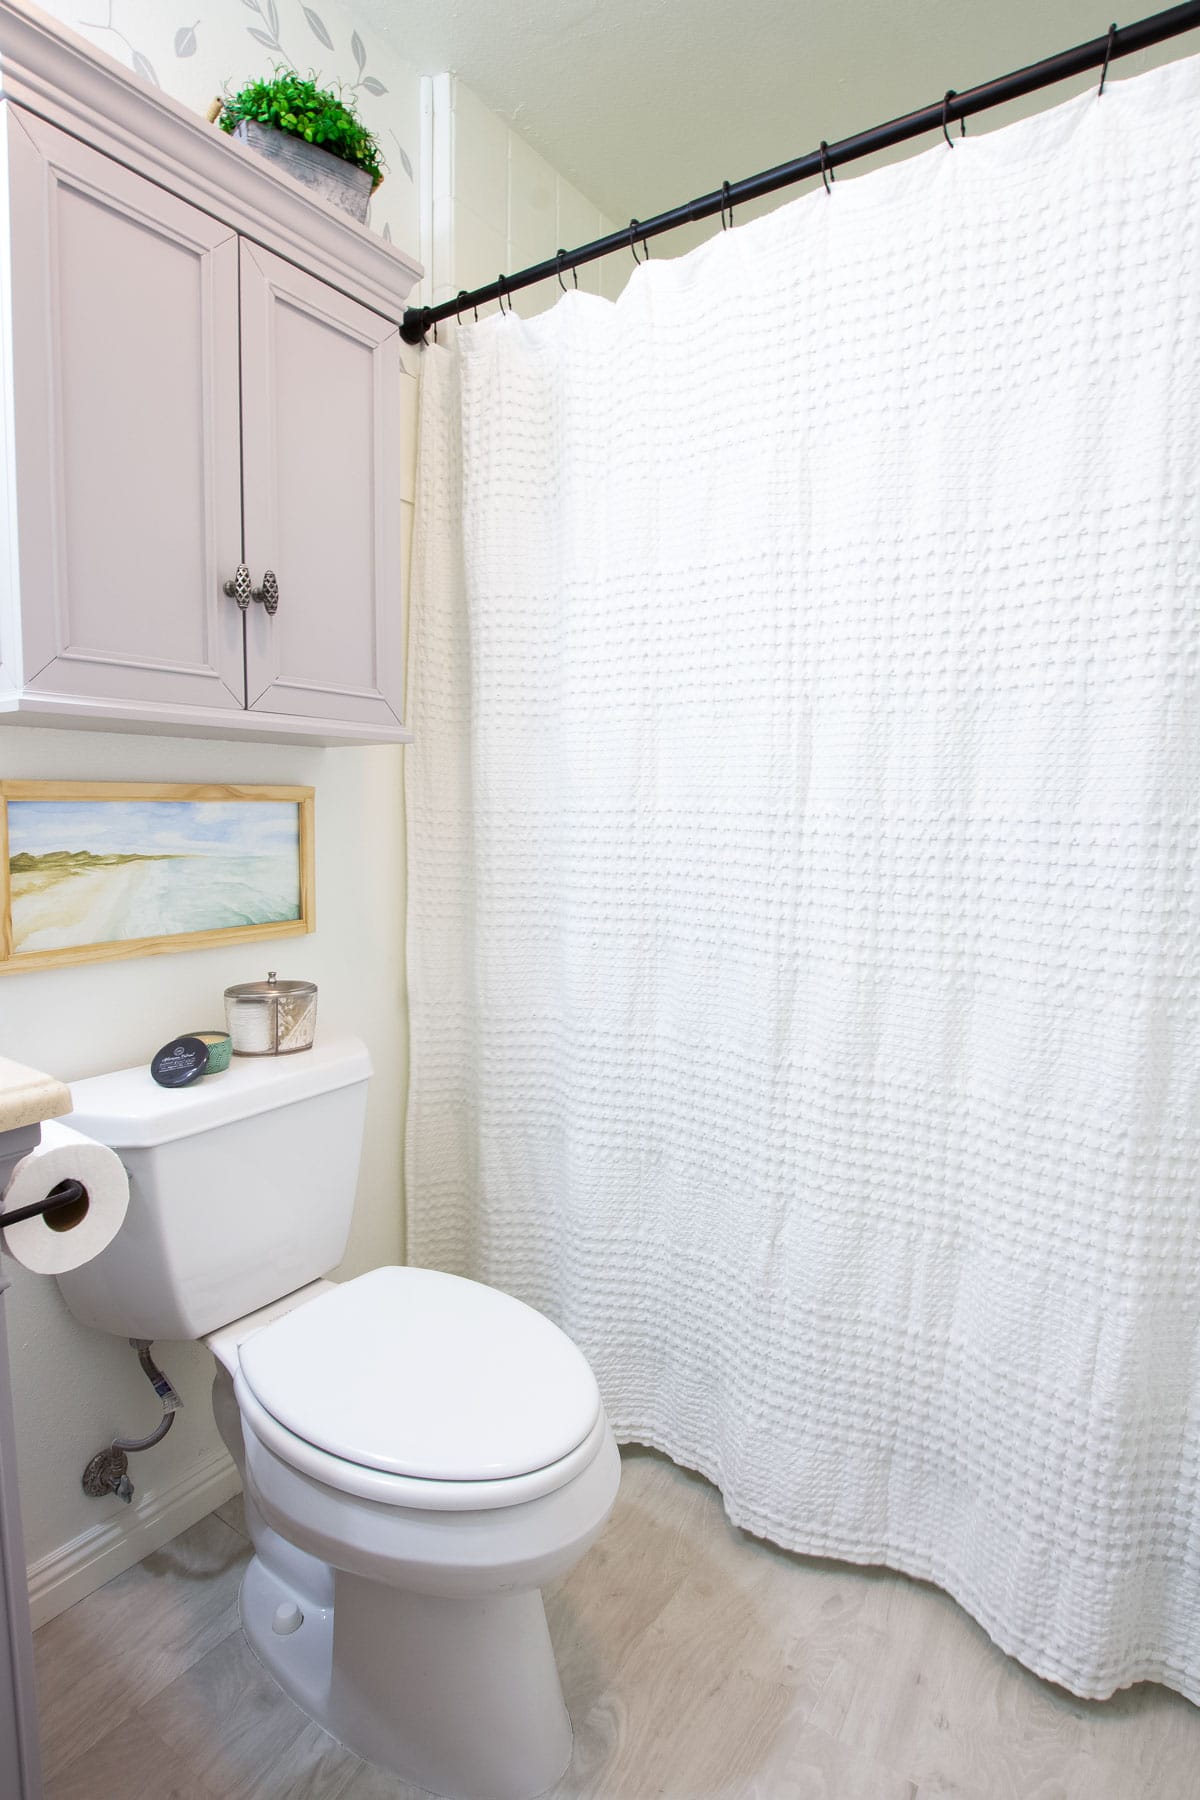
And I almost forgot to share this detail!
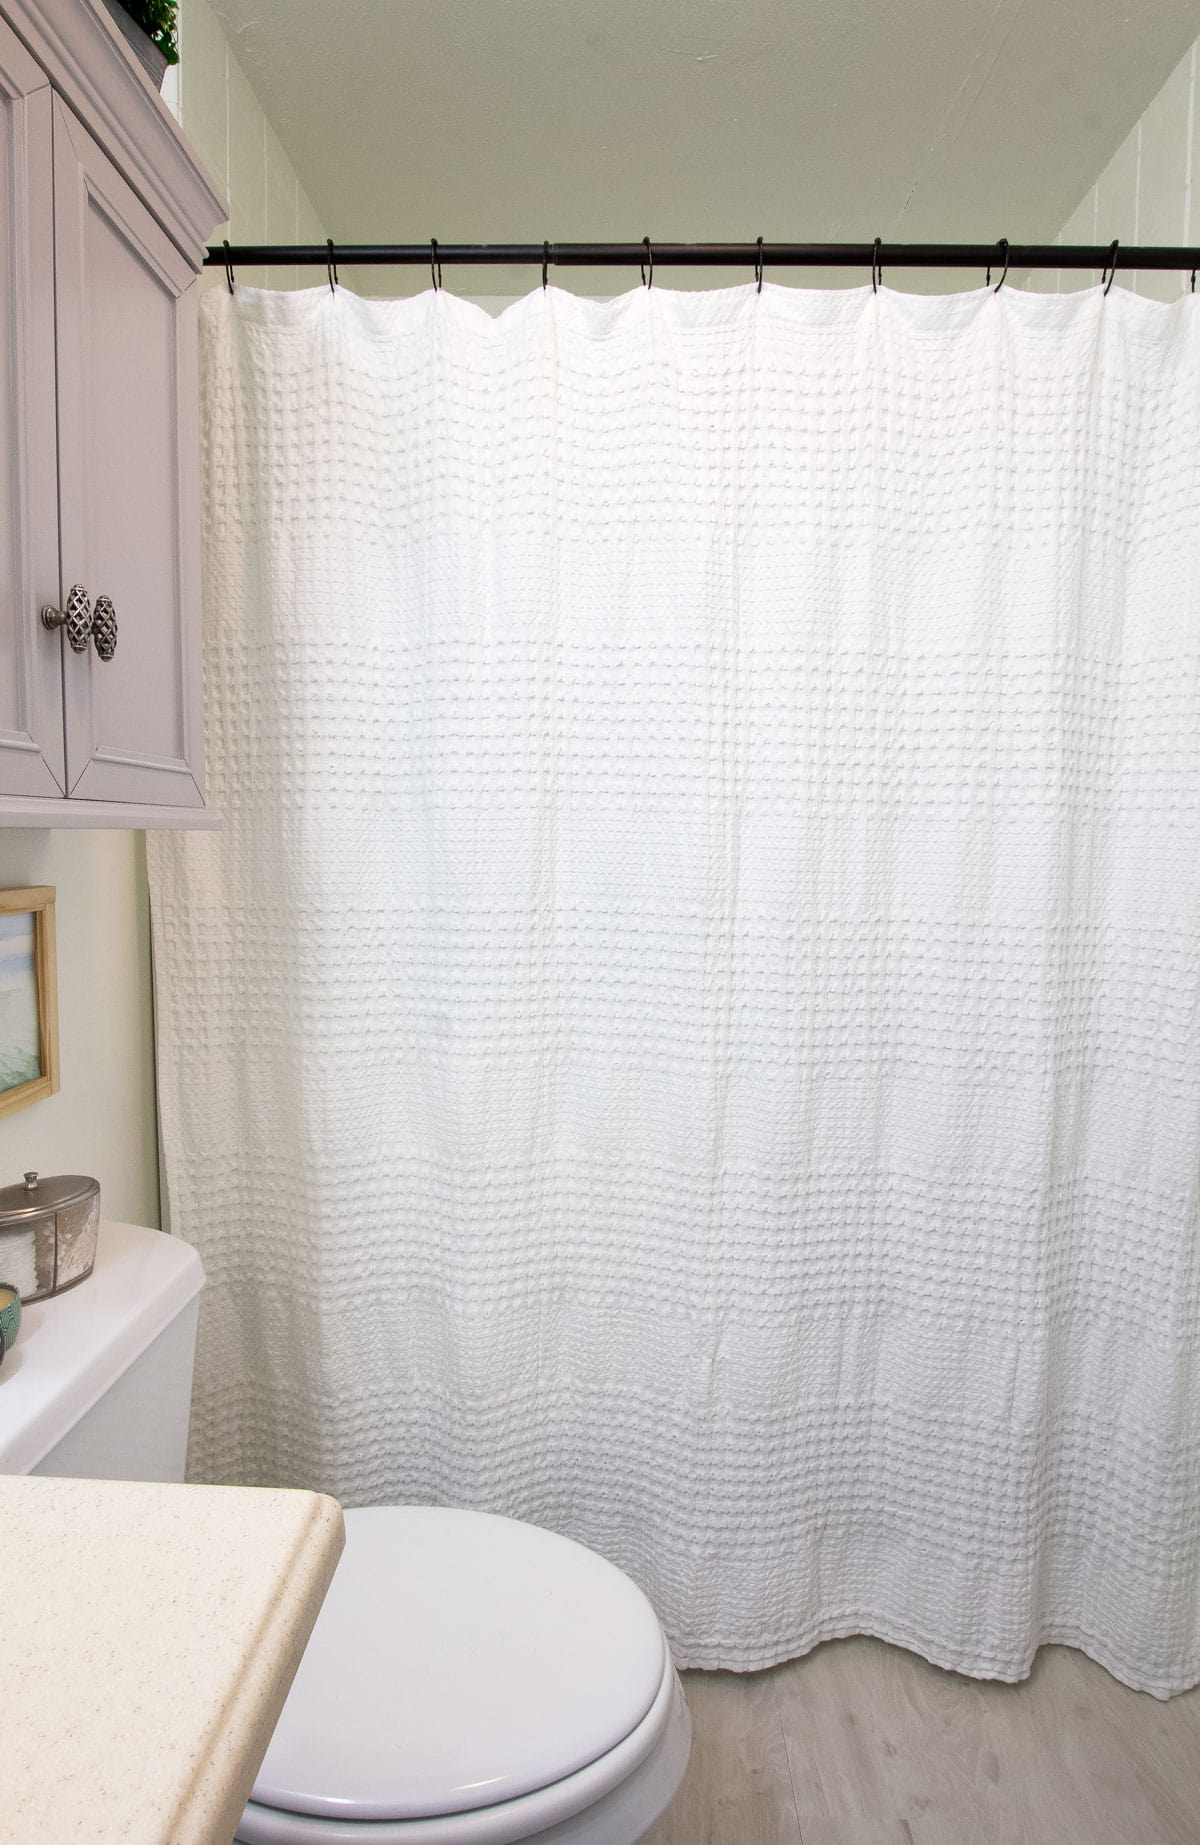
The shower door is still there! However, I added a waffle weave shower curtain with a decorative rod to the wall just a wee bit in front of the shower door! It actually makes the bathroom look larger!
The waffle weave curtain has two different textures of weave. I had tried one with just the regular weave, but it looked too much like a hotel! 😉 The one I decided to keep adds more texture and interest to this tiny bathroom update, don’t you think? And the gauze-type weave gives it that coastal vibe!
And one last after photo!
In case you are wondering what type of budget I had for my tiny modern coastal bathroom makeover…
This post may contain affiliate links, at no additional cost to you. For more information, see my complete disclosure HERE.
Here is a Source List and Budget Breakdown:
- Wall Paint: Behr Premium Plus Satin Satin Enamel in “Beach House” $32 (the coastal name was a coincidence!)
- Shower Tile Surround: Behr Cabinet and Trim paint in “Beach House” $20 (here is the DIY tutorial)
- Cabinet Paint: Nuvo Cabinet Paint Kit in “Driftwood” $69 (another coincidence, and you can find the DIY tutorial here)
- Loose Lay Vinyl: Achim Flex Flor Loose Lay Vinyl in “Whitewash” $240
- Light Fixture: Ephraim 3 – Light Dimmable Vanity Light $133
- Medicine Cabinet: Kohler K-3073-NA Archer Frameless Medicine Cabinet $100
- Faucet: Delta Linden Centerset Faucet $86
- Cabinet Pulls: I purchased mine from Hobby Lobby several years ago, but here are some similar
- DIY Rustic Custom Wood Frame: DIY tutorial is here, about $25
- Bridgewater Candles in Sweet Grace and Afternoon Retreat $26
- Tiered Basket: Hobby Lobby $35 (on sale 50% off)
- Bath Rug: Target Threshold Bath Rug $20
- Wall Treatment: TBA
- Wood Trim: Home Depot $10
The whole makeover was just under $800. I know some would think I’m a bit crazy for investing that much money in a bathroom of a rental home. BUT, I consider it an investment for the blog, as well as making my home a lovelier place to live in!
PLUS, many of the items can go with me when/if I leave… including the flooring!
So… what do you think? Like I said, I’m in love!


Congratulations! I personally think you did an amazing job re-designing your bathroom. I got inspire to redo my bathroom as well, great job!
Aw… thanks so much, Michelle! You made day! Inspiring is what bloggers love to hear!
WOW!!!! Julie, you have really outdone yourself. Everything about this bathroom is so beautiful 🤩
Thank you so much, Danielle! I love it!
I would like to know how you updated the shower and removed the glass shower door. I have a similar set up and I want to make the tile all white and use a rod and curtain.
Of course, “D”! Thanks for reminding me that I needed to add that detail. The link for the tile-painting is in the post, but you can click HERE for convenience. I just updated the post with another photo and what I did with the shower curtain. It’s super easy, as I had to leave the shower door (rental life), but I simply added a decorative rod to the wall just a wee bit in front of the shower door. Nobody’s going to know! 😉 And, it actually makes the bathroom look bigger! Hope that helps! Let me know if you have more questions!
It looks amazing! Well done!
Thank you, dear friend! Hugs!
Fabulous job Julie! I bet your landlord is thrilled!! 😊
Thanks, Barb… The LL hasn’t seen it yet, but she always says, “As long as it looks good”… I don’t think she can argue that it looks, at the very least, better! LOL! Now to get her to okay doing the kitchen cabinets! 😉
Oh, it looks gorgeous, Julie! I love it all!
Thank you so much, Pam! Hugs!
You did an amazing job Julie, You really lightened and brightened up this small room. Your colors are perfect and how ingenious to use a shower curtain to disguise the ugly shower door. Aside from your talent in decor…the fact that you are limited because it is a rental (which made it more challenging) but you stepped up to the plate so to speak.
Love it!
(and thanks for your prayers. 🙂 )
Kari @ Me and My Captain
Always prayers for you, Kari! And thank you for the wonderful encouragement! Hugs, sweet friend!
Julie, you have done a fabulous job of renovating your bathroom! It’s beautiful! Thanks for sharing with us.
Have a wonderful day. Do pray that your Mom is doing better at her new facility. Bless you!
Thank you so much, Mary-Ann… and my mom is doing better. She has quite a few good days, and a bad day every once in a while. But, it’s still a lot of work. And, it’s all good!
Amazing transformation of your bathroom Julie! Every detail is perfect including the mysterious wall treatment above the chair rail. Is it removable wall paper?
Thank you, Michelle! I’m really happy with it all. Nope… it’s not removable wall paper! 😉 With the humidity, I didn’t think it would work in the bathroom!
Your bathroom looks amazing, Julie! Congratulations on what you did yourself, and for all the planning and execution of the whole! So curious to know what you used for the upper wall ‘stencil’ – adhesive wall paper cutouts?
Your countertop container for makeup remover pads and Qtips is the same one I bought for our master bath reno back in 2017.
Kudos!
You are almost correct on the wall treatment, Rita. They are decals using my Cricut! 😉 I’m already thinking about changing it, but I need a breather before I do! LOL! And, yes, that container is at least 4 years old! LOL! I’ve never found anything I like more! 😉
The is so beautiful! I really like the leafy wall print.
Thanks, Peg! And YOU know what the treatment is! 😉
Beautiful, beautiful job, Julie! Congratulations!! Love it all – the floor is a great upgrade and adds such a coastal vibe. And the wall treatment – I’m guessing tempaper or decals? Anyway, whatever it is is just PERFECT for this sweet little room!
Oh my gosh it’s beautiful! Can’t believe you did so much on your own! Love the shower curtain in front of the shower door! What a great idea! I wish I had known about that a few houses ago 😁
Ah, thank you so much, Susan. I tell ya, that faucet took me forever to fix and get to stop leaking! I don’t have any photos for the process, but I really need to do a post anyways! LOL!
Congratulations on finishing the bathroom redo. It looks great.
Thank you so much, Kristie! I’m so enjoying it! 😉
Congratulations on finally getting to check this project off of your list. The end result is so pretty and I know that you’ve been enjoying it so much.
Thank you, dear friend! And you have been such a great encouragement and support through this time (you and Crissy, both)! Appreciate you big time!
Oh my goodness, Julie! You hit it out of the park with this bathroom makeover!! I am so impressed with all the work you’ve done. I know how hard you worked on this over the past year, and it shows! It’s a complete transformation and looks gorgeous now. Well done! Pinned!
Thank you so much, Crissy! I appreciate your love and support through the process! Can you believe, I’m already thinking about changing the wall treatment?! LOL!
Julie – I love what you did. Everything is beautifully done and very tasteful. Great job!
Thank you so much, Regina… I’m really enjoying it!
This is gorgeous Julie! You did an amazing job of pulling it all together. I knew I would love it when I first saw your mood board. I love your idea of adding a curtain in front of the shower door too! Next time I visit Katie’s apartment, I think we will try that in her bathroom. Thanks so much for the inspiration!
So glad you picked up an idea from the post, Denise! And thanks for the encouragement, too!
Julie, fabulous makeover. I love everything you did. I know a project like this takes a lot of thought, planning and execution. Congrats for sticking to your plan and the gorgeous results. Your landlord should pay you for all the work you did.
LOL! I think she (my LL) will be really happy with the results. Thank you for the love!
Omgoodness Julie this bathroom looks so amazing! Seriously, you must be so proud of yourself for all you have accomplished! Who cares how long it took so long as you enjoyed the journey and are pleased with the results!! Woohoo for makeovers! Pinning!
Oh… thank you so much, Cindy! I really am loving it, and I appreciate the kinds words about how long it took! 😉
Your bathroom looks amazing! I love the color scheme and the wallpaper you picked is beautiful!
xoxo
Lovely
http://www.mynameislovely.com
Julie,
Your bathroom looks amazing!!
What beautiful ideas and changes!! I looked at it and did a double-take…”wait…what…is this HER bathroom?”🤔🎉👍
I had seen the first remodels of the cabinets and shower area …but the finishing touches “knock it out of the park”. It looks spacious, fabulous!! Well done!!
Thank you so much, Aunt Gale! Your comment made my day! Love you!
Just beautiful Julie! I know you have worked so hard on your bathroom and it really paid off, my friend! You created a fresh and pretty bathroom! LOVE it all especially the walls!
Thank you, dear friend! I’m SO thankful to have it done, and to be able to enjoy it!
Julie, you’ve really outdone yourself! I love the way you’ve made such a big difference in your bathroom for very little money. I think people can be intimidated into doing nothing when faced with bathrooms. TV shows offer great ideas for spending $20,000 on bathrooms, of course, but what can a person do for less than $1,000? Well, you’ve shown us, and in grand style. Your post is so inspiring!
Thanks so much for joining the Grace at Home party at Imparting Grace. I’m featuring you this week!
Oh… thank you so much for the kinds words, Richella, and for the feature! I’m actually surprised I spent $1000… that’s a lot for me! But, the Lord provided!
Beautiful job Julie! There are so many decisions to be made in updating a bathroom. You made great choices. It all looks so lovely 🙂
Thanks so much, Rachelle! It was a lot to finish, but I love walking in and enjoying the loveliness!
Your bathroom looks fantastic! What a big difference. I especially like your idea of putting the shower curtain up to hide the shower door. I am stealing it and also going to look for the lighting!! Thank you for your inspirations!
Thanks so much, Catherine! I’m enjoying it so much!
It looks great! you have a good eye. enjoy
Thanks, Josee! It was fun to update, for sure!
Julie, this is gorgeous! You have made it look so fresh. I would love this in my bathroom although I live nowhere near the beach. Thanks for sharing this.
Thank you so much, Wendy! You made my day… even if it is a little late on my reply! 😉