
How to Make a Vintage-Look Mercury Ornament Garland
We’re taking on another simple Christmas decor craft today! Would you like to learn how to make a vintage-look mercury ornament garland? This DIY mercury ornament garland is easy to make and adds a lovely old-world look to your home.

This post may contain affiliate links, at no additional cost to you. For more information, see my complete disclosure HERE.
HOW TO MAKE A VINTAGE LOOK MERCURY GARLAND
Mercury glass is one of those looks that never seems to go out of style.
It’s a classic…
And when I recently admired a friend’s mercury glass garland hanging from her mantel, I went shopping for it and, of course, it was out of stock…
And out of my price range.
So I went hunting for something similar and found several options on Amazon.
But, they weren’t exactly what I was looking for, and I knew I could make exactly what I wanted.
So I did!
And I’m gonna show you how!
But first…
Vintage-look Mercury Glass Ornament Garland on Display
If you perused my Christmas Tiny Home Tour or my Frosty Minty Christmas Trees Tour, you may have gotten a sneak peek!
Let me give you a quick glance on where my mercury glass garland is hanging…
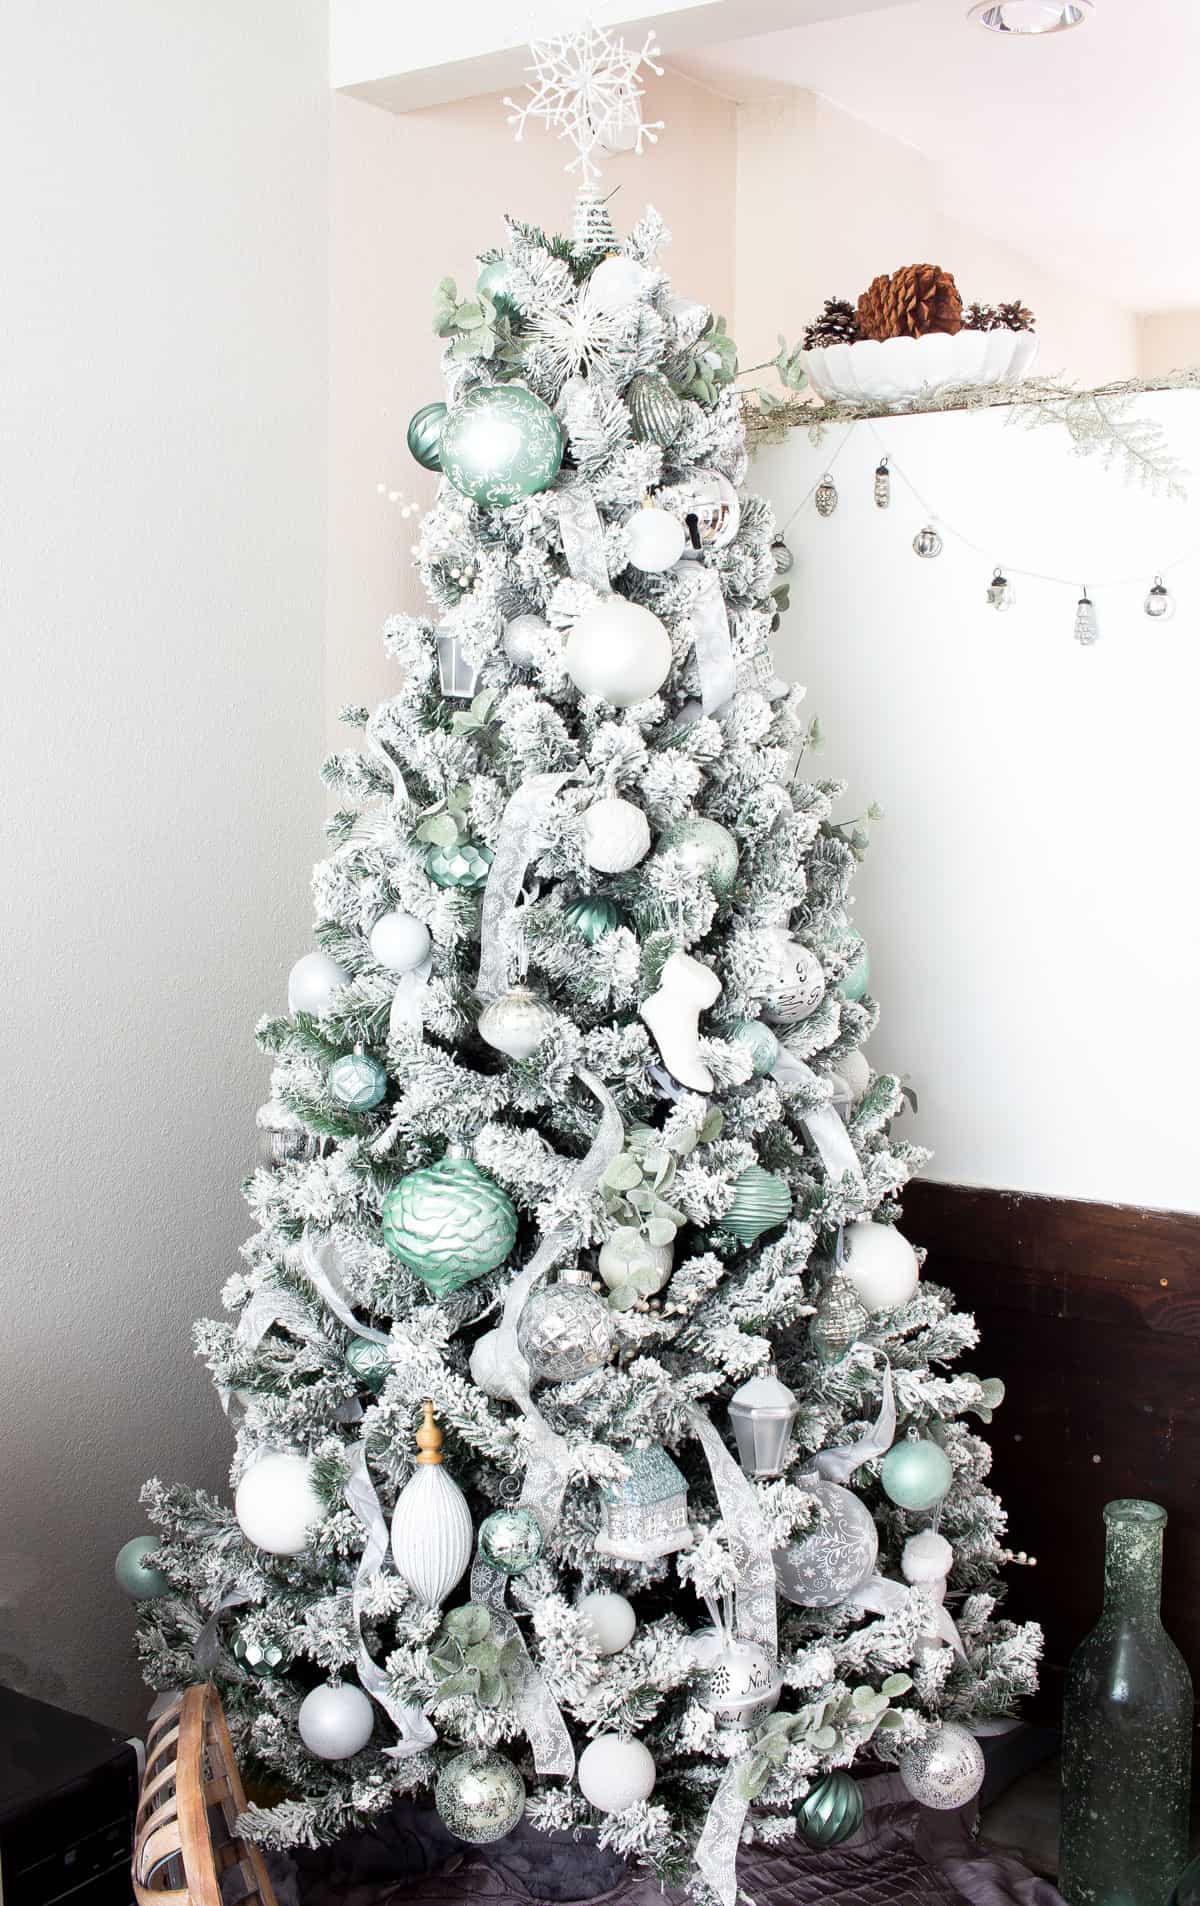
See that, to the right of the tree? That’s the back of my antique baker’s cabinet. It works as a ‘pony wall’ between my wee kitchen and tiny living area. It definitely needed a little bit of sparkle this year!
What You’ll Need
You’ll only really need a few items to make this quick and easy Christmas garland that has an ‘old-world’ feel:

- Miniature mercury glass-type ornaments (I picked mine up at Homegoods, but Amazon has a good selection, too!)
- Sparkly twine, again lots to choose from at Amazon. I used a silver that I had and I tried to tea-stain it, but I think it was polyester, so it didn’t work. Cotton twine would have done the trick! 😉
- Tacky Glue (I use this stuff all the time)
- Scissors
How to Make a Mercury Glass Ornament Garland
This garland is really simple to make… truly.
The Mathematics of Twine
- Using your twine, simply measure how long you want the garland, including the draping. The mercury glass ornaments are super lightweight, so don’t worry about them weighing the twine down.
- Add about 6 inches to your measurement so you have three inches on either side to play with for hanging.
- Fold the twine in half and mark the center (I tied a knot in it). You may not want to place an ornament there, so it’s easy to hang.
- Tie a knot on both ends about three inches in from the ends.
- Now take either half of the twine and fold in half to find the center again. You’ll place your first ornament there.
- Continue to fold the twine in half to find centers and place your ornaments with correct spacing.
Explaining that part is a little hard… let me know if you think a video would be helpful! 😉
Adding the Mercury Ornaments to Your Garland
- Slip a 3-inch piece of twine through the ornament, and tie it tightly in a double-knot to your garland twine base.
- Add a spot of glue to the knot and press it into the knot (I just used my finger). This will keep the knot from untying.
- When the glue has dried (doesn’t take long with Tacky Glue), clip off the extra twine close to the knot.
- And that’s it!

Display Your DIY Mercury Ornament Garland in Your Favorite Spot
As I shared before, the back of my “Hoosier” needed a little sparkle to dress it up. This is the first year I’ve decorated here for Christmas.

Using some sparkly stems and/or branches can add a special touch, too!
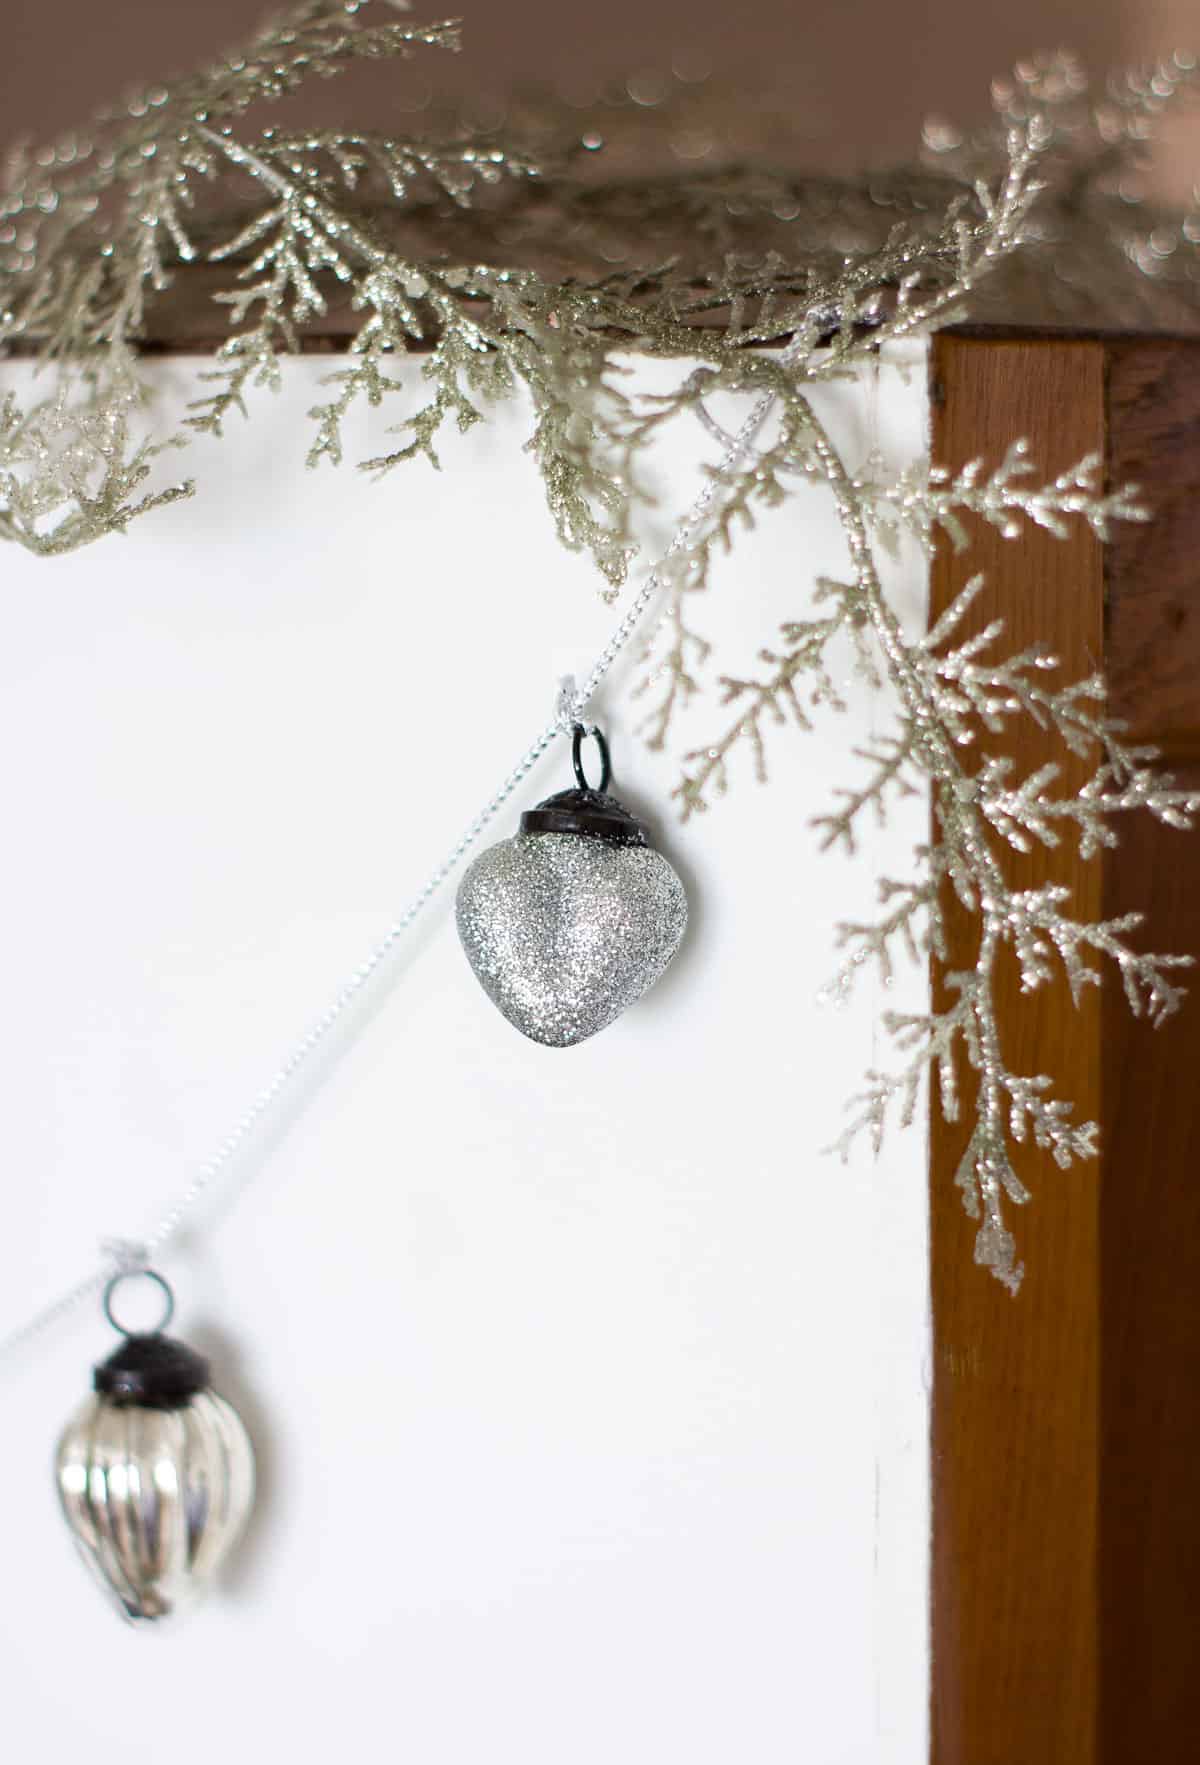
Using different shaped ornaments, as well as a couple with sparkles, adds some interest, too, don’t you think?

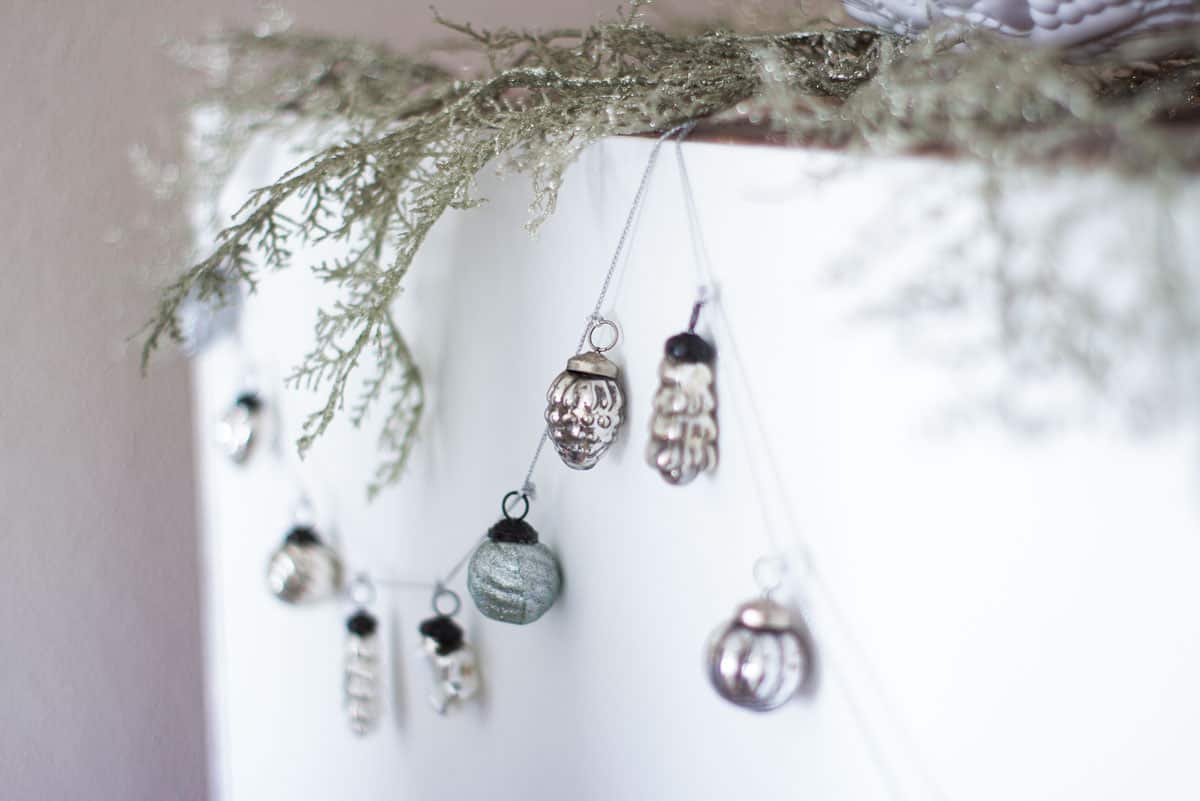
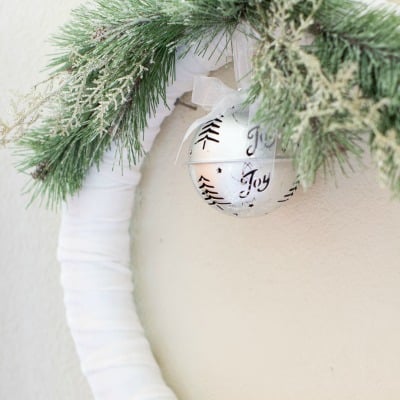
These branches had just a little tint of mint to them… perfect to match my frosty decor, and even my new DIY Velvet Christmas Wreath!

You can hang this pretty garland in all kinds of places:
- along a mantel
- across a media console
- over a mirror
- under open shelving
- even around your Christmas tree!
And, you can use different colors of mercury glass ornaments and twine, too! Maybe even add more ornaments, closer together?
I hope you enjoyed learning how to make a vintage-look mercury ornament garland. Where will you hang your garland? Share your ideas and thoughts in the comments!


So pretty! I do love those ornaments you chose1
Thanks, Jeanie. I was excited to find them!
The ornaments were gorgeous. I couldn’t keep house without Tacky Glue. My other standby for knots is clear nail polish–especially on fish line and bead elastic.
Yes, clear polish is definitely a smart way to go!
Your garland is so pretty, Julie! I live the vintage look and it looks spectacular on the back of your baker’s cabinet along with your tree.
Thanks, Paula… I really am happy with it!
Super cute and great tutorial. I’ve been wanting one of those mercury glass ornament garlands. Thanks for making one and sharing! 🙂
So easy, and pretty affordable, especially to get just what you want!
Love it and so easy to make once you show how. 🎄❤️
Oh, yes… super easy, Linda! 😉
Another great project Julie!!!! I love mercury glass and had no idea that there were mercury glass ornaments! I have to make this garland! Thank Julie😊😊
Oh, it would look so pretty in your home! Love ya!
You know how much I love the vintage look Julie. Your garland is just perfect. Pinning for next year!
Thanks, Michelle… yes, I must say, this *does* remind me of your style, too!
I love this Julie! I have a DIY vintage mirror hanging on the wall in my lounge and I think a garland like this would be perfect for that. I’m pinning this so I don’t forget to make it next year!
Oh, yes… I think you need a mercury glass ornament garland for your mirror! 😉
So pretty, Julie! I do adore all things mercury glass!
I didn’t use to, but I have a new love for mercury glass these days! 😉
This is so pretty. I love mercury glass. I never thought to string ornaments for a garland!
Thanks, Marie! I think next year, I may add even more!
This was one of my favorite things on your Christmas Tour! It is really beautiful! Wishing you a very Merry Christmas, Julie!
Hugs,
Tee @ Teediddlydee
Ohhhh, you made my day, sweet friend! Merry CHRISTmas!
It’s so pretty, I love it!
Thanks so much, Amy!
I love this garland so much! Thanks for sharing. Pinning! Merry Christmas, Julie
Thanks for the pin, Julie, and the kind words!
Hi Julie! What a simple project that makes a big impact This is on my to do list! And you flocked tree is gorgeous!
Aw, thanks, Sue! It is SO easy, and I love the look!
I love this Julie! I’m all about the vintage look. Pinned for next year!
So glad you like it, Kim!
Very pretty! Merry Christmas!
Thanks, Lauren! Merry Christmas!
Such a pretty garland, Julie. You definitely nailed the old world look! Thanks for sharing. Pinned! Merry Christmas 🙂
Of course! Thank you, Rebecca!
Still loving this! I love mercury glass and I love vintage…what could be better?? Also, your flocked tree looks SO pretty!
Thanks, Janet… Not sure decor will make it up this year! A travesty for a blogger… but, this blogger has LOTS of family stuff going on, and I just don’t want to stress!
I love this so much Julie! It’s so easy to make yet packs a lot of gorgeous punch! Thanks so much for sharing it with us at Farmhouse Friday… we’re featuring you at tomorrow’s party!
Just getting to my comments… thank you so much, again, Michelle… Praying for you and your health!
Julie, this is such a pretty idea for Christmas. It really makes a statement on your wall! I’m featuring you at the next FWF party 🙂
Merry Christmas hugs,
Rachelle
Thanks so much, again, Rachelle! What a blessing!
Such a sweet little garland Julie.
Thank you for sharing your DIY mercury ornament garland at Create, Bake, Grow & Gather this week. I’m delighted to be featuring it at the party tonight and pinning too.
Merry Christmas,
Kerryanne
Thank you again, Kerryanne, for the feature! I always love perusing your blog!
Julie,
Your garland is so cute and I love how easy it is. Thanks so much for sharing
So glad you like it, Rachel… and thank you for the kind words!
Beautiful Garland, Julie! Thanks for the idea! xo
Thanks for dropping in, dear friend! Love ya! (And the idea came from seeing YOUR garland!)
I LOVE THIS!!!! Vintage mercury glass ornaments are my favorite and your garland is just fabulous, Julie!! Pinned! Thanks so much for sharing at Home Imagined this week!
Thanks, Rachel… It’s so simple, but I love the look!
Julie, this garland is beautiful. I may be biased, but it seems a vintage touch always makes for the best Christmas decor.
Thanks so much, Maria! I just visited you blog and it’s lovely! We’d love you to join our link party here on the blog! We open on Tuesdays and close on Fridays! Hope to see you there!
I’m featuring you when the next To Grandma’s house we link party starts – thanks for sharing with us!
Thank you so much, Tarahlynn!
Hi Julie – I am so glad you shared this post with our Home Imagined Link party because I love this idea. Now I am thinking about that antique bakers cabinet. It must be stunning. Thank you again for sharing this post with our link party.
LOL! I did share it on the blog at one point. It is now in Mom’s bedroom. 🙂
Julie,
I love mercury ornaments and your garland is so pretty. Congratulations, you are being featured on Thursday Favorite Things. https://www.eclecticredbarn.com/2023/12/holiday-decorating-on-thursday-favorite.html
Hope you stop by.
Hugs,
Bev
Thank you so much, Beverly! It’s such an easy project!