
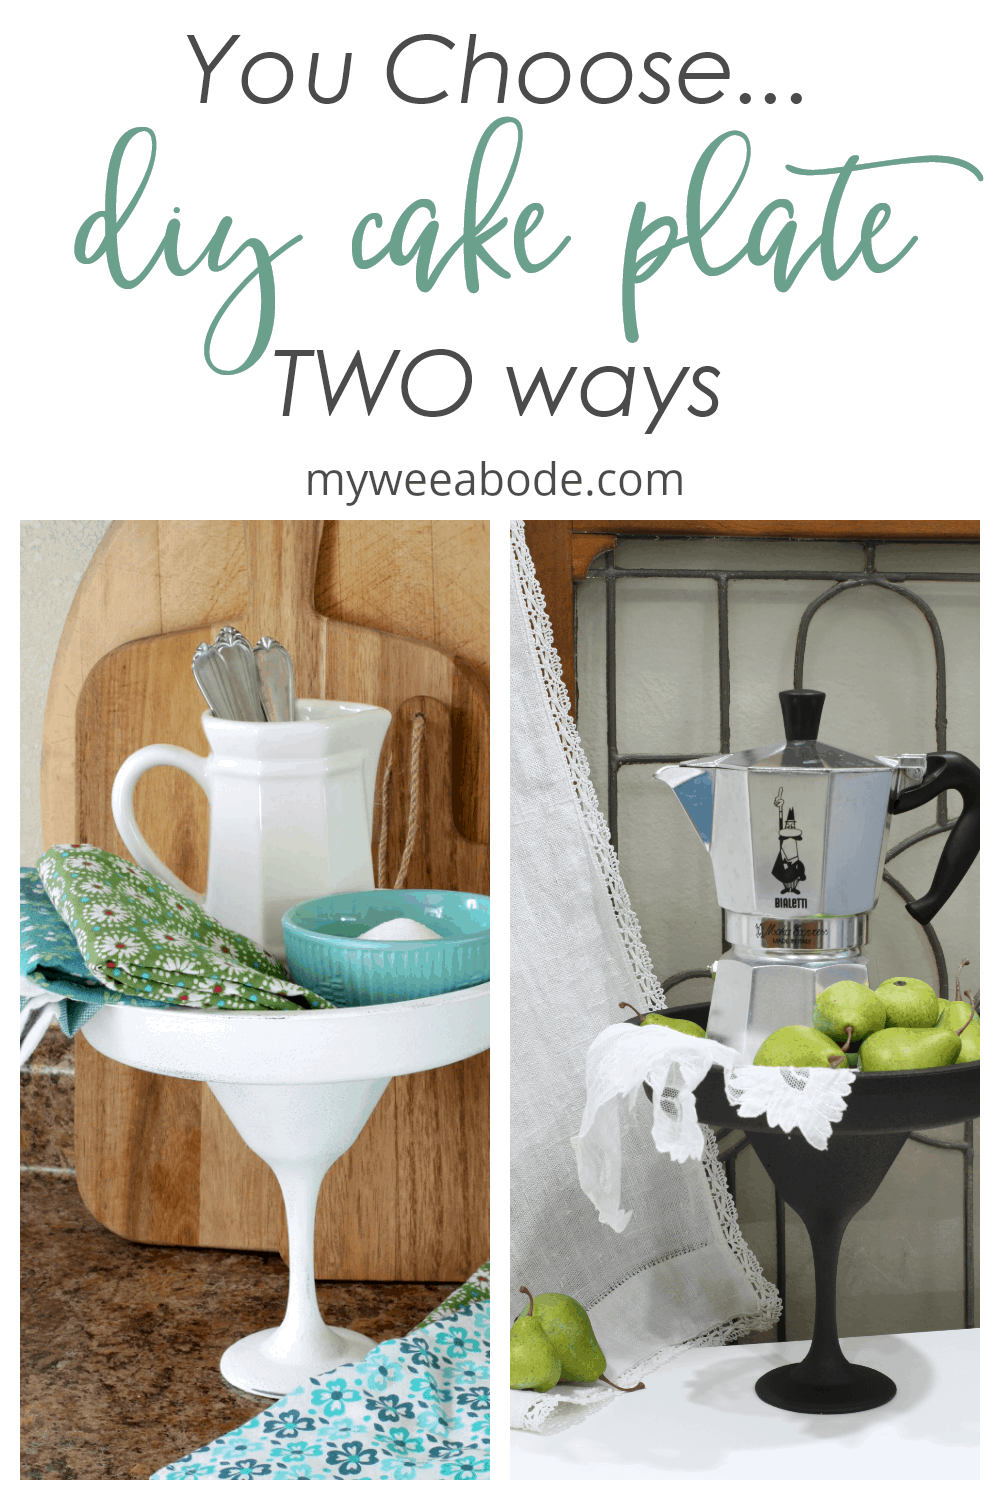
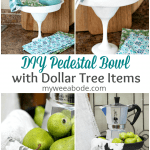
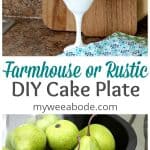
DIY Rustic Cake Plate Made Two Ways
Hi all! Hope you all had a restful holiday weekend! Have you gotten any projects or crafts done this weekend? Well, if you’re like me, a quick and affordable project will always catch your eye! Especially one made with Dollar Tree items! Today, I’m going to be sharing with you a DIY Rustic Cake Plate Made TWO Ways!!! You may even find a farmhouse coastal cottage project, too!
Let me take a moment to express how very thankful I am this Memorial Day for the men and women who sacrificed their lives in order to protect our country and to help give us the freedom we all hold so dearly here in the United States. I’m sure you agree, we are forever grateful.
Having a 32-hour work schedule is really nice because my normal day off is Tuesday. With this being a holiday, I’m getting to enjoy a 4-day weekend! Lots of time for projects! And this DIY cake plate is actually just a small part of a ‘makeover’ I will be sharing soon (can you guess what that might be?)!
I’m always looking for items that will help with storage in My Wee Abode. Small homes often have unique situations that challenge their owners/renters to think outside-the-box. I recently saw a beautiful matte black pedestal tray (cake plate?) at Hobby Lobby, and thought it would be a perfect storage solution for my upcoming makeover. However, I just couldn’t bring myself to pay the sale price of $15 . Sooo, I came up with my own version!
This post may contain affiliate links, at no additional cost to you.
For more information, see my complete disclosure HERE.
WHAT YOU WILL NEED, Part 1
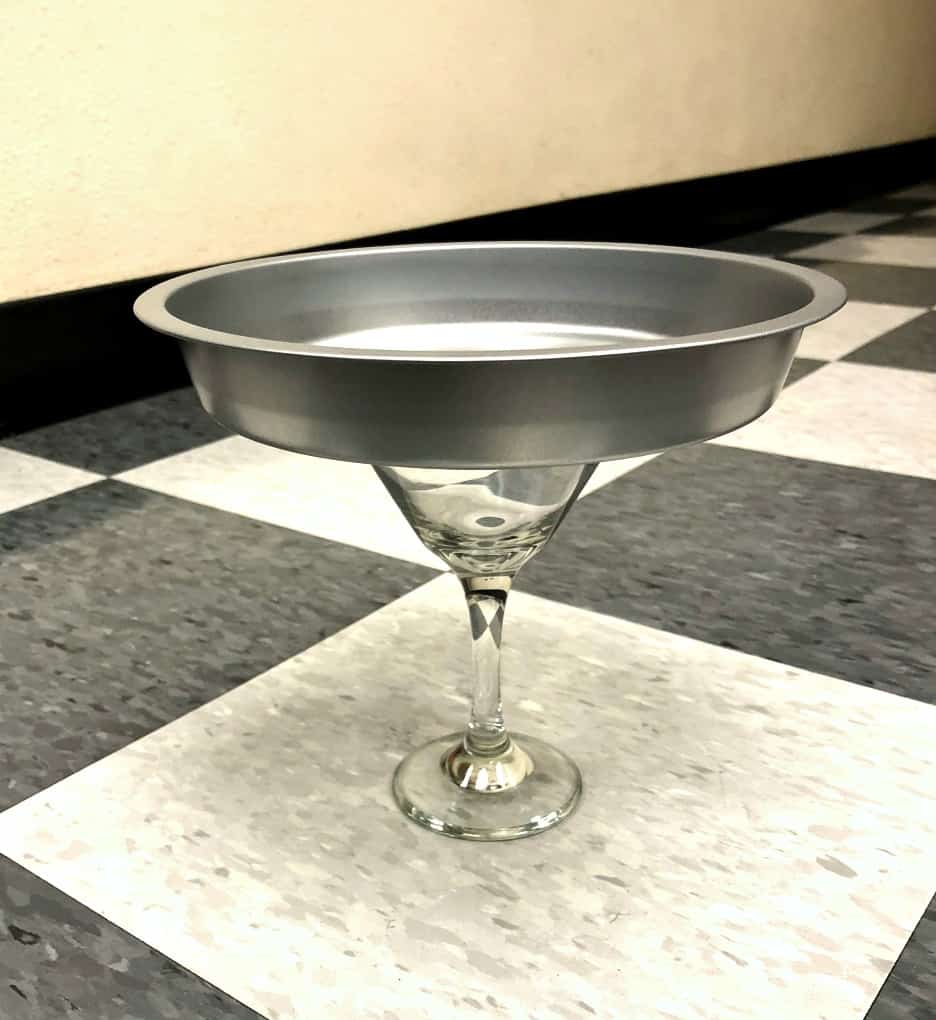
- Cake tin (I’m adding a link for your convenience, but I purchased mine for 99 cents from Dollar Tree)
- Wine/Parfait Glass.. You can actually use candlesticks, too (again, 99 cents at Dollar Tree)
- E6000 Glue (or any type of super glue… but I like how E6000 holds)
- Rust-O-Leum Multi-Color Textured Spray
- Rust-O-Leum FLAT PROTECTIVE ENAMEL in BLACK (you’ll soon see why this is bolded 😛 )
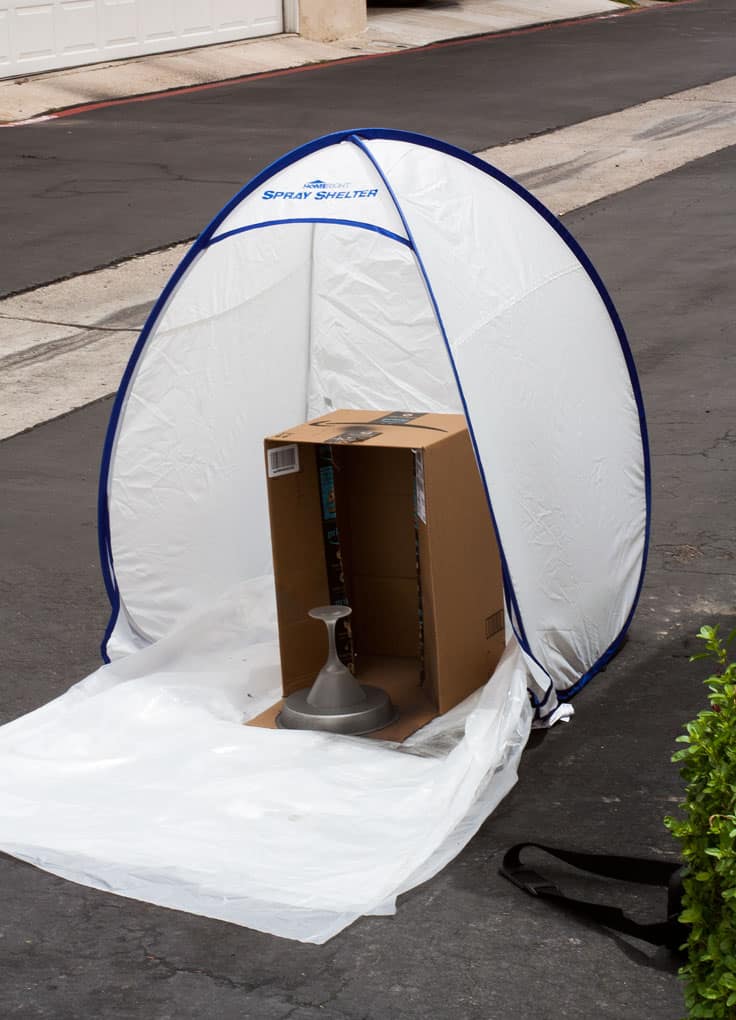
- HomeRight Small Spray Shelter (Optional)
- Plastic Tarp (Optional)
BUMP IN THE ROAD, Part 1
In order to get the final look (at least for the first style), be sure to purchase FLAT PROTECTIVE ENAMEL paint. This will give you the flat/matte finish that I *finally* achieved. At first, I used Satin Finish paint, which gave a shiny finish… which had a bit too much glam for my taste. Flat Protective Enamel gives the nice matte finish that you will want in order to achieve the first look.
CREATE YOUR CAKE PLATE BASE
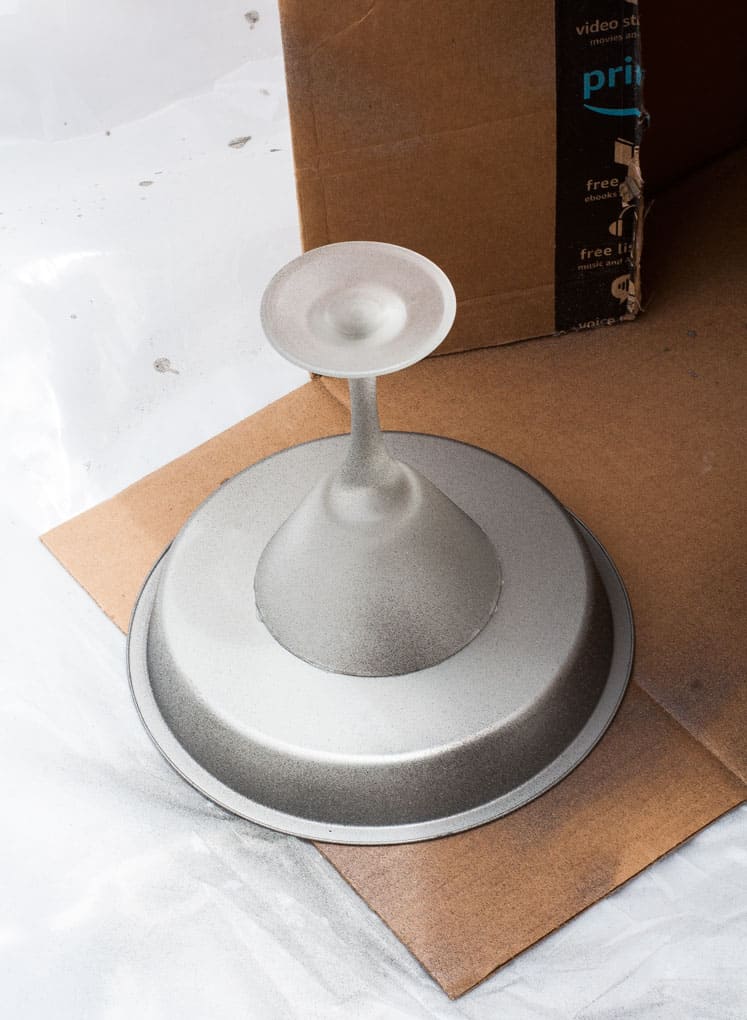
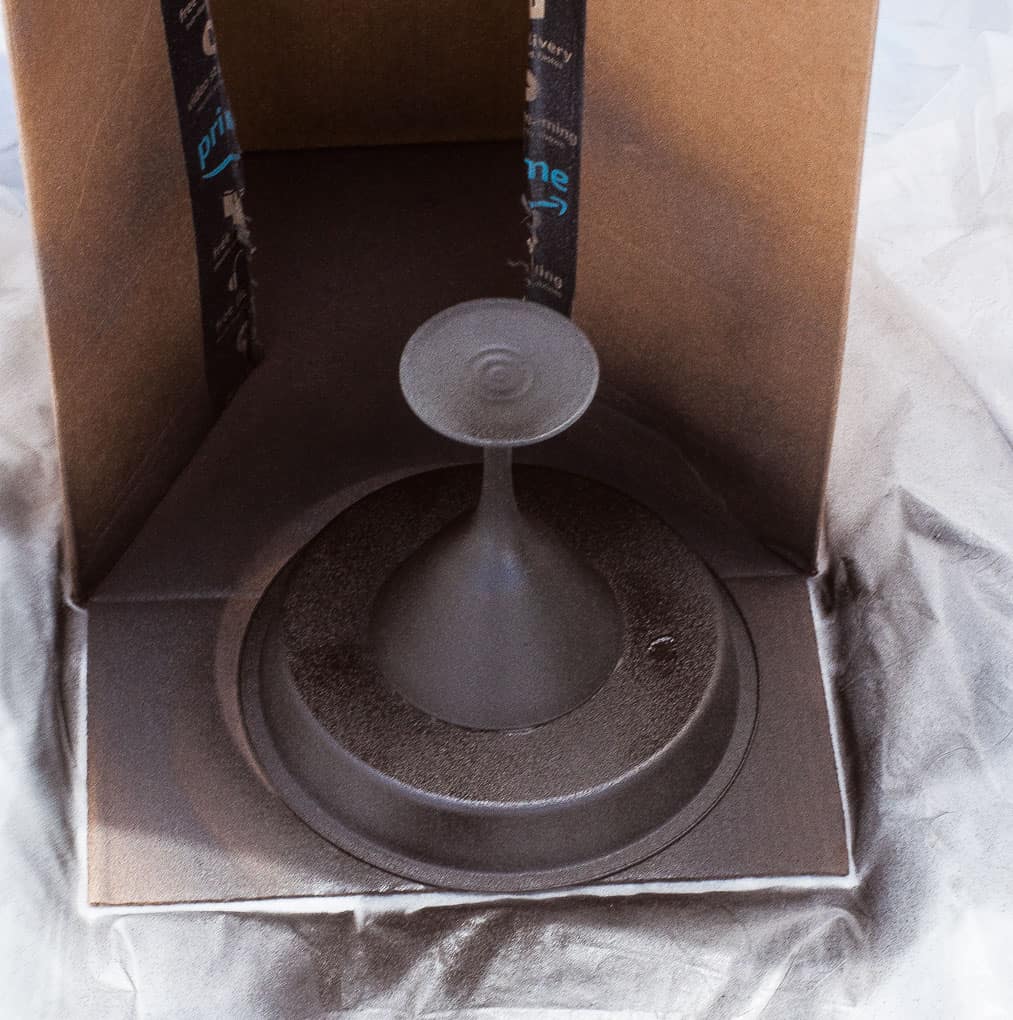
The first thing you will need to do is glue your cake plate and ‘stand’ together. Whether you choose a glass (you can even turn the glass upside down for a different look) or a candlestick for your stand, you will turn the pan with the bottom side up, spread glue on whatever part of the stand you want to attach to the pan, center it in the middle of the pan and press it firmly down. Next, you’ll carefully flip the pan and stand right-side-up. Place something in the middle of the pan (i.e., a small bowl or coffee cup) to help it stay firmly in place while it dries for 24 hours.
TEXTURIZE YOUR CAKE PLATE
In the past, I have used Rust-O-Leum Multi-Color Textured Spray in order to give some hardware a wrought iron look, and it worked perfectly. I thought the same process might add some depth and interest to this piece, too! Simply place the cake plate upside down, and follow the directions on the can. After applying several coats (spray as many coats as you like to achieve the look desired), turn the cake plate right-side-up and spray again, turning the plate as needed to apply even coats.
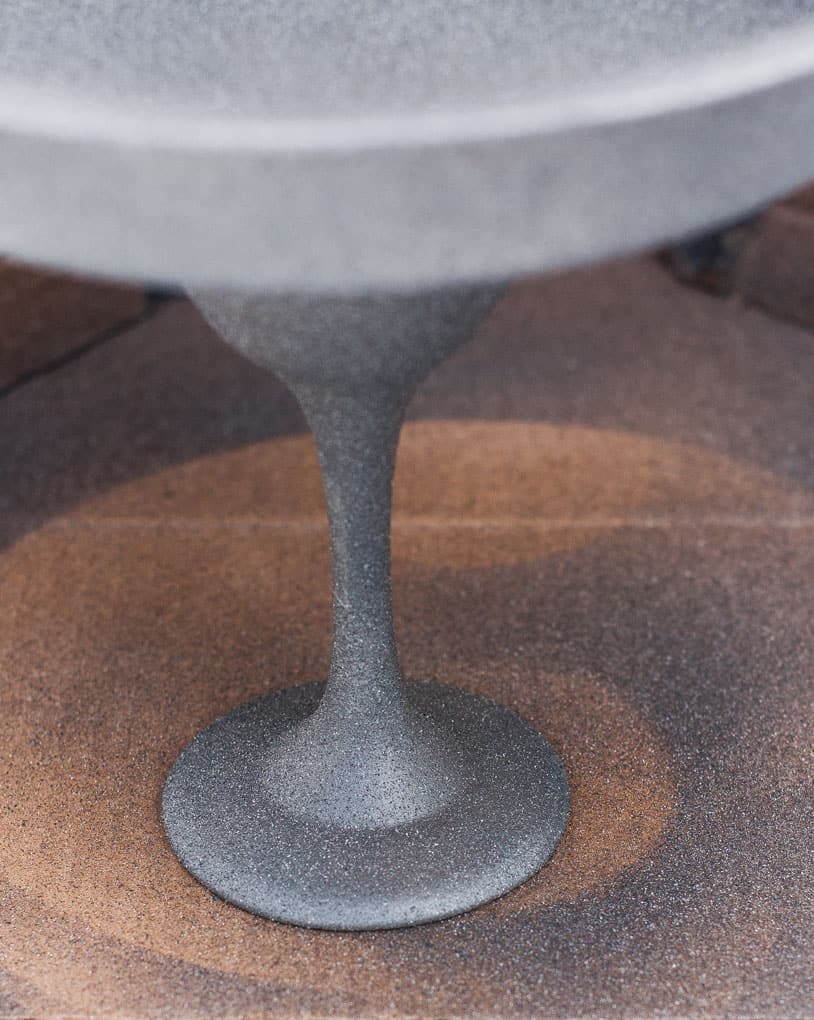
The HomeRight Small Spray Shelter made this process a lot easier! This was a windy day, and it was a bit difficult keeping my spray tent in place on the asphalt, so the cardboard box lent some added weight. One of my blogging friends, Wendi at H2O Bungalow, suggested to place bricks inside the shelter, at the corners, to keep it in place! Brilliant! (And it only flashed through my mind for a second to go steal the bricks from the neighbor’s wall. 😉 Whaaat?!) I also placed a lightweight plastic tarp (optional) in the bottom of the shelter to give it some added protection (I like to keep my HomeRight Small Spray Shelter looking nice).

SPRAY PAINT FLAT BLACK FINISH
This would have been my last step, except for the bump-in-the-road that I shared earlier. So, not only did I spray paint the cake plate with the Flat Protective Enamel, but it also received a complete coat of the Satin Finish! Do as I say, not as I do, friends. Only apply the FLAT PROTECTIVE ENAMEL, in the same way the Texture Spray was used.

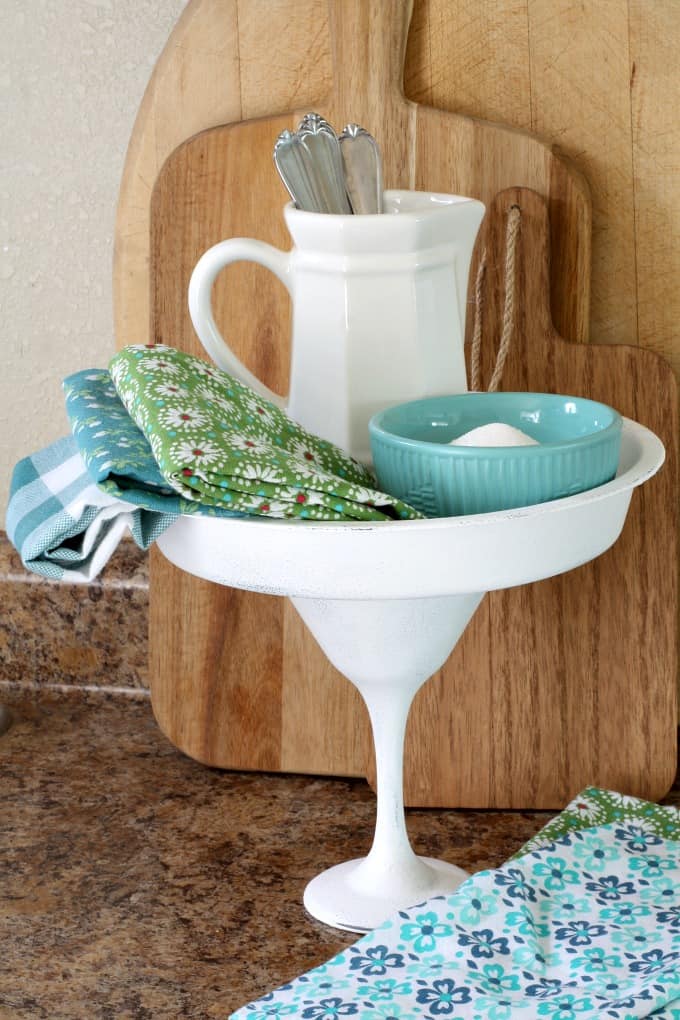
FINAL PRODUCT, Part 1
And this is what I finished with… kind of…
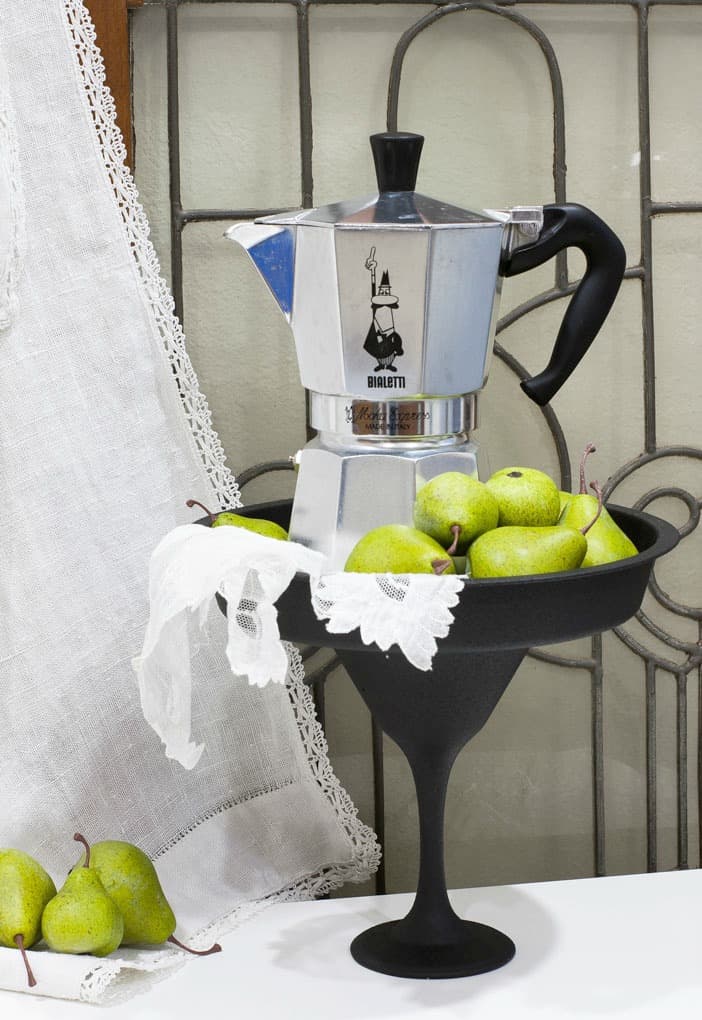
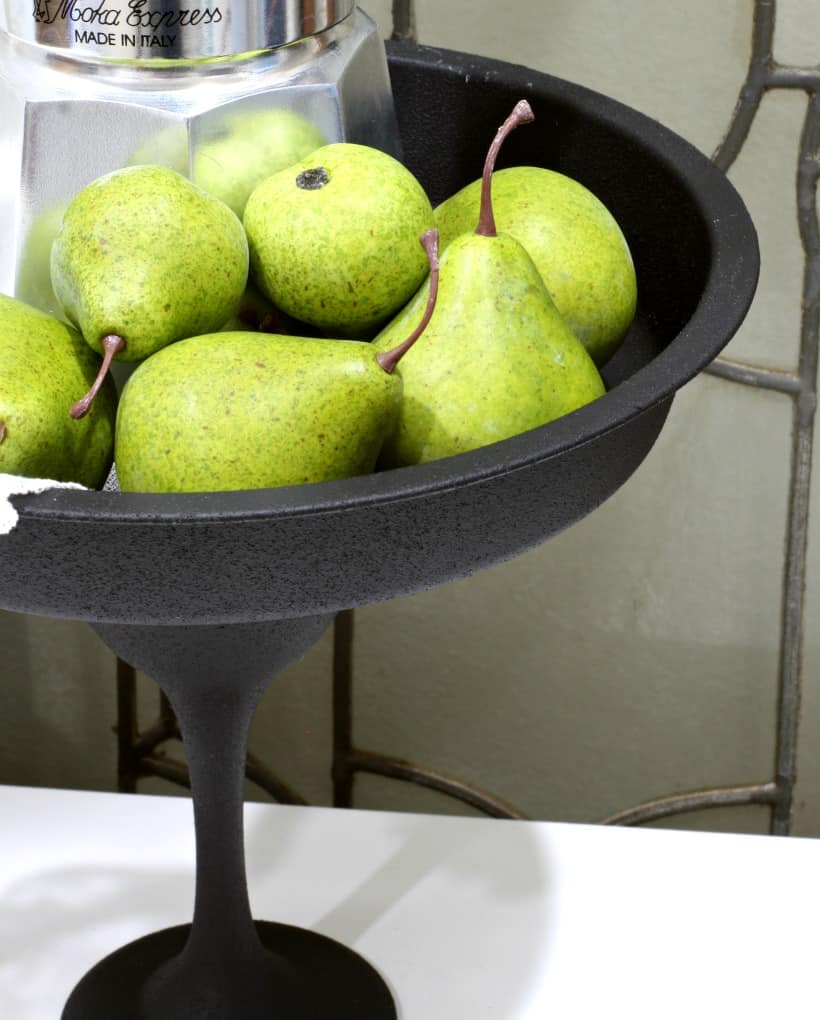
This is a lovely finish, especially if you prefer a warmer look with a more mid-century modern feel.
BUMP IN THE ROAD, Part 2
Now, if you like the black finish, which I actually do, you are all done. However, if you continue to glance at the cake stand throughout the day, and that night think, “That’s going to be WAY too dark for the makeover I’m doing”, then you might want to do this….
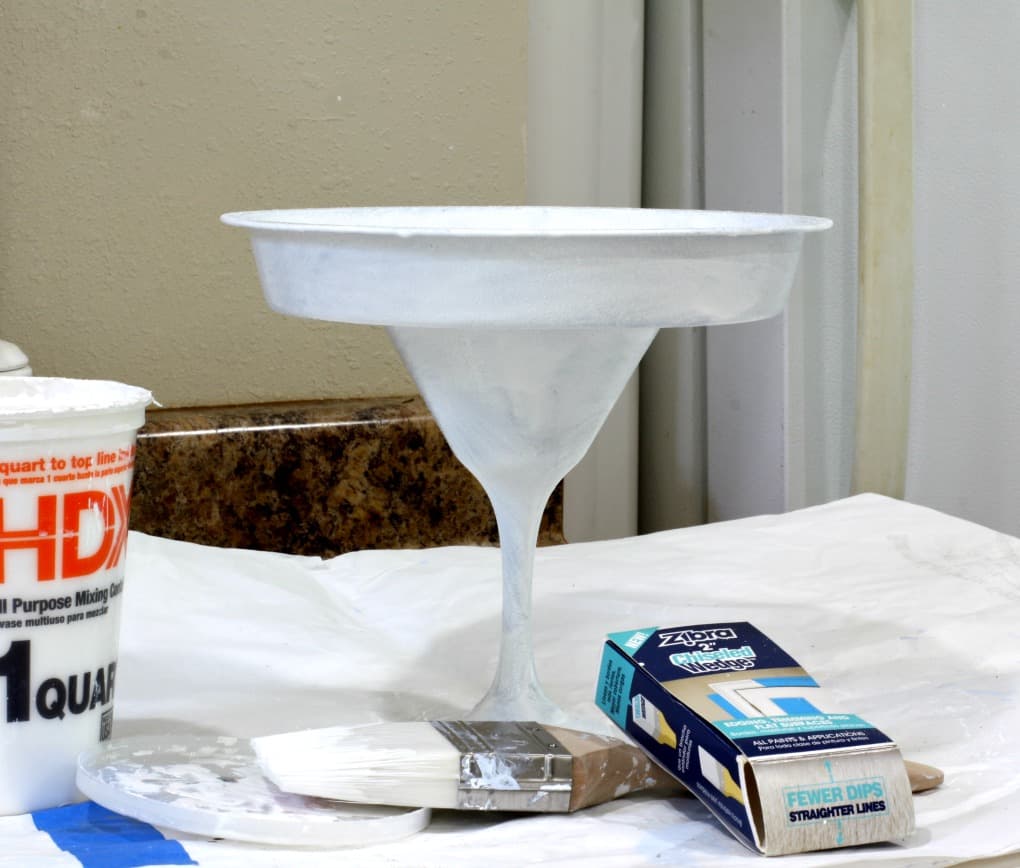
WHAT YOU’LL NEED, Part 2
- DIY White Chalk Paint
- Zibra Chisel Brush
- 150 grit sandpaper (I love this brand/type)
- White or Clear Americana Décor Cream Wax (you can get this at Hobby Lobby for 40% off with the weekly coupon)
- Lint Free Cloth
CHALK PAINT THAT CAKE PLATE IN WHITE!
Okay… I had to do it, y’all! Ask my family… my mantra is, “Paint it white”! If you have a dark corner in your kitchen that you need to makeover, a black cake plate ain’t gonna cut it. Also, if you like a more farmhouse-coastal-cottage feel, break out your Zibra Chisel Paint brush and chalk paint that puppy WHITE!
TAKE SOME SANDPAPER TO IT
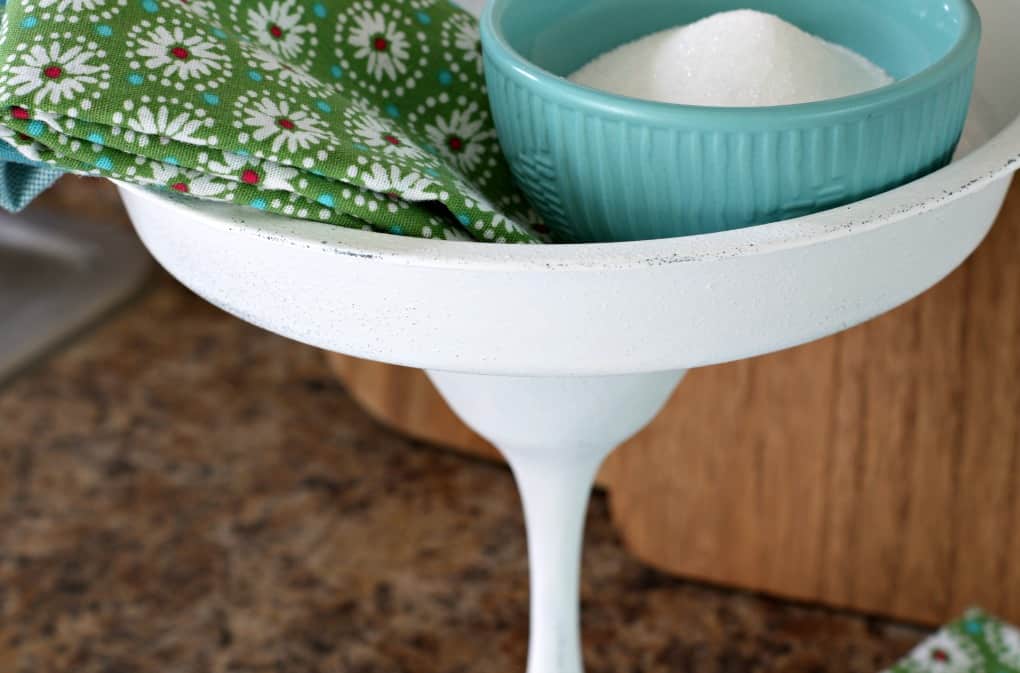
After the paint has dried (it took 2.5 coats to cover it), take your 150 grit sandpaper and “distress” to your heart’s content (or at least to your eye’s content). If it doesn’t look ‘finished’, chances are you need to sand it more. Remember, you can always paint it again if you sand too much. The black that was originally painted on the cake plate will show through and give it a vintage ‘enamel’ look. LOVE IT!!!
FINISH IT OFF WITH A WAX SEAL
After the distressing is done, take a damp cloth and wipe the cake plate off. This will remove any excess powder and prepare the surface for a wax coat.
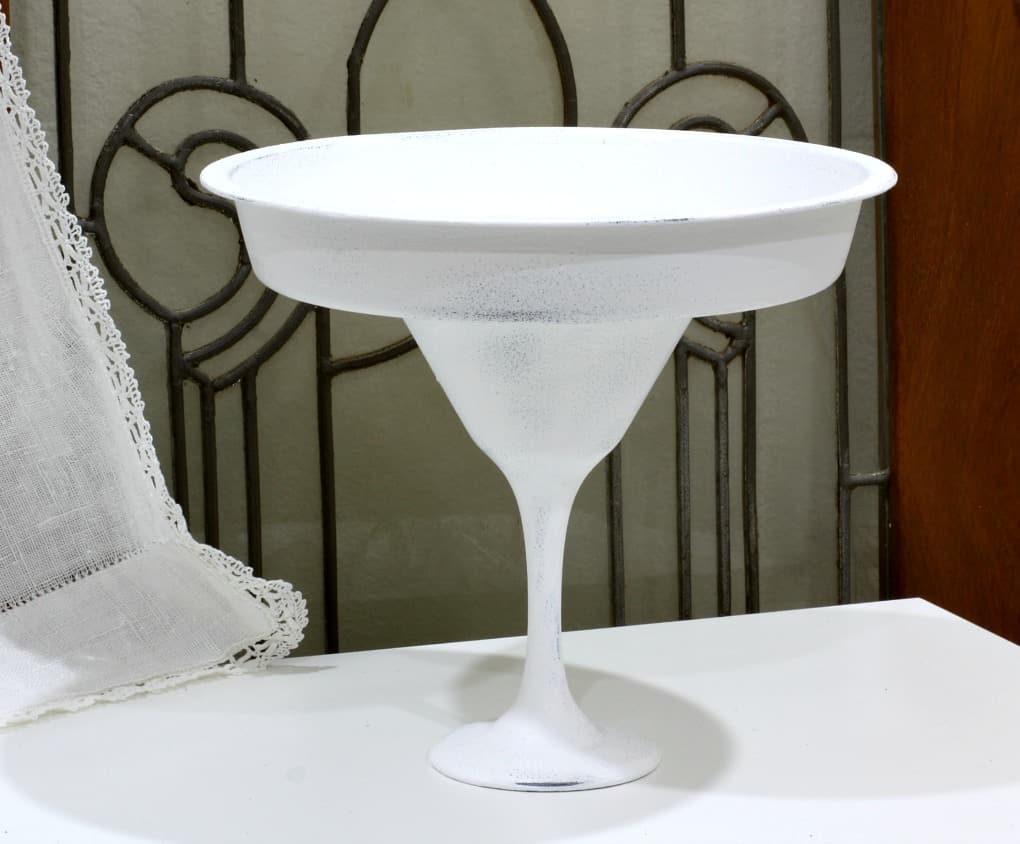
Apply an even coat of Americana Décor Liquid Wax (I prefer the white wax because it gives the cake plate a more vintage “creamy” enamel look) using a lint free cloth. After the wax has dried (usually 15-30 minutes), take a clean lint free cloth and buff the wax. The more your buff, the more satin the finish will become. (I don’t buff my wax too much because I prefer to keep the chalk-like finish on my pieces).
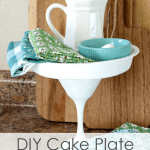
FINAL PRODUCT, Part 2, and FINALE
So here you go… this is much more my style, don’t ya think? (And just look at the counter space that is still available underneath!)
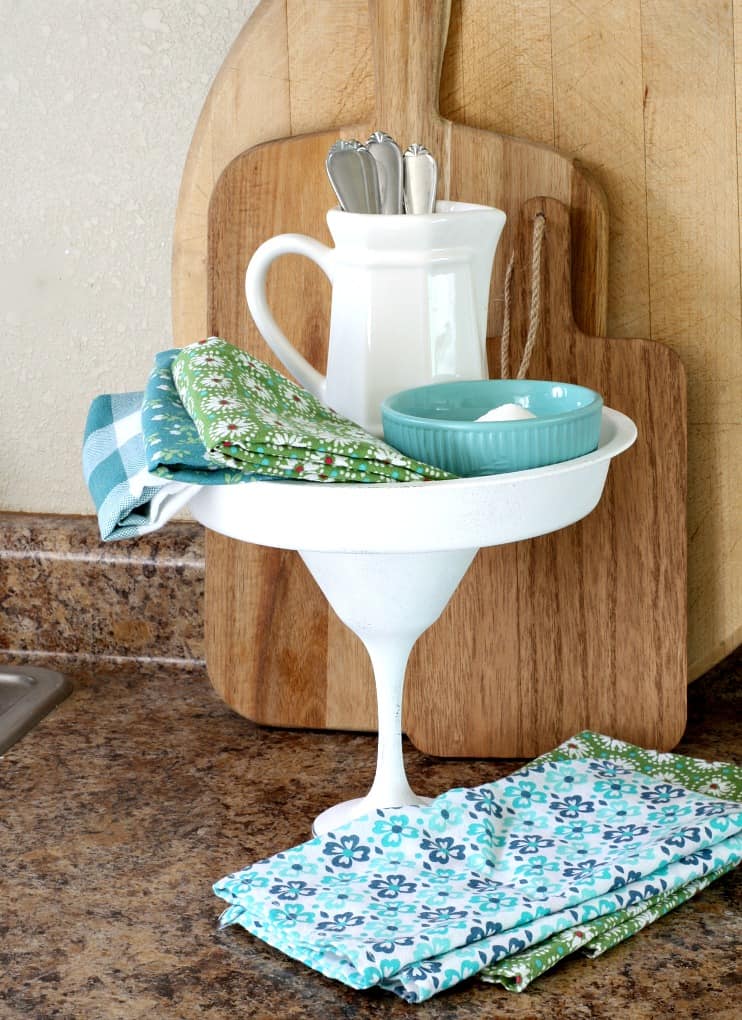
Love the black peeking through!

Definitely more my style…
So, which do you like better? Might you even be bold and do this in another color? Did you catch any clues about my upcoming makeover (check my text and photos)? I would love to hear from you in the comments!


Love the white! It looks terrific. Next project….lace tatting?!!!
Thanks, Peg! I do NOT think I will be doing lace tatting! 😉 It’s a pretty linen though, isn’t it?
I’m loving the white! It fits in so much with your current decor 🙂 Really neat way that you put those things together to make a cake plate!
Thanks, Marissa! Yes, the white makes me happy-sigh. Funny, my sister loved the black more! 😉 I think it’s neat how we can all be different!
The white is awesome! Made me laugh about thinking of “borrowing” the bricks. 🙂
Thanks, honey… glad I made you chuckle! 😉 I’m definitely getting wilder being an empty-nester!… JK!! Love ya!
They are both lovely! But I’m a bigger fan of the black. Love the green contrast!!
Thanks, Deeds! Yep, I’m definitely the light-airy decor sister, and your are the warm-rustic sister! 😉 Love it, and you!!!
That is so clever!! I love it!!
Thanks so much, Vicki! You got your first email then? 🙂 Hope you enjoyed it! Have a wonderful week!
Super fun project, Julie. I like it white better too. What a great way to repurpose and get a new item. the sum is better than the parts.
Thank you so much, Carol! I’m excited to share where it will be going in my little place. 😉 Thanks for the encouragement!
So fanthy. *raises eyebrows a few times*
Thanks, Boo! You’re pretty fanthy yourthelf! 😉
I love this unique spin on gluing two things together to make a stand. I would have never thought to use a cake pan.
Thanks, Dru! It’s going to come in very handy for my makeover coming soon! 😉 Thanks for dropping by!
beautifully styled Julie, both ways. Although I have been leaning toward the light side lately.
Thanks, Mary… I have always liked the lighter side… but I thought the darker would look more like a chalkboard effect. But, it was too dark for where it is going to live. 😉 Looking forward to seeing you soon!
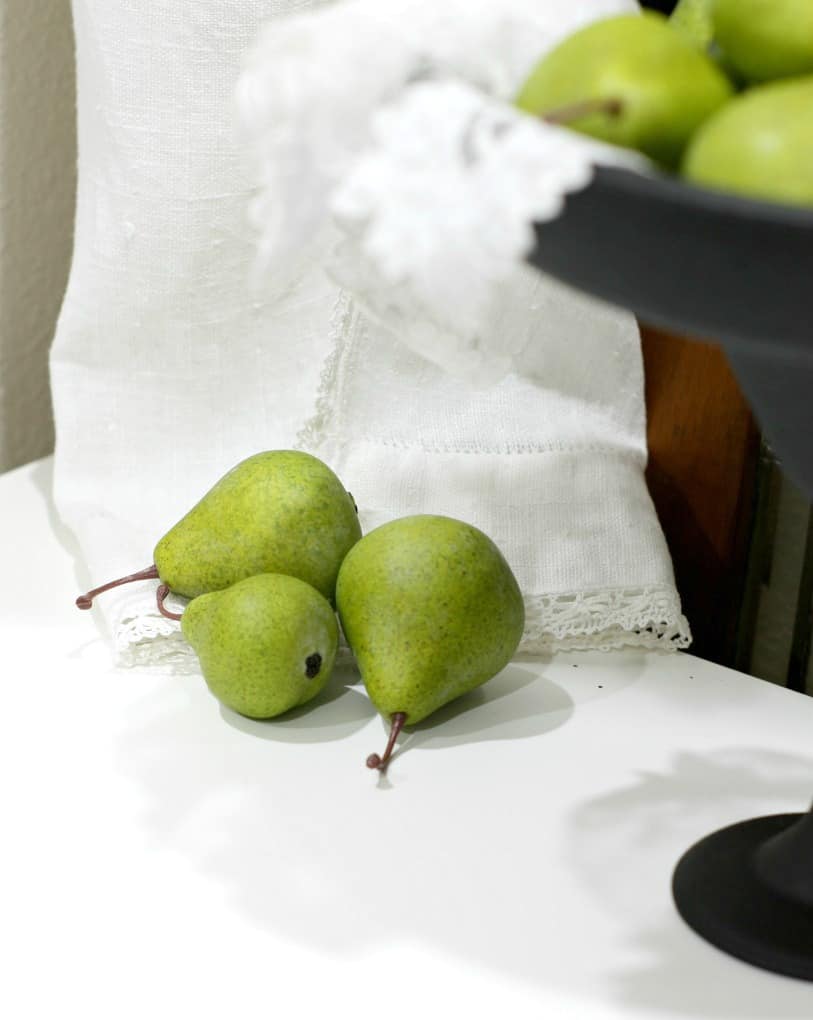
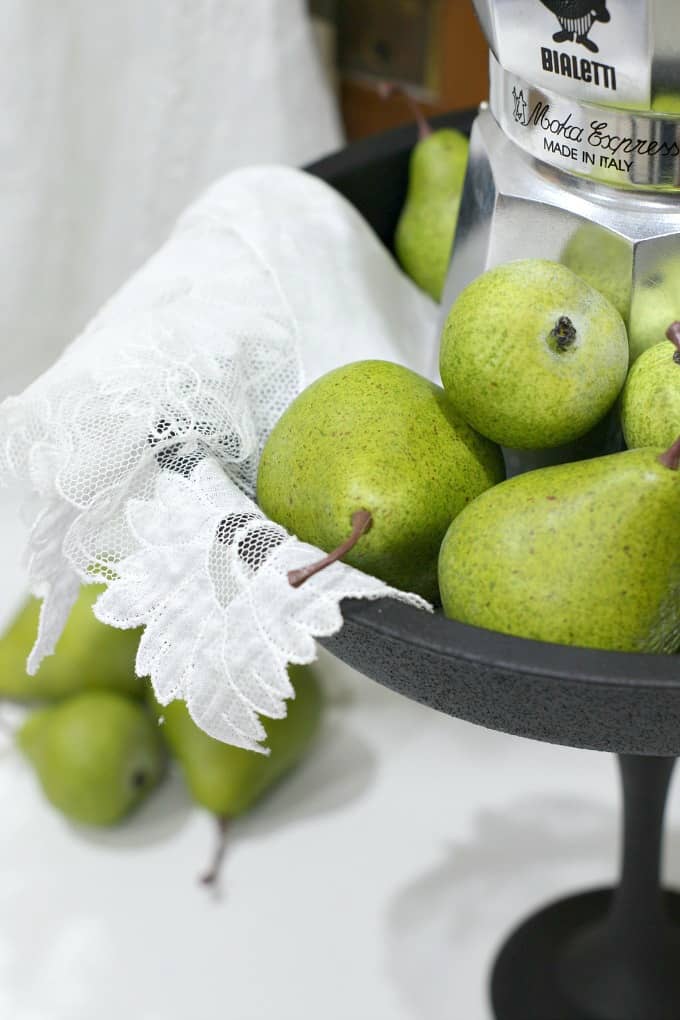
These are so clever and you have styled them so pretty. I have a green compote on my kitchen island where we keep fresh fruit. It’s a great resource and I think your cake plates would work well for this purpose too.
I love that black speckle-y finish, looks so old world.
Thanks so much! It’s perfect for where I’m using it… coming soon! 😉
I really like the white version and the same happens to me all the time too. White just makes everything brighter and looks great always. Your cake stand is such a fun and easy project, perfect for short weekends too!
Thanks for visiting, Katrin! Yes…. I’m definitely a ‘white’ girl. LOL! However, that black reminds me of a chalkboard… would probably look cool with some chalk smudges or dry brush! Man… now I wish I would have added that! Oh well… we are always thinking, right? Hugs and hearts!
I love them both but I prefer the black one for my kitchen 🙂 What a brilliant idea!!!
Thanks for dropping in, Christina! I love that we all have different tastes! And, yes, the black is quite striking! Have a wonderful weekend!
Hi Julie! Your project is SO creative! I wouldn’t have guessed it was made with the glass and tin if I hadn’t have read your post! I like them both but am partial to the white one. Especially with the white pitcher and pretty turquoise blue ramekin 🙂 Pinned!!
Thanks, Wendi! I’m finding that I need to remember that, when it comes down to it, I always like light and airy. I SO appreciate the black, but it just doesn’t work for me… at this time. 😉 Thanks for the pin, and the love! <3
Hi Julie! Love this idea!!! I’ve seen pretty plates glued to those old 1980’s glass candleholders before but not anything like yours. I love how tall your display stand is! Beautiful idea!!!
Thanks, Barbara! I needed it tall for the area I’m using it in. 🙂 Leaves the counter space open still! 😉 Thanks for supporting me, dear friend!
Love this idea Julie! Great project and tutorial.
Thanks, Michelle… I so appreciate the support and love my fellow bloggers give! Hugs and hearts, friend!
Julie You are brilliant to use a glass as the pedestal base!! It looks like it is all one piece now! My fave is the lighter colored one too!
Thank you, Cindy. It was fun to create, and I still use it at my coffee station!
What a cute way to style a cake plate! I love my tent for painting too.
Maria
Thanks, Maria! The cake plate will make another showing soon! In it’s regular ‘home’! Hugs, friend!
Julie, this is super cute!!
Thanks so much, Stacey (btw… you and my son share the same name!). I’m glad you dropped in! Are you heading to Haven this year? Hugs and hearts!
This is so cool. You are amazing in all that you can do. Creativity and intelligence in one package. I pinned this one and maybe one day I will get ambitious or maybe I could commission you to make me one in all of your spare time! Haha! Love you sister.
Thanks, Teresa… There are so many to choose from, and the price is great, too! I’m sure a DIY pillow cover will be a future post… sew and no-sew! Love you, too, T!
Love how they both turned out Julie. If I had to choose between the two I’d go for the dark and gritty version. It looks so solid and medievalish.
Hey, Michelle! Thanks so much for the encouraging words. I love how both versions have been favored! And, love how you call it ‘gritty’! 😉 My sister likes the black because she likes warmer tones… and is more MCM as opposed to my love for coastal/cottage/farmhouse! Glad you liked the post!:-D
This is so cool Julie! Love it! As someone who makes a lot of cakes this looks awesome:)
Jessica! Thanks for dropping in, and for the kind words! I’m glad you like it! Have a great week, friend! Hugs!
I will definitely be looking at Dollar Tree items with new eyes! Love the white version.
Hehe…Linda, I’m surprised you haven’t thought of this before! 😉 White is definitely my fave, too! Thanks for coming by, dear friend!
Hi Julie! What a great project! I love both colors and the way you have styled them. Love your bread boards too! I am featuring you today at TFT. Thanks for joining us. Have a great weekend ahead!
https://followtheyellowbrickhome.com/enjoying-summer-splendor-at-thursday-favorite-things/
Thank you so much!!! Really, very thankful! Hugs!
I like both the white and black versions and it’s great that it’s easy too!
Thanks, Carol! I REALLY like both, as well! If I had room in My Wee Abode, I would make BOTH and change them out for the seasons! 😉 Thanks for coming by! XO
Julie, this is adorable!! Look how creative you are! I’m seriously going to have to make one for myself now! Pinned! Happy TFT!
Theresa
Aw, thanks so much, Theresa! Would love to see it when you are done… come post it on my FB page, if you like! Hugs & hearts!
I’ve been thinking about making something like this for quite awhile. Love the inspiration. I was thinking about maybe leaving the glass clear and maybe gluing something small inside like a miniature Fairy Garden or something similar. Thank again for the inspiration !!!!!!!!
Barb
Oh! That’s a cute idea! Like creating a waterless snowglobe of sorts! Cute! So glad you shared, Barbara!