
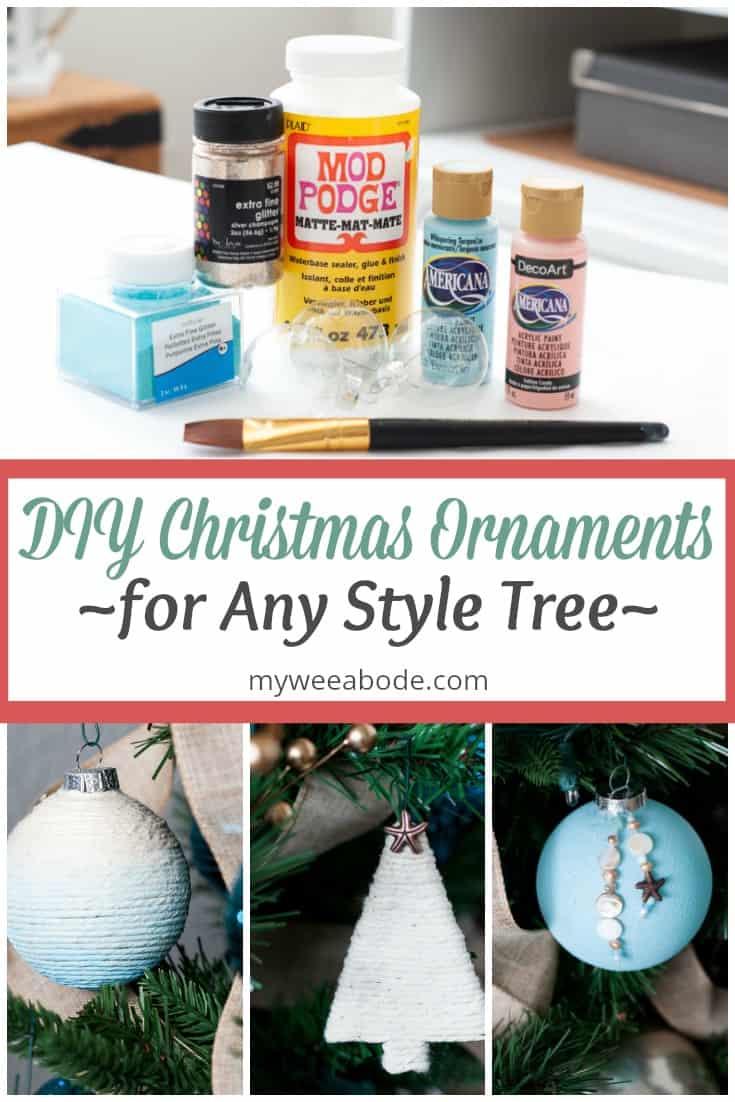
Easy DIY Coastal Christmas Ornaments
The Christmas season has begun, and what better way to start than with these easy DIY coastal Christmas ornaments that can be switched-up for any style and used on large or small Christmas trees!
So glad you dropped in today! December is here, and we are well into the Christmas season. Of course, with this season comes the delight of gorgeous décor! How ‘bout you? Have you started your Christmas decorating? Sometimes I find myself running a bit late, which has definitely happened this year. However, I wanted to be able to share some Christmas crafts and decorating tips with you, and we’re going to start today with some easy DIY coastal Christmas ornaments that you can put your own spin on. And, these are GREAT for large or small Christmas trees.
If you want to add some FREE Christmas decor to your walls, you won’t want to miss these Christmas and Winter Printables.
EASY DIY COASTAL CHRISTMAS ORNAMENTS
Now, y’all know I live on the coast of sunny So Cal. And you also know that I tend to love all the blues and aquas that often go along with living in this beautiful and balmy area. 😉 But, have you noticed? I’m not an ‘all-out-beach-loving-decorator’.
Don’t get me wrong! I love the homes that feature beach signs and shells and other beach-coastal elements. But, wait for it…. I really don’t like the beach! Duh, duh, duhhhhhh! Never have and, at the ripe old age of …, I’m thinkin’ I never will. So my coastal touches tend to be a bit more understated. Simply ‘coastal’, not necessarily ‘beach-y’. Give me some aqua anything, a sand dollar, and a starfish or two, and I’m a happy camper. Just don’t ask me to camp at the beach! 😉
(BTW, in case you were wondering about the “HomeRight Refresh Your Walls Today” bloggers challenge… guess who won second place?! You can see all the entries HERE, as well as see the top three winners!)
With that said, we’re going to make a few understated coastal ornaments that, with a twist or two, would look lovely on LOTS of different styled Christmas trees… Farmhouse, cottage, even mid-century modern… maybe? Let’s get to it!
This post may contain affiliate links, at no additional cost to you.
For more information, see my complete disclosure HERE.
General Supplies for DIY Ornaments
Here are a few items that you will need for ALL of these ornaments. Specific items for each ornament will be listed with the individual ornament instructions.
- Clear glass ornaments
- Quick Dry Tacky Glue (I like this variety pack for lots of different crafts)
- Paint Brush
- Small bowls to hold liquids (paint, Mod Podge, etc.)
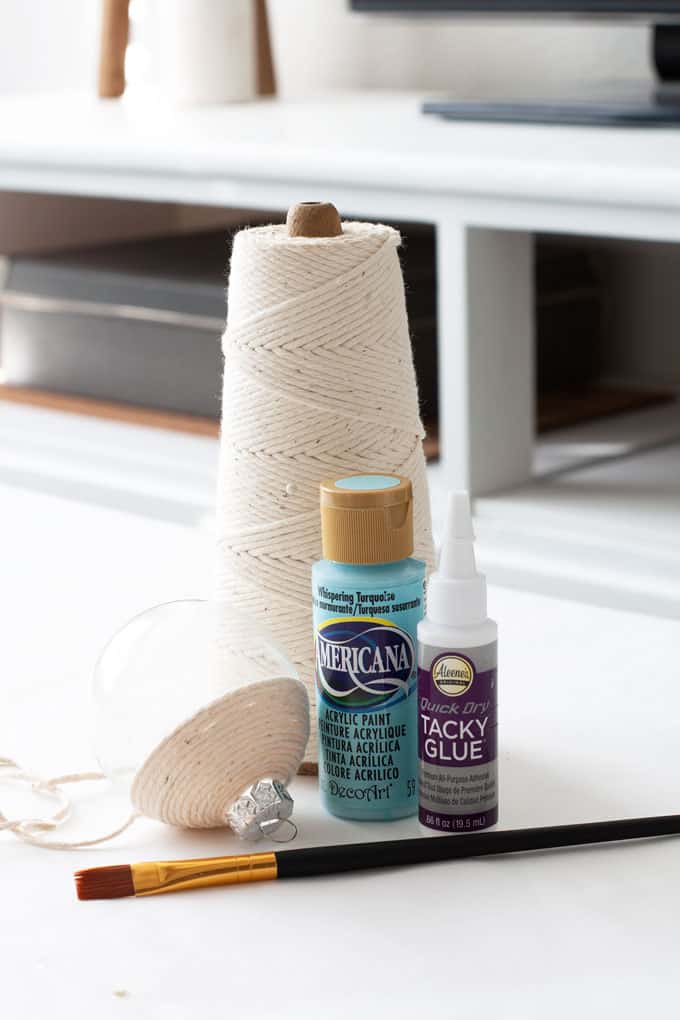
Ombre Twine Ornament
Additional supplies needed:
- Cotton Twine
- White or off-white acrylic paint (for base coat)
- Acrylic Paint Color of your choice (I used FolkArt’s Metallic Rose Gold and Americana Whispering Turquoise)
Make sure to clean all the ornaments with rubbing alcohol to remove any dirt/oils from the surface.
Remove the metal ornament top, and paint the whole ornament with one coat of white/off-white paint. This will ensure that the smallest of gaps won’t show between the twine. Yep, I learned the hard way.
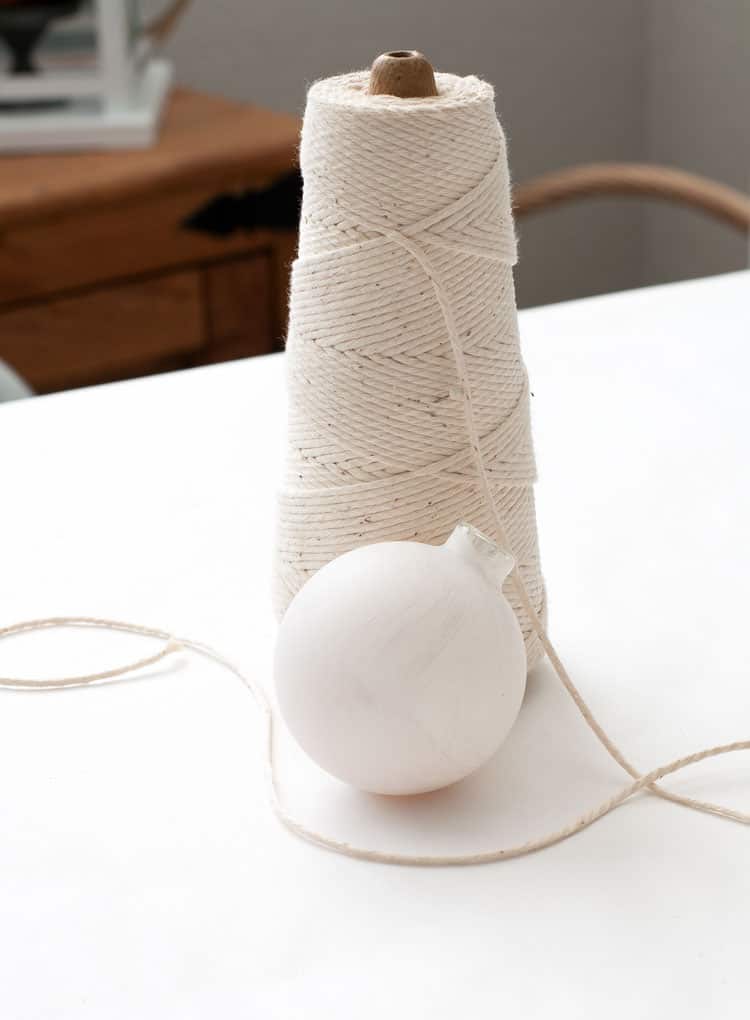
Apply a thin coat of the QUICK DRY Tacky Glue to the top of the ornament, about ½ inch down and around. Place about ½ inch of the end of the twine going down the ornament, and then begin wrapping the twine around from the top (at the base of the ‘neck’) going down, making sure the end of the twine is hidden underneath as you go. This will anchor the twine, and it won’t be visible. 😉
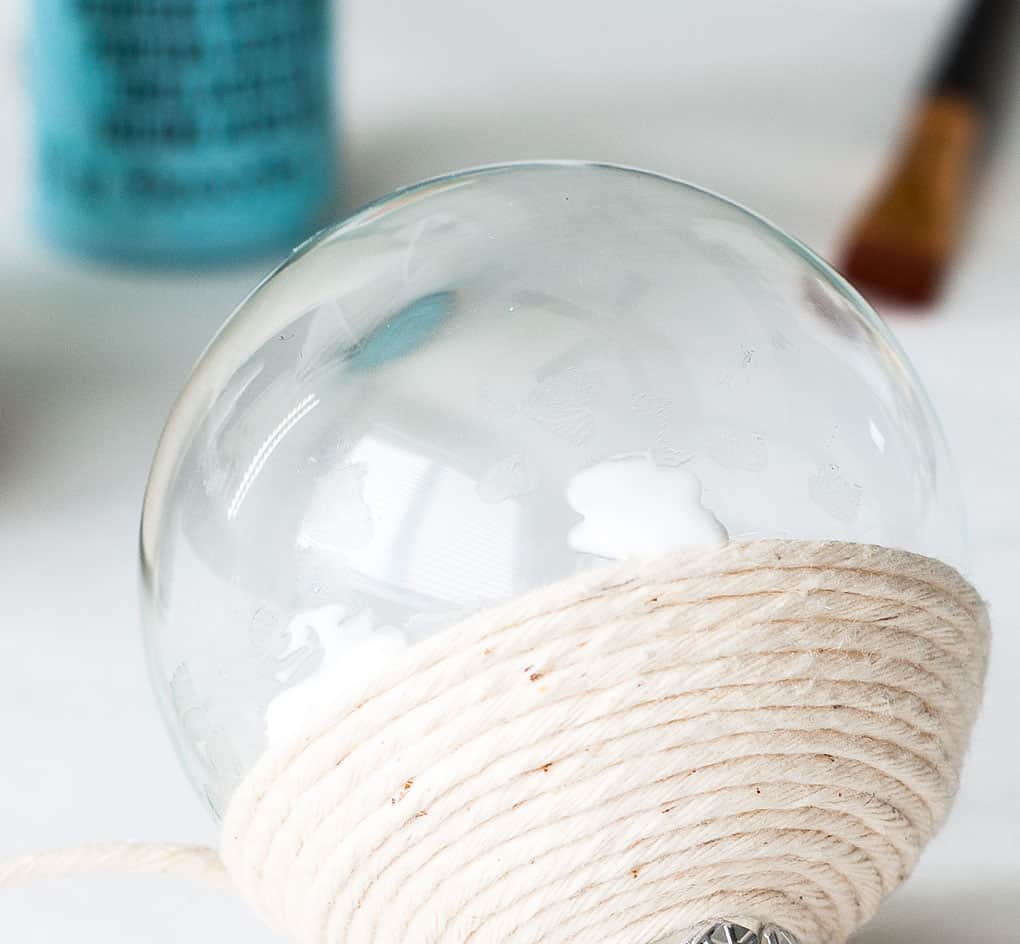
Continue adding glue and wrapping until you get to the bottom (Note: as you go, gently press each strand up against the last strand, to help eliminate ‘gaps’.) When you have the smallest of an opening at the bottom, clip off the twine at about ¼ of an inch and twist and glue into the little ‘hole’ that will be left.
BTW, you can also create a Christmas Wooden Bead Garland with cotton twine tassels.
After the glue has dried (wait about ½ hour), it’s time to add the ombre effect. Starting at the middle of the ornament, use the Whispering Turquoise (or Rose Gold) paint and dry brush the twine, using very little paint at the top, and more as you go down. “Dry brush” is a simple technique where you dip your brush into the paint and wipe off most of the paint on a cloth or paper towel. Then you brush the remaining paint on your brush onto the surface you are painting. For best results, at first, wipe off most of your paint from your brush. You can always add more afterward.
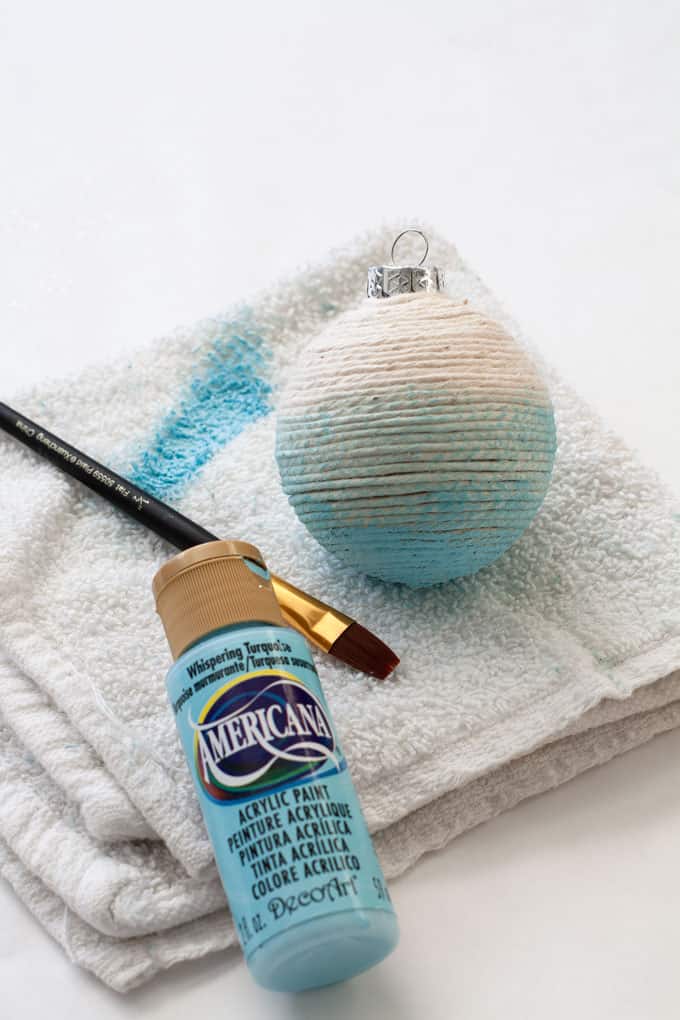
To keep the bottom dark and solid, don’t wipe off any of the paint from your brush.
Replace the metal top and admire your creation! 😉
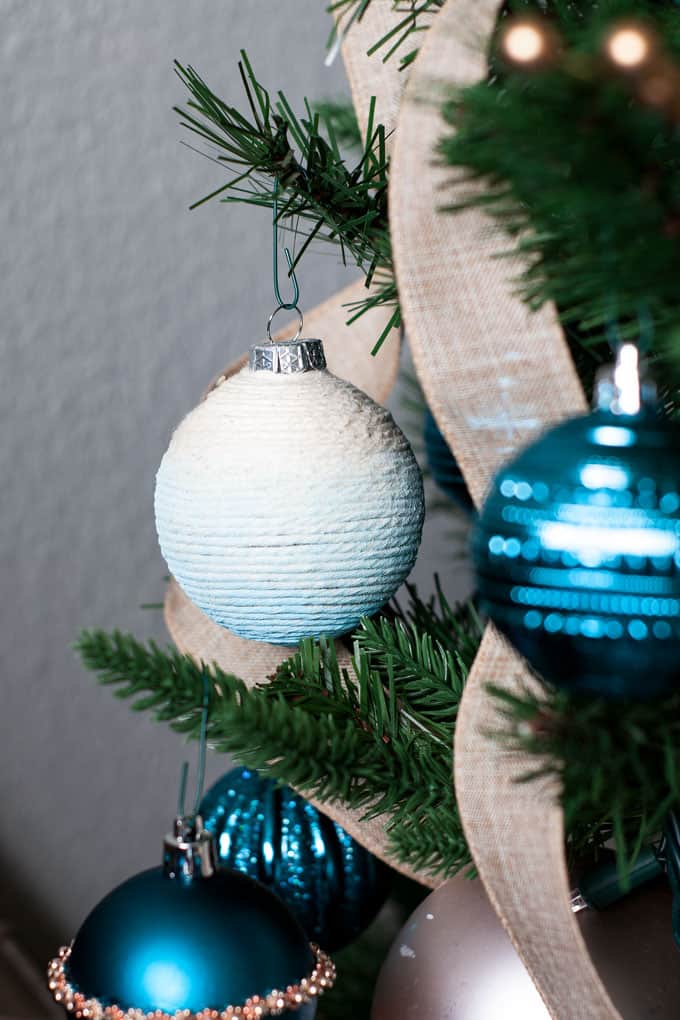
You can use any color you want for this ornament and put your own spin on the ombre look. I love the natural appearance of the twine, and the understated coastal style. (You’ll get to see the Rose Gold color in my next post!)
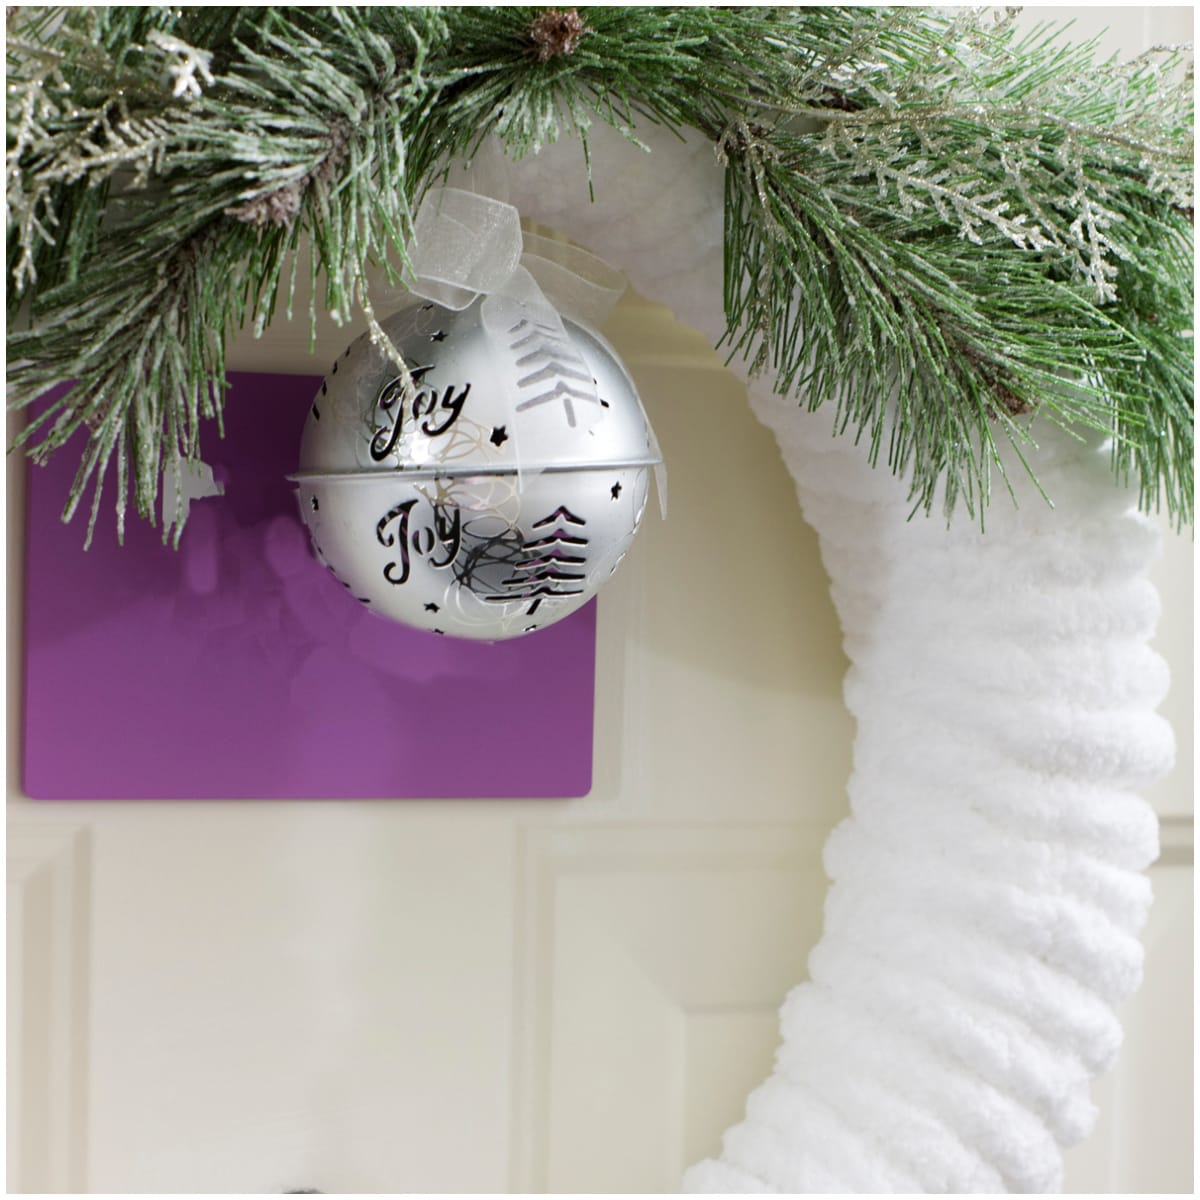
Extra Sparkly Ornament
Additional supplies needed:
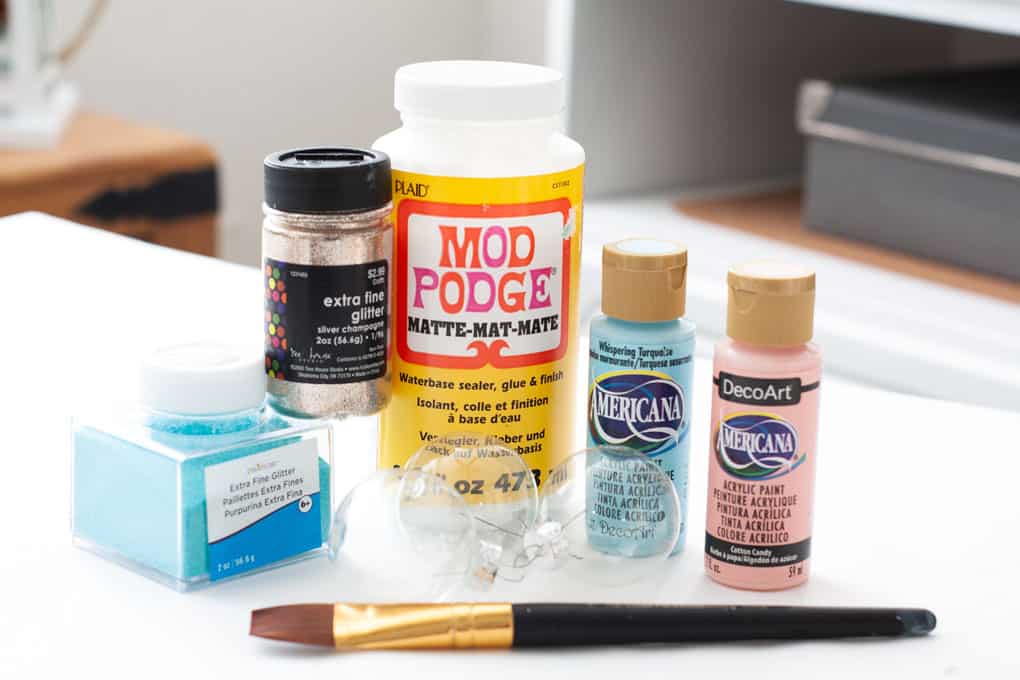
- Extra fine glitter (your choice of color) (Pick this up at your local craft store for the best price!)
- Acrylic paint (to coordinate with your glitter…I used DecoArt’s Americana Whispering Turquoise and Cotton Candy)
- Mod Podge Matte Finish
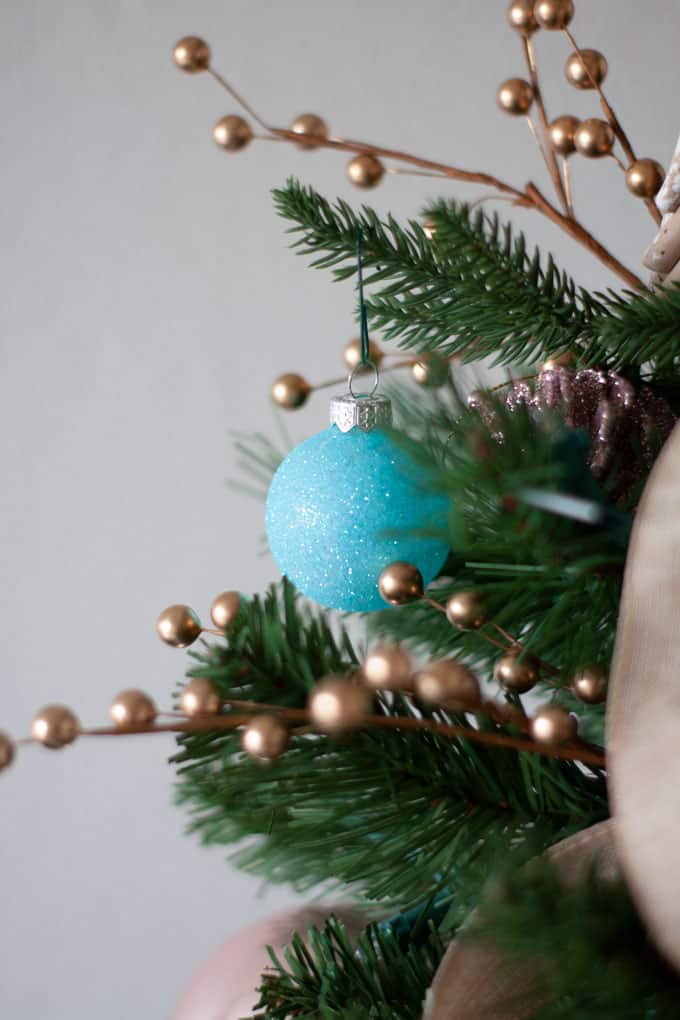
This one is SUPER simple! I love how it gives MAJOR sparkle to a large or small Christmas tree, no matter how you choose to decorate.
Remove the metal top from the glass ornament and paint with two coats of your choice of paint.
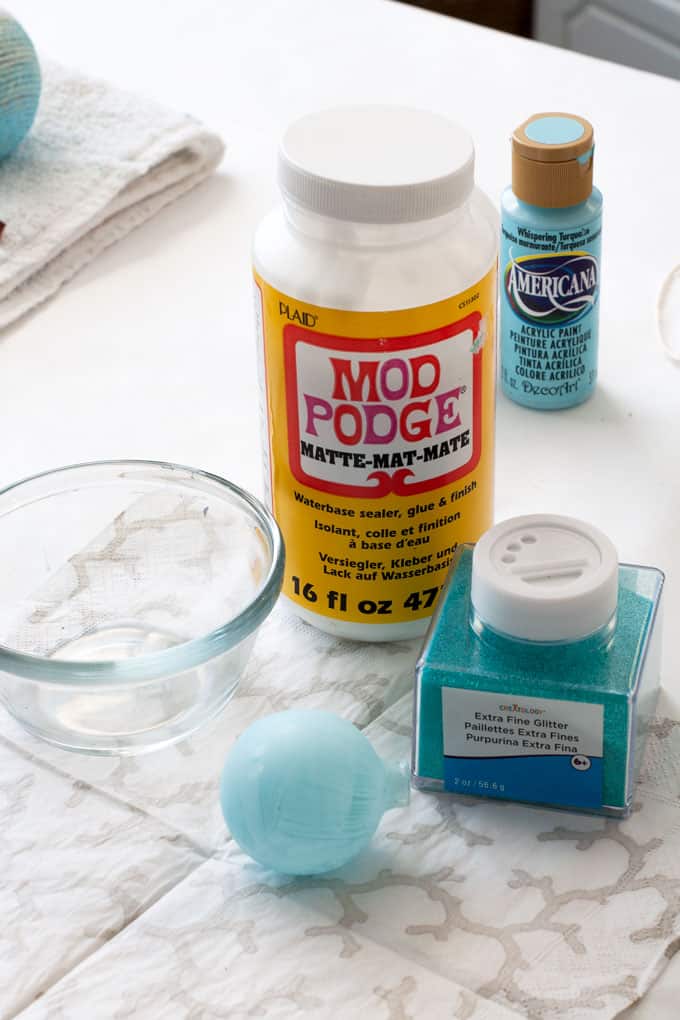
After the paint is thoroughly dry, paint the ornament with one coat of Mod Podge and IMMEDIATELY sprinkle a generous amount of glitter on the ornament. Be sure to cover completely.
Shake off the loose glitter and let dry. After the ornament has dried (I let it dry overnight), gently tap the ornament onto a paper towel on a firm surface. This will help remove any glitter that didn’t adhere.
Replace your metal top and… easy-peasy!
Again… in my next post, I’ll share my Rose Gold variation!
Twine Tree with Starfish Topper
Additional items needed:
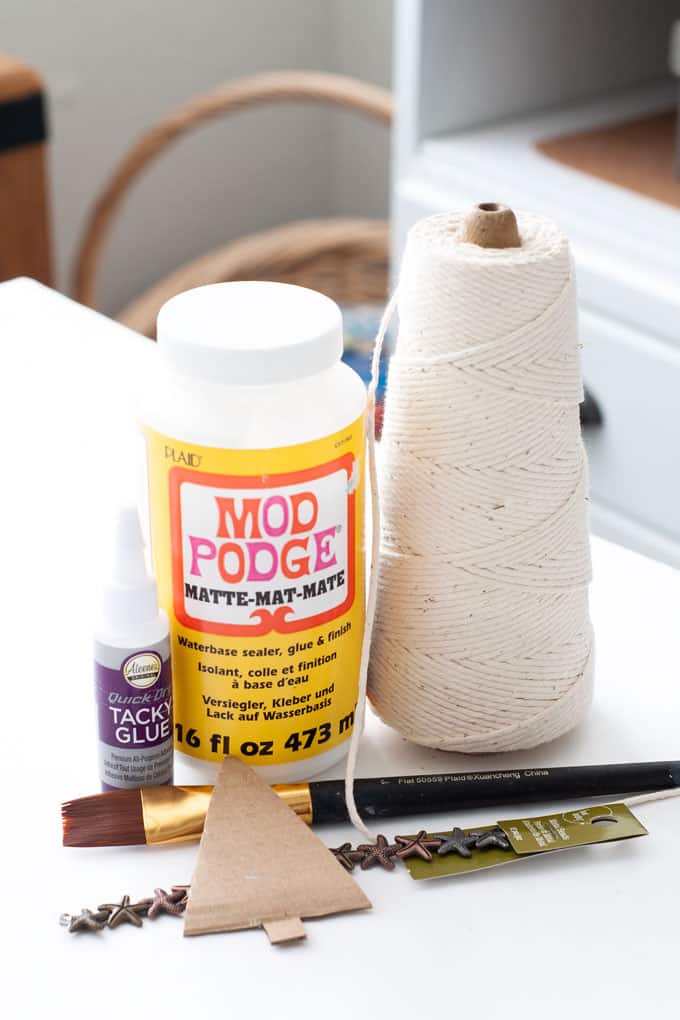
- Cardboard cut into the shape of a Christmas tree
- Cotton twine
- Starfish bead/jewel… THESE are totally cute! (or whatever you desire to embellish with)
Again, this one is uber easy and will look lovely on a rustic tree, coastal tree, or even a traditional tree! My inspiration for this ornament is from Andrea at The Cottage Market! Her farmhouse twine ornament is SO pretty!
After cutting out your cardboard tree, apply QUICK DRY Tacky Glue on both sides of the tree (I did about an inch down as I went). To hide the end of the twine, use the same technique described in the Ombre Ornament.
Continue to wrap the twine around the cardboard, making sure to gently press each strand up next to the last strand. This will help eliminate ‘gaps’. At the bottom of the tree, cut the twine and glued it down, then wrap the ‘stump’ of the tree separately.
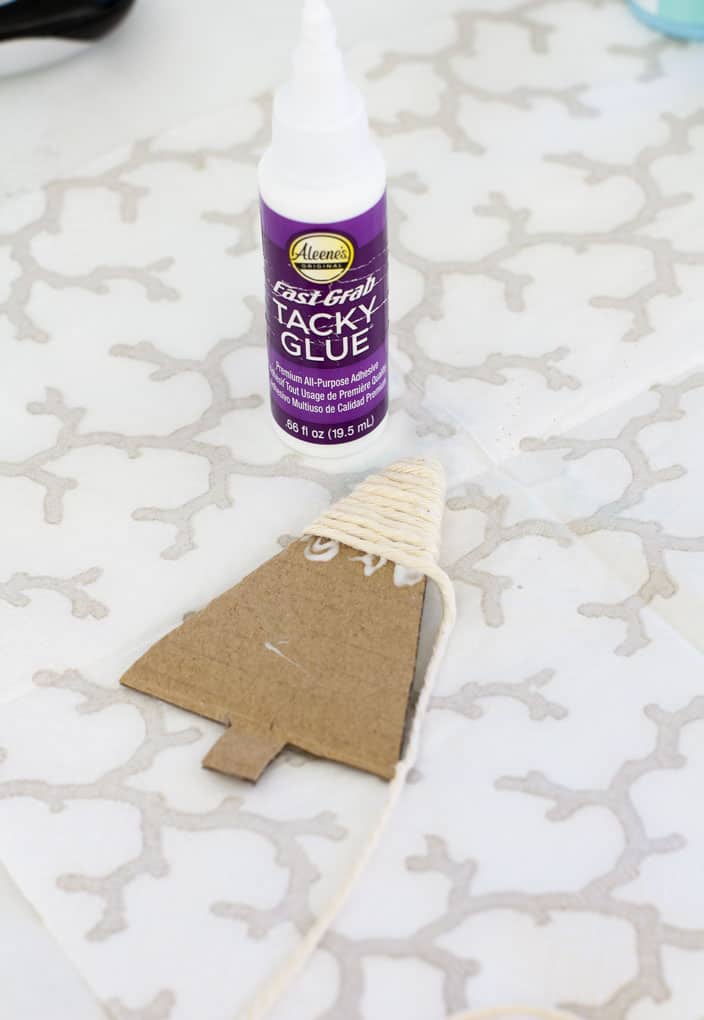
Glue the star to the top and slide an ornament hook on the back, and you’re done!
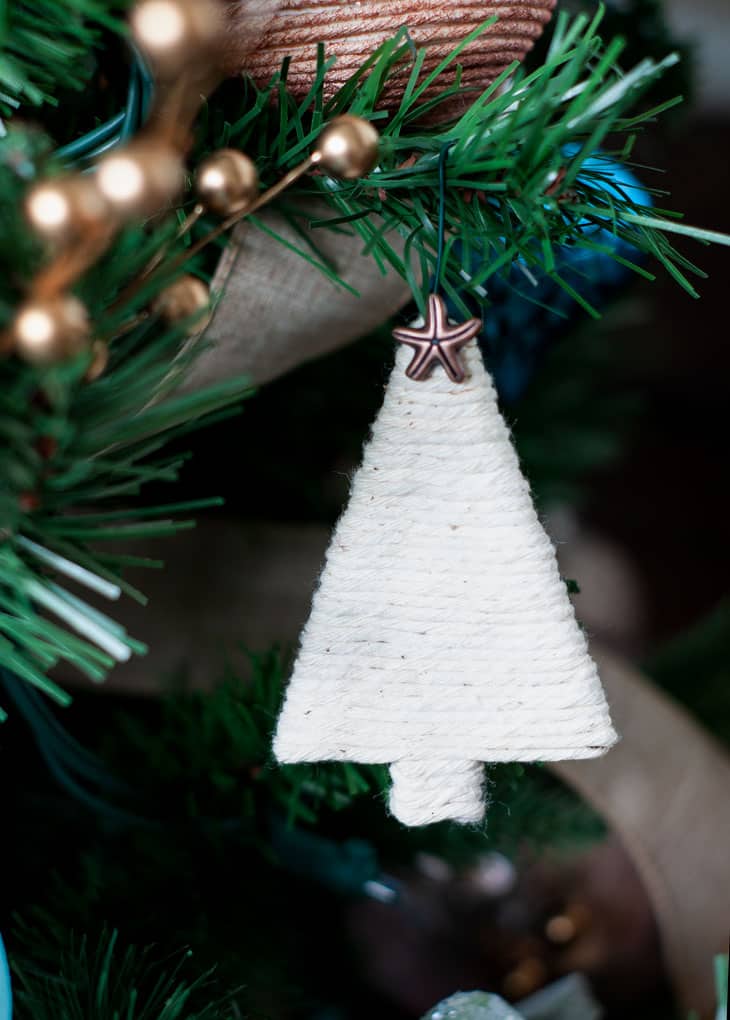
(Ooooo, do you see a little Rose Gold peeking out at the top of the photo?)
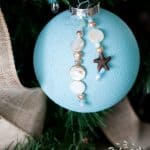
Sea Glass Ornament with Charms
Additional supplies needed:
- Martha Stewart Sea Glass paint (I used Blue Calico and Sea Lavender, which is actually an aqua.. and it’s cheaper at your local craft store 😉 )
- Medium Foam Stipple Paint Brush
- Various beads/charms (I waited for mine to go on ‘Doorbuster’ at Michael’s for 70% off!)
- Beading thread
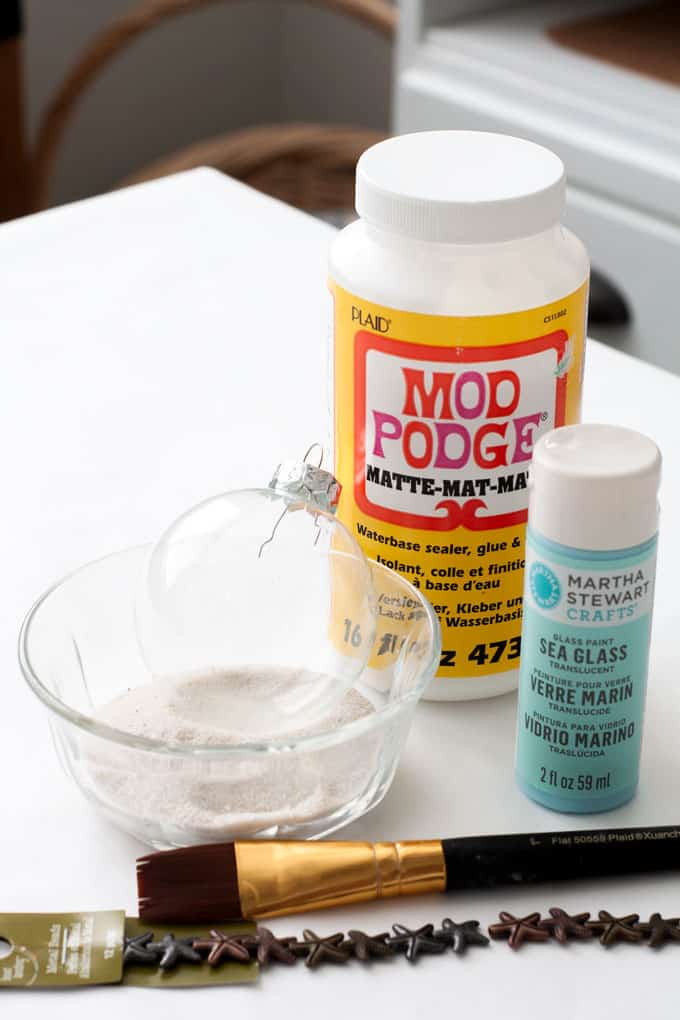
Inspired by Kim from Sand and Sisal, these sea glass ornaments are the perfect coastal touch for your Christmas tree. I had never tried creating a sea glass look, so I was especially delighted with the results!
After removing the metal top and cleaning the ornament with rubbing alcohol, take the stipple brush and dip it into your choice of Sea Glass paint. Using an up-and-down motion, simply apply the paint with the brush setting flat against the ornament. (I used three coats, but now I wish I has only used two, to get a more translucent look. But, use as many coats as YOU like!)

Adding “Charm”
After the ornament has thoroughly dried, add your charms. String your choice of beads on clear beading thread. Tie off the thread, making sure to leave a loop that is large enough to go around the neck of the ornament, but small enough to have the beads ‘meet’ the metal top.

And that’s it! Four easy DIY coastal Christmas ornaments that can be given a twist to add beauty to any Christmas tree!
What would you do to make these ‘your style’? What is your tree going to look like this year? Let me know in the comments. I’m definitely going with a coastal tree this year, and I will be sharing my tree with you in my next post!

BTW, these easy DIY coastal Christmas ornaments are being shared at the Merry Christmas Blog party, hosted by Shabbyfufu and Southern Hospitality. Go visit, and you may find some new blogs to fall in love with!


so pretty Julie and I agree on the beach-y thing. Oh don’t get me wrong I do love the beach and everything coastal but on my own terms. I would like to make the ombre ornaments but in pink…sigh…another project on my to do list. Happy Holidays from a coastal city in Florida.
Ooooo, pink ombre! I wanna see when you do that. My fam is in W. Melbourne… I don’t remember if I shared that with you before. Thanks for coming by, Kari. Hugs!
You are so darn creative girl! These are so cute! XO
Oh. go on… really, go on!!! 😉 Thank you, Holly. Your encouragement made me smile SO big. Hugs!
Those are super cute! Love the beachy touches! Even though I dont much care for the beach either, lol. Wonderful ornaments my friend!
Thank you, Melan. We can ‘not go to the beach’ together, and pick up a coffee soon!
Love all of these, Julie! Great ideas for crafting ornaments! I’m a beach lover. I love anything from boogie boarding to sitting and reading a book and listening to the waves crash on the shore while digging my toes in the sand. 🙂 I was also a certified lifeguard for many years. 😉
I knew you loved the beach, but I didn’t know about the lifeguard cert. Very cool! Learned something new about you! Hugs, sweet friend!
Very pretty, Julie! I love the effect you achieved on that painted blue ornament. You are dominating the coastal theme this year!
Oh, I don’t know about dominating, Crissy, but I sure love it this year. 🙂 Thanks for the sweet words, dear friend. You are a wonderful cheerleader! Hugs!
So very pretty, Sis!!! I especially like the last one with the charms!
I think that may be the fave… hehe. Thanks for commenting, Lil’ Sis! Love you!
These are all lovely, Julie! Your post just popped up on my FB feed and since I love all things coastal, I had to stop by. I especially love the blue one with the starfish charm. What a lovely way to include coastal decor for the holidays. I’d love to have you come and party with us at Snickerdoodle Party and share your latest with us.
Oh, thanks for coming by, Beverly! I’ll stop on by. I have seen the party before but didn’t have anything to contribute for the season/time that I saw it. Thanks for the invite, and the sweet words! Hugs!
Such cute ornaments, Julie!!! I just had a thought… The clear glass/plastic ornament: You could totally make this with blue waves around the bottome of it, then add a little sand and make a Christmas beach scene with a mini tree in there ~ okay, if it’d fit! Lol!!! Happily pinning for you, as I always love your projects. <3 Happy to be on the Merry Christmas tour with you today.
Happy Christmas crafting,
Barb 🙂
That is an adorable idea, Barbara! I think a little bottle brush tree would totally work! I tried to do something similar, but I struggled and ran out of time. We’ll see what next year has in store! 😉 Thanks for the sweet words, and pin.
These are so creative, Julie! I’m so late with decorating this year, I finally got my tree out yesterday but have yet to put it up!
I TOTALLY understand! How are you doing the blog tours with no tree? LOL! It’s encouraging to know that it’s not just us newbs that are struggling with time. 😉
Julie these are so adorable and so doable too. I really like the twine wrapped tree and can see doing it in regular twine for a farmhouse look!
Yes… My inspiration was from seeing them in regular twine. I was also thinking that they would be cute dry-brushed, like the other twine ornament I did. 😉 Thanks for coming by, Mary! Hugs!
All your ornaments are simply fabulous Julie… Sooooooo Coastal Farmhouse : ) I love your spin on them all and absolutely adore the ombre ball! You are such a creative soul and I love all that you do! Sending hugs and wishes for a wonderful day!!! Thank you so much for sharing!
Thanks for coming by, Andrea… it always makes my day. 🙂 Love all the Christmas features you are doing this season. Thanks for the sweet words, and being such a kind friend. Hugs and hearts!
Your ornaments are so pretty and really do have a coastal vibe. I love the ombre look very beachy! 🙂
Thanks, Michelle! I think they would even look good on a farmhouse style (well, maybe not the sea glass ones, LOL). You’re always so kind and sweet. Hugs and hearts, dear friend!
Abosolutely delightful! So pretty.
I like the beach as long as
It’s not Hot (above 65 is hot)Donna
It’s not crowded
I don’t have to pay for parking
I don’t have to bring those who bring sand back with them
So basically I like the beach a day or two a year.
But I do enjoy your costal farmhouse style
I’m with you, sister! Thanks for the sweet words, and for being so faithful in so many ways in our friendship. Love ya!
I’m in love with all the twine ornaments. The texture is lovely.
You are one creative lady.♥️
Well Lisa, that a big compliment, coming from you. Thank you so much! 😉 Hugs!
They all look so fantastic, thank you for sharing your creative ideas, very inspirational.
Thank you for these easy Christmas crafts. It is fun to find a craft that is easy to do with kids they look so fabulous and like anyone could have fun making.
Thanks, Sue. Definitely can make these with the kids, and they will come out lovely! Have a wonderful week! Hugs!
Julie I love these! Not so over the top “beachY’ but beacy none the less! perfection.
🙂 gwingal
Thanks you, sweet friend. I’ve reached my goal! 😉 Hugs!
Julie,
Your coastal ornaments are lovely. Please stop by Thursday Favorite Things since you are being featured.
https://eclecticredbarn.blogspot.com/2018/12/thursday-favorite-things_19.html
Hugs,
Bev
Thank you so much, again! Bev, you are too kind! Hope you have the merriest of Christmases!
After reading this I wish I had another month until Christmas so that I could try them! How fun! Maybe we’ll attempt some for next year’s tree. Just gorgeous!
Thank you, ‘sister’! So happy to have spent time with you this week! Wish we lived closer! Hugs!
I love these Christmas Decorations. I love the coast, although I don’t live near a coast and never have! Thank you for sharing these cute ornaments.
Thank you, Amy! I think this year I will be going much more neutral, but I do love my coastal touches, even at Christmas! Thanks for stopping in! Hugs and hearts!
Thank you for sharing at #ThursdayFavoriteThings. Pinned and shared. Have a lovely week. I hope to see you at next week’s party too!
Such sweet coastal style ornaments Julie. I’m so pleased that you shared them this week at Create, Bake, Grow & Gather. I’ve pinned them and will be sharing later this week.
Hugs,
Kerryanne
Thanks, Kerryanne! I’ll be featuring your maker’s wreath this week at Tuesday Turn About!
Thank you for sharing at #ThursdayFavoriteThings. Pinned and shared. Have a lovely week. I hope to see you at next week’s party too!!
These are so clever, Julie! I love the texture of the twine ornaments, and I never met a shade of aqua I didn’t adore!
Yep… give me all the aqua!
Julie, these are adorable!! I absolutely love the colors (and to ombre it…genious!) and the textures. Great job!
Thanks, Pamela… So fun and easy to make, too!
Wow, Julie, I LOVE your ornaments! You have some great ideas here, and I especially LOVE the blue ball with the hanging beads! It is a winner, winner, chicken dinner! Thank you so much for sharing!
Hugs to you!
Tee
Thanks, Tiffany… I love that you can create all different colors with the sea glass paint, too!
Oh I think the first one is my favorite. I like the texture of the string and the ombre look. They all look great!
Yes, I think that is my fave one, too!
Hey there! I am featuring your cute ornaments at our link party this morning!
Oh… thank you! Off to visit now! Got sidetracked this morning!
what a lovely idea. I would love to make these to hang up all year long. They are so pretty. thank you for sharing.
Thank you, Lisa… that’s very kind!
Adorable ornaments Julie! Those trees are the sweetest 😊
Oh… thank you, Cindy! Hugs!
Super cute coastal ornaments! I love all the designs you came up with.
Thanks so much, Meagan. They were fun to create!
Thanks for sharing with us I’m featuring you this week when the next To Grandma’s house we go link party starts!
Thank you so much, Taralynn! What a blessing! BTW, your comments always wind up in my spam, no matter how many times I “un-spam” it. So sometimes, I might be a little late with my reply!