
How to Install a Wireless Ceiling Light
Have you always wanted a light in your hallway (or anywhere for that matter), but there wasn’t any electrical hard wiring available? Today, we’re going to learn the trick of how to install a wireless ceiling light.
Whether you have a large or small home, own your home or have an apartment, creating the perfect lighting in a room can, at times, be a challenge. Maybe you can’t find the perfect fixture, or there’s isn’t a plug close to the area where you need a lamp, or maybe, like me, you need an overhead light, but there isn’t any hard wiring available in the ceiling. What’s a girl to do?
HOW TO INSTALL A WIRELESS CEILING LIGHT
The Dilemma
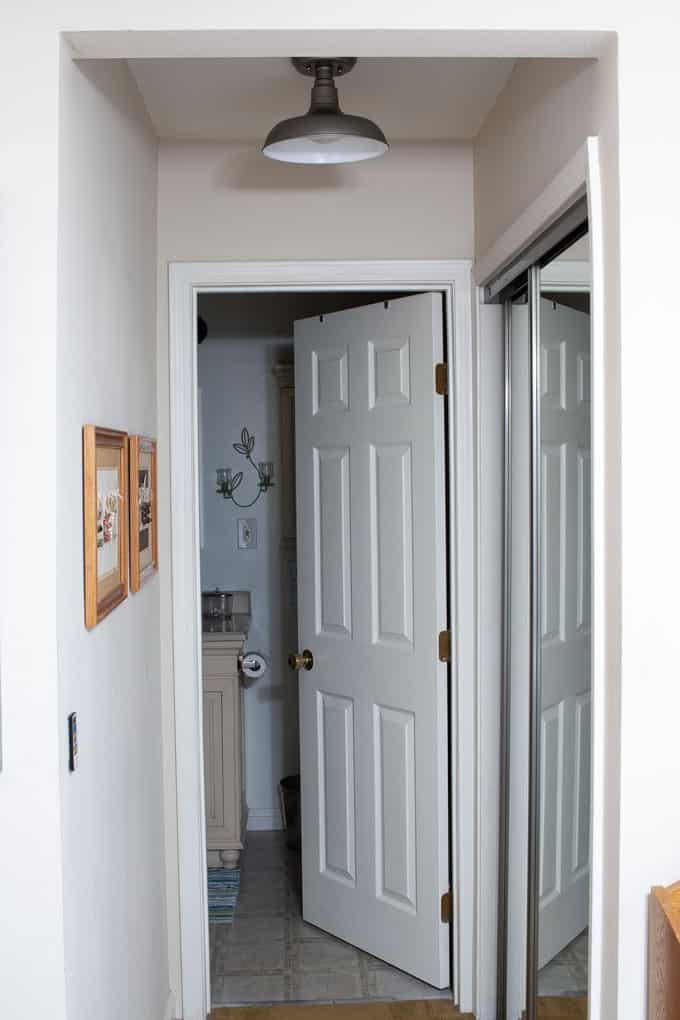
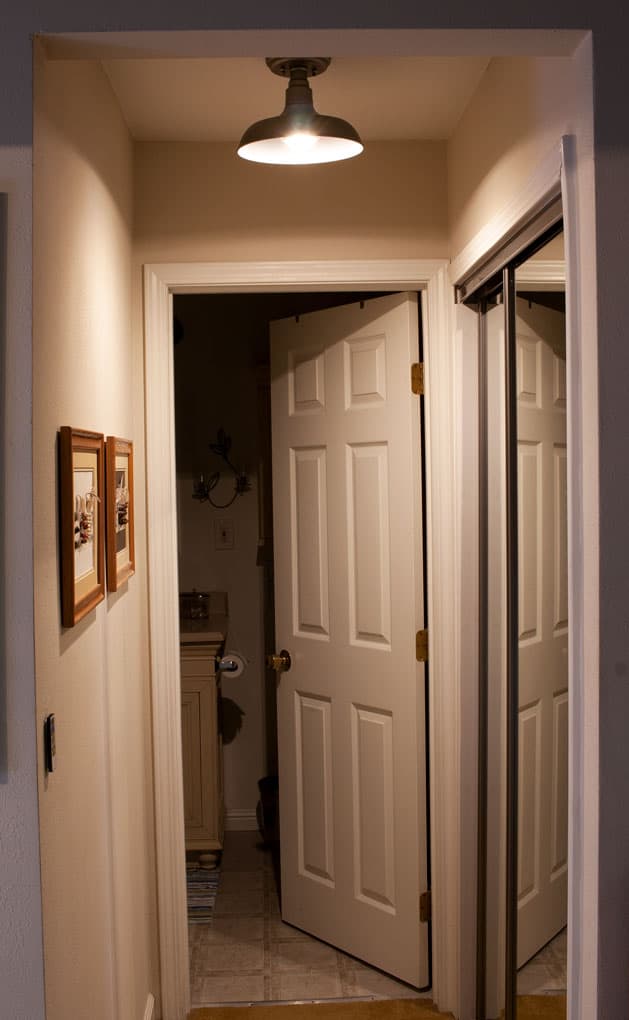
You may be wondering, “Why would you need a ceiling light when you only have 400sf of living space?” Well, let me tell ya why. 😉 In My Wee Abode there is a tiny, unlit hallway that leads from the bedroom into the bathroom. The one and only closet in MWA (besides the closet I created in less than 30 Minutes) is located in that tiny hallway and has full-length mirrors for the doors. However, often times I cannot use those mirrors for lack of lighting.
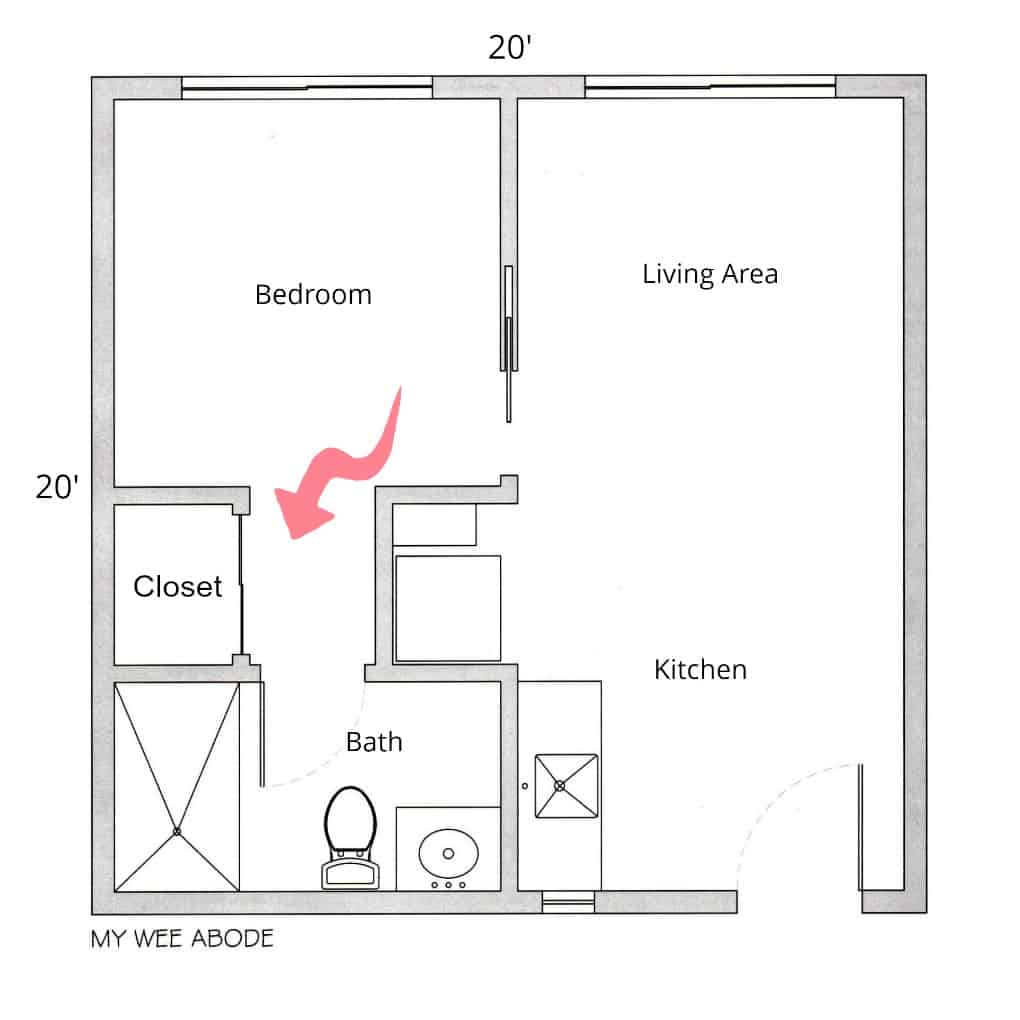
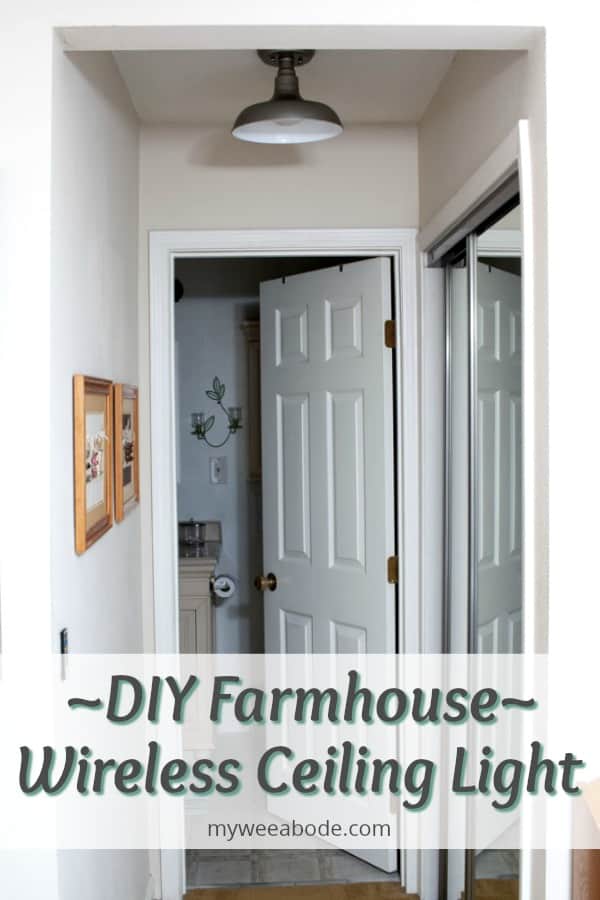
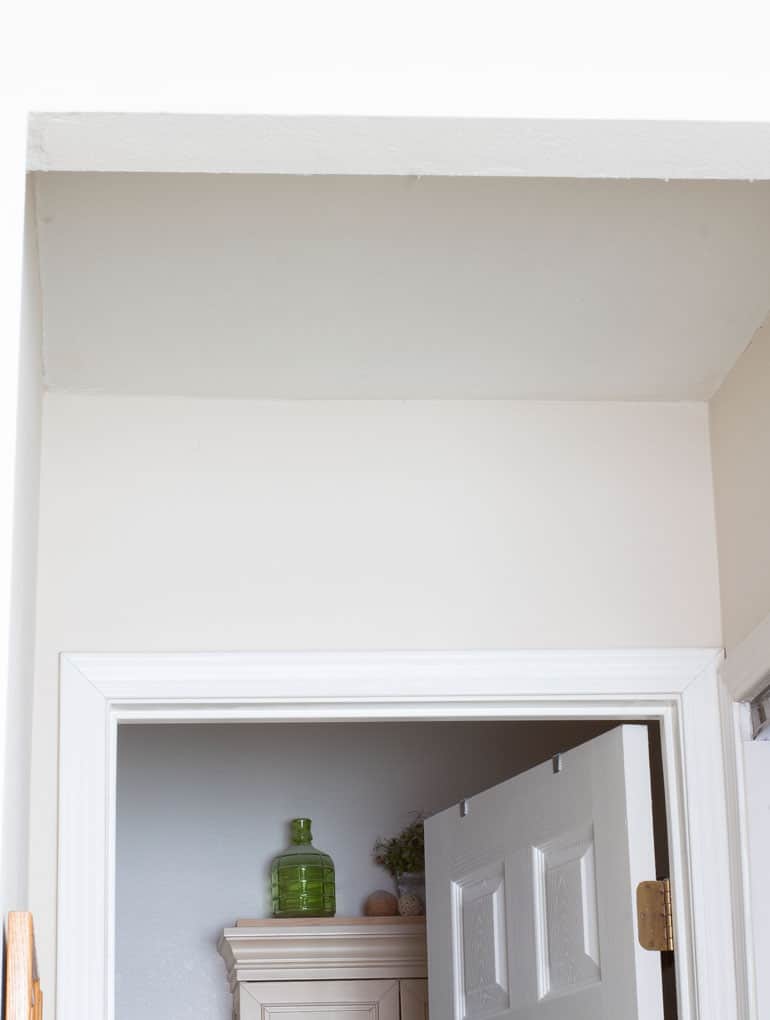
See here… the light into the hallway gets blocked by the bathroom doorway and the overhanging beam blocks the light from the bedroom. So, even when you have a small home or tiny house, additional overhead lighting can be an issue.
(Yes, it looks bright and airy now, but not at 6am or 7pm! 😉 )
The Solutions
Let’s talk about a few options for this dim dilemma. First, you could ignore it (like I did for over 2 years) and just live with the occasional irritation of looking into a gloomy mirror. Or, you could spend a small fortune and hire an electrician to cut open the drywall and hard wire the area for a standard ceiling light. ORRR, you could hack a standard overhead fixture and learn how to install a WIRELESS ceiling light! For me, option number three was a no-brainer because it was do-able, affordable, easy, versatile (I could use just about any style of fixture) and removable. Remember, when you live in an apartment or rental home, as I do, you need to be able to put things back the way you found them for when/if you move out (unless your landlord loves the upgrades as much as you do!).
For another easy and affordable lighting solution, take a look at my Small Space Coffee Station!
The Inspiration
The ‘magic light’ first came across my path about 2 years ago when I was reading a post on the Sarah Joy Blog. She shared how she had learned (from a blog SHE was following) how to create a ‘magic light’. She used this trick on two gooseneck barn sconces that she used in her reading nook. Eureka! I had found the answer to my dark hallway problem. Thanks for the inspiration, Sarah! (BTW, take a look at Sarah’s blog… it’s just lovely!)
This post may contain affiliate links, at no additional cost to you.
For more information, see my complete disclosure HERE.
What You Will Need
- Ceiling light, aka flush-mount light, of your choice (I chose a farmhouse style light, but you can use this “hack” on just about any style of lighting fixture… classic, modern, mid-century modern, cottage, shabby chic… skies-the-limit)
- LED Puck Light
- Remote for Puck Light
- Plastic sheeting or coated poster board (This may be optional… read on)
- A round object for stencil
- Command Strips for Pictures, medium or small (You can also use double sided Velcro that has adhesive)
- Scissors
- Rubbing Alcohol
- Mounting supplies (drill, screwdriver)
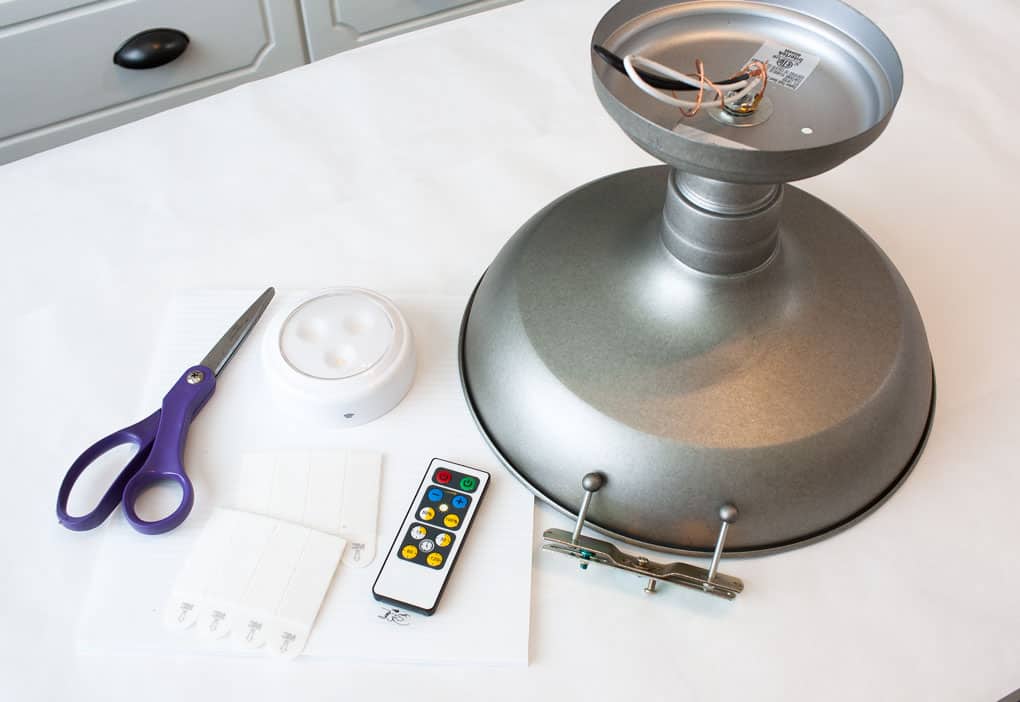
(NOTE: Originally I use corrugated plastic, as shown in my photos, but it was too rigid. I ended up using a piece of coated poster board I found at Michael’s.)
What To Do
Here are the steps to create a farmhouse style (or any style) ceiling light that doesn’t require hard wiring, but DOES have a remote!
Hacking the Ceiling Light
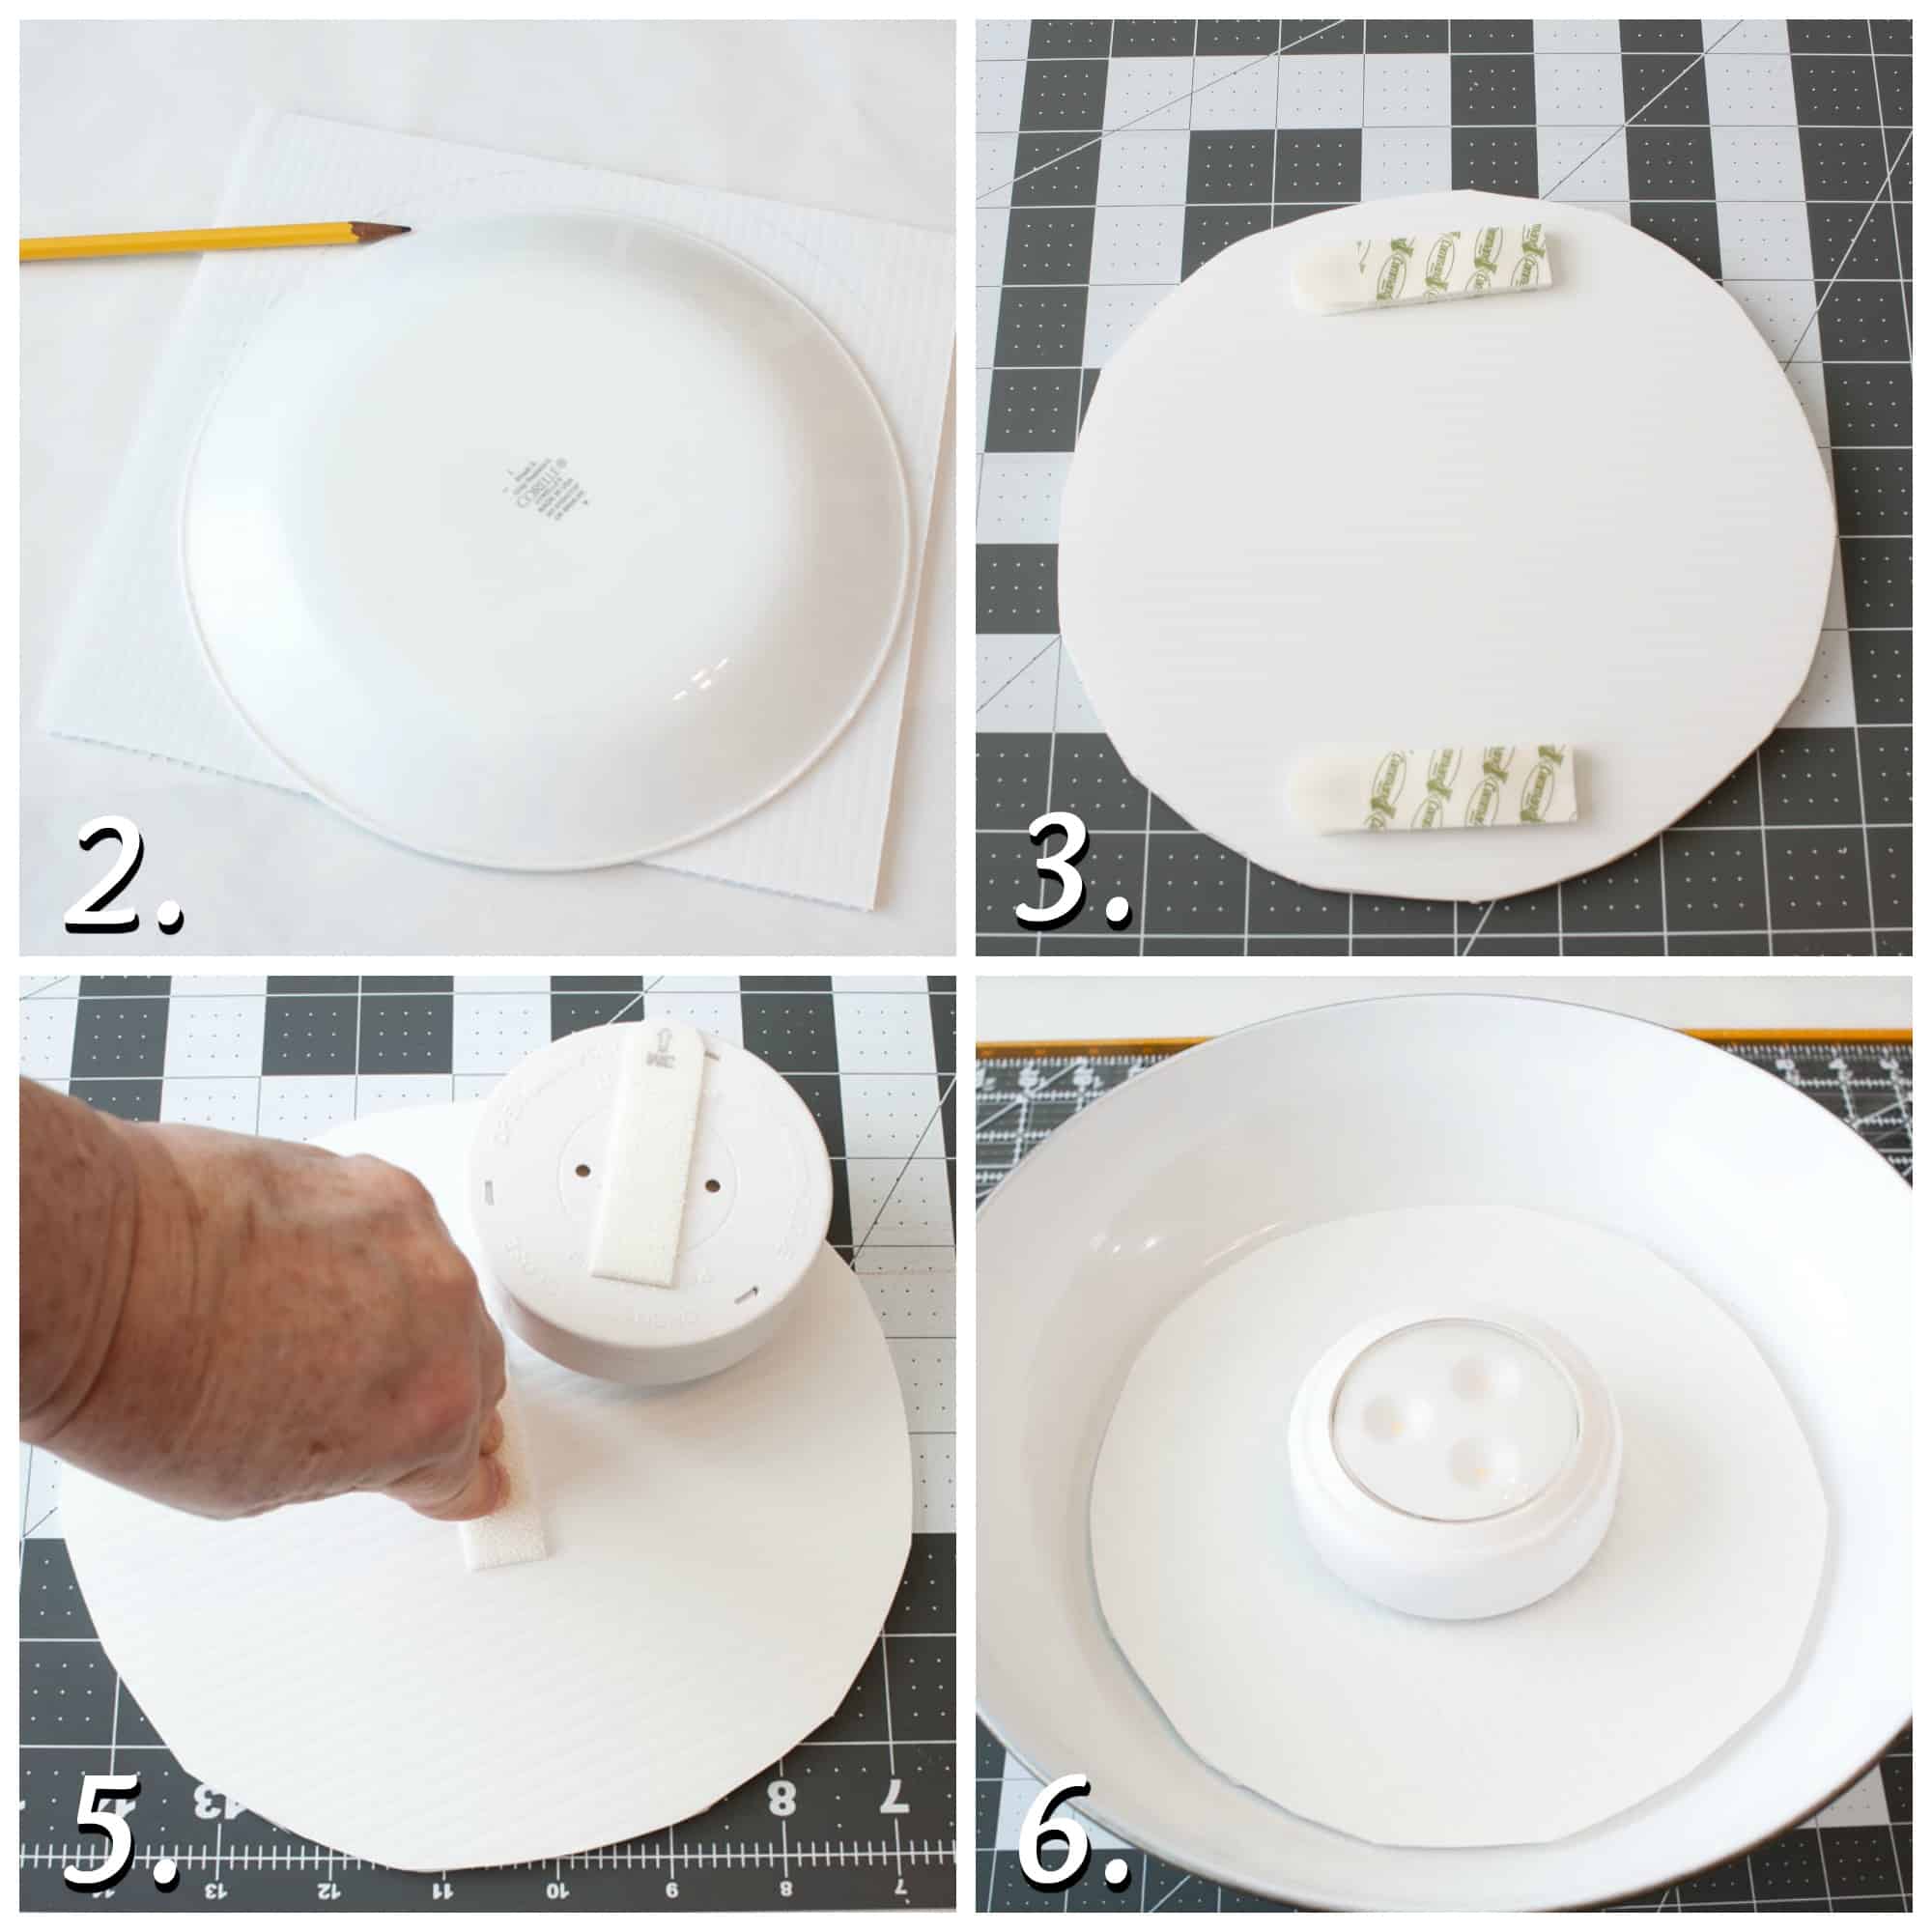
- Using rubbing alcohol, clean the inside of the fixture, the back of the puck, and both sides of the plastic sheet.
- In order for the puck light to adhere to the fixture, you will be using the Command Strips. However, on this fixture, the socket protruded just a wee bit too much and there wasn’t anything for the puck to attach to. If you find you have the same issue, using a round plate as a stencil, cut out a piece of the coated poster board to fit the inside of the fixture.
- Following the instructions on the Picture Command Strips (PCS) box, attach two pairs of PCS to one side of the plastic sheeting and then attach the sheeting to the light fixture, making sure to center the plastic. Press down for thirty seconds and then remove the plastic sheet. You should now have PCS on both the light fixture and the plastic sheet. Remember, follow those instructions on the PCS box.
- Next, add one set of PCS to the back of the puck light (be sure not to cover any important info on the light).
- If you followed the directions on the PCS box, your plastic sheet should be detached from the fixture. Turn the sheet to the side that doesn’t have the PCS on it. Center the puck light on that side and attach it to the plastic sheeting… follow the PCS box instructions (Have I said that enough?).
- Wait one hour for all the Command Strips to set. (This is a great time to install the mounting bracket to the ceiling. Again, read on.)
- After the Command Strips have set, assemble the light.
Installing the Light Fixture
To mount the light fixture to the ceiling, simply remove any hardware from the mounting bracket that may not be needed (I had to remove two screws that were not important). Then, simply attach the bracket to the ceiling (I used a drill, one anchor, and a screw). Now you can attach your ceiling light to the bracket (I left the ceiling light wiring attached to the fixture, in case I ever want to use it the ‘real’ way.) If you want more instructions on how to mount the bracket and light fixture, let me know in the comments.
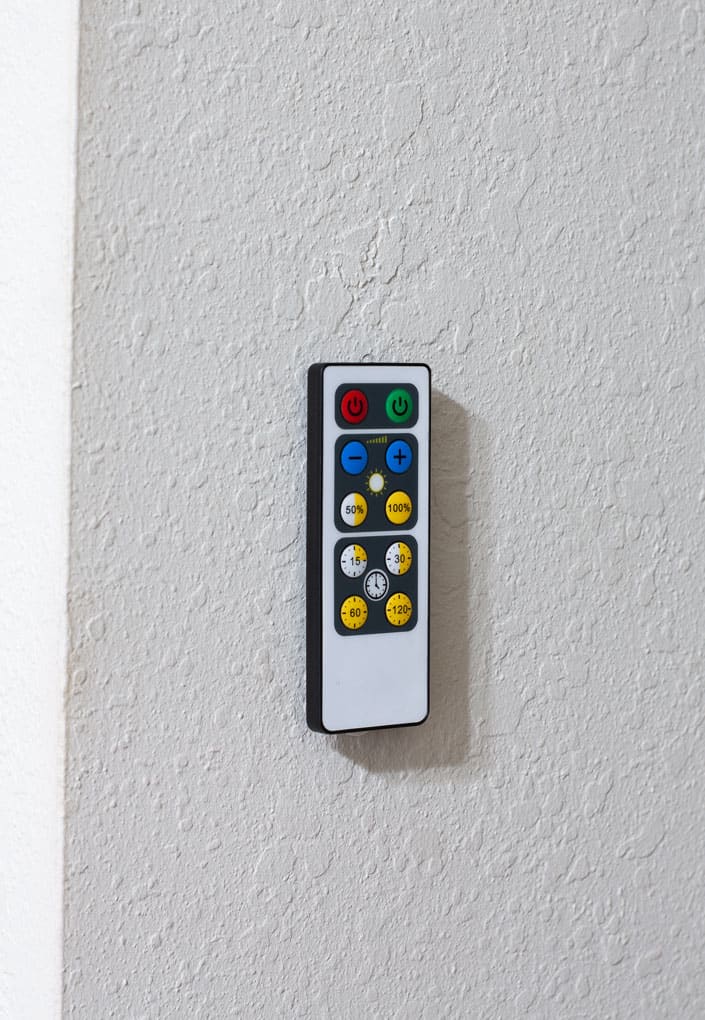
Remote Control Magic Ceiling Light
For obvious reasons, a magic ceiling light needs to have a remote that acts like a switch on the wall. Simply take another set of PCS and attach it to the remote and then to the wall (again, follow those PCS instructions on the box… I guess I haven’t said it enough 😉 ). There’s only one trick to making the remote work with the puck light… be sure that the sensor on the puck light is ‘facing’ the remote. Other than that, all you have to do is remove the plastic insert on the remote and push the power button. Voila!
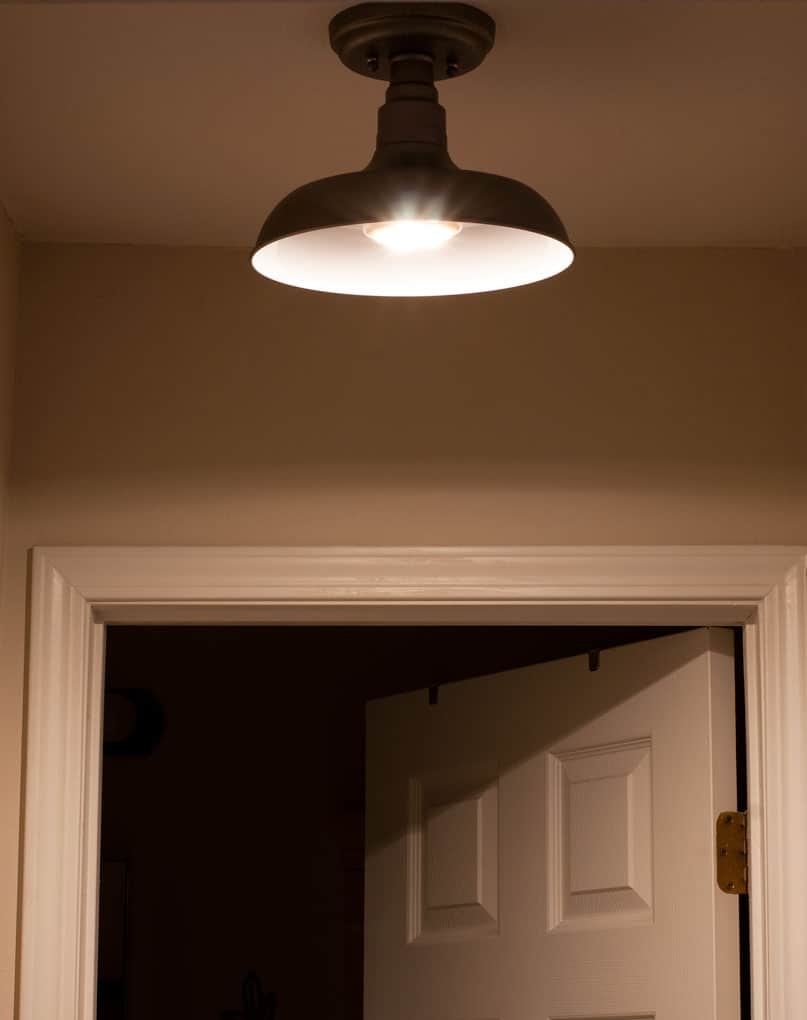
Here’s a close-up.
And here is some perspective on what it looks like in the actual hallway.

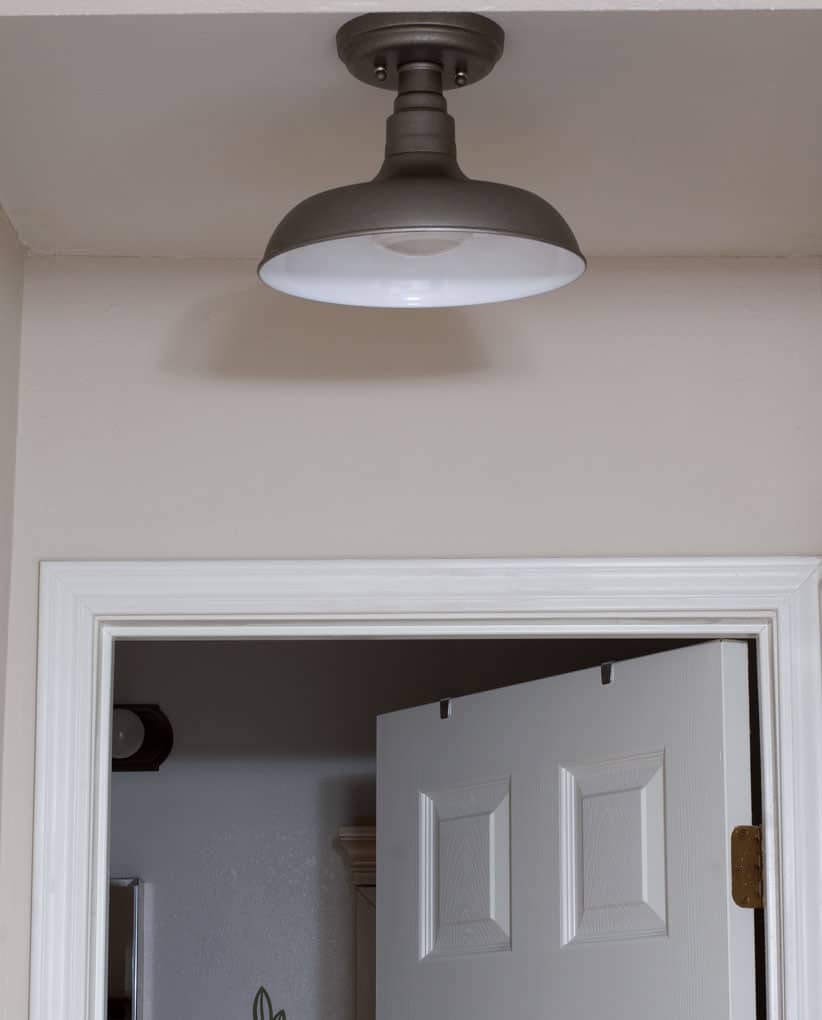
Finished Project
And here it is, complete and ready to light up my life!
Originally, I was going to use a sconce version of this light on the wall (kinda like the one that Sarah used in her reading nook). I purchased it and brought it home, but when I held it up on the wall to see how I liked it, it just looked WAY too cluttered. This small hallway needed the ‘flush mount’ light to keep the light and airy look that I love. What do you think?
Close-up of my new farmhouse wireless ceiling light.
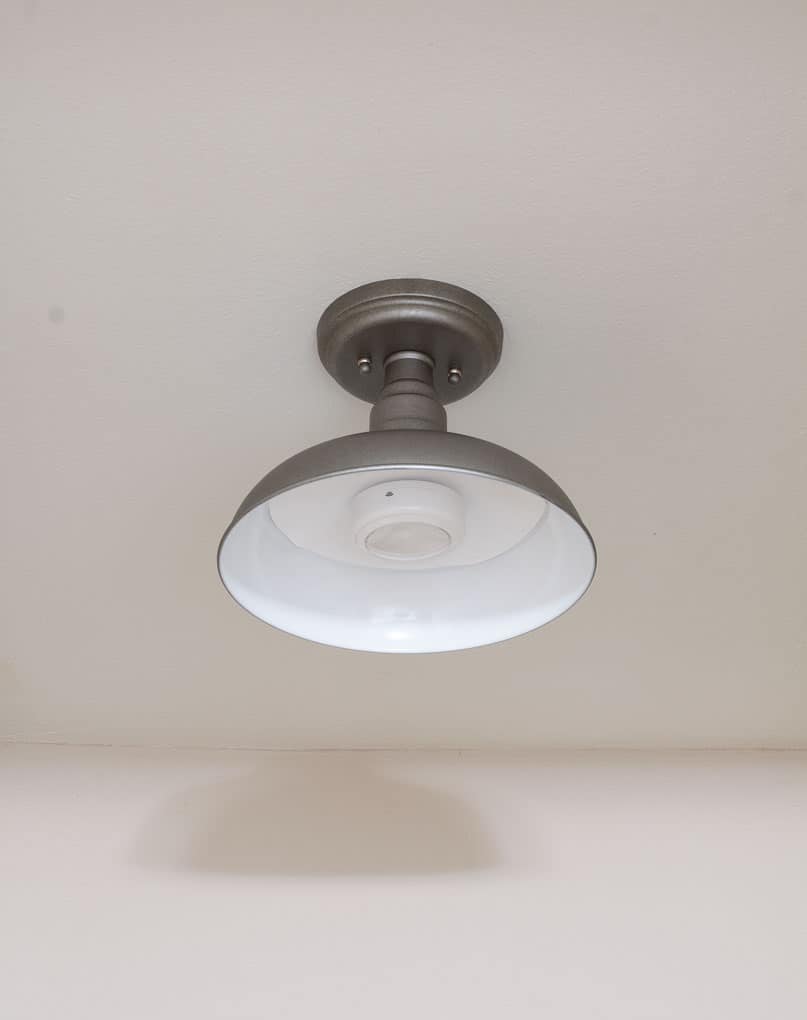
I think I may seal around the edge of the plastic liner with some glue, just to finish it off even more. But, frankly, unless you’re looking at a close-up photo like this, you can’t see the seam. (Can you see the sensor on the puck light? It’s facing towards the remote.)
Here it is turned on in the dark.
Crazy that there is no hard wire, huh? All you (I) have to do is replace the batteries. I LOVE IT!
What About You?
Quick, easy, versatile, affordable, and lovely, this magic ceiling light hack was the perfect solution for my little loft apartment. And this trick can be used on just about any lighting fixture. Do you need to add some light to an area in your home that doesn’t have any wiring in the walls? Maybe a reading nook, or in a bedroom that doesn’t have enough room for a side table lamp, or maybe on the wall in the dining room… so many possibilities!
What do you think? Is this something that YOU will be adding to your home? Let me know in the comments, or feel free to share a photo with me on Facebook. Also, let me know if you have any questions or want more info!


Very interesting Julie. The puck lights I have bought in the past weren’t very bright. Is there a wattage on the puck light package ?
There is no wattage on the package, but it does say it is 55 lumens. The converter I just googled says that is equal to 4 watts. I’m not sure that is right, because this seems definitely brighter than a measly 4 watts. It seems to give off more of a 40-watt bulb, which is sufficient for my needs. There are other puck lights with higher lumens available. Funny, I had the same question for Sarah when she shared her sconces. She said the two of them together gave off plenty of light for reading… I would agree. Hope that helps! Hugs!
Great job. You are so smart to come up with the idea for your hall. We all usually have a dark place somewhere in our homes such as closets or hallways. I am sure this will be a good project for a lot of us. Keep up the great blog.
Thank you for the encouragement and sweet words, Mary. I hope it helps LOTS of people. 🙂
Looks great. Love your blog.
Thank you, Wendy! I’m so glad you are enjoying the blog. <3
Great solution and I love how it looks!
Thanks, Carol. I’m so happy with it… and my landlord just texted me… she’s doing an annual walk-through. Didn’t say anything about it, but said everything looks good. 🙂 Hehe.
What a great idea, and I’m shocked by the amount of light that put off. Isn’t it wonderful that you were inspired by another blogger and retained that inspiration for two years until you needed it yourself?
Aw, thanks, Toni. Yes… Sarah’s post impressed me in a big way. This is such an effective fix, especially for rental homes… and for those of us that don’t know the first bit about electrical work. Hugs!
This is such an awesome idea!! I will check out Sarah’s post as well! Your light looks amazing! Thanks for sharing!
Thank you so much, Cindy! I think you will really enjoy Sarah’s blog! Have a wonderful day!
It looks fantastic. What a great idea !
Thank you, Lindy! So glad you commented. 😀 Hugs and hearts!
Thank you so much for this lighting information! I have a need for something like this in my cloffice. Your pictures and instructions make everything so clear.
Yay! I wanna see when/if you do it in your cloffice! (love that word, btw). Hugs, dear friend!
It looks fabulous. You wouldn’t know that it is wireless by looking at it. And it seems to throw quite a bit of light. Great job Julie!
Thanks, Melan… it gives off plenty of illumination for my purpose. And you can actually purchase even stronger ones. 🙂 Hugs!
Now that is something I can really get on board with, I hate having to deal with wires. And Julie your ceiling light is very pretty.
Thanks, Mary! I’m super glad you like it… I think it is pretty adorable too! 😉
So clever, Julie! I had not thought about using something like this and disguising it with a beautiful light fixture. You know, my hubby is all about motion-sensor lighting. I’ll have to ask him what he uses. He even installed one in my bathroom cabinet under the sink so I won’t have to turn the lights on if I get up for something. Pinning!
I actually have a motion sensor light where my coffee bar is. I LOVE it for the same reason as your bathroom… I can easily make coffee in the morning without turning all the lights on. Woot! Hugs, sweet friend!
What a clever solution for a low light area, plus it looks great, too! Your instructions are great and would be easy to follow.Thanks for sharing with us at Snickerdoodle, Julie!
Thanks Beverly. I always worry that I might be giving too many instructions. I think I get it from writing software user manuals during my analyst days! 😉 Hugs!
Julie, this is genius! Pinning this for future reference for sure!!
Oh, thanks, Roxanne. Simply putting my twist on the inspiration from other bloggers! (Still thinking about your adorable pillow! Be sure to link it on the party tomorrow!)
This is so darn clever! I really like the look of that…I was afraid you were going to start cutting holes in your ceiling, lol. Pinning!
Hehe!!!! No can do in a rental home! And my landlord didn’t even notice the light when she came in today! Hehe!
Smart girl for figuring out how to light this dark hallway! Love your idea Julie!
Thank you, Michelle. I love when we are inspired by other bloggers, and can put our own twist on it! 😉 Hugs!
Julie,
This is seriously BRILLIANT! Thank you so much for sharing. I need to pin this project for all the places that I didn’t think I was able to put a light.
Thanks for the inspiration friend!
karianne
Awwww, go on! No, really, go on! 😉 LOL! You are so sweet, KariAnne! Thank you for the encouragement and love, AND for linking up at the party! Hugs!
I agree – very clever solution and such a stylish hall lamp!!! Nicely done!!
Thanks so much, Peg… I REALLY love it! Hugs, dear friend!
Love this! My home has a few closets that are lacking overhead lights! I need to try this!
Oooo, would love to for you to share when/if you install some! Thanks for dropping in, sweet Lauren!
Wow, this is brilliant! Hiring an electrician can be so expensive. With this idea, a light can be installed anywhere! I like the style of light you chose.
Thanks, Debra… it actually took me a bit to find a barn/farmhouse ceiling light, at an affordable price. I love it! Be sure to link-up at the Homestyle Gathering that opened today. Hugs and hearts!
This a such a fantastic idea! Our house did not have any ceiling lights when we moved in. Over time my husband has installed pot lights in many of the rooms but not all and now I know just what to do. Fabulous share Julie!
Thanks, Patti! So happy you enjoyed the post… you made my day! 😉 Make sure to link-up at the Homestyle Gathering today. Would love for you to share with our readers!
This is great! I have a puck light in that dark hall closet, but it’s the kind you push the top of the light to turn it on and off. That means it’s on a side wall in the closet and not on the ceiling. It’s okay, but not a great solution. THIS gets the puck light on the ceiling where it does the most good. Amazing! When I get this done in my closet I’ll share pics. Thanks, Julie!
Oh, I’m so glad you got some inspiration and solutions! Definitely share pics when you get it done! And be sure to link-up at the party today!
This is really genius, Julie! What a terrific idea for an apartment, dorm, anywhere! Charles has installed puck light around our trailer in the underneath storage areas because once it is filled up with boxes and such, the lighting that is built-in doesn’t reach everywhere. Love your idea and pinned both the not-turned-on and on versions to my DIY Project boards. <3
Awesome idea,
Hugs,
Barb 🙂
Thank you so much for the double-pin, Barbara. And thank you for the sweet words! You are a sweetheart!
I am so proud of you that you did this, its hard to deal with electrical wiring. Great tips.
Maria
Hehe! You made me giggle with joy that you are proud of me. 😀 Thanks for coming by, my friend!
What a great idea and thank you for the clear instructions and photos! I am off now to read your post about the coffee area light!
Oh, thanks, Connie! And welcome to My Wee Abode! You do lovely quilt work! Please join us at Homestyle Gathering each Tuesday! Hugs and hearts!
Looks great, Julie! I had just ordered supplies to try this hack for a wall sconce!
Oh fun!!! I wanna see! I hope it’s a post coming to your blog! 😉
You’re welcome!
🙂 Barb
What a great idea! Pinned ♥
Thanks, Dee! I’m SO happy with it! Hugs and hearts!
What a great idea! Thank you for sharing! I’m saving.
Oh, so glad you like this, Diane. You are so welcome! Hugs and hearts!
What a great product. I have never heard of a wireless fan. Such a good idea. Thank you for posting all about this fan.
Sure thing, Sue! Hope this wireless ceiling light comes in handy for lots of people! Hugs!
Hi Julie,
You are way too clever, Girl! I can’t believe you came up with such an ingenious, and attractive, solution to your lack-of-light problem. I am totally impressed! Happy Valentine’s Day! Cheryl
Well, thanks, Cheryl… but, I did have inspiration! Don’t we all? Thanks for stopping in, friend! I appreciate your comments, more than you know! 😉
Now that you’ve had the wireless lights for a while… do you still recommend this brand? I have seen reviews where the batteries are drained very quickly. Have you had this experience? I am debating on doing the same project or just biting the bullet and paying to install a light fixture. Thanks for the update!
Heidi… I just recently noticed that the battery had gone out on mine, but I’m not sure when it happened because I have not used the light nearly as much as I thought I would. However, I have not heard any other bloggers complaining about the batteries going out quickly (there are several bloggers that have used these puck lights for wall sconces.) I’m sorry I can’t help more.
Hi Julie, My daughter just gave birth to our second grand child–and I was not allowed to be there. 🙁 But he’s beautiful, and Lord willing, we will have lots of time to bond when this is all over.
The reason for my comment is that I bought a set of puck lights a couple of years ago, and just a few weeks ago FINALLY got them out of the package and installed the batteries. I left them overnight in a basket in my bedroom (since they were going in my closet and I hadn’t put them up yet.) I woke up in the middle of the night to one of them flashing! THREE of the six of them seem to turn themselves on all by themselves at random times! I had to take the batteries out of them. I’m planning to return them to the store (which has an amazing return policy!) but can’t get out because of the quarantine. So, my closet is still dark. But I loved your post. It’s a great idea. I love the fixture you chose. And I’ve also seen Sarah’s post, and liked that as well. Thanks for sharing.
Have fun with your new jellybean–and the one you get to take care of! Blessings!
Oh, I’m so glad you commented and shared your story, Marilyn. By any chance, are your puck lights motion sensored? And are you sure your batteries were still ‘good’? The reason I ask, I have a motion sensored LED under the cabinet above my coffee station… when it starts to die, it starts blinking on and off in the same way. Just thought I would throw that out there. Thank you so much for commenting! Love sharing with MWA fam! 😉
Thanks for mentioning that, Julie, I can change the batteries in the one and see if that works. But the others just come on by themselves at random times–no flashing. Maybe new batteries all around? Thanks again, Julie!
Let me know how it all goes, Marilyn. 🙂
Hi Julie, Love this idea! Do you think it would work for a pendant light? We don’t have a ceiling light in our dining room and it’s KILLING me! Thank you!
I don’t see why it wouldn’t work. Just make sure the puck gives off enough light for the area (you may need to go with more than one pendant). Glad you like it!
Julie! It looks sooo good! I have a couple of areas I need to do this to especially in our basement hallway. I love the light fixture that you chose… and so brilliant to use this in a rental! Great job! Pinned!
Karin
Thanks so much, Karin! I love how it looks in my wee hallway! 😉
This is crazy because I had gotten a small chandelier for my daughters bedroom, she’s 15 and begged me for it when we saw it at Lowe’s for 75% off. It’s 12 inches in diameter. We live in an apartment and she has no ceiling light, so u explained I could put it up but there are no wires for the light to work, she said she didn’t care, she just wanted it for the bling lol. Than by chance while scrolling I came across this! So now I’m going to put it up and add the puck! Great idea! And I’m glad I came across u!!! Thanks!!
Diva’s Mom
Oh, Kristin! That’s so exciting that you found the solution for you daughter’s chandelier! Even if it’s not A LOT of light, it will be more than she had! Now be sure to go join our blogiversary giveaway! 😉
Hi, I just came across this because I was looking for a solution to a pretty dark family room (no overhead light). It’s not huge, and a bit of a strange layout, but I think that your idea will go far in brightening it up. With more lumens, I think. 😊
My 94 year old mom will appreciate being able to see when she’s visiting.
Thank you!
Oh, I’m so glad you found the blog! And this hack, as well! Let me know how it works out for you, Alison… Hugs and hearts!
How do you attach the bracket into the ceiling?
Hi, Lisa… thanks for the question! You just attached it with the screws into the ceiling.
Thanks so much! I did finally figure it out. My light looks fantastic. Thank you for an awesome idea!
Yay! I’ve got some ‘magic’ sconces going up soon… with a new twist! Can’t wait to share!
Instructions on mounting ceiling bracket please.
Hi, Mary… here’s a link to an even better way to create a “magic” light, and it includes the tutorial for mounting the bracket. Hope this helps!