
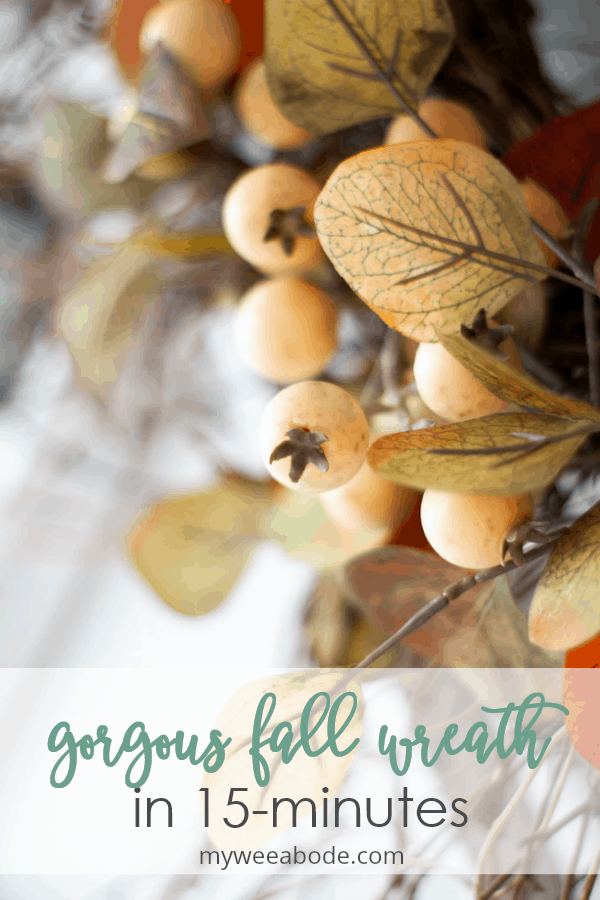
Gorgeous Fall Wreath in Fifteen Minutes
Learn how to make a gorgeous fall wreath in fifteen minutes. This quick, easy, rustic fall wreath is super affordable and fun to make.
QUICK EASY RUSTIC FALL WREATH IN FIFTEEN MINUTES
Happy first day of fall!
Thank you all so much for the sweet words concerning my Fall living room decor. Who knows, I may add a bit more, or change it up some. But one thing that won’t be changing is my beautiful fall wreath!
Have you seen it? No? If you can’t wait to the end of this post… click HERE. 😉
So many people shared such kinds words about my wreath (y’all like it as much as I do), I figured a quick tutorial was in order.
Seriously… this one is quick!
As a matter of fact, this lovely wreath is so quick and easy to make, it only takes 15 minutes. Really… it’s that easy, and super affordable, too!
AND, you’ll be able to use the sunburst grapevine wreath over and over again!
Let’s get to it!
This post may contain affiliate links, at no additional cost to you.
For more information, see my complete disclosure HERE.
What You Will Need
To create this quick, easy and rustic fall wreath, you will need:
- 28″ Sunburst Grapevine Wreath This is the one I got from Hobby Lobby. With the coupon, it’s 40% off.
- 2-3 fall colored eucalyptus leave branches (You can find these at Hobby Lobby or Michael’s)
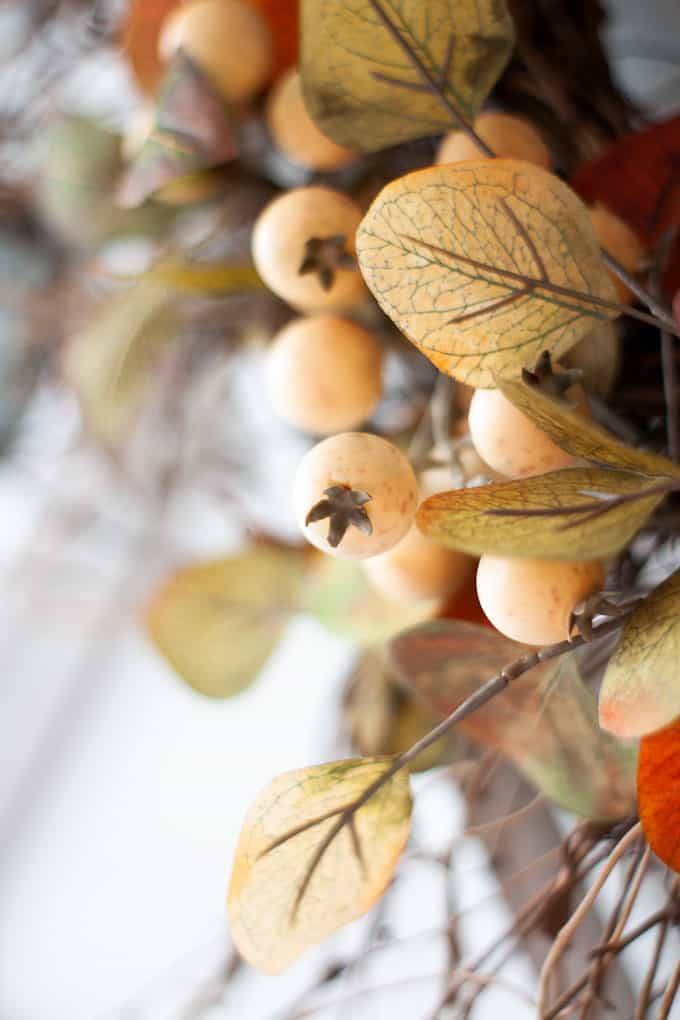
- One cream colored berry branch (I found mine at Michael’s)
- Floral wire
- Wire Cutters

Gorgeous Fall Wreath in Fifteen Minutes – Quick Tutorial
- Cut your eucalyptus branches into several varying lengths: several long ones and a few shorter ones (for fill-in). (Frugal-tip: Cut only two branches to begin with. If you don’t use the third one, you can return it.)
- Snip your berries off the branch… again, some with lots of berries and then a few with 2 or 3 berries. I was able to pull the berries off the branch, which left some extra wire exposed. This was great for adding to the wreath. (2a. (Not shown) At this point, you can also take 3 of the floral wires and cut them in half.)
- Take your branch “stems” and shape them around the wreath.
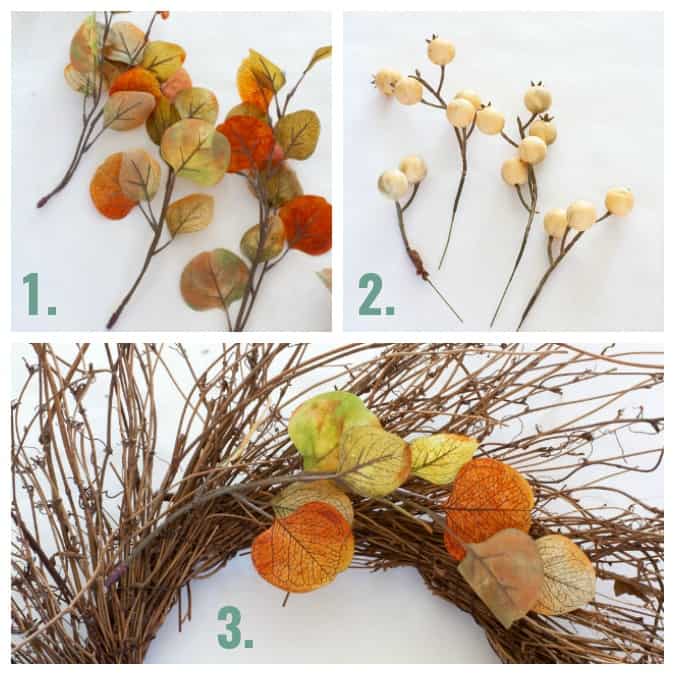
- Continue laying the branches around the wreath until the branches ‘fill-in’ and look as full as you would like. You can also ‘tuck’ some of the stems into the grapevine wreath while you do this.
- When your branches are placed where you desire, take a piece of floral wire, bend it, and ‘hook’ it over a stem, through the grapevine and then twist it together in the back. This will keep the florals in place, yet allow you to disassemble to use again (no glue). Add wires around the circle of eucalyptus until all branches are secured.
- Take your berry stems and insert around sporadically around the wreath (nor floral wire needed). (see steps 7 and 8, as well).
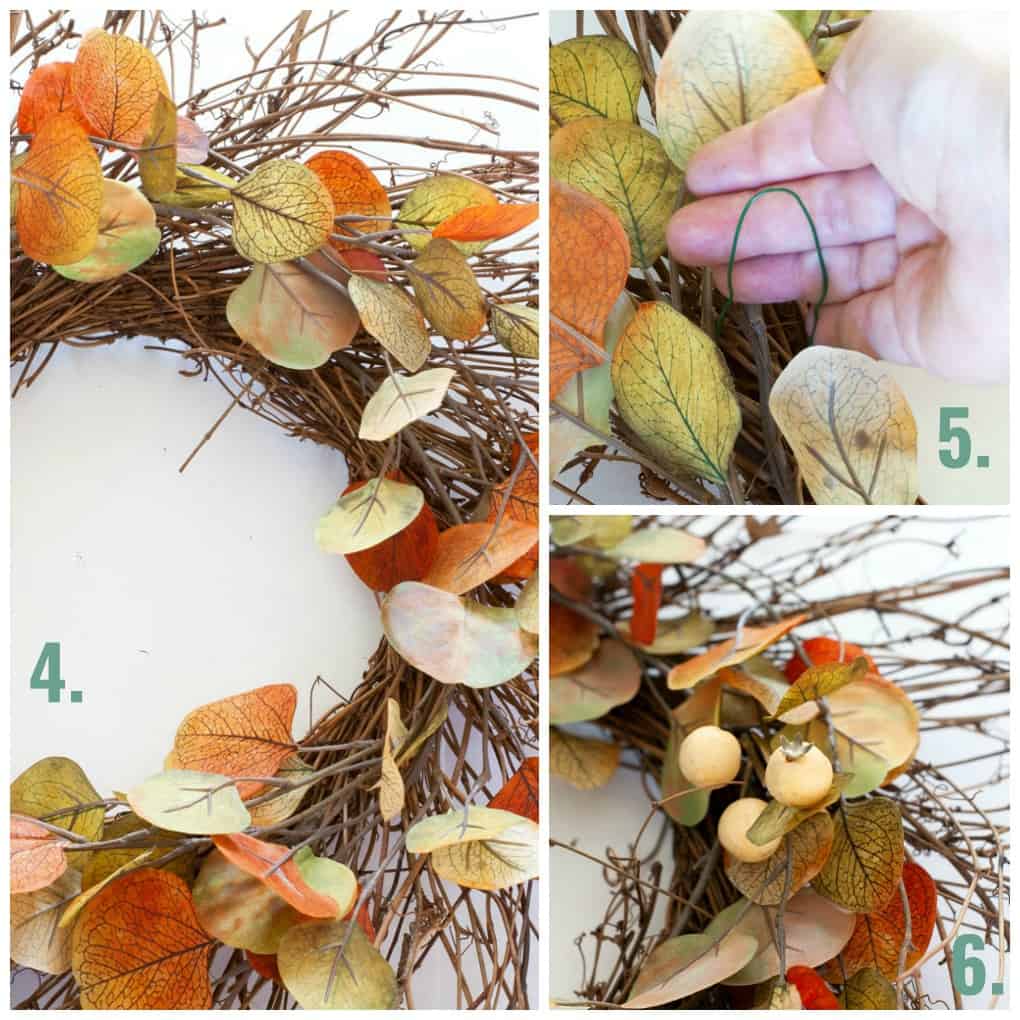
- At the lower ‘corner’ of the wreath, you can add a ‘cluster’ of berries. Place several bunches curving and going upward, and several curving and going downward (see photo). This will leave a ‘blank’ spot in the middle.
- Add a leaf sprig to cover the bare spot.

- Hang your 15-minute fall wreath in your favorite spot! (Think door, fireplace, above TV, mirror, etc.)
Finished Product
Yep… quick, easy and rustic fall wreath in fifteen minutes. And, because the wire is used to affix the florals, you can easily take this apart and use the wreath for any season, and save the florals for another fall project next year!

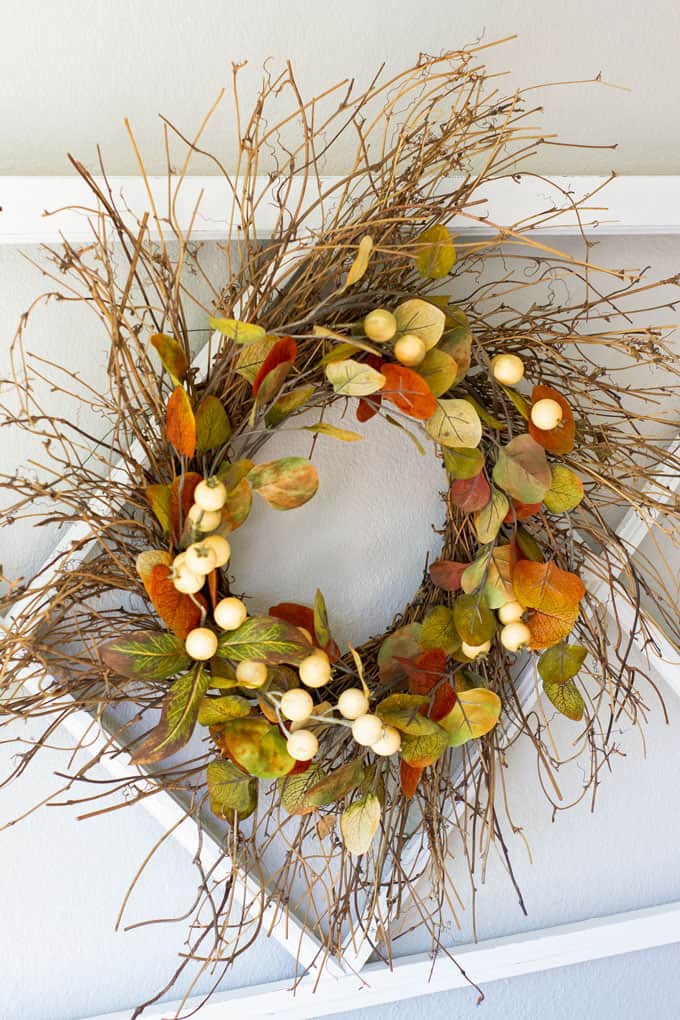
Placing the wreath on something like a windowpane adds more interest and texture, too!
And adding a touch of black to your decor helps to ‘ground’ your room.

Love these sweet lanterns.

And the berries are so pretty… even though they are faux, these look great!
Now It’s Your Turn!
How ’bout you! Do you think this quick, easy rustic fall wreath may make a visit to your home? What floral elements might you use? Maple leaves, acorns, pine cones? Let me know what you are adding to your home this fall!


Always gorgeous and tastefully classic!
Thanks, T… glad you like it. And thanks for all the prayer this weekend. The workshop was so fun, and I was very calm. 😉
So gorgeous. Simply done but will never go out of style. I love this.
Thank you so much, Pamela! I love that I can use the grapevine over and over! 😉
So pretty!
Thanks, dear friend! Hugs!
Very pretty. I love a sunburst wreath for any season. They are so interesting and a nice departure from a normal round wreath. Good job.
I agree, Pat (obviously, hehe). I’ve wanted one forever and finally had an excuse to get it! Love it!
Very pretty! I love this project and your blog is beautiful!
Aw, thanks so much, Missy! I sure hope you’ll join us at Tuesday Turn About tomorrow! 😉
Great tutorial Julie. Happy fall🍂🍁🍂
Enjoy your Monday
Cindy
Thank you, Cindy! Can’t wait to see all the lovely tablescapes tomorrow! I’ll miss joining in!
Thank you Julie! I’ve been waiting for tutorial like this one. Beautiful wreath for fall!
Linda
Oh, I hope you put the DIY to good use! Thanks for stopping in, Linda!
Very pretty. I love it’s almost neutral but still has a bit of rustic colors. Those types of grapevine wreaths gives it a bit more dimension too.
Yes.. those creamy berries are so pretty, and unusual! I’ve wanted a sunburst grapevine forever, and finally broke down! 😉
So so purdy. I loved at your workshop this weekend when you said it took you only 15 mins to make this the ladies all gasped! Hahaha~
Thanks, Boo. Really… I didn’t even notice the gasp… or did I? LOL! Well, I hope some of the ladies get to see it and even make one of their own. Love ya!
Hey Julie,
I love your wreath. It’s got to be one of the prettiest I’ve ever seen. And that it is a quick project makes it even better. Hope you are doing well. Upholstery is keeping me super busy! Hugs!!
Thank you so much, Nancy! That means so much to me! You definitely look to be super busy! 😉
Beautiful wreath Julia and I love that you can reuse the grapevine part over and over.
Thanks, blogging BFF! You are so sweet!
Love this pretty wreath Julie! Perfect for Fall. I have pinned.
Thank you, Libbie! Hugs!
Such a lovely wreath, well done. Very simple, but outstanding when hung!
Thank you, Laura! Love “seeing” you here… usually only ‘see’ you on FB! Hugs!
Love this wreath, Julie. Super cute, supper easy , super quick. Love that you showed out to attach so the florals can be removed. Lots of Pinning.
Thanks, Carol! And thanks so much for pinning! You are a dear!
This is absolutely gorgeous, Julie!! xo
Thank you, sweet friend! Miss you!
Lovely! Thanks for sharing! 💕
Thank you, Lauren! Hope you are doing well!
Julie that certainly is a stunning wreath. And now that fall is here we can really revel in the warm colors that it has. I hope your area is having nice crisp fall weather.
Thanks you, Mary… yes, looks like we are getting some unusually cool weather here… thankful!
Beautiful wreath Julie! The berries look so real. It adds the perfect Fall touch to your living room. Love it!
Thank you, dear friend! I hope you are having a good week!
So pretty! Love those white berries!
Aren’t they amazing! I have another branch that I was going to return, but I may keep it!
This is awfully pretty! Very fall and I like the more subtle color scheme. It looks pretty simple if you break it down! Thank you!
Thanks, Jeanie… it really is simple to make. 😉 Hugs and hearts!
Julie, I love this wreath, and that close up shot is stunning. Great job!
I’m fairly sure I pinned this from tailwind, but I’m pinning it again 🙂
Big Autumn Hugs!
Rachelle
This is just lovely Julie! You have a great eye for finding beauty! I love that it’s so easy to do too. Thanks for the tutorial! 💗
Thank you for your kind words, Barbara… I think the same thing about you!
Love this wreath and its spot hanging from the window pane, Julie!!! The little lanterns are adorable hanging with it. Really pretty wreath!
Your home looks very inviting here for fall,
Many hugs,
Barb 🙂
Thank you, sweet Barbara! You are a doll!
Your wreath is just beautiful Julie! Pinned!
Thanks, Michelle… so easy and fun to make!
Beautiful Julie! I always love using wreaths inside the home instead of just in the doors!
Yes… I’m wanting to make one for inside the door, and also maybe one or two for my cupboards!
Your wreath is beautiful, Julie! Love the whispy grapevine wreath form you used too. Pinned
Thank you, Marie! Def one of my favorite projects and posts!
I love the way your wreath turned out, my friend…but you already knew that! This is a great tutorial, and I love the soft fall colors you chose. Your up-close photos are amazing. Pinning to two boards!
Thank you, Crissy! You’re an amazing supporter! Hugs!
Love this! I especially like the colors – not overstated. It allows the natural look of the wreath to shine through.
Thanks for sharing.
Thanks so much, Karen… very kind of you to visit and comment. 🙂
the wreath looks amazing…. you transformed it into a completely different and beautiful one… thanks for sharing your ideas…❤️
http://www.geniusenough.com
Thank you so much! Your words are very kind!
I just adore homemade wreaths and I love seeing how others make theirs. Just love the rustic fall colors in this beauty!
Carrie
curlycraftymom.com
Thank you, Carrie… Yes, I think we all can appreciate a lovely wreath! 😉
Hi Julie: I love the greens in this wreath, and how the backdrop grounds it over the television. I want a large focal point like that, its gorgeous.
Thank you, Leanna! I’m really enjoying it in my home!
This is such a pretty wreath and you’ll be able to enjoy it for years to come. I’ve always wanted to use one of the starburst grapevine wreaths for a project but never have. After seeing yours, I need to make one.
I waited to get one for years… but I finally broke down, and I’m so glad I did… I can’t wait to use this for each season this year. Will be a fun ‘series’. 😉
Thank you for sharing at #ThursdayFavoriteThings. Pinned and shared. Have a lovely week. I hope to see you at next week’s party too!
Thanks, Marilyn! Always love joining TFT!
Julie! You’ve done it again! You create the most lovely things. I’ve pinned this to my Autumn board–I need a new wreath–and I think I already have that kind of base in my craft stash.
Thank you so much for joining the Grace at Home party at Imparting Grace. I’m featuring you this week!
Oh, thank you so much, Richella! I love joining your party!
This fall wreath is truly beautiful and oh so festive. What a great combination and you make it looks so easy!
Thank you, Patti… I think it may be a top 5 for me so far! 😉
This wreath is so pretty and I love that it is an easy craft idea for fall. Thanks for linking up with us at #OMHGWW.
Thank you, Alice! And thank you for hosting!
Such a lovely wreath Julie and I love those black lanterns too! Great tip to wire the flowers on instead of using glue as well.
Thank you for sharing your projects at Create, Bake, Grow & Gather this week. I’ve just pinned your rustic fall wreath to our party board.
Hugs,
Kerryanne
Thank you, Kerryanne! I love your party!
So prettty!
Thanks, Jenna! It was super easy!
Goodness gracious! I never thought I’d get to the bottom from all the comments! They must all love the wreath as much as I do! Who doesn’t want a fab fall wreath in 15 minutes?! Thanks for linking up at Farmhouse Friday too. Pinned 🙂
LOL! You are the second person to say that about the comments. Always blessed when people like the projects I share!
Beautiful! Love this wreath looks like I could probably do this even. 🙂
Yes you could! Really simple!
Great tutorial!
Thanks, Rachel!
Julie, this is a very popular project! Everyone loves it! So pretty and unique! Thank you for sharing at Embracing Home and Family!!
Thanks, Jennifer… it was definitely a fun one to do!
Also, tomorrow your wreath will be featured on our link party! Thanks again for sharing!
Thank you, again, for sharing!
Such a pretty wreath Julie! Perfect for prepping for Fall! Thanks for sharing at Charming Homes & Gardens!
Thanks, Kristin! Love you party!
Julie,
You always make such lovely wreaths and this one is so beautiful. Congratulations, you are being featured at Thursday Favorite Things. I hope you stop by. https://www.eclecticredbarn.com/2020/08/thursday-favorite-things_19.html
Hugs,
Bev
Thank you so much, Bev! Always blessed by your shares!
Wreaths are always such a quick and easy way to add a pop of colour or an update for a new season Julie and you make some of the best.
Thank you for sharing your quick and easy rustic fall wreath at Create, Bake, Grow & Gather this week. I’m delighted to be featuring this project at tonight’s party and pinning too.
Hugs,
Kerryanne
Thank you, friend!
Gorgeous wreath for fall. I love it displayed on the vintage style window.
Hugs,
Kippi
Thanks, Kippi… one of my fave projects… I love the cream-colored ‘berries’!
Hi Julie! Your wreath is amazing. You did a great job with it – and sharing your tutorial. Thank you!
I am actually getting a bit inspired lately – today was finally not a zilliion degrees and 100% humidity.
Oh, I’m so glad you were inspired, Michele! I get it… it has been scorching here, as well! We are finally getting a break!
Such a pretty Fall wreath Julie. I really like the touch of berries and the fact that you can easily take apart and keep using the wreath for different seasons too. Such a great idea. I would love for you to share it at our new link party Home Imagined Tues-thurs if you get a chance. Have a great week.
Will do, Meagan! What time does the party start and end (time zone, too, please)?
Starts today Tuesday 9am ( Eastern standard time) and ends Thursdays at 5pm.
Thanks so much for the support.
Thanks for stopping by and sharing! I love this wreath so much.
Love this wreath and it’s inspiring me to get my fall entry decor underway!
Thanks, Janet! It’s a fave!
Such a pretty wreath for Fall, Julie and SO easy!! I love quick and easy 🙂 Thanks so much for sharing at Home Imagined this week!
Of course, Rachel! Thank you!
Julie,
What a lovely wreath. Simple but stunning. Congratulations, you are being featured on Thursday Favorite Things. https://www.eclecticredbarn.com/2023/09/autumn-posts-on-thursday-favorite-things.html
I hope you stop by.
Hugs,
Bev
Thanks, Beverly! And thanks for all your help with that other issue! 😉
Super cute wreath for fall, Julie.
Thank you for sharing your DIY fall wreath project at Create, Bake, Grow & Gather this week. I’m delighted to be featuring it at tonight’s party and pinning too.
Hugs,
Kerryanne
Well, thank you so much, Kerryanne! Always a thrill to be featured at your party!
I love the way your wreath turned out. And it certainly doesn’t look like a five minute DIY. The colors are perfect. Great job.
Thanks, Clearissa… I just jumped over to visit your site. We’d love to have you link up at Tuesday Turn About here at My Wee Abode. Hope to see you there!
That is lovely!
Oh, thanks so much, Joanne!
Thank you for sharing your rustic fall wreath DIY at Create, Bake, Grow & Gather this week. You always have the sweetest DIY’s Julie and I’m pleased to be featuring your wreath at today’s party and pinning too.
Hugs ~ Kerryanne
Thank you so much, Kerryanne! This week has been rough. I’ll be back at the party next week!
Julie your wreath is lovely and so simple. I love projects that look great but are easy and fast…as it seems I run out of time these days. Have a great October…here we are in the middle of it already. (sigh)
Thank you, Kari! I know… We have less than two weeks left!
Love your 15 min wreath, but it will take me 3-4 hours to gather the material. Small price to pay for being a country gal.
LOL! I was thinking the same thing, Fernie. “It will take some of us longer to gather the materials than to make the wreath!” I may need to add that to the post! 😉