
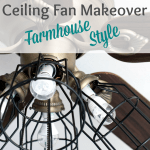
Ceiling Fan Makeover Farmhouse Style
Tuesday is here! Are you ready for a new SIMPLE makeover? Let’s learn how to do a diy ceiling fan makeover farmhouse style!
CEILING FAN MAKEOVER FARMHOUSE STYLE
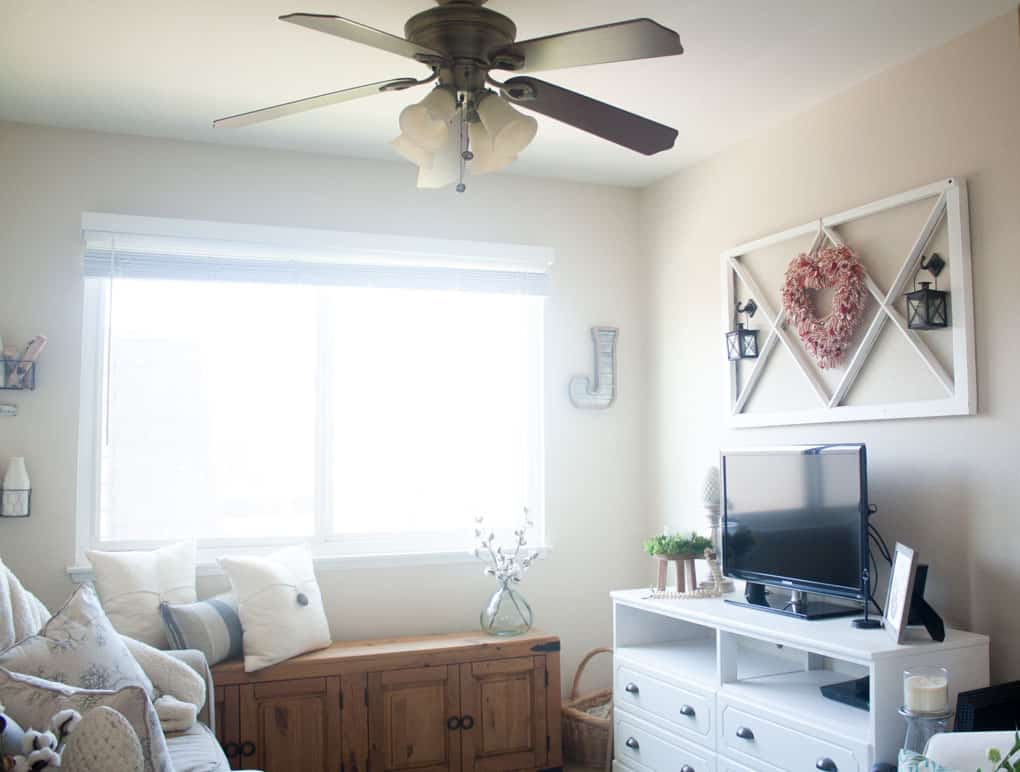
Living in a rental home creates some… let’s say *interesting* decor challenges. The ceiling fan in My Wee Abode has been an ‘eye-sore’ since I moved in two years ago. Old dated shades, fan blades that were just an awful color, and even the base color is (was) not my fave.
Not only did the aesthetics bother me, but it gave off an awful yellow cast to my whole living area… AND kitchen!
Something needed to be done, and it had to be done with a budget AND not compromise the whole fan (because my landlord might not like it!) So, to do a ceiling fan makeover farmhouse style was the answer!
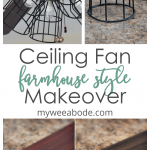
Before
I know I have shown quite a few pics of my living area…Rest assured, My Wee Abode’s other rooms will soon be shared. There just happens to be a lot of projects going on in the living room right now. So, here is a before pic, with the ever-so-lovely dated ceiling fan.
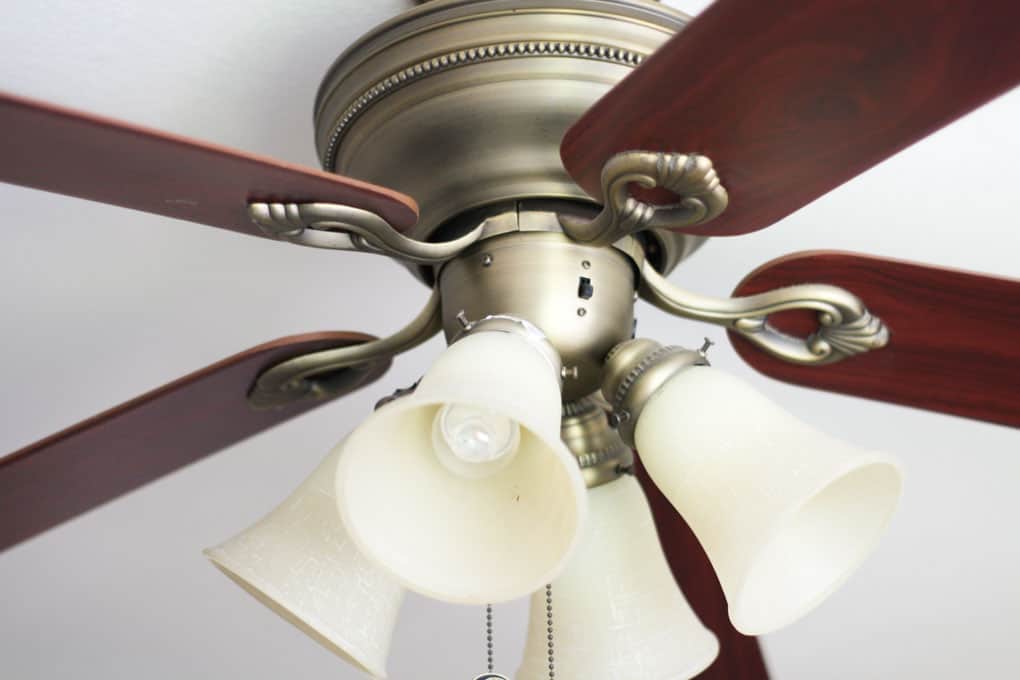
Yep… that is a red colored ‘wood’… Don’t ask me… I have NO idea. It was here when I arrived.
And, yep, cream-colored, almost yellow, glass shades. Yeah (cringe)… let’s just start the makeover, shall we?
BTW, my makeover was inspired, in large part, by my sweet friend, Roxanne, at The Honeycomb Home!
What You Need
(I am not being compensated for any products I am linking to… I’m just sharing what I used and have liked!)
- A (dated) ceiling fan (well, you gotta start with the basics, people!)
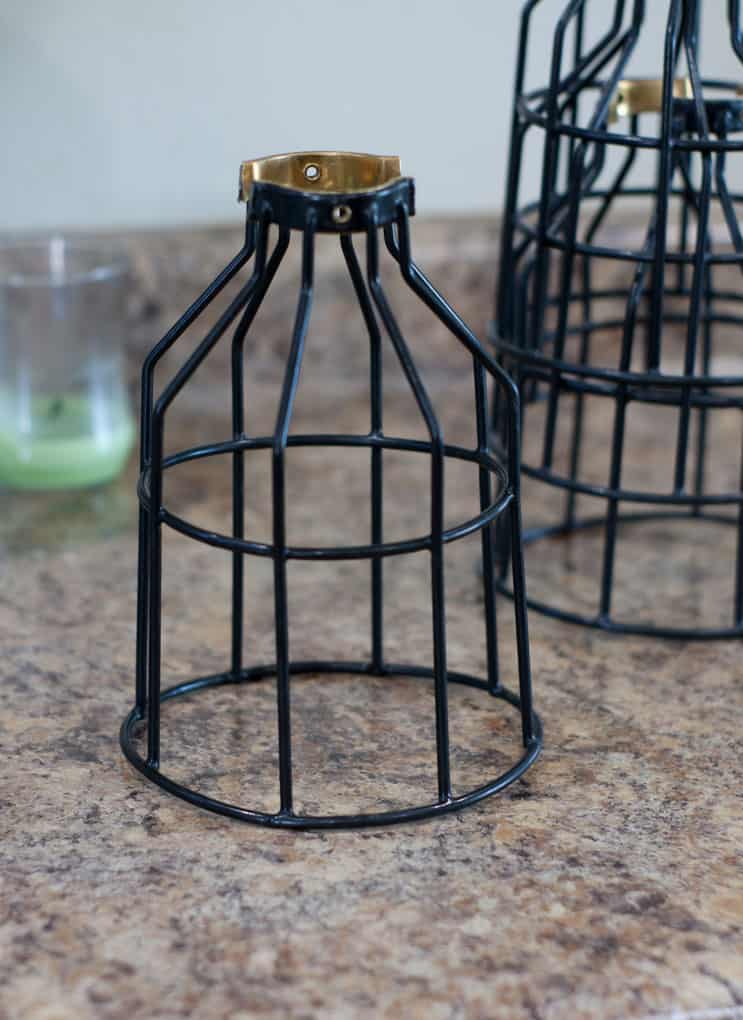
- Cage shades (I got mine here)
Chalk paint(I said this was going to be easy!)Stain(Nope, easy….)Paint and stain brushes(Really easy!)
Bumps in the Road
I had originally started contemplating this project about six months ago. I wanted to paint the fan blades to coordinate with my coastal-farmhouse style, and I also wanted to replace the ugly dated glass shades with cage shades. So, I went on the hunt for some affordable shades.
First Bump
I soon realized that cage shades come in many different diameters (is that the right word?). I needed four (4) shades that, after installation, would not end up bumping into each other.
Tip 1: Be sure to check this measurement at the top 3-4 inches of the shade, to make sure they will all fit without overcrowding.
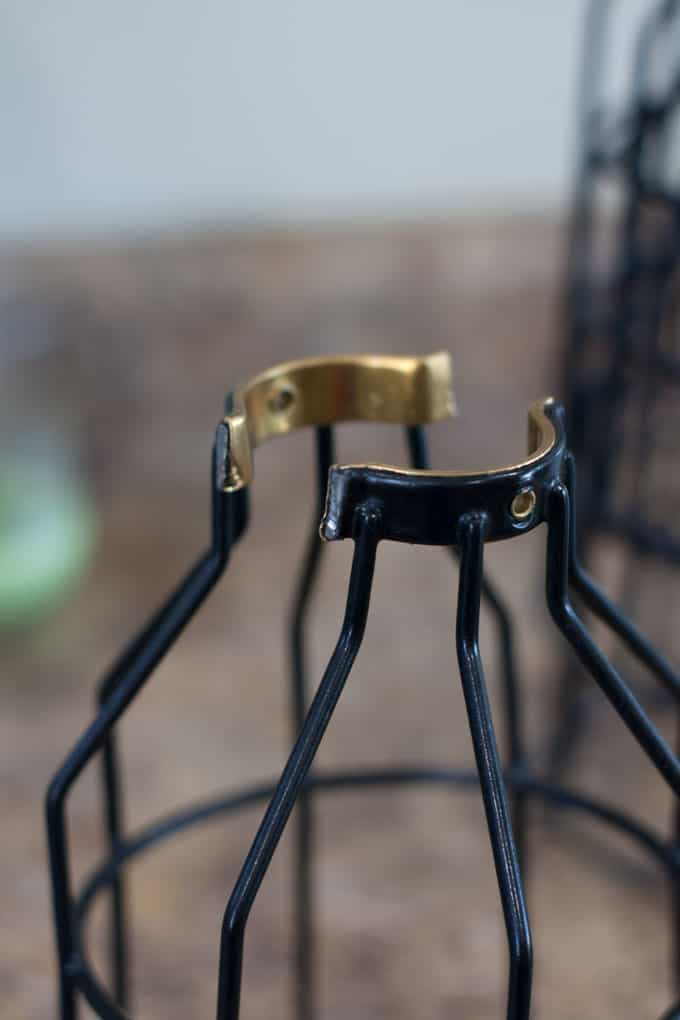
Second Bump
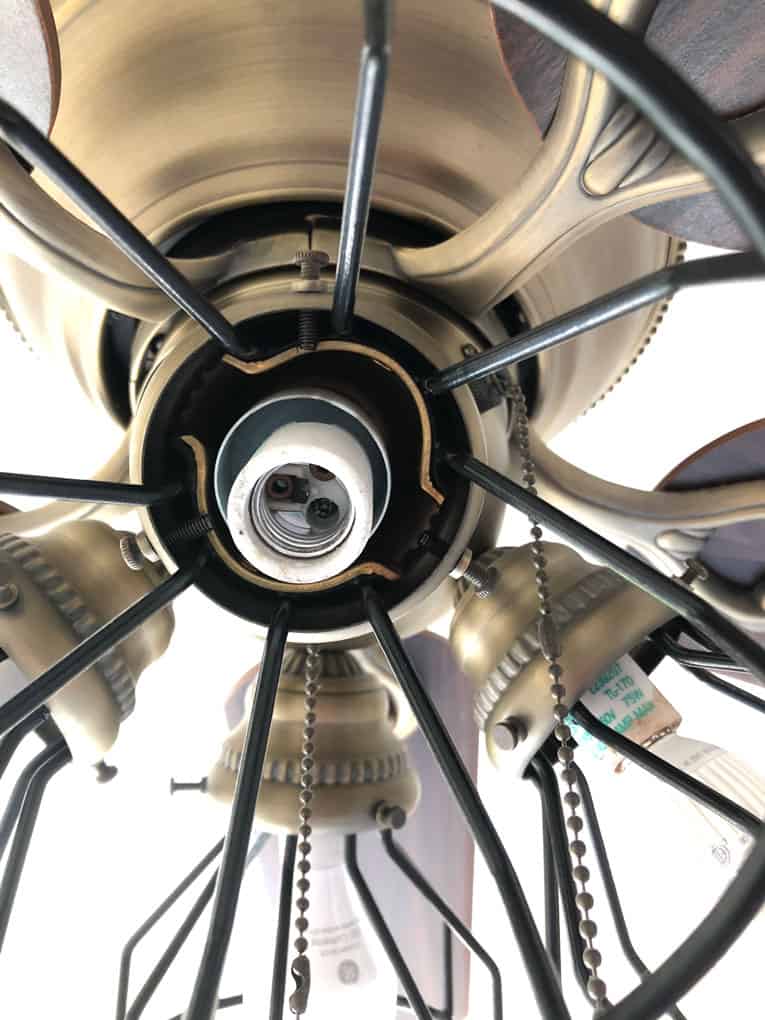
After I found the shades that would fit, at an affordable price, I realized that the opening of the shades (the ‘neck’ where the screws were), where I planned on screwing and attaching it to the ballast ring, had tabs and those tabs made the neck too big to fit into the shade holder.
AND, the neck was also too *big* to screw on the outside of the actual ballast that stuck out.
Tip 2: Metal tabs can be cut off (easily, if your day-job happens to be an office manager at a machine shop!)
Now for the Easy Part
Removing Shades and Blades
First, take the shades off the fan. This will avoid any mishaps while removing the blades (and, noooo, I didn’t break any shades… really, believe it or not, I didn’t.)
Next, remove the blades. This can vary with different ceiling fans, but with mine, it was as easy as unscrewing three (3) screws on the top side of the blades. My blades did ‘stick’ a bit, but I just simply used a small putty knife (a butter knife would work well, too), and slid it between the blade and the element that holds the blade, and gently popped it off.
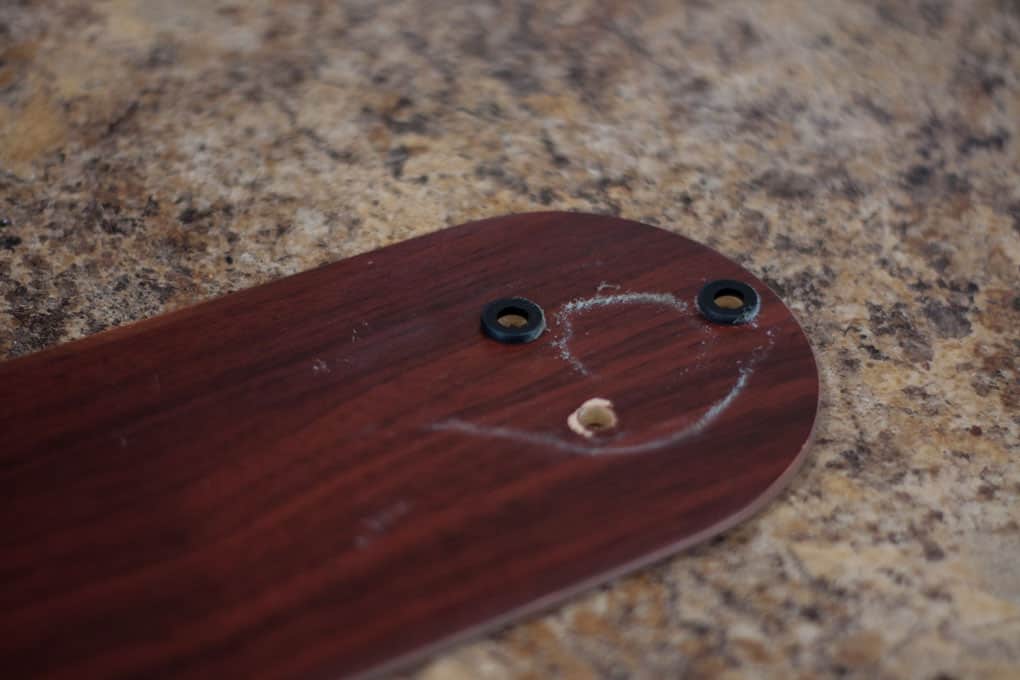
Some of the blades came off with the rubber washers attached (see pic), and the other washers were left behind on the fan. Again, just gently peel these off the blade and replace them when re-installing the blades.
Cleaning
Take this opportunity to give the blades a good washing.
While washing my blades, I turned the blade over and was pleasantly surprised to discover a different color ‘wood’! 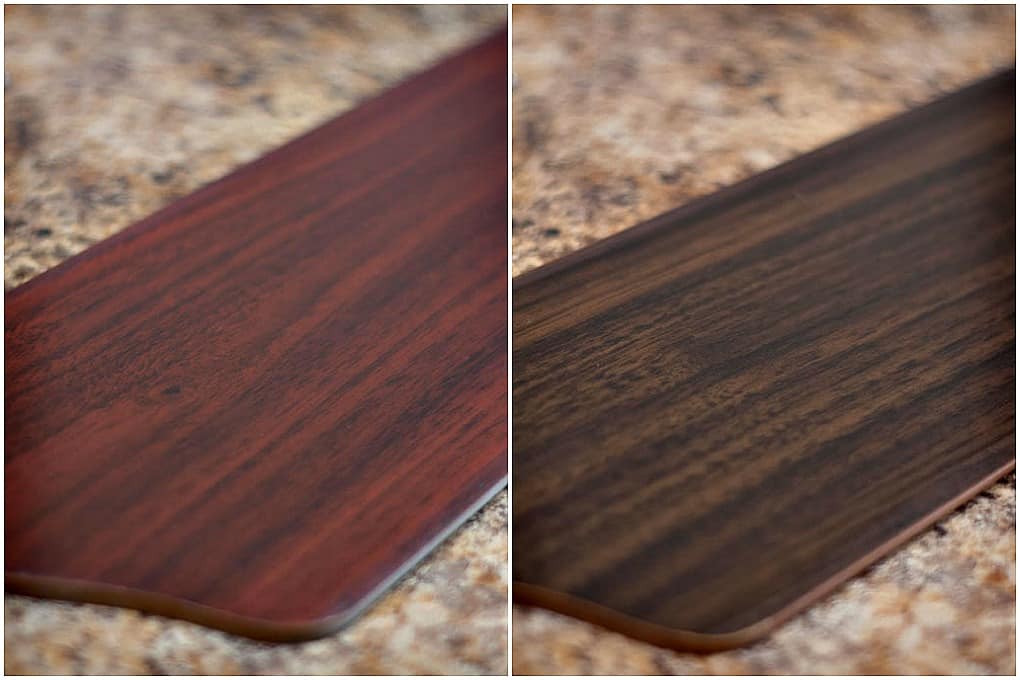
It wasn’t *exactly* what I had envisioned, but it was pretty pickin’ close, and I was happy to not have to re-paint the blades!
This double-colored blade is true of many ceiling fans, so, if you aren’t happy with the current color on your ceiling fan blades, take a look to see if there is another color on the other side!
After cleaning the blades, replace them, making sure to replace the washers, too!
Replace the Shades
Now the shades can be replaced.
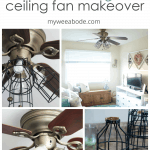
With my ceiling fan, I simply took the neck of the shade (where I cut the tabs off) and pulled the very top of the sides apart. I then put them into the shade holder, squeezed the sides together, inserted them in the cup (between the cup and the ballast ring) and then released it. The tension of the neck on the shade against the decorative cup worked perfectly!
Then, I just screwed the shade screws (that are on the shade cup) under the neck in order to ensure the shades would not fall out (again, see the pic for details).
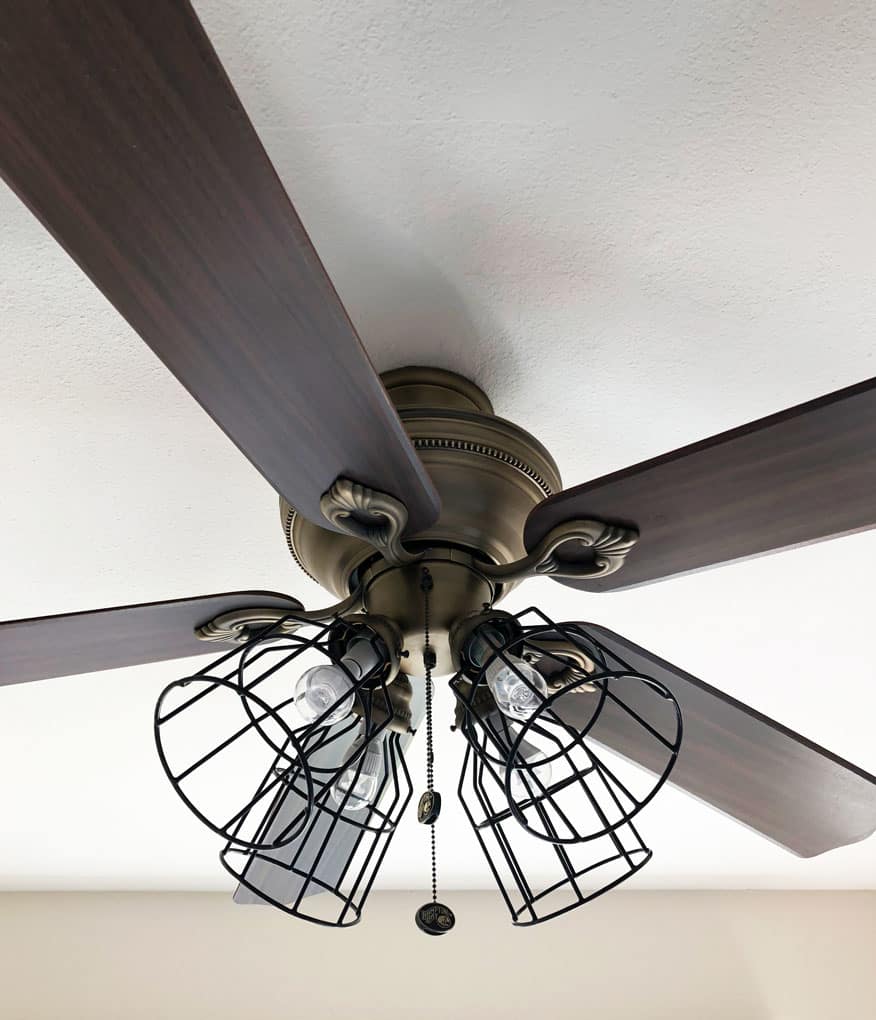
After
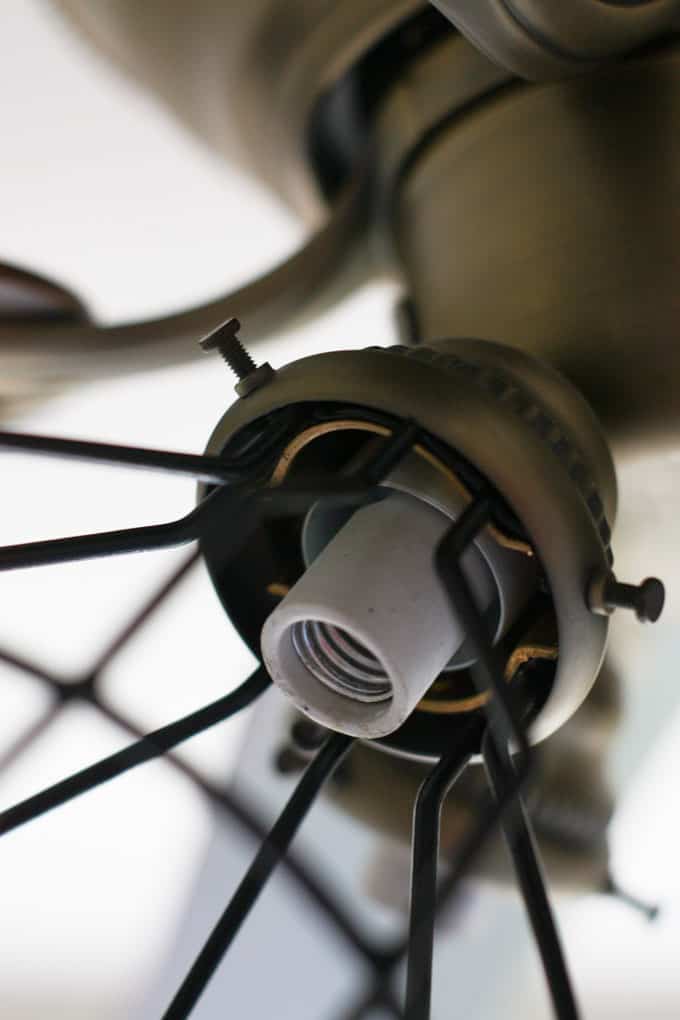
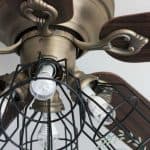
I am so pleased with how this turned out. I wasn’t so sure about the ballasts being exposed, but I kinda’ like the industrial feel that it gives.
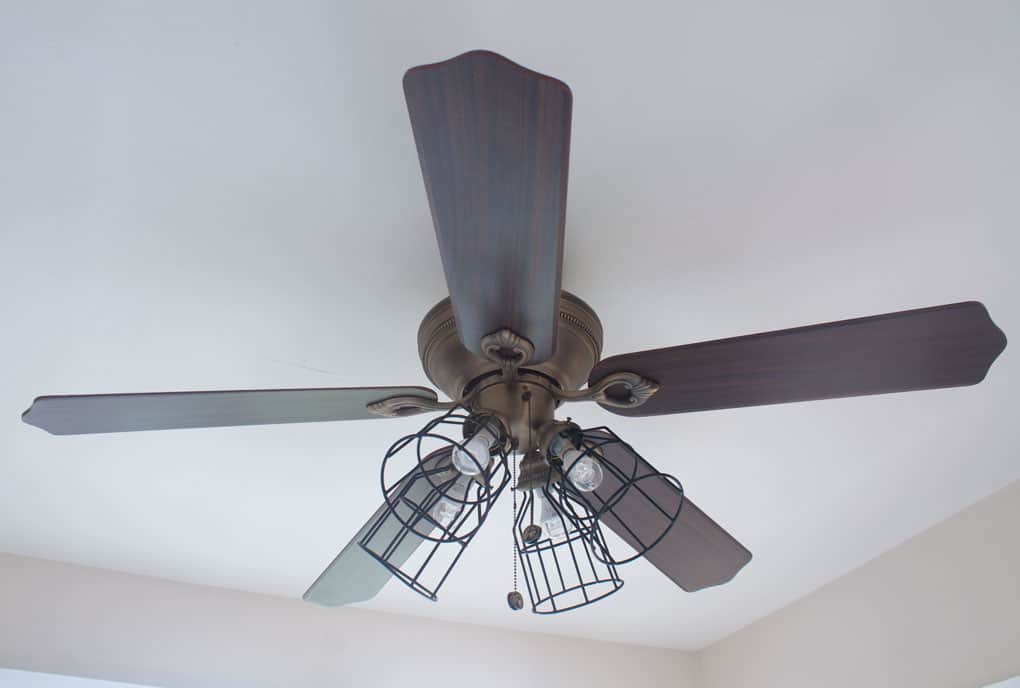
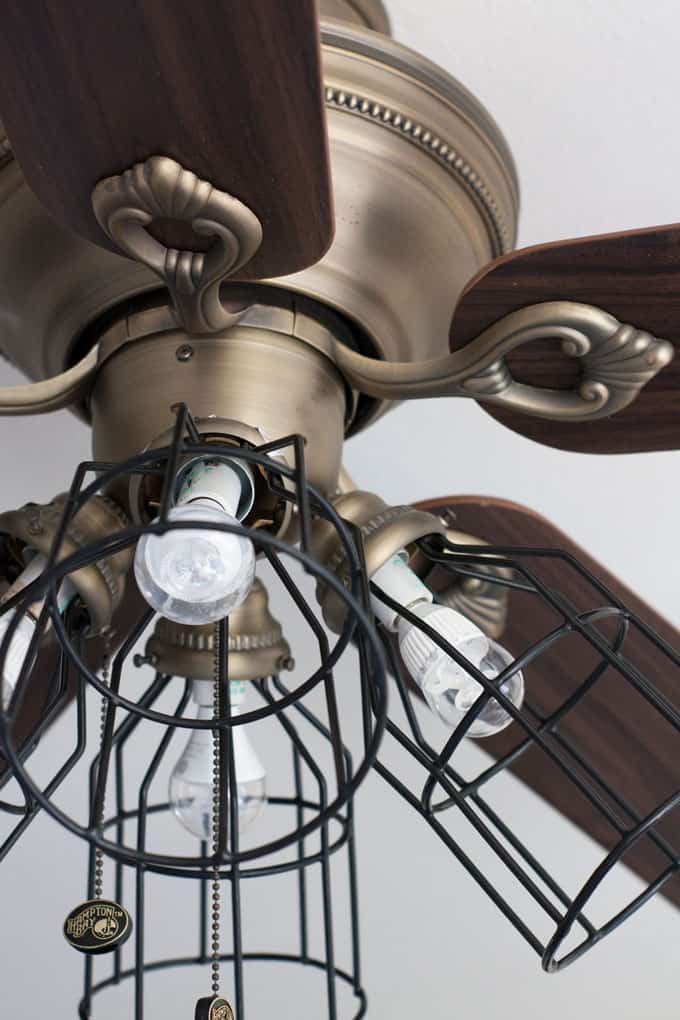
Now that the bulbs are exposed as well, it gives off a much brighter and whiter light! No more yellow cast that was so depressing !
This ceiling fan also has a dimmer, which I would strongly recommend with any light in any room!
Once more… here is the before pic of the room…
And the after!

The antique gold is not so bad, now that all the other parts have been changed!
Even though it is a small change, it REALLY makes a difference in the room, don’t you think? (Still working on those photography skills, and getting all aspects to be consistent. Appreciate you watching me grow in this area! 😉
Now It’s Your Turn
Do you have a ceiling fan that may need a makeover, farmhouse or otherwise? How would you like to change the lighting in your home? Also, I’m thinking about adding at least one more lighting element in this room… what do you think? What type of lamp do you think should I use?
As always, thanks for coming by! You all make this so fun for me! I’d love to hear from you! Feel free to leave a comment below!

This looks AWESOME! It realrly ties eve4ything together! Well done!
Thank you, Jared! You are awesome for supporting me and commenting so often! 😉 I love you! (And, I can’t wait for you to see the makeover in person!)
What a great update! It really makes a statement and the lighting will be much better!
Thanks, Darlene… I’m REALLY happy with it! Thanks for your input during the process, as well!
Such a great outcome Julie! How lucky are you with this project, that you work in a machine shop! And that the other side of the blades were the perfect color. Loving the new look! 🙂
Thanks so much, Nancy! I love it when there aren’t any *real* bumps-in-the-road… right? 😉 So happy you visited! Sleep well, friend!
the porcelain unit the bulb screws into; some can be removed ( power off unit) and spray paint black , it would give more of a completed look and you would only see the bulb….
I totally agree with you… spray painting those parts would definitely give it more of a finished look, and I was planning on doing that. But then… I found out that all the bulb info and UL instructions were on those parts. So, as a renter, I didn’t think it was a good idea to cover. I might be able to use a nice tape and paint the tape though! Thanks, for the inspiration, Linda! <3
What an amazing look! I love that it is affordable. I have a black fan light so you’ve got me thinking. I just have to find the shade cages. Thanks for the inspo!!
Thanks, Darlene! There’s a link in the post for the cages… I found these to be the best price, even with shipping. They have several styles, too! Hugs, dear friend!
Great update! I can’t believe you found cages so cheap.
🙂 gwingal
Thanks for coming by, Nikki! Yes… I tend to be a real ‘hunter’ for bargains (have to). My open shelving hardware (future post) cost me about 1/2 the price of anywhere else! 😉 Love me a bargain! Loved your gardenia video. You go, girl!
Really great idea, Julie! I love the fan’s new look with its industrial shades! <3 Happily pinning to my DIY Projects. Coming over this week from Blogging fifty ~ fun! I really like that you modified the metal lamp shades. Brilliant!!! Ha ha, pun not intended, really! Have a great week!!!
Barbara! Thanks for coming by, and for pinning! (All the hugs!) You going to Haven this year?
That is a great transformation. Loving the addition of the metal pieces.
Thanks so much, Mary! Yes, the cages are my favorite part, and the biggest transformation. I would like to paint the whole thing, in the future. Have to check with the LL first, though! 😉 Hugs, friend!
What an AWESOME idea! Seriously! You are brilliant! I would have never thought of cage lights for the fan!
Thanks for inspiring me today!
karianne
KariAnne… in all your busy-ness… you came by? What the what?! You are an awesome support and encouragement! I really needed this today! Thank you, friend!
Looks great! I did this also. My kitchen fan needed a lift and just wasn’t possible to replace it. I love it. 👍
Hi, Janet! Oh, I would love to see your fan! If you have a FB account, hop on over there and follow My Wee Abode and you can post a pic on my page! Thanks for the comment. Hope to ‘see’ you again, soon!
Great make over! I’m sure your loving the new and improved light!! Updating lighting and ceiling fans make such a difference. Glad you came up with a way to do it in your rental. I once replaced 2 light fixtures with ceiling fans in an apartment, kept the old fixtures, then swapped them back out when I left! That was a lot of work, but worth it! Your makeover was much less labor intensive! Equals good job!!!
Thank you so much, Nancy! I think I would like to paint the whole thing black, but not sure my LL would appreciate it. I think the ceiling fan in my BR is going to have to be replaced… I just tried to pull the chain on it for the first time, and it pulled completely out of the base! LOL! I need to get if fixed before our So Cal weather turns crazy hot! Glad you visited, friend!
Usually, when the chain pulls out there is a little part that can be replaced to fix it. But maybe your landlord doesn’t know that and you’ll get a new fan! Fingers crossed!
Exactly! I can Google and Youtube these kind of fixes… BUT, if anything went wrong, my LL would not be happy. She is wonderful, and will be more than happy to fix/replace (I kinda think she is wanting to replace it. Would prefer the one I just revamped to be replaced, but we’ll see!)
I LOVE the industrial look. VERY CREATIVE. Pinned to a new board called Industrial. Thanks so much for your very creative style also. Best wishes from Thursday Favorite Things party. Linda – co hostess – at Crafts a la mode
Thanks so much, Linda! Hoping to update it even more… soon! Appreciate the love, and TFT! Have a great holiday today!
Congratulations! Your post was my feature pick at #ThursdayFavoriteThings this week. Visit me at https://www.marilynstreats.com on thursday morning to see your feature! All hosts choose their own features from the comments left on their blog so be sure to return to my blog to see your feature. I invite you to leave more links to be shared and commented upon. Please don’t forget to add your link numbers or post title so we can be sure to visit!
Oh, thank you SO much, Marilyn. I appreciate you commenting and letting me know, as well. For some reason, I don’t receive pingbacks… ever. 🙁 Of course I’ll be coming by on Thursday. Again, thank you so much!
I’m so glad you were inspired by my fan makeover! Now if I could only find something similar to replace the shades on my bathroom vanity fixture!
I TOTALLY get that!!! I have the exact same dilemma!
Great transformation! I didn’t even know that you can buy cage shades. I wonder if I can put up a cage shade in my laundry room for the overhead light. It has a really cheap glass dome covering on it now.
I’m sure there is something you could do! 😉
Love all the photos of the actual change out, so helpful for us visual learners! And I really like the finished look. Thanks for sharing with SSPS, we appreciate it!
I’m glad you liked the tutorial! 🙂