How to Make Velvet Christmas Ornaments Two Ways
Ornaments, ornaments! Ornaments everywhere! My Wee Abode is on a bit of an ornament ‘kick’, y’all! Today, let’s learn how to make velvet Christmas ornaments TWO ways! This simple tutorial will show you how easy it is to DIY velvet Christmas ornaments!
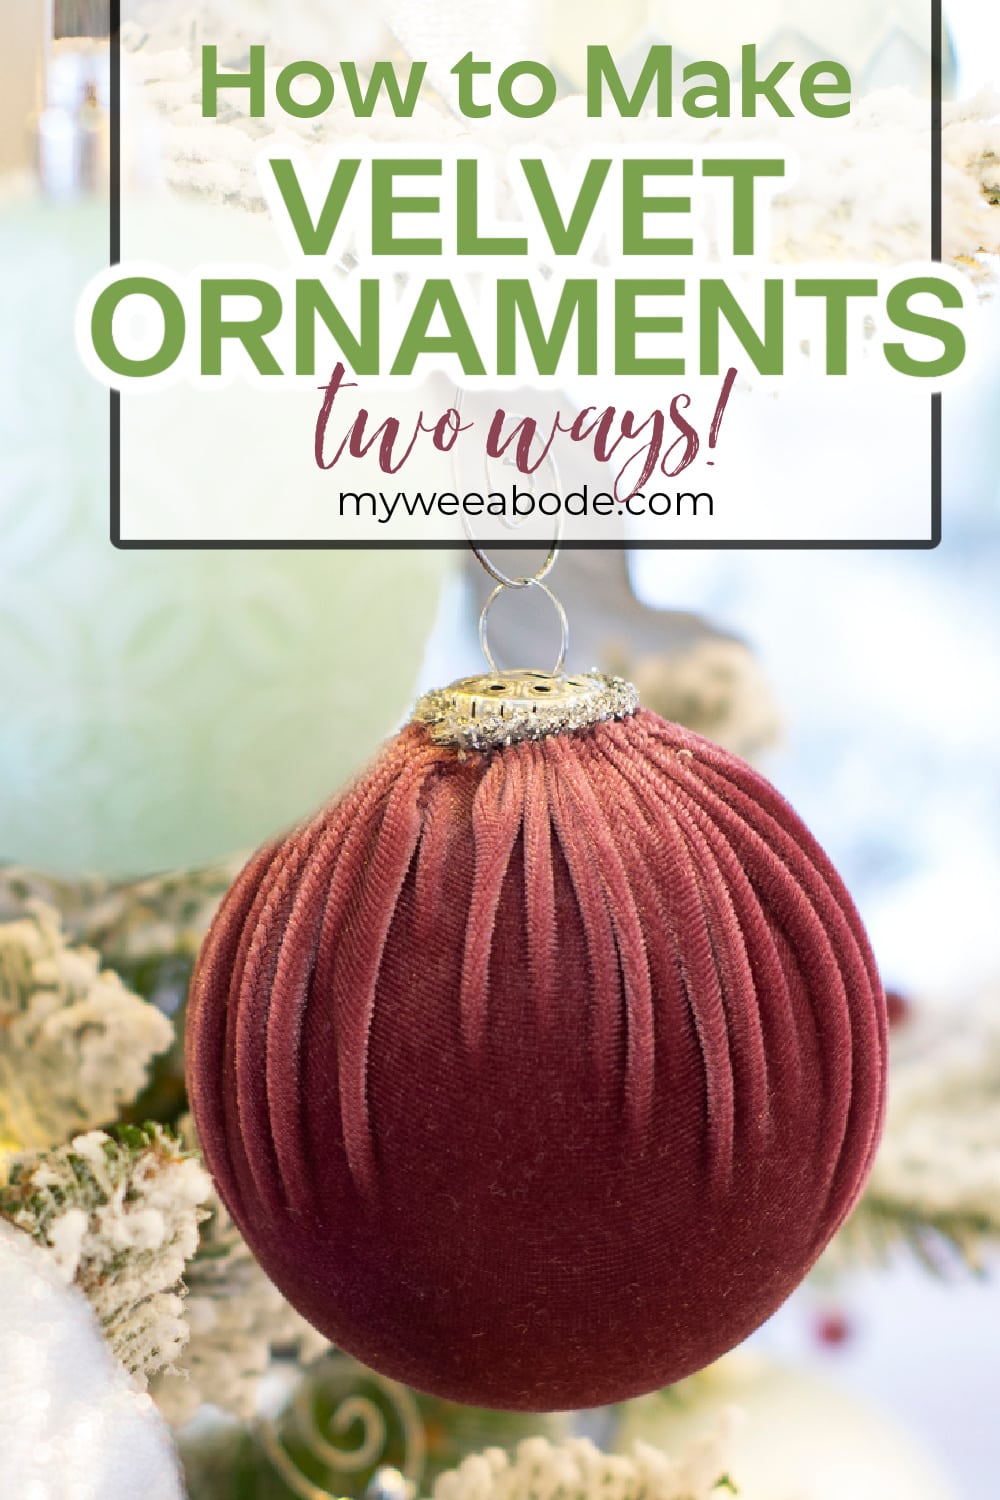
HOW TO MAKE VELVET CHRISTMAS ORNAMENTS TWO WAYS
Welcome! Welcome to My Wee Abode!
Today is the November Pinterest Challenge and it’s all about DIY Christmas tree ornaments!
And we are in PLENTY of time for Christmas! Will wonders never cease?!

Before we go on, I want to thank our lovely hostess, Cindy from County Road 407, for pulling this whole gaggle of bloggers together to share some wonderful DIY Christmas tree ornaments. We love you, Cindy!
If you are traveling from Decor To Adore’s site and knocking on My Wee Abode’s door for the first time, a special welcome to you! If you love Louisa May Alcott, I’m sure you loved Laura’s DIY!
And, if you are already a MWA family member, welcome back! I’m always so happy to “see” you!
What is the Pinterest Challenge?
If you are new to the Pinterest Challenge, it’s all about one inspiration photo, a group of bloggers, and each of us putting our own twist on the inspo image!
However this month, Cindy let us all get a little crazy! Crazy about Christmas, that is, and we’re sharing a bit of our craze with you!
This month, each of my sixteen blogging buddies is sharing a Christmas tree ornament DIY… in PLENTY of time for decorating YOUR tree!
DIY Velvet Christmas Ornaments
Did you know that I LOVE velvet DIYs?
Well, you do if you’ve been hanging around our little home for any amount of time!
- DIY Velvet Pumpkins, Just Like the Pros
- How to Make Stretch Velvet Acorns the Easy Way
- Frosty Velvet Christmas Wreath
- How to Make a Valentine Garland with Velvet Covered Hearts
- Easy DIY Velvet Mushrooms Three Ways
And this is the short list!
I’ve been wanting to create velvet Christmas tree ornaments for several years, and FINALLY got them done!
Plus, I’m not just sharing just one way to make these! There are TWO ways you can make these soft, velvety ornaments!
So, let’s get to it, shall we?
Velvet Christmas Tree Ornaments – What You’ll Need
There are two short lists of supplies; one for each type of DIY velvet tree ornament!
This post may contain affiliate links, at no additional cost to you. For more information, see my complete disclosure HERE.
Velvet Christmas Tree Ornament from Velvet Yarn
The idea for a velvet yarn ornament came to me while thinking about another velvet Christmas decor item (coming soon!).
Here’s what you’ll need:
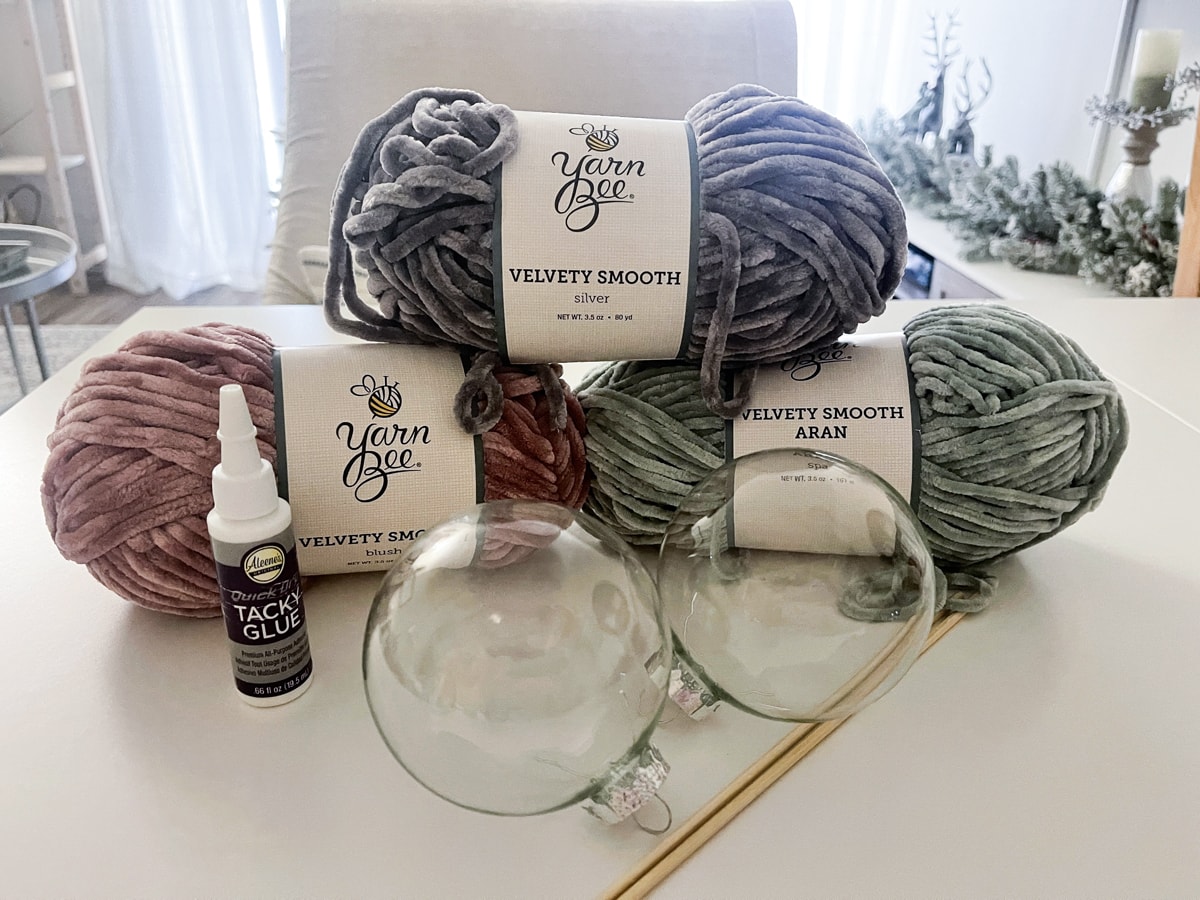
- Velvet yarn (aka chenille yarn). You can find this at your local craft store, or you can buy online on Amazon, Michael’s, or JoAnn’s. I used two different weights of velvet yarn from Hobby Lobby for these ornaments. One was a 5-bulky (for the rose and silver yarn) and the other was a 4-medium (for the mint). For this project, I preferred the 5-bulky, and would even try the 6 weight. Just be sure to check the weight when you buy.
- Coordinating acrylic paint (not pictured, and optional)
- Three to 4-inch clear ornaments. I prefer the glass. They just ‘feel’ nicer. However, plastic will work, too! You can find these at Michael’s… local pickup, but you can order online!
- Quick Dry Tacky Glue, at Michael’s or Amazon.
- Scissors
- Wooden skewers (or something to poke and maneuver the yarn)
Velvet Christmas Tree Ornament from Stretch Velvet
Because there are so many stretch velvet DIYs here at My Wee Abode, I decided that a picture wasn’t really needed… and I forgot to take one (insert eye-roll). So, here’s the list:
- Stretch velvet fabric; you can get this at your local fabric store, but there are a lot more colors to choose from on Amazon (seller 1 and seller 2) and Etsy.
- Extra Strong Upholstery Thread
- Large sewing needed with large eye
- Tacky Glue (Set) (I like this set because I’ve used all of them at some point.)
And these items are optional for embellishments:
- Rhinestones (optional)
- Jewel Picker
- Silver trim of your choice
Now, let’s get to the tutorials, shall we?
How to make a Velvet Christmas Tree Ornament from Velvet Yarn
Let’s learn how to make this first Christmas ornament using velvet yarn!
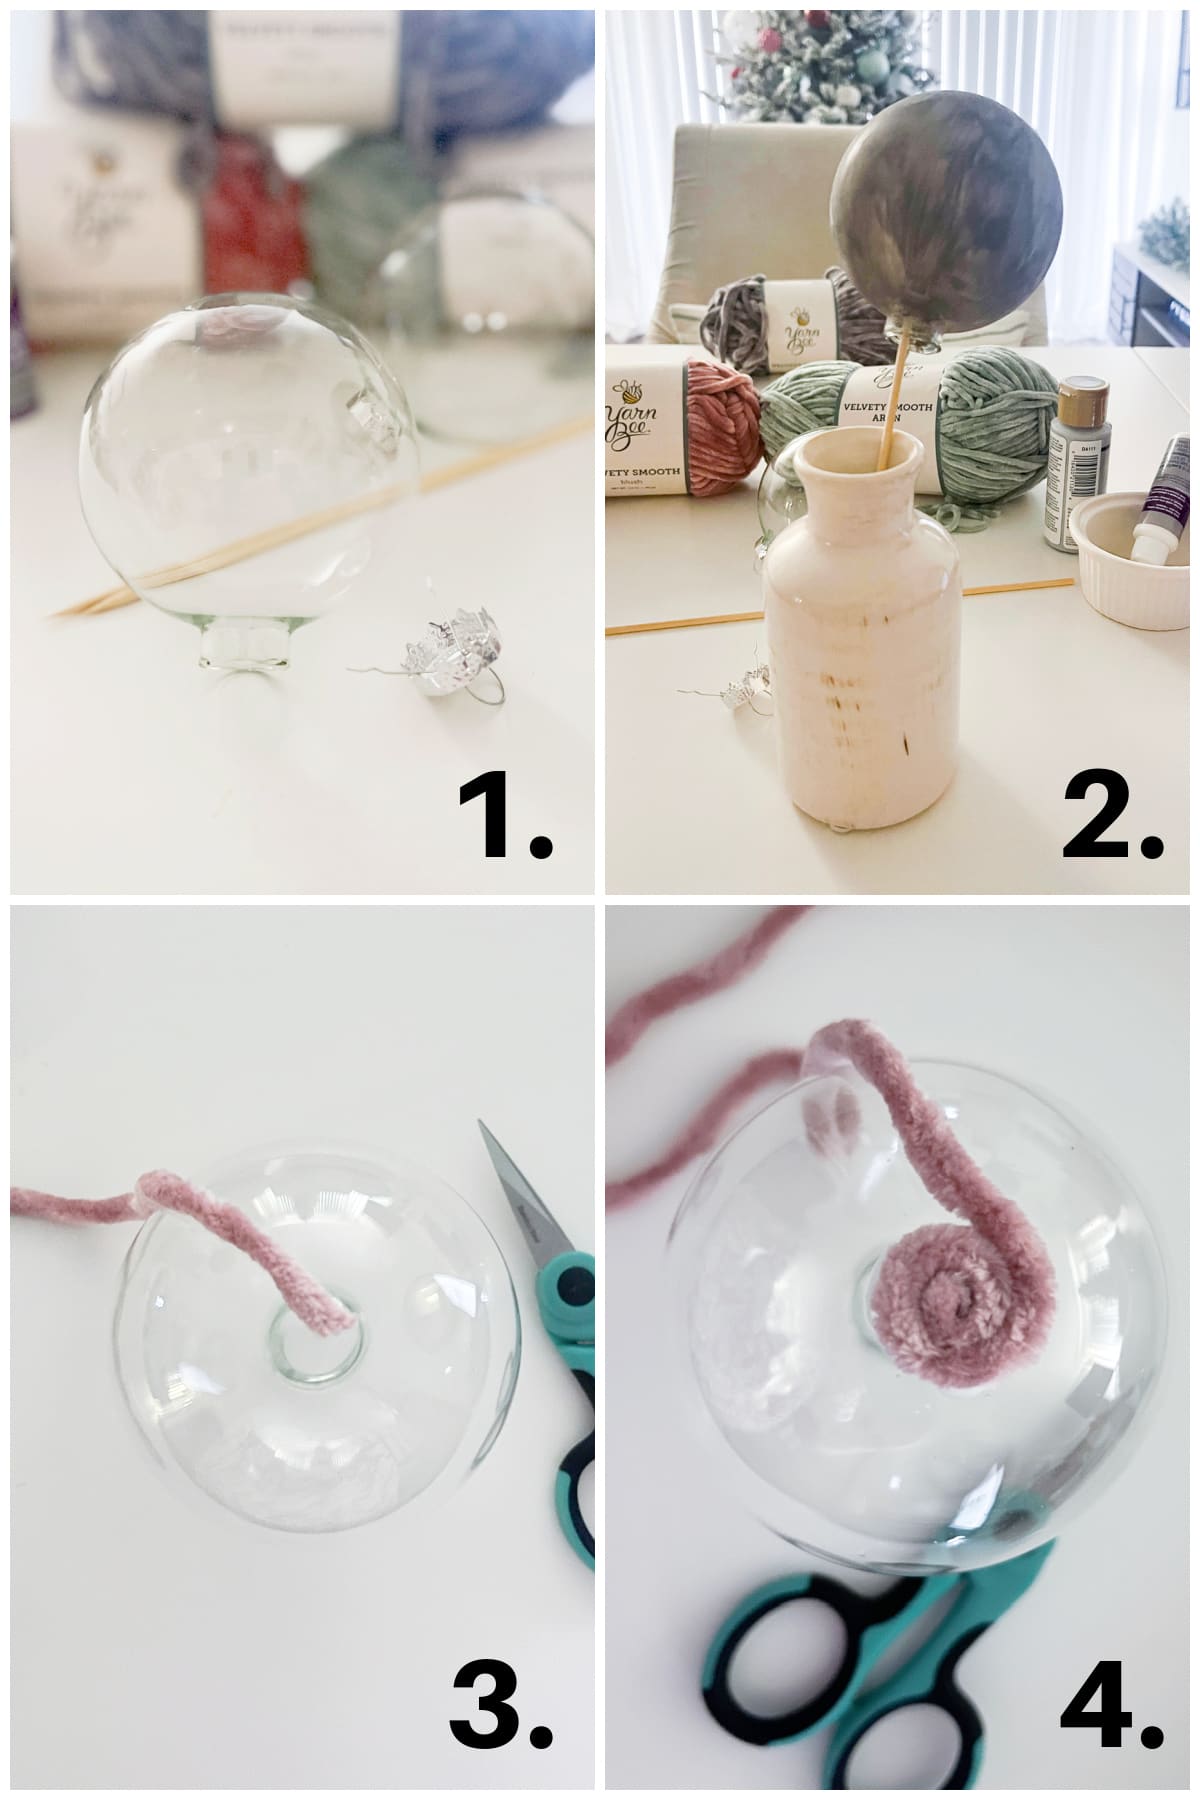
- First, remove the decorative hook/hanger from the ornament by simply pulling gently and firmly on the round hanger (Photo 1).
- You can paint your ornament with a coordinating acrylic paint, if you like. I tried this on the silver/gray ornament, and it worked nicely. But, it only made a small difference with giving a more ‘solid’ look to the ornament. Just use one of the wooden skewers and place in a short vase while the ornament dries. I only did one coat of paint. (Photo 2)
- Put a drop of glue on the center/bottom of the ornament. Be sure to get this as exact as possible, because this will be the starting point to a straight wind around the ornament. I found that placing the bottle of glue on its tip at the bottom, and then holding up and turning the ornament and adjusting the bottle to the center, worked the best. Then place the end of the yarn on the glue (Photo 3).
- You can almost immediately start winding the yarn around the center point. I used a stream of glue (instead of sporadic dots) to ensure the yarn stayed in place (Photo 4).
More Winding…
At this point, I started taking pics of both the rose and silver ornaments, depending on when I remembered to take the photo! Just keepin’ it real, as always!
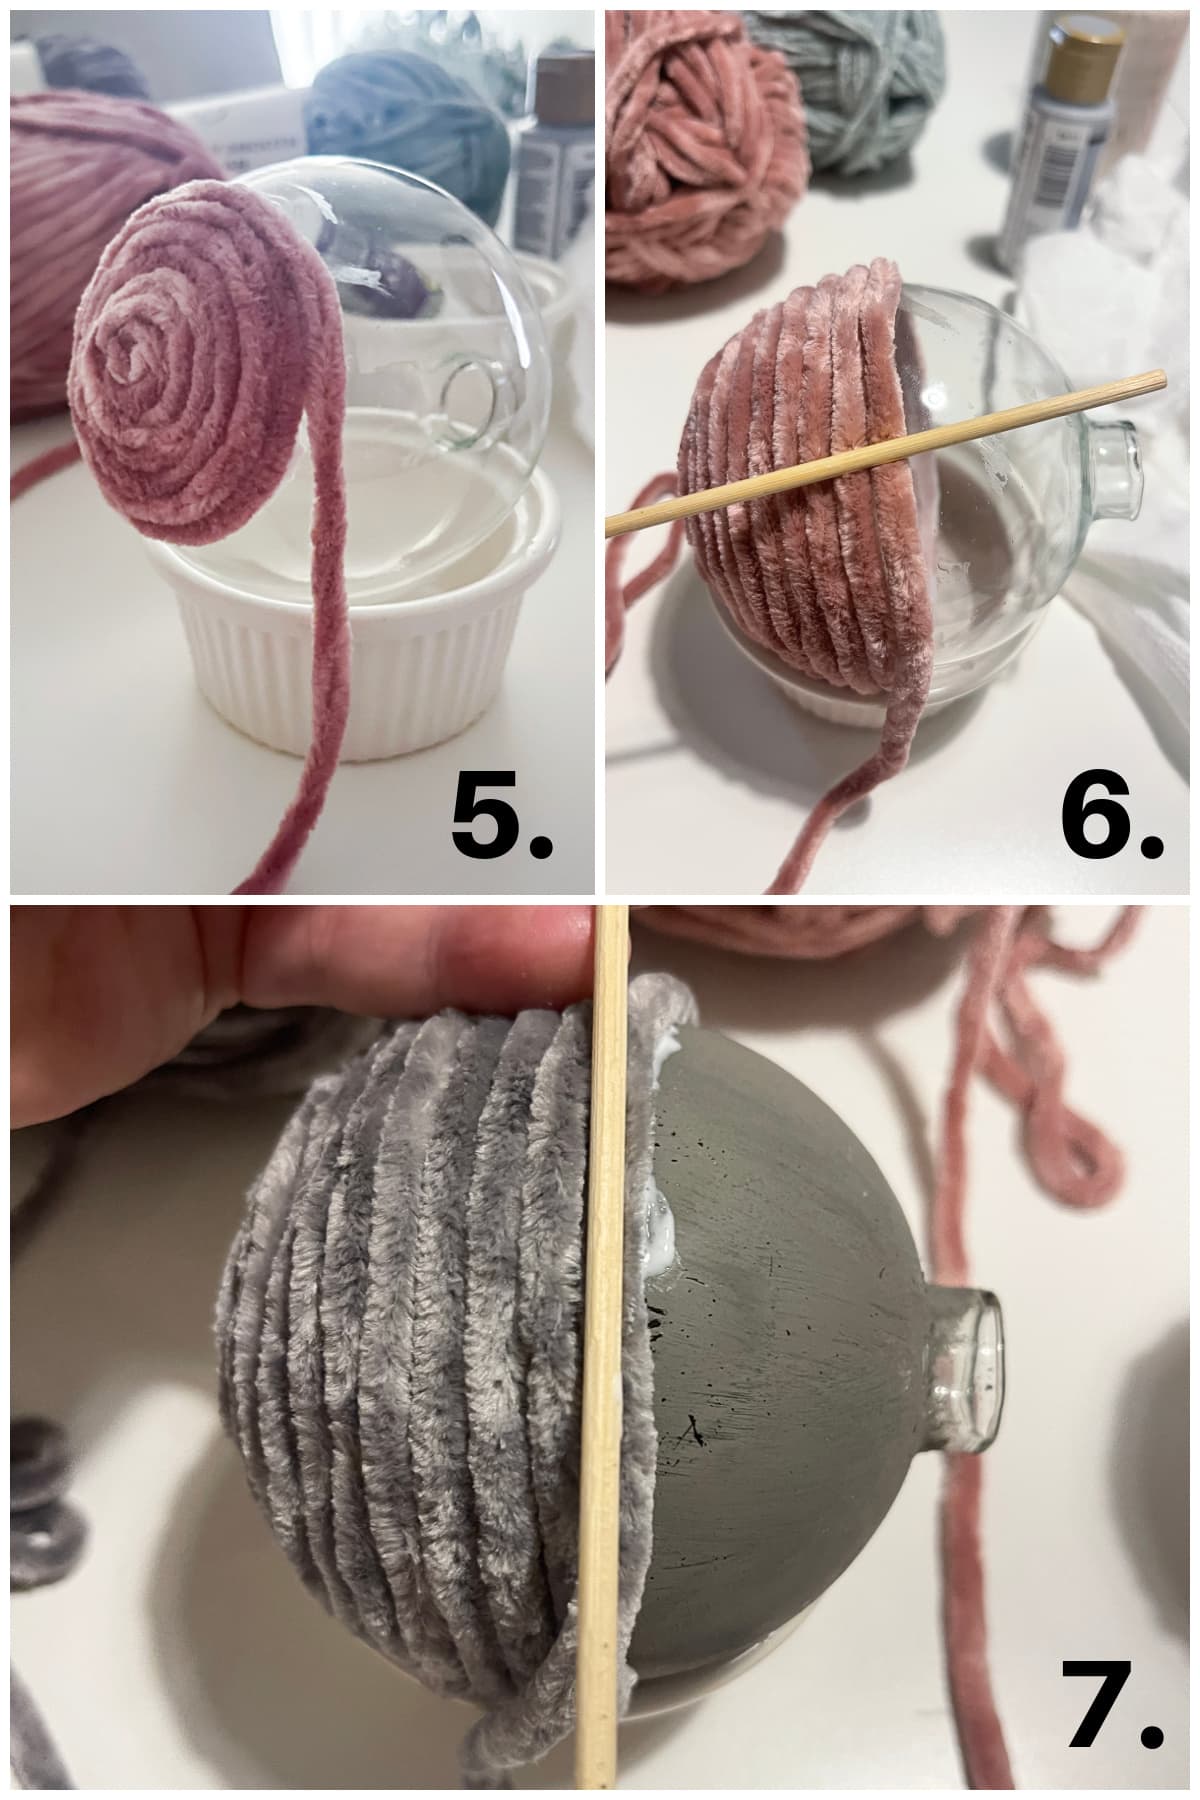
- Let the rows dry in-between winding. Usually about two or three rows is a good time to wait about 15 minutes, as this glue dries fast! (Photo 5)
- While winding the yarn, use the skewers to ‘push’ the yarn into the glue, as well as to maneuver the rows into place. Sometimes they might separate, so just push them closer together (Photos 6 and 7)
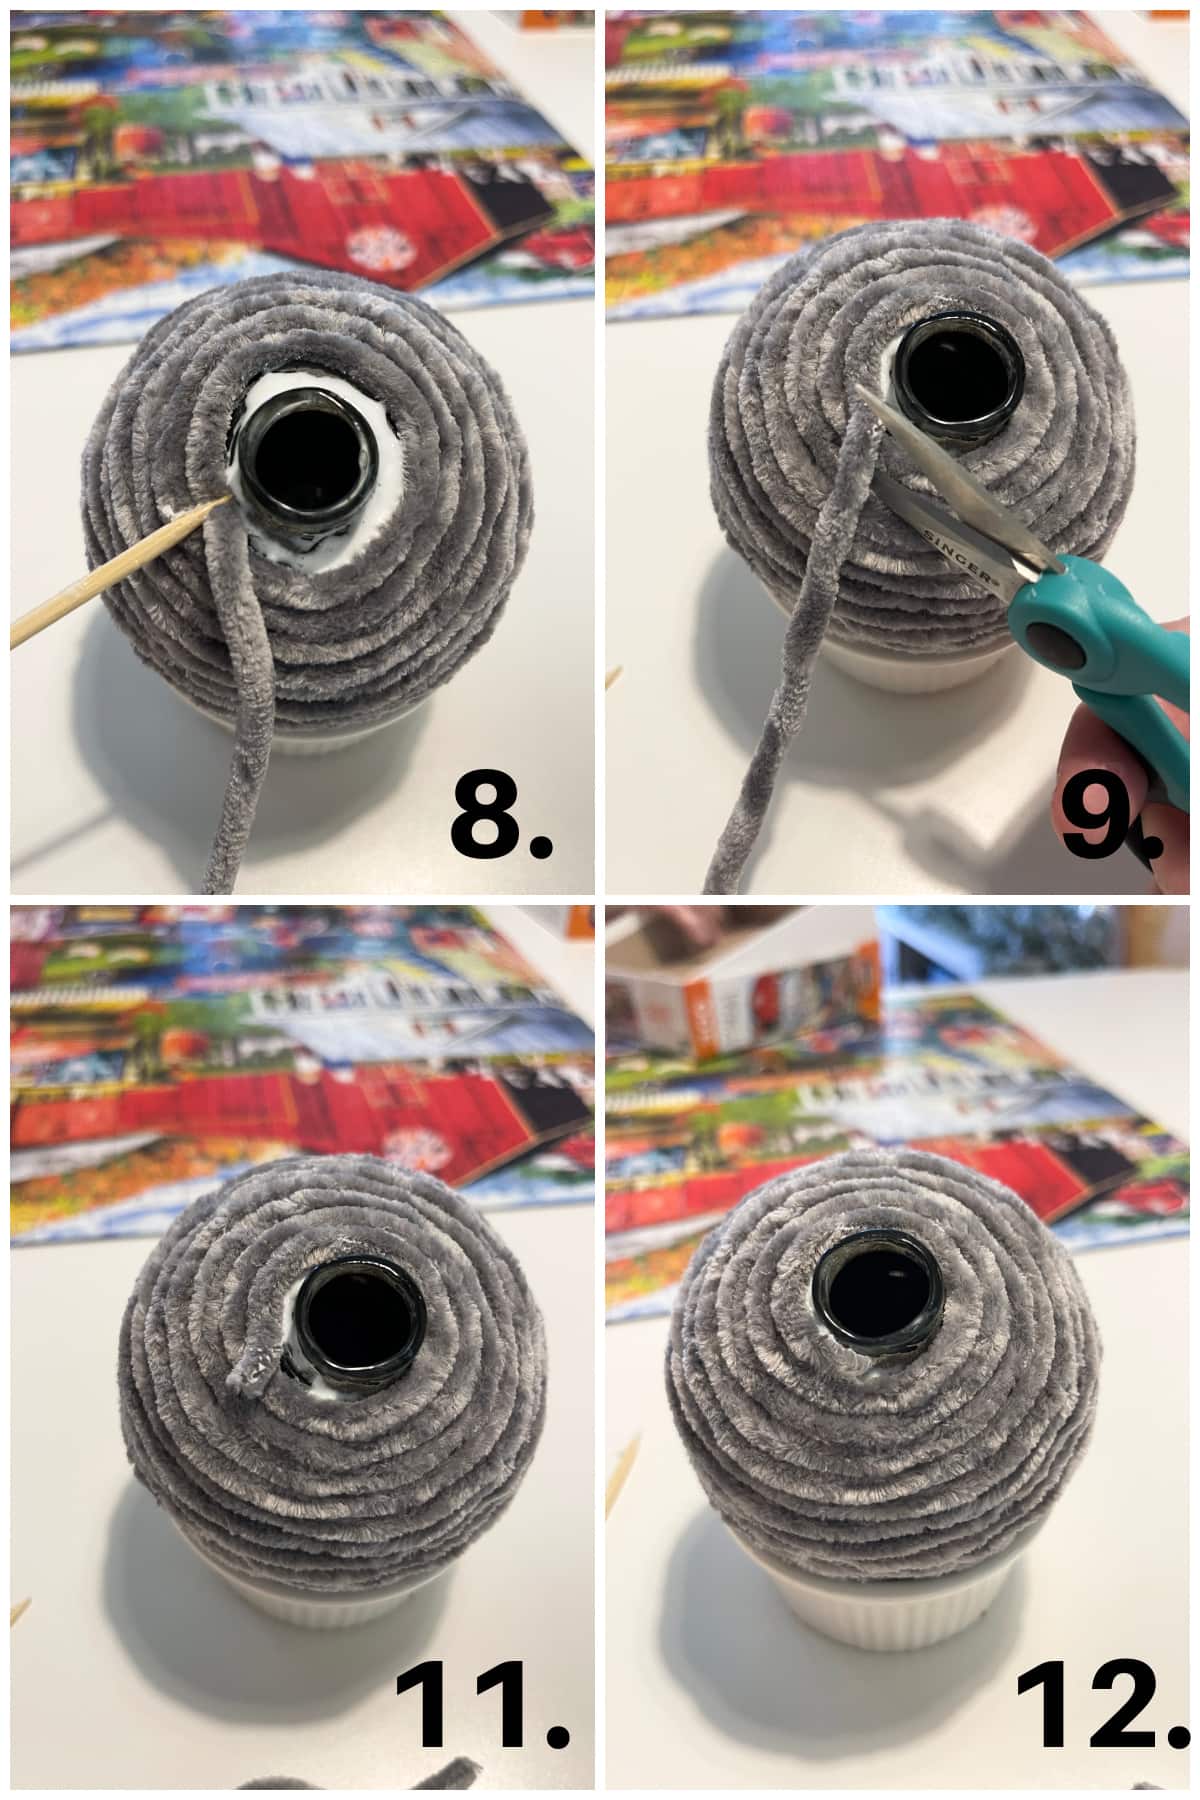
- When you get to the top of the ornament, use the skewer to do more pushing and prodding (Photo 8). When you have it as close as possible to the base of the ‘stem’, clip the yarn and then push the end into and under the last row of yarn (Photo 11 and 12).
Now, if you like, you can add rhinestones or trim to your velvet yarn Christmas ornament. You can find the tutorial on how to add rhinestones on my custom color ornaments tutorial. To add trim, just drape or wrap and glue in place as you go!
How to make a Velvet Christmas Tree Ornament from Stretch Velvet
Now, I’m keepin’ it real again. I did NOT create photos for this stretch velvet ornament tutorial.
And it’s not because I forgot. LOL!
It’s simply because to make these velvet covered Christmas ornaments, you do just about the same thing as my DIY velvet mushrooms, pumpkins, and even my velvet acorns!
Here are the steps. To see the actual pictures of this, click on the velvet mushroom post for the best visual:
- Turn your velvet face down and trace your “stencil”. This can be a bowl, plate, or ??? (Take the size of your ornament, and add about 1.5 inches to the velvet cut.) Pro tip: Using a felt tip pen is easy, and shows up on the darkest of fabrics.
- Take a needle with a large eye and your upholstery thread (doubled over), and slip stitch around the circle about 1/4″ away from the edge.
- Slightly pull the thread to begin forming the cover for your ornament. Pro tip: Be sure to leave your needle threaded to tie off your thread at the end.
- Cover your ornament with the velvet and pull the string in gently and firmly around the ‘stem’. Arrange and rearrange to get the velvet centered. Then, tie-off the thread.
That’s it! Even easier than the velvet yarn tutorial, right?!!!
For a finished look, replace the cap and hanger, and then add some trim around the cap. This will hide any space or gathering you don’t want exposed.
Admire Your DIY Velvet Christmas Tree Ornaments
Now for the finished products!
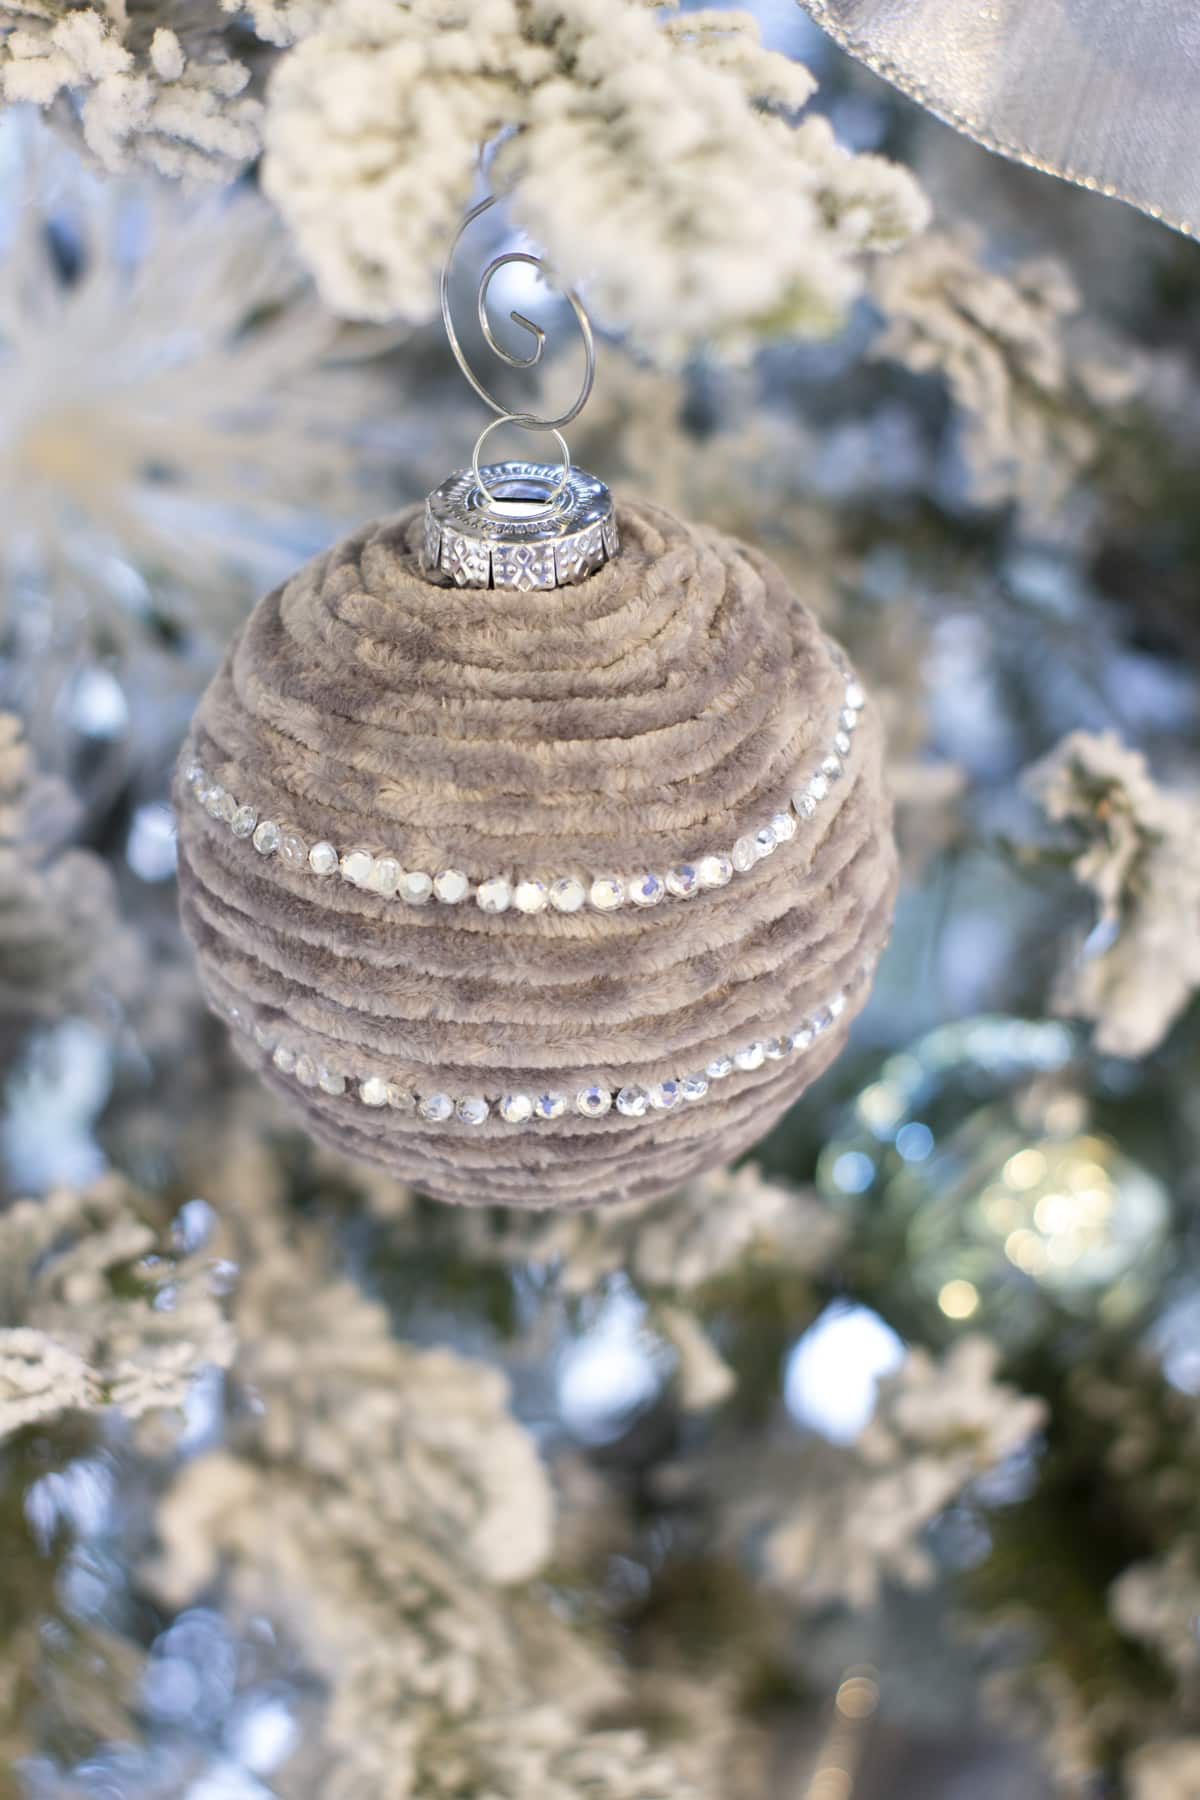
The rose-colored velvet yarn ornament was in the 5-bulky weight yarn (as well as the silver/gray ornament).
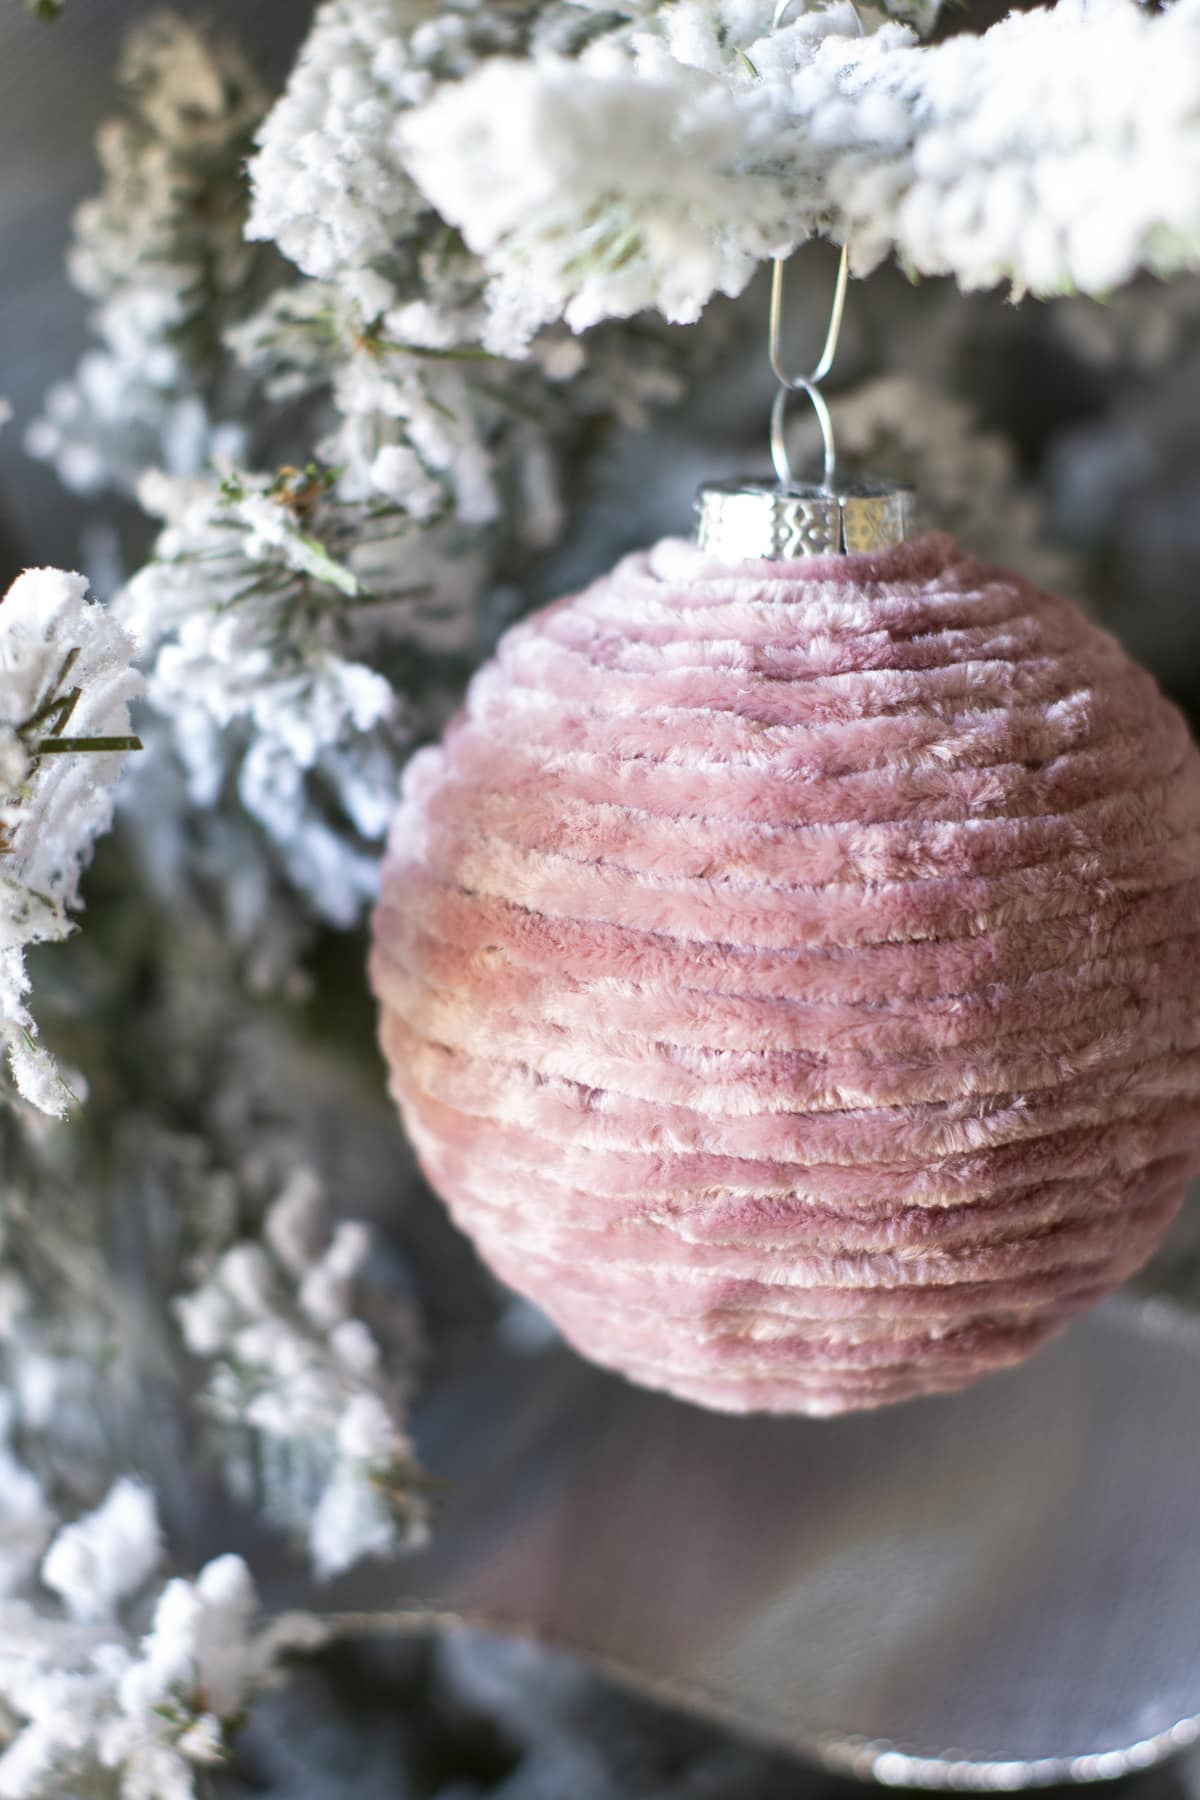
No embellishments were needed for this luxurious color!
The silver/gray ornament needed a bit of sparkle, and y’all know how I love rhinestones on velvet!
The minty yarn ornament was my first prototype, and I used the 4-medium weight yarn on this. To tell you the truth, I didn’t realize I had picked up two different yarn weights until I started the rose-colored yarn! But, it was fun to do both ‘sizes’.
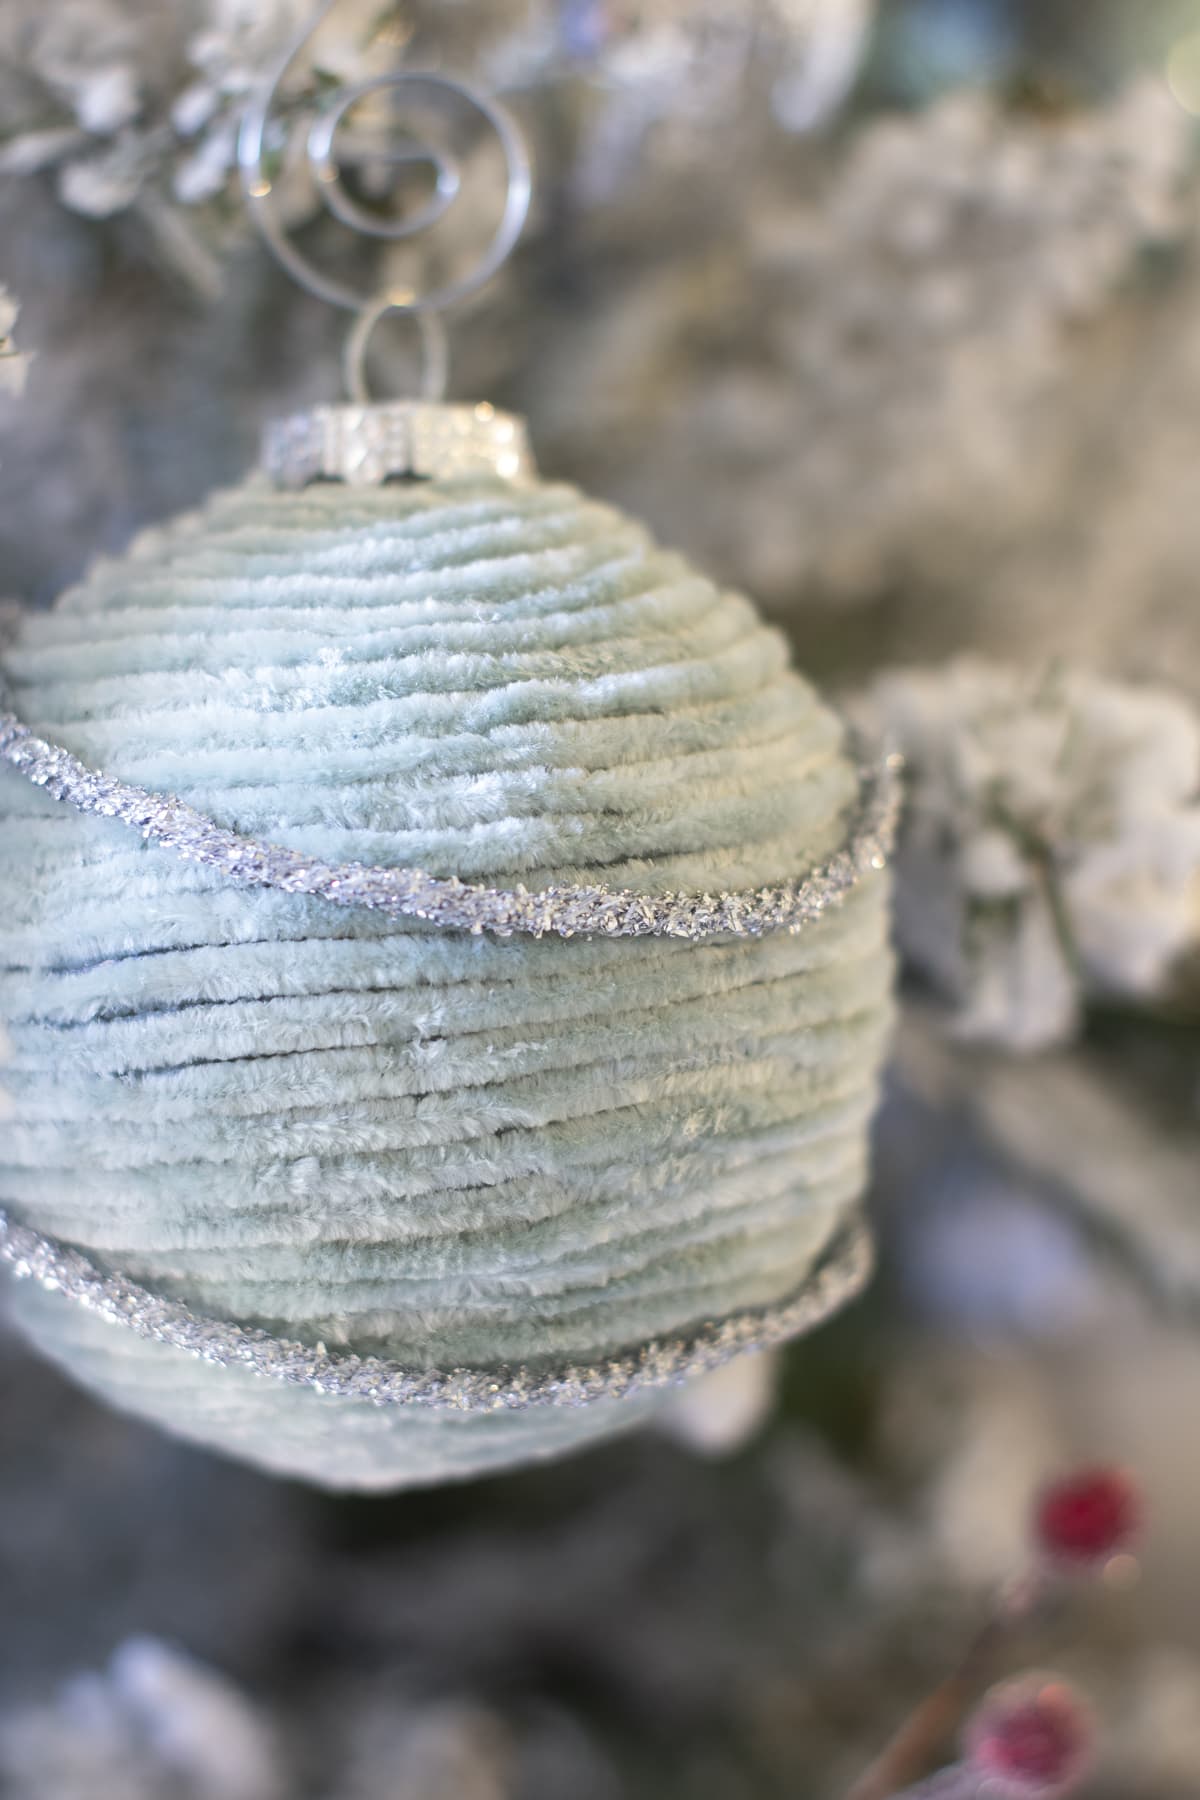
You can also see some ‘gaps’ in the rows. Some coordinating paint would have helped this!
And now for my one stretch velvet ornament!
This was so easy, and it came out so pretty!
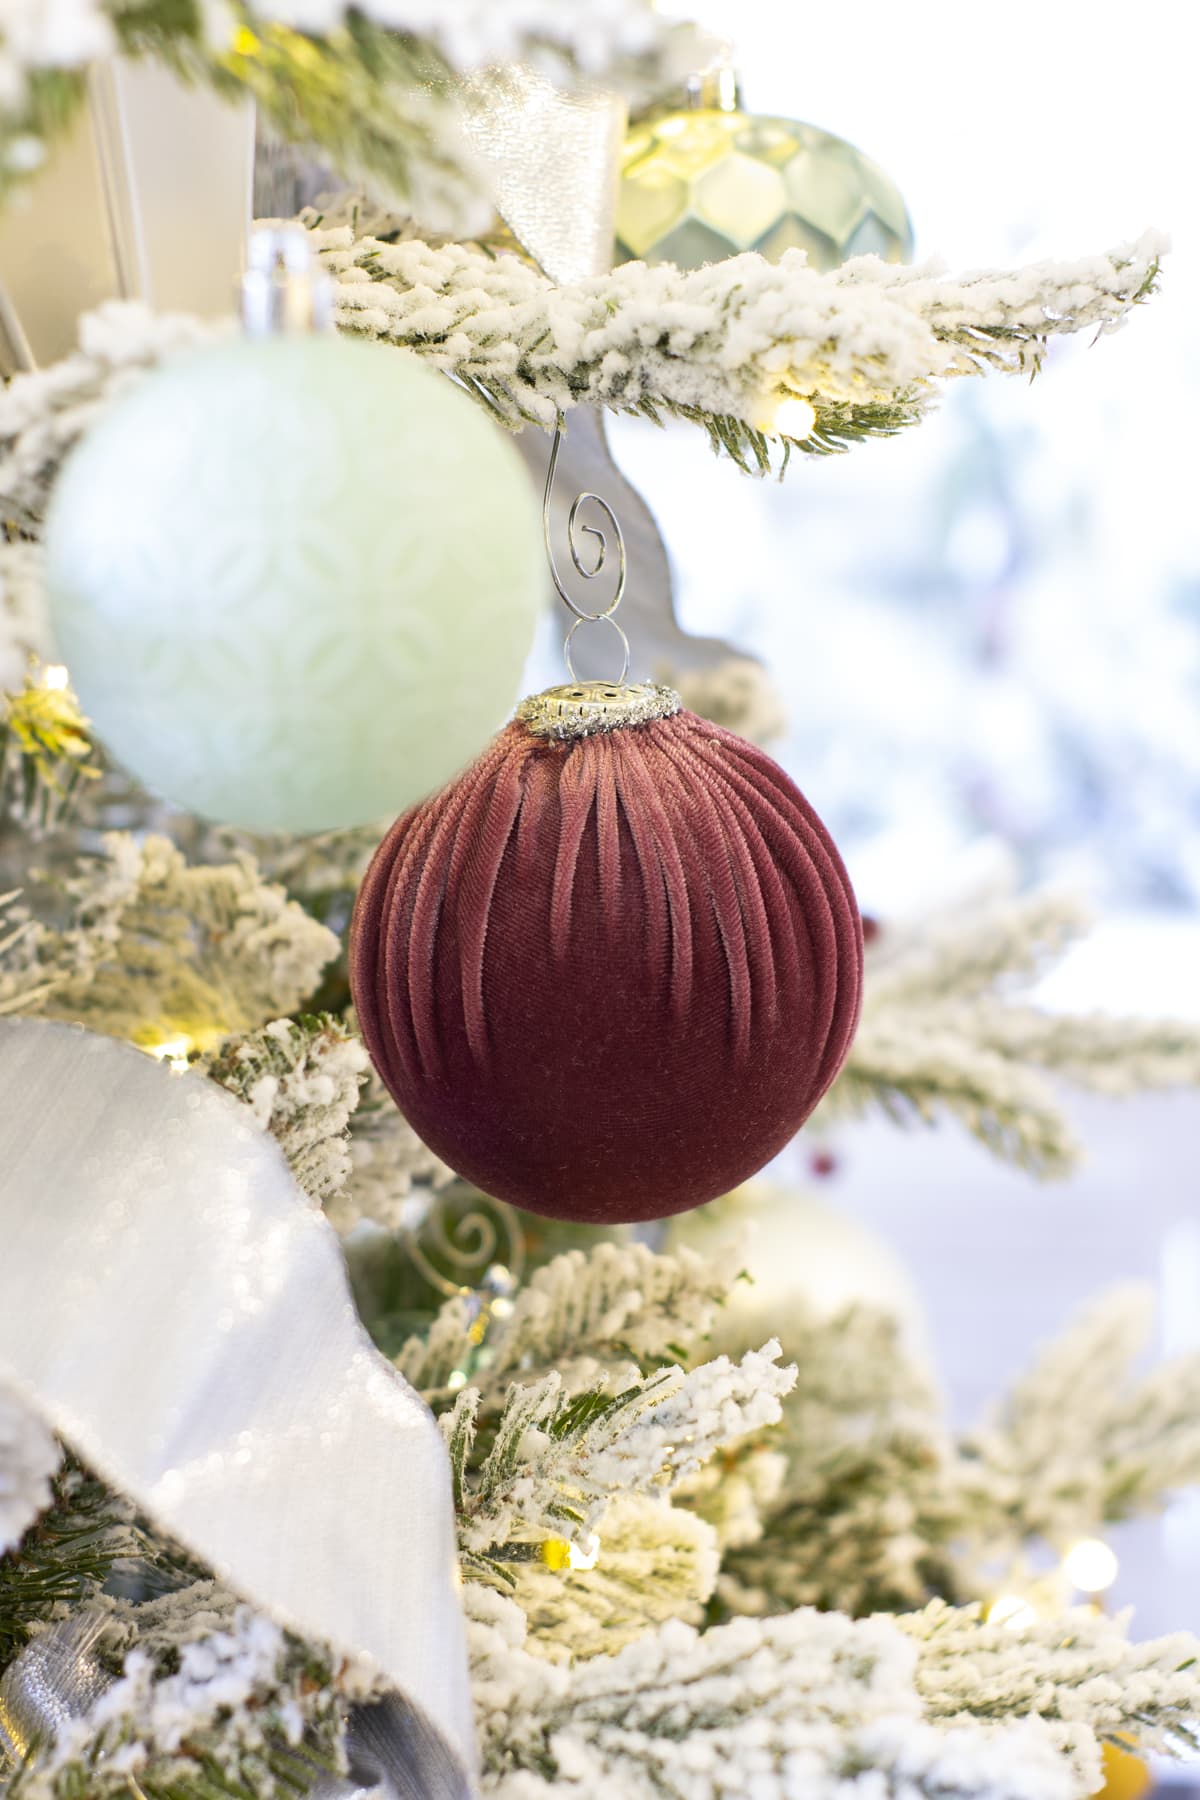
You can see how the trim is glued at the base of the ‘stem’. This added just enough sparkle and covered a small ‘gap’ at the top, too!
So, which ornament is your fave? Do you think you will add this to your DIYs for this Christmas? The stretch velvet ornament would be an easy sewing project for a young person, and it would be a lovely gift for parents, grandparents or friends!
And for an extra ornament twist…
Make a personalized velvet ornament with your special someone’s initial using chenille yarn with these yarn wrapped clay letter ornaments.
Now, it’s time to hop on over to Lora Bloomquist’s blog to get the scoop on her pine cone ornaments! Don’t you just love pine cones for Christmas AND winter decor?
While you’re at it, remember to visit each and every blogger at the bottom of this post to get LOTS of Christmas ornament ideas and inspiration!
Be sure to subscribe to My Wee Abode, and get the latest post notifications, along with access to our free printables library!
Merry Christmas!




I love these so much Julie! The velvet yarn reminds me of cozy chenille, and your soft color choices are so pretty! Pinning of course!
Yes… the yarn is also called chenille yarn. I guess I should put that in the post! 😉
Julie these are exquisite! Velvet is such a cozy and elegant choice for the holidays season! Just beautiful!
Thank you, Cindy! I really loved making them!
HI Julie, Pinned! So pretty and classic. Love this! Happy Thanksgiving! laura
Thanks for pinning, Laura! I always appreciate your comments!
Oh I love these, so elegant and your soft colors are so pretty. Your tutorial is so easy to follow too and I love the way you’ve embellished them to add even more charm and sparkle.
Thank you, Marty! This was such a fun Pinterest Challenge!
These ornaments are so beautiful! Who doesn’t love the elegance of velvet? Hugs and blessings to you.
Thanks, Renae! We are loving them!
Oh I LOVE velvet so this craft is really speaking my love language. Thank you for sharing!
Oh, I’m so glad you like them, Laura! Thank you!
Julie,
These are so elegant and fun. Great post.
Thanks, Rachel! It was such a fun challenge this month!
Gimme all the velvet ornaments! Love these, great job!
Yes, me, too! AND, your decoupage ornament is AMAZING!
So beautiful Julie, I love how cozy the velvet looks, soooo pretty! Have a Happy Thanksgiving!! Hugs- Tanya 🙂
Thank you, Tanya! They are so fun to make and add fun embellishments!
I’ve not even been to the side of the store that carries this velvety goodness but can hardly wait to go see it. Hoping I can find all the stuff I need to make some. I LOVE THESE!!! They are so elegant and beautiful. Thinking this would make a fun DIY party! Glad you got to join us this month and shared your fabulous creativity. Happy Thanksgiving. pinned
BTW, thanks for the love. It made me smile. 🙂
And you can make them ANY color you want! None of that red!!! 😉
These velvet ornaments came out so beautiful Julie! What a fantastic post. Pinned!
Aw… thank you! I really love them!
These are so pretty, Julie. They actually look very vintage to me with the coloring of the velvet. I’ve seen that stuff at Hobby Lobby and wondered what could be done with it; now I know! Great how to!
Oh, I’m so glad you liked them, Lora. You’re right… they do look a bit vintage! Adding some vintage look lace or ribbon would really make them ‘shine’.
I’m going to start calling you the queen of velvet! Everything you do with it turns out lovely! All of your ornaments are beautiful! Happy day!
Aw, thank you so much! I’m hoping Google thinks the same! LOL!
Julie!! Long time no see… I have my velvet pumpkins up on the mantel again and yes, I do remember how to stretch the velvet around to make one, so making your pretty rusty pink ornament would be fun!! I don’t think I could choose between any of them as they are all lovely!!! Enjoy yours! <3
Happy Thanksgiving and big holiday hugs to you,
Barb 🙂
Yes, you DO know how to make stretch velvet pumpkins! I hope you enjoy making these! Thank you!
Julie, you are the queen of velvet! I love both ornaments, but I love the yarn one the best. I didn’t even know there was velvet yarn. Great tutorial, too. Merry Christmas, my friend.
Thank you so much, Carol! So kind of you!
Love these velvet ornaments, especially the stretch velvet. I’ll have to give it a try! Thanks for inspiring me!!!
Thanks, Diane! They are really quite easy! And the skies-the-limit with the colors!
Julie these are so beautiful! The dusty rose one with the rhinestones is my favorite. Thank you for sharing at my Weekly Link party! I’m happy to be featuring you this week!
https://www.ourtinynest.com/2022/11/30/weekly-wednesday-link-party-324/
Thank you so much, Nicolle… #blessed!
Julie, your ornaments are so gorgeous, elegant and yummy! I’m featuring this post on All About Home this evening. Thanks so much for coming by and joining in. We appreciate you so much!!
Thank you so much for the kinds words AND the feature! Always blessed to be featured at your party, Debra! Hugs!
Julie,
I love these velvet ornaments. Congratulations, you are being featured on Thursday Favorit Things. I hope you stop by. https://www.eclecticredbarn.com/2022/12/candy-canes-and-thursday-favorite-things.html
Hugs,
Bev
LOVE your DIY velvet/chenille yarn ornaments. Saving this to make some for my tree this year. Can we share this in our weekly round-up?
Thanks, AnnMarie! Of course, and thank you for sharing! Y’all are always welcome to share… no permission necessary. 😉
These ornaments are gorgeous Julie! Pinned!
Awww, thanks so much for the compliment, AND the pin!
Thanks for sharing with us, I’ll be featuring you this week when the next To Grandma’s house we go link party starts! Happy Xmas!
Oh, thank you so much, Tarahlynn!