How to Paint Walls Fast and Easy
My Wee Abode is participating in the “HomeRight Refresh Your Walls Today” blogger challenge, so we’re going to learn how to paint walls fast and easy!
This post may contain affiliate links, at no additional cost to you. I received product in exchange for my own honest opinions and review. I would never share a product that I would not happily use myself. For more information, see my complete disclosure HERE.
This past weekend, My Wee Abode got a bit of an update… and then some!
The “HomeRight Refresh Your Walls Today” blogger challenge actually did, indeed, challenge me to give the living room a makeover, AND it was done in actually less than a day. By using a handy-dandy and AMAZING tool manufactured by HomeRight, the walls were painted in no time… easy and fast.
Oh, and BTW, the challenge also involves a prize and ends on November 30, so stay tuned for the winner!
UPDATE: So exciting to share, My Wee Abode (that’s me!) won second place in the Home Right Refresh Your Walls Today” challenge!
HOW TO PAINT WALLS FAST AND EASY
I’m not going to keep you in suspense.
The tool that will revolutionize the way you paint a room is called the HomeRight Paintstick EZ Twist Paint Roller. Yep… this paint roller with the long name will help you paint your walls in the shortest time you can imagine.
Seriously! Let me show you how.

 Wait!!! What Color Did You Use?
But first…If you’ve been following the saga of this makeover, you know that I asked y’all to help me choose a paint color for my living room.
I have quite a few friends and readers waiting to hear what color I decided to use, so, without further ado, the color I chose was…
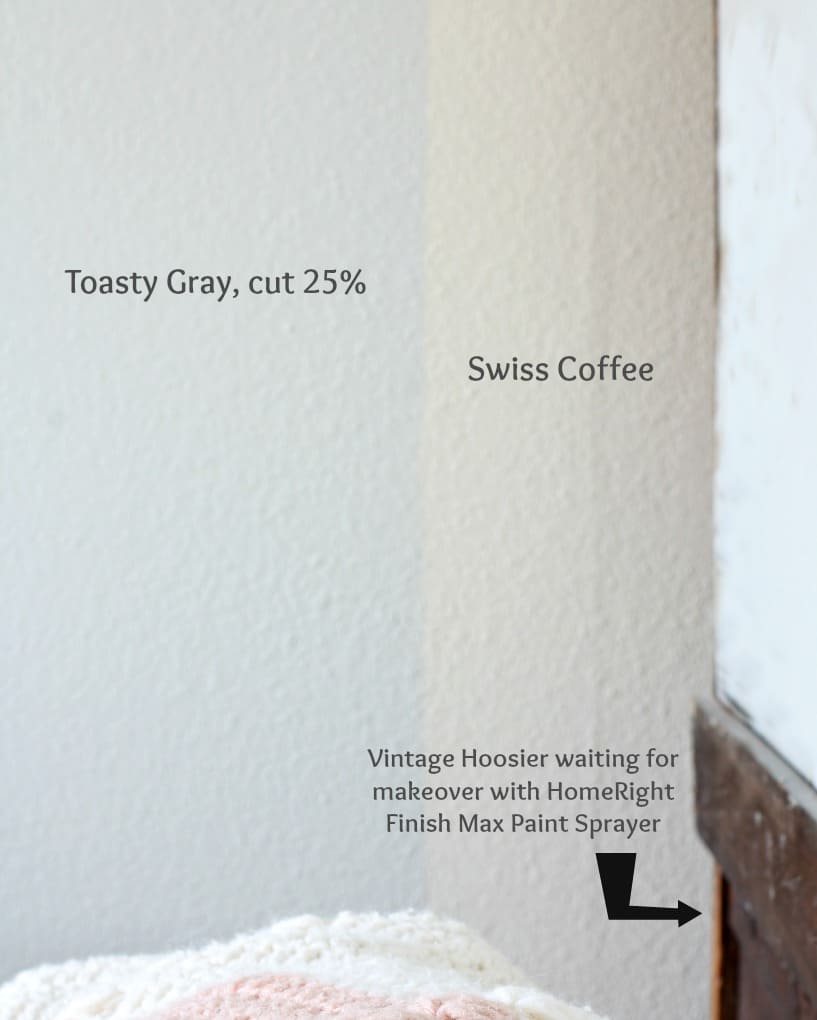
Behr’s Toasty Gray… cut by 25%! (More and how I came to choose the color in a coming-soon post.) Here’s a pic of the Toasty Gray (cut 25%), on the left, and my old Swiss Coffee, on the right. Big difference, eh?
Did you guess the right color? Did I choose your fave?
BEFORE
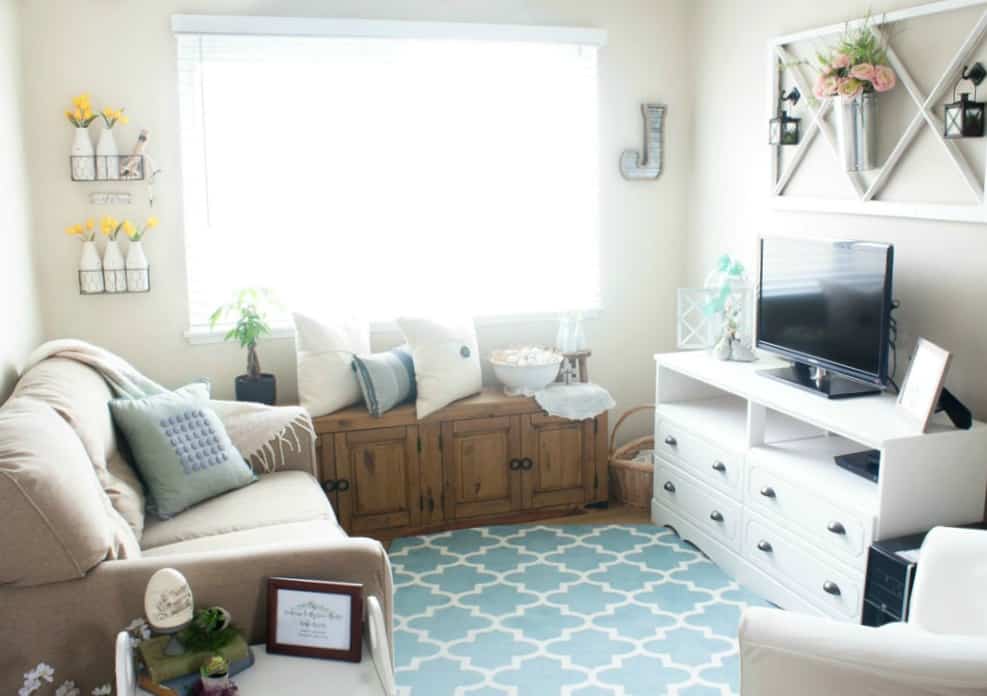
Oh… and real quick, here’s the before photo. The wall color isn’t bad, but during the day it had a yellow undertone, and at night it cast a blush tone.
It just didn’t make me happy.
Now let’s get to the practical stuff because today is all about how to paint your room in the fastest and easiest way possible.
Cutting In
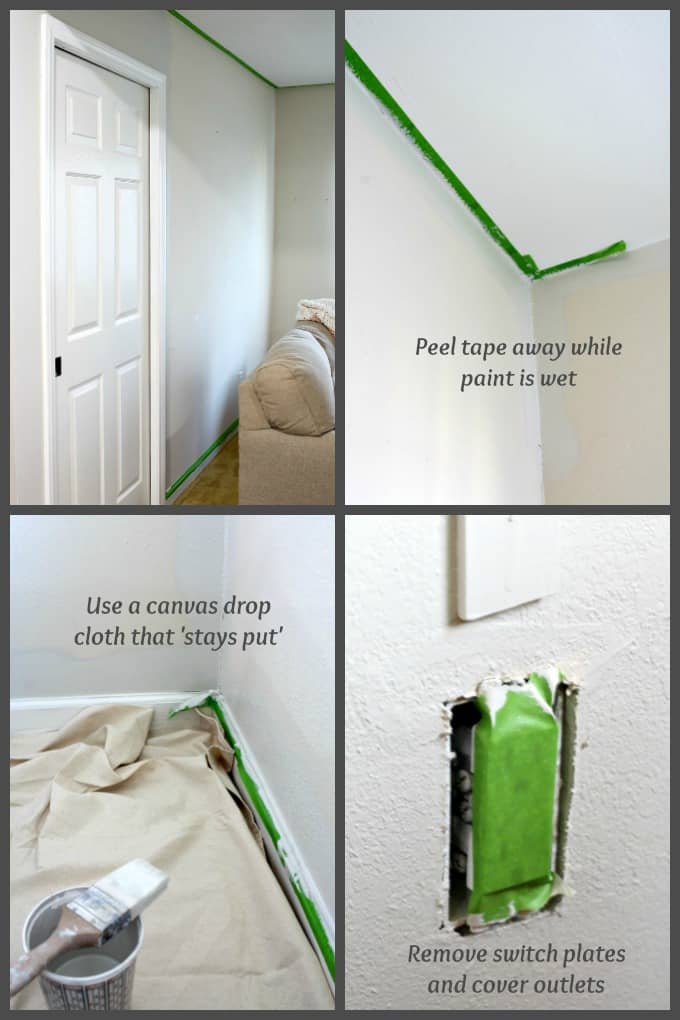
After you’ve purchased your paint and picked up your HomeRight Paintstick EZ Twist Paint Roller and some of the other paint tools you may need, you will need to cut-in around your ceiling, corners, baseboards, and, perhaps, some windows.
I ordered the HomeRight Quick Painter Painting Edge Painter (I’ve seen it in action… I’m going to use it on my kitchen update!), but it didn’t arrive in time. So, I used my handy-dandy Frog Tape and did my cutting-in the old-fashioned way.
Using the HomeRight Paintstick EZ Twist Paint Roller
Parts
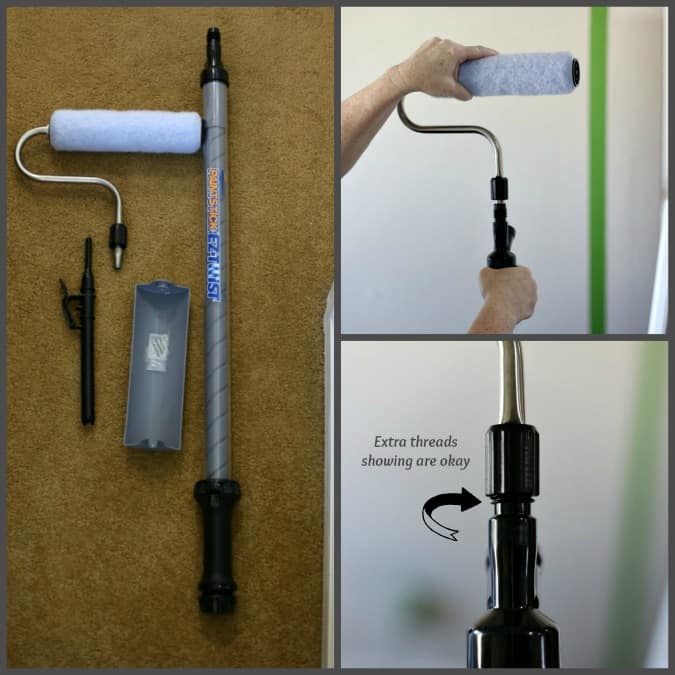
The HomeRight Paintstick EZ Twist Paint Roller comes with several easy to assemble parts, and HomeRight provides you with easy to follow instructions on how to assemble it. (Side note: The cap that screws the roller onto the actual stick… you may have some ‘threads’ show at the bottom after you screw it on… that’s normal.)
Prepping
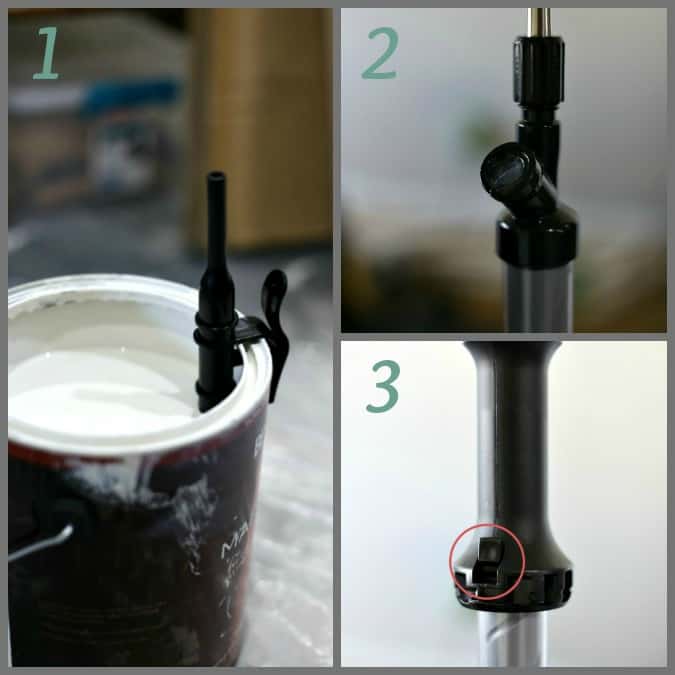
- Attach the Fill Tube onto your paint can. (Be sure that the Fill Tube is on the opposite side of the paint can handle.)
- Before you fill the paintstick, be sure to put some petroleum jelly (included in the box) on the Fill Port.
- Move the Toggle Switch to the Up position.
- (Optional: You can attach the splatter guard by snapping the cut-out side of the guard onto the silver roller frame, then snapping the other end onto the end cap. I’ll be honest, I couldn’t figure this out while I was using it… I kept trying to attach it first to the end cap, then the frame. It needs to be attached the other way.)
Filling the PaintStick
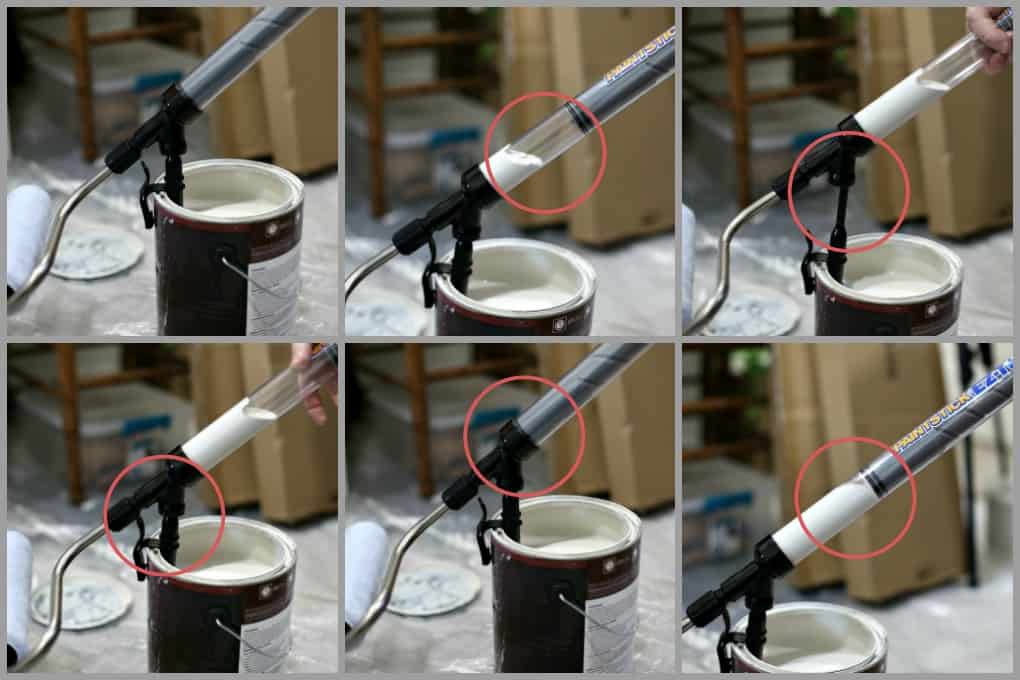
- Place the Fill Port over the Fill Tube until it hits the base of the Fill Tube (it will stop when it hits the base). (You HAVE to be standing on the opposite side of the Fill Tube… Ask me how I know this.)
- While holding the paintstick onto the Fill Tube, use your other hand to pull the Inner Handle back, and the paint will start filling the handle. After you have filled it with a bit of paint, you will see an air pocket at the top.
- Lift the paintstick off of the Fill Tube and immediately place it back on the Fill Tube and push the paint back into the can.
- Draw the Inner handle back again, and the air pocket will just about be eliminated. Now you can fill the whole paintstick.
- When the paintstick is completely filled, lift it off the Fill Tube.
Using the Paintstick
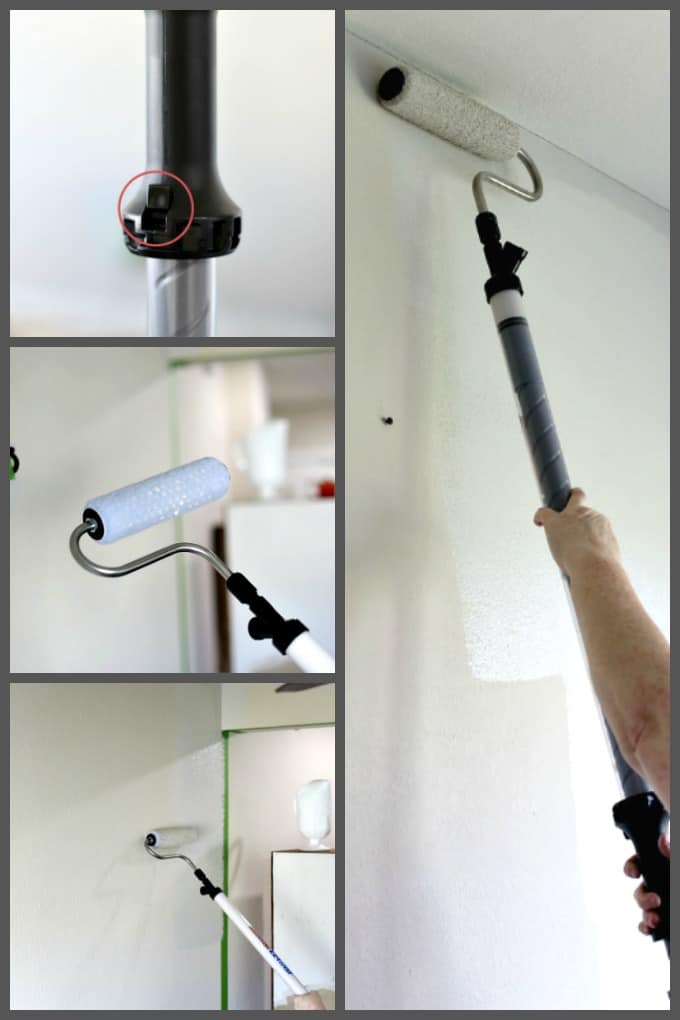
- Move the Toggle Switch to the Down position.
- Start turning the Inner Tube clockwise to feed the paint to the roller. After multiple twists, you will see the paint begin to appear on the roller in a dot-like pattern. Begin rolling the paintstick roller onto the wall, and continue to turn the Inner Tube to feed more paint.
- When the roller is covered, and the dot pattern is no longer visible on the roller or wall, you can begin painting the rest of the wall(s). (Side note: It takes almost a full ‘fill’ of paint to get the roller saturated the first time. After the initial fill, you don’t need to re-fill nearly as often.)
- Continue to paint in up-and-down motions, twisting the Inner Tube as you go and as needed.
- When the paint is gone, simply refill as you did the first time. For the three walls in my living room, I had to fill the HomeRight Paintstick EZ Twist Paint Roller a little over three times and had leftover paint to put back into the can from the handle and the roller.
Clean Up
The clean-up instructions that HomeRight provides in the box are quite good (especially on how to disassemble the roller). But, I would also take a look at HomeRight’s video on how to clean the HomeRight Paintstick EZ Twist Paint Roller. It was really helpful, and I will definitely be picking up a couple of the cleaning tools suggested (optional), too.
AFTER and Added Touches
Because the HomeRight Paintstick EZ Twist Paint Roller is so simple, quick, AND super affordable, I was able to add a new feature to one of my walls!
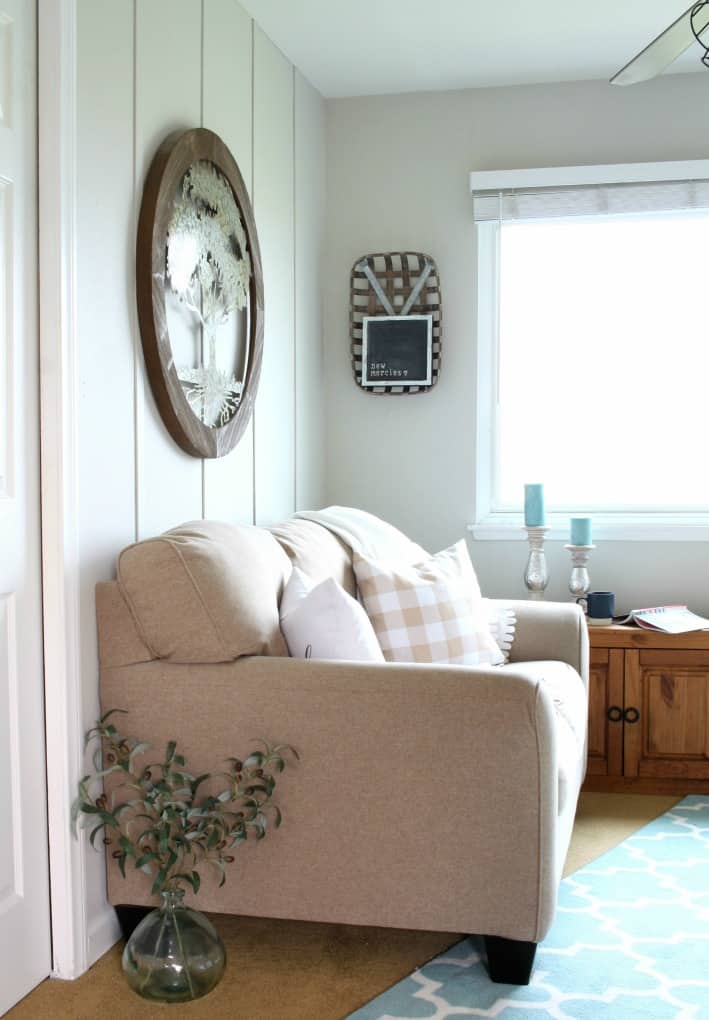
I LOVE the wood trim… it gives an added coastal farmhouse vibe, don’t ya think?
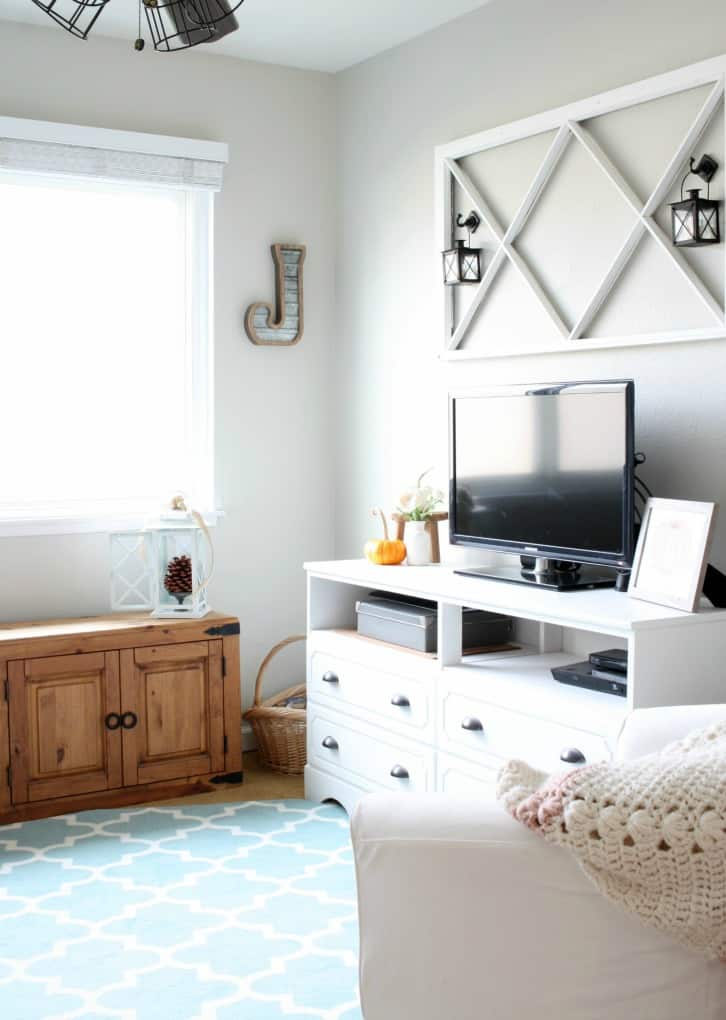
And the paint color is perfect… exactly what I wanted.
One more of the before…

And the AFTER!
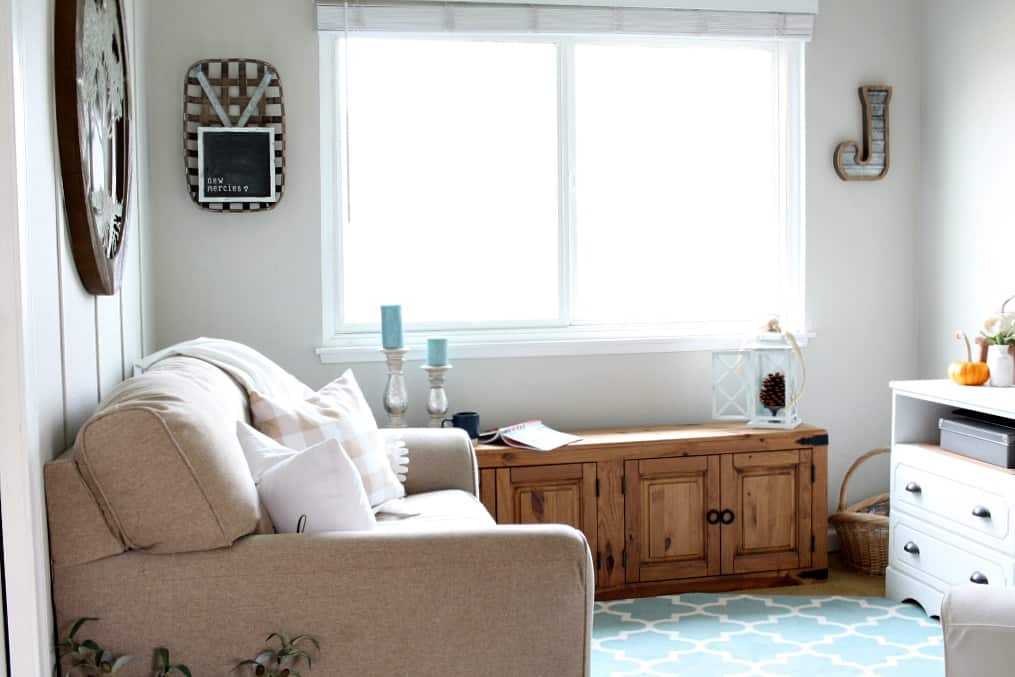
I would say this whole update took less than 8 hours. No wonder they are calling this the “HomeRight Refresh Your Walls Today” blogger challenge. It was easily done in less than a day!
Using the HomeRight Paintstick EZ Twist Paint Roller:
- Cut the wall painting time by about two-thirds
- Eliminated the need for a ladder
- Did away with bending up-and-down to dip a roller into a tray
- Eliminated any accidents like stepping into a paint tray on the floor… which is quite easy to do in a 10’ x 10’ room 😉
- Definitely gave my walls a smooth and even coverage, helping my one-coat paint to cover in… one coat!
You Can Get Your Own!
You can pick up your very own HomeRight Paintstick EZ Twist Paint Roller. If you are just dying to use it today, simply head on over to your local Lowe’s, and the HomeRight Paintstick EZ Twist Paint Rollers are on a wire rack next to the Lowe’s paint counter!
However, if you have a day or two to spare, and you want the convenience of having the HomeRight Paintstick EZ Twist Paint Roller delivered to your door, you can also order one through Amazon.
This whole project was super speedy, easy-peasy! My daughter was actually taking pics while I was painting the room (thank you, Nika, for being my photographer), and she was VERY impressed…
“Mom, you did that in just about an hour! You did great!” (Hehe, it’s always fun when the kids are impressed. 😉 )
What about you? What do you think about the HomeRight Paintstick? I’m so impressed, I’m ready to take on my whole apartment now… but, I think I’ll just take on the kitchen next. 😉
Let me know what you think, or if you have any questions, and leave a comment below. I love reading your comments. They make my day!






I love your room Julie…looks brighter. I also like when a room is freshly painted as it gives one a feeling of a new beginning!!! And let the decorating begin. Happy thanksgiving
Yes, very much looking forward to decorating, and I love the transformation! Thanks for the encouragement, Kari! Hugs!
The walls look great Julie! I love the wooden trim you added to the wall behind your couch. Great overall look.
Thanks, Karin! The trim was so easy, and I was a bit scared how it would look, but I’m SO pleased! I do a happy-sigh every time I walk in the room! 😉
I feel like it looks way brighter than before! What a refreshing difference! Pinning. 🙂
It definitely is more updated… cozy for still light and airy! Thanks for pinning, dear heart! Hope you have a blessed day tomorrow!
Looks great Julie! And next time I paint I will definitely try this product. Thanks for the tip! 🙂
Isn’t the paintstick great?! So, so easy! Thanks for the encouragement! Hugs, dear friend! Happy Thanksgiving!
Wow Julie, it looks great! The new color feels so warm and cozy (love the before / after pic). I especially love the wood accents too, it really adds dimension to the room. Another awesome project!
Thanks, Diane! I so value your opinion, and I’m glad the wood trim came out the way we thought! It was super easy! Are you back from your trip? Hugs… I miss you!
That looks sooo great!! I love the wood trim you added.
Thanks, Peg! I’m THRILLED with the feature wall! It was super easy! (Still trying to figure out about Friday!)
Julie, what a wonderful difference painting has made in this room. I love the color you choose. I am sorry I did not know about this painting tool when My son painted my new little house. Home Right has come up with the easiest way to paint a room or a whole house in a lot less time. I will definitely purchase one of these in the future.
Thanks for coming by, Mary… and for the sweet words. The paint definitely made a huge difference! HomeRight products are all quite amazing! How big is your new little house?
My new little house is just over 1400 sq ft. It is 2 bath and 2 nice bedrooms and another room I am using for my office. God provided this for me before the prices went to high for my budget. Now I have a good investment for my children. Blessings, Mary
Very nice, Mary! God is always good! Have fun making it a cozy home!
I love it. Looks great.
Thank you so much for dropping in, Wendy. And thank you for the encouraging words, too! I love it!
This looks great! Love your color choice! Pinning!
Thank you, Lynne! Can’t wait to see your finished room! Hugs and hearts!
This is great and your instructions are fantastic. The HomeRight paintstick is a huge timesaver! Pinning for later!
Thanks, Michelle, for the sweet words! Hope you have a wonderful Thanksgiving! Hugs!
I love your color choice. I’ve been debating on the paintstick for quite awhile. I ordered the cut in tool using your link.
Happy Thanksgiving
Oh, you should definitely get a paintstick, Lisa! Thanks for the encouragement, and the purchase! You have a blessed Thanksgiving, too! Hugs and hearts!
It makes such a difference, Julie! Great choice. Now, did you get samples of several colors first before deciding? I always struggle picking colors and end up getting a sample first, which is why I have quite the collection of paint samples! I’m pinning this to my wall decor board.
Thanks, Crissy… Yes, I got 3 different samples from the store, and I definitely have a bit of a collection. I don’t have enough space for them, so I’ll be purging some soon. Care to take a few of mine? LOL! Hugs!
Great color. Your instructions make me feel like I could tackle the bathroom painting. Thanks for the step by step
Thanks, Donna! Yes, I KNOW you could paint your rooms easily with the HomeRight Paintstick! 😉 Love ya!
I love how your room turned out, Julie! The color is great and no yellow undertones. I’m starting to think I should have bought one of these for our painters. 😉 BTW, they finally finished last night at 9:45 pm. Pinning…
Yay! Your painting is done! I’m SO happy for you! I think it’s odd that professional painters *don’t* use or know about the paintsticks! The color here is now perfect! LOVE IT! Hugs, dear friend!
I love the color you chose, it’s perfect for your room and no more yellow cast. Those paint sticks look so chill and I’ll need one before I’m ready to paint again. Great pick Julie!
Thank you, Toni! I’m super happy with the color, too! You def need to get one of the paintsticks! SO HELPFUL! Hugs, sweet friend!
Loving the new look for this room!! And that paint stick looks so handy 🙂
Thanks for sharing
>> Christene
Keys to Inspiration
Thanks for dropping in, Christene, and for the kind words! The paintstick is VERY handy! 😉
A lot of great tips, we have a lot of painting to do
Oh, Susan! I can’t recommend this tool enough! It’s a must! 😉 Thanks for coming by, new friend! 😀
Your space looks beautiful! I’m impressed with how quickly you were able to complete your project!
Thanks, Lauren! It was, indeed, super fast! And fun! 😉
Julie I could have used this product a few months ago when I spent countless hours on top of a ladder doing just what you did but the hard way. I love the new color and your accent wall is beautiful. Your living room looks coastal farmhouse in all its beauty!!
Thanks you, friend! It was very nice not using a ladder! 😉 Thanks for the sweet words! Hugs!
I’m all about EASY when it comes to painting, so I’ll be picking up one of their paint sticks soon! Love the new color!
It’s definitely worth the money! Thanks for dropping in, Pam!
I love these paint rollers and have wanted to try one forever. It looks like it does a fantastic job. Your room looks amazing!
Thanks, Michelle! And the paintstick is so affordable, too! Totally worth it! Hugs!
Julie,
Your home is just lovely. I love the new brightness in your space. Thanks for sharing. We are moving soon and I need all the paint tips I can get.
Thank you, again.
Oooo, hope the paintstick can help. Look forward to reading about your move on your blog. 😉
OK…I really could’ve used this last week! What a great tool…thanks for sharing. It just may be going on my Christmas list…and hope you win!
Hugs, Lynn
Oh, thanks, Lynn. You made my morning! 😉 Hope you get one for Christmas… it’s quite amazing. I’ll let everyone know what the results are sometime next week. Here’s hoping! Hugs!
Love the room Julie! So bright and cheery! Thanks for all the tips… just in time… we are going to be doing A LOT of painting in the near future! Sending hugs and wishes for a fabulous day!
Thanks, Andrea! You won’t be disappointed if you get the paintstick… It really is quite amazing! You have a good one too, and hugs back!
Hey Julie! Your room looks great and I love this tool! I need to get one for painting our bedroom next year. Thank you for the recommendation. I’ll be sure to reference your links when ready to buy. Merry Christmas and Happy New Year!
Dianne! I hope you are doing well! Thanks for coming by and for the sweet encouragement. 🙂 Hope you have a very Merry Christmas!
Everything looks fabulous! Thanks for sharing at TFT!
Thanks, Amber! (When do you sleep? LOL!) Hugs!