How to Use Vinyl Decals for a Wallpaper Look
My not-so-recent bathroom refresh included a temporary wall treatment that will work great in any home, but especially an apartment! Today, learn how to use vinyl decals for a wallpaper look!
HOW TO USE VINYL DECALS FOR A WALLPAPER LOOK
Have you had a chance to see my modern coastal bathroom update? It took a long minute to finish, but it was sure worth the wait… at least for me it was!
The updates included:
- Repainting the ugly yellow cabinets
- Updating the old beige shower tile surround (This was actually my favorite project.)
- Adding a new light fixture
- and, changing out the old faucet
- plus a whole lot more!
And then there was the wall treatment…
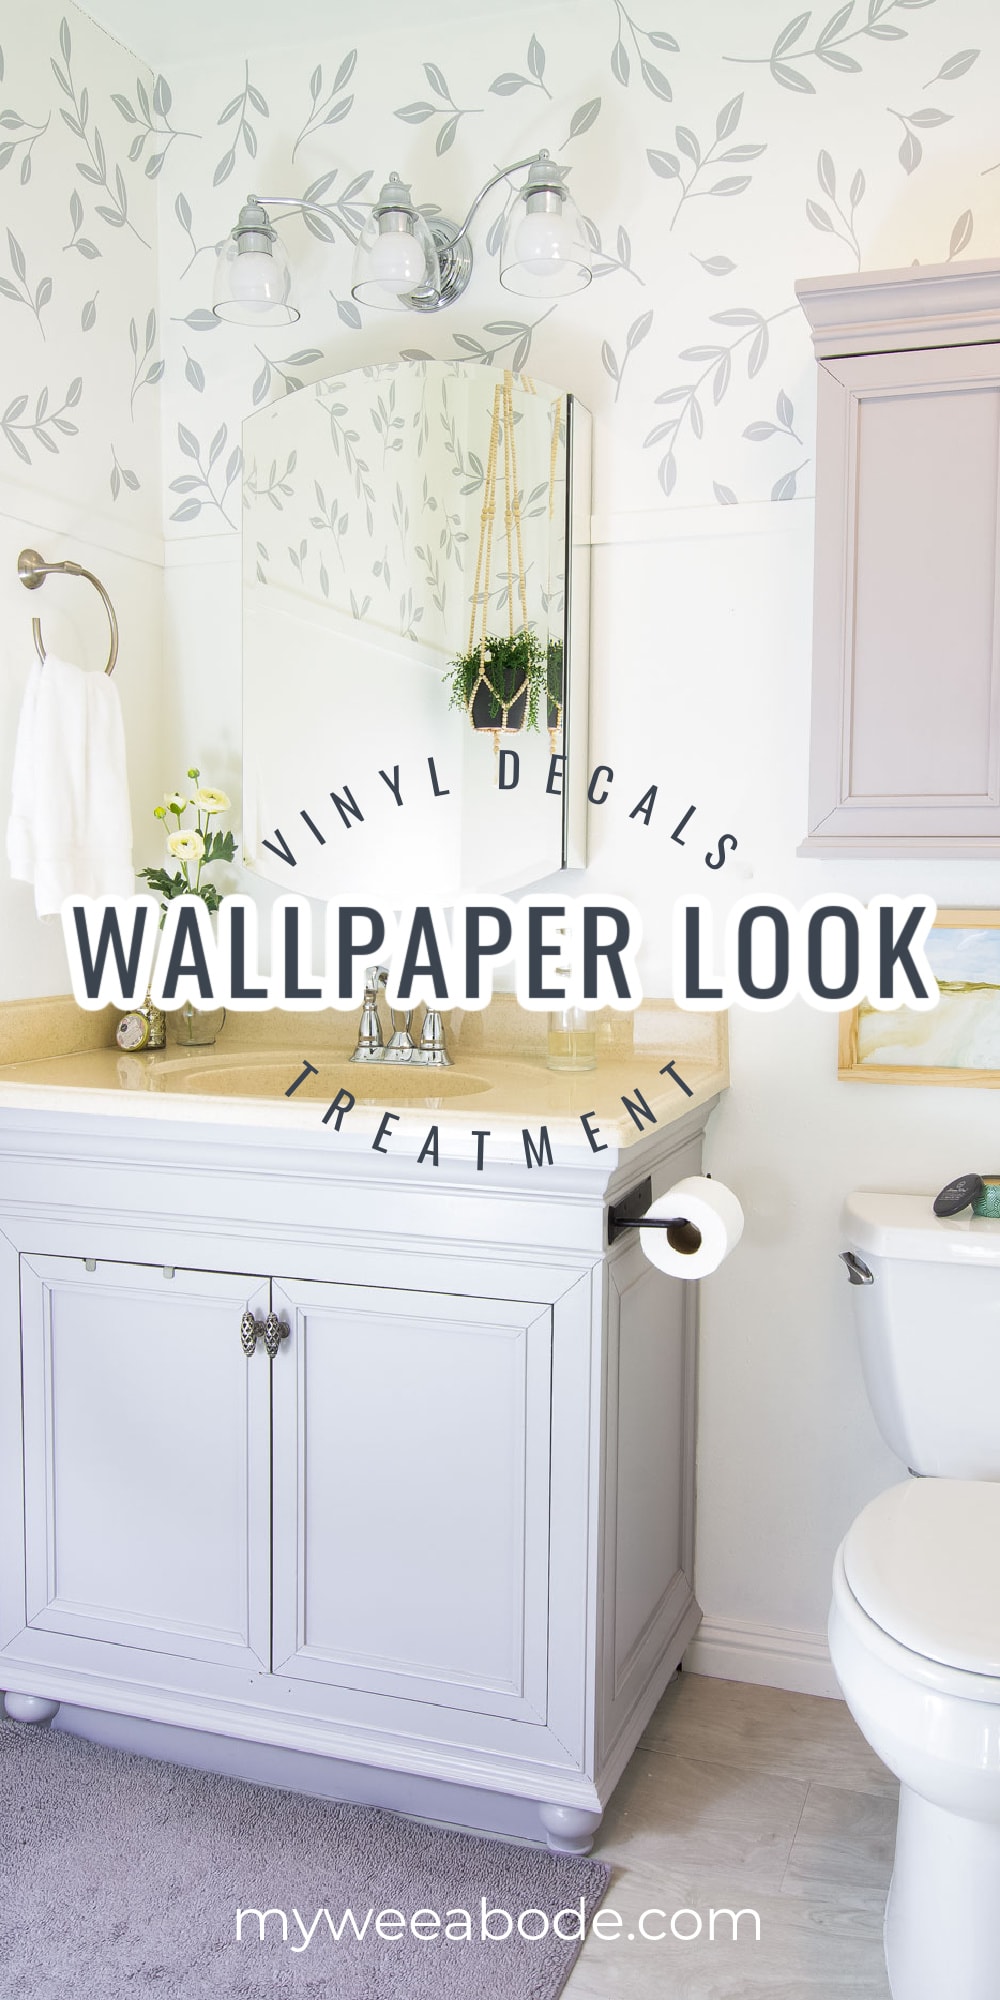
Because I live in an apartment, I needed a wall treatment that was ‘temporary’.
Let me tell you, trying to figure out how to add a removable wall treatment to my orange peel bathroom was a bit of a nightmare an adventure.
First, I tried removable wallpaper. Repositionable wallpaper is normally a perfect solution to a wall treatment in a rental home. But, with the humidity in the bathroom and the orange peel wall texture, the test strip just wouldn’t ‘stick’. (Remember, always do a test strip with removable wallpaper. During the summer, temporary wallpaper won’t even stay adhered in my living room!)
Next, I used a stencil. Unfortunately, with the orange peel, and the look I wanted, it was just TOO difficult. At least it was too difficult for this G-ma who needs to get out and get some exercise! However, I think using a different style stencil on a different wall would have worked great. I’m hoping to try this technique again in the future (after I’ve shed a few pounds, perhaps?!) 😉
If I told you that this temporary wall treatment issue kept me up at night, would you believe me?
Well, it DID!
Several ideas rattled around in my noggin’ for quite a few days and nights! And then I remembered…
This post may contain affiliate links, at no additional cost to you. For more information, see my complete disclosure HERE.
The Solution: Vinyl Decal Wallpaper Look
I got a Cricut for my birthday!
So I started my research for creating vinyl decals for the bathroom walls.
Using the Cricut Design Space, I found several arrangements of vine-type leaves, and decided to try it.
The Cricut Design Space has all kinds of SVG files to use for projects, along with lots of projects, tutorials, and so much more. I paid the monthly fee (about $10) and started creating!
Tips and Tricks for How to Add Vinyl Decals for a Wallpaper Look
Let’s take a look at some key tips for successfully creating a temporary wall treatment in your bathroom!
What Materials Tools Are Needed to Make a Vinyl Decal?
Believe me, having the right tools for THIS job is absolutely necessary!
Usually I can ‘wing-it’ for a lot of DIYs. And I *did* try get by with what I had for this project, as well. But, it just didn’t give the same results as when I finally broke down and purchased the best tools for adding vinyl decals to a bathroom wall.
Here’s what you’ll need:
- Cricut Explorer 2, or your favorite cutting machine
- Basic Cutting Set
- Variety Pack Cutting Mats (You’ll use the Light Grip mat)
- Vinyl Transfer Tape
- Adhesive Vinyl, I used this brand, and it worked GREAT!
- Frog Tape
- Hair dryer
How to Make Vinyl Decals?
Learning how to make vinyl decals with your Cricut is easy to figure out with the instructions that are enclosed in the box. And, there are SO many YouTube videos that you can search for, as well.
However, here are a few tips that will help to fine-tune your vinyl decal project. And, to be honest, I simply contacted the Help Desk at Cricut for most of these tips! The Cricut Design Space Help Desk really is that… helpful!
- Use the Light Grip mat and be aware that the knife can cut completely through the vinyl. Obviously, this isn’t good. There is actually a setting in the Cricut Design Space app that will keep the knife from cutting too deeply.
- When arranging SVG files, arrange and rearrange the different files (I had at least 5 different files) to get the most out of the vinyl.
- Before using the vinyl, do practice cuts on cardstock.
- To add the vinyl to the mat, keep the roll attached. After the decals are cut, peel the vinyl off the mat by bending the mat back and away. This keeps the vinyl smooth. Then cut away the vinyl with the decals away from the roll.
I’ll share more tips along the way, with photos, too!
Test Your Vinyl Wall Decals
So, here’s an ugly photo for you!
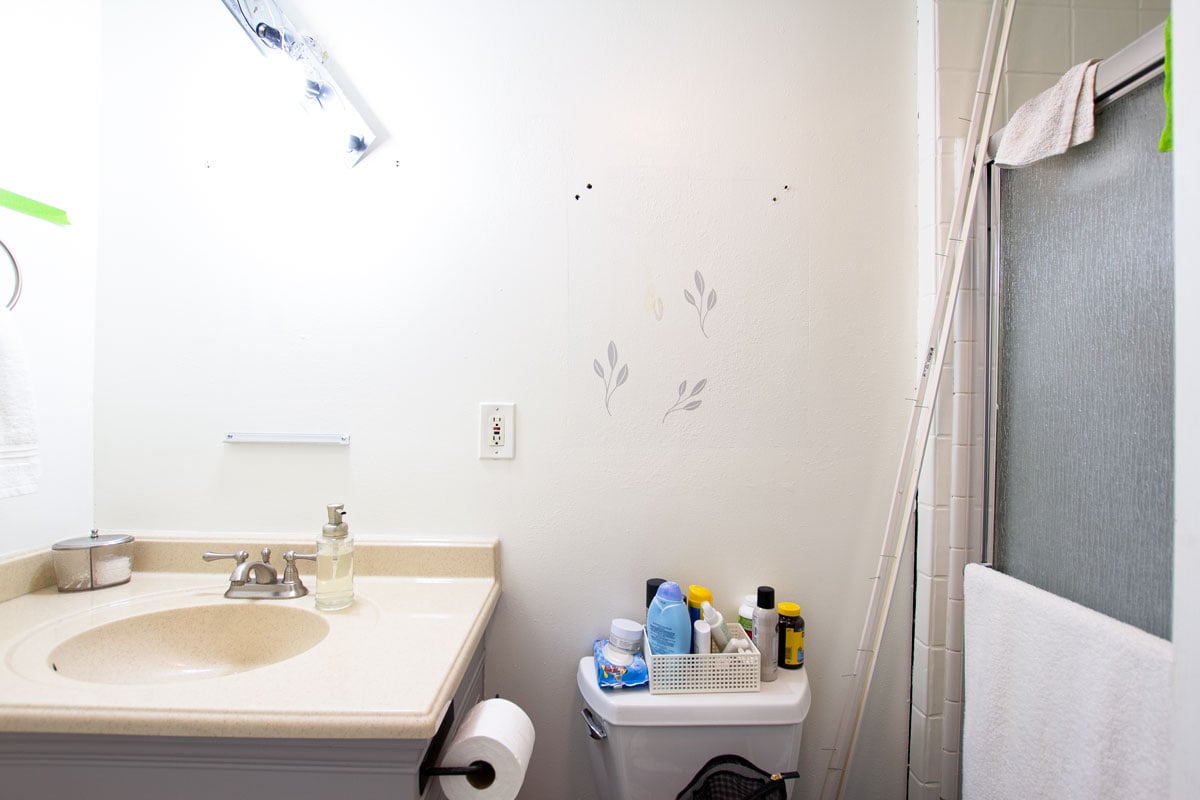
First, be sure your vinyl decals are the size you want. The best way is to print different sizes and place them on the wall.
Also, leave the decals on for a few days to see how they react to the elements in your space. For me, the steam from the shower, humidity from the weather, and the texture of the walls all played into whether or not the vinyl decals would work. And work they did!
Prep Walls and Arrange Your Vinyl Decals for Wallpaper
Be sure to clean your bathroom walls before starting this project. It’s really important that the decals have a very clean surface to ‘stick’ to. Using an all-purpose cleaner and some microfiber cloths worked great for me!
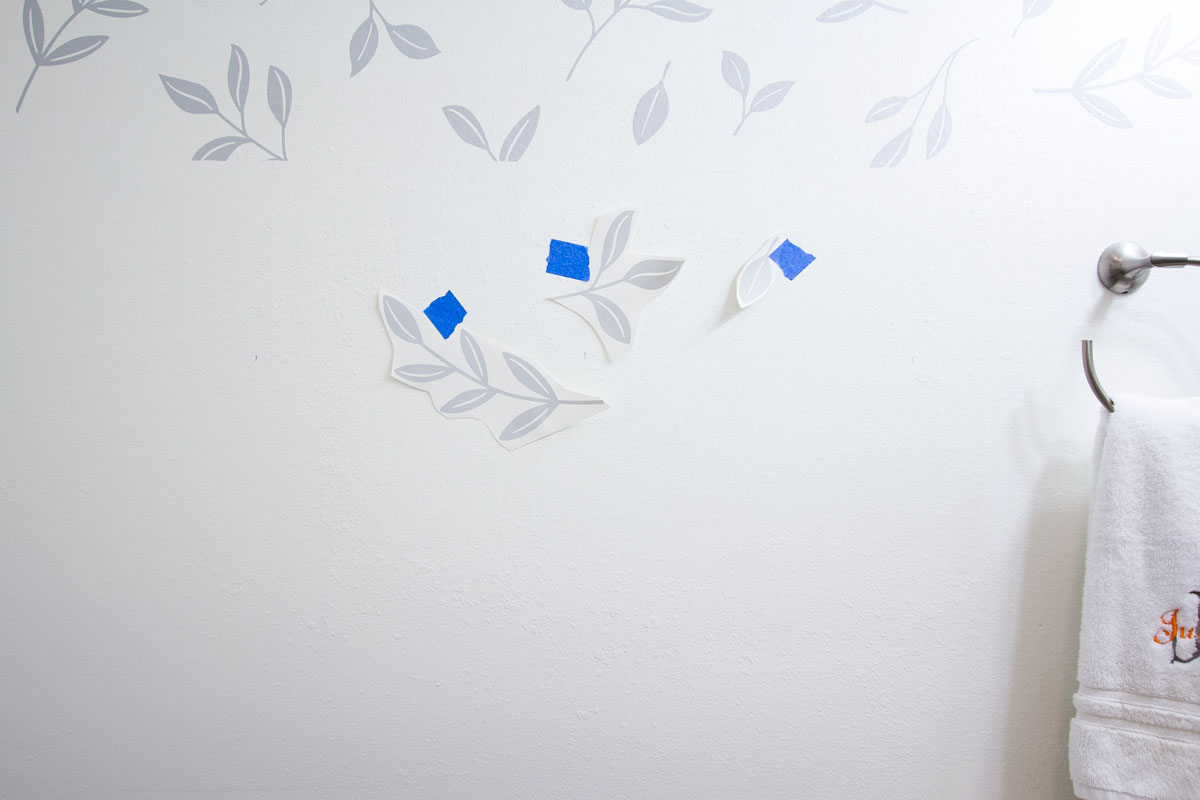
After you have cut out your decals, take some painter’s tape and arrange them on your wall.
When you have a variety of vinyl stickers that are random, you can pretty much arrange them to your liking. If you use a more uniform design (like something that needs to go in rows, etc.) be sure to measure and arrange systematically.
If you want to add some wood trim or another element to the wall after the decals are affixed, add a strip of green frog tape to be a ‘placer’ BEFORE you start adding your decals. This will show you where you need to cut away excess vinyl.
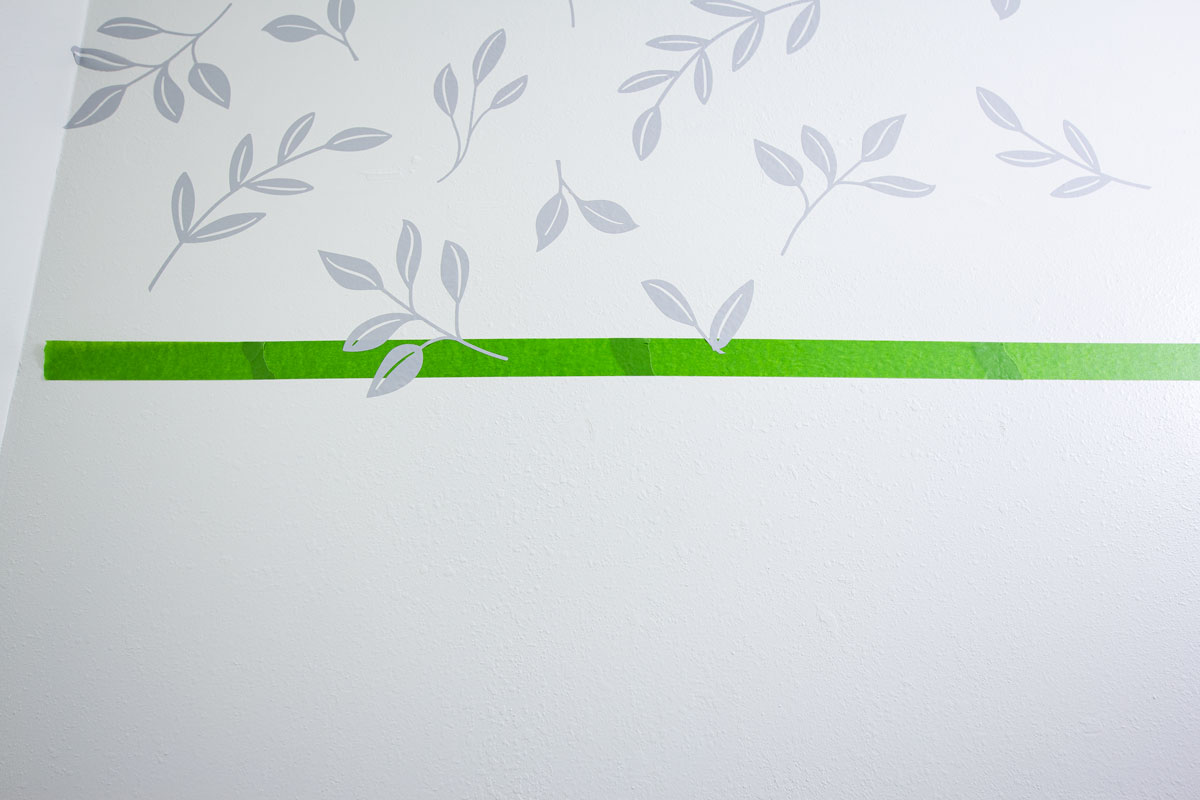
Make sure to align the Frog Tape straight on the wall… and check with a level. 🙂
How to Use Vinyl Decals for a Wallpaper Look
Okay… here are the details of the best way to actually place your vinyl decals for a wallpaper look.
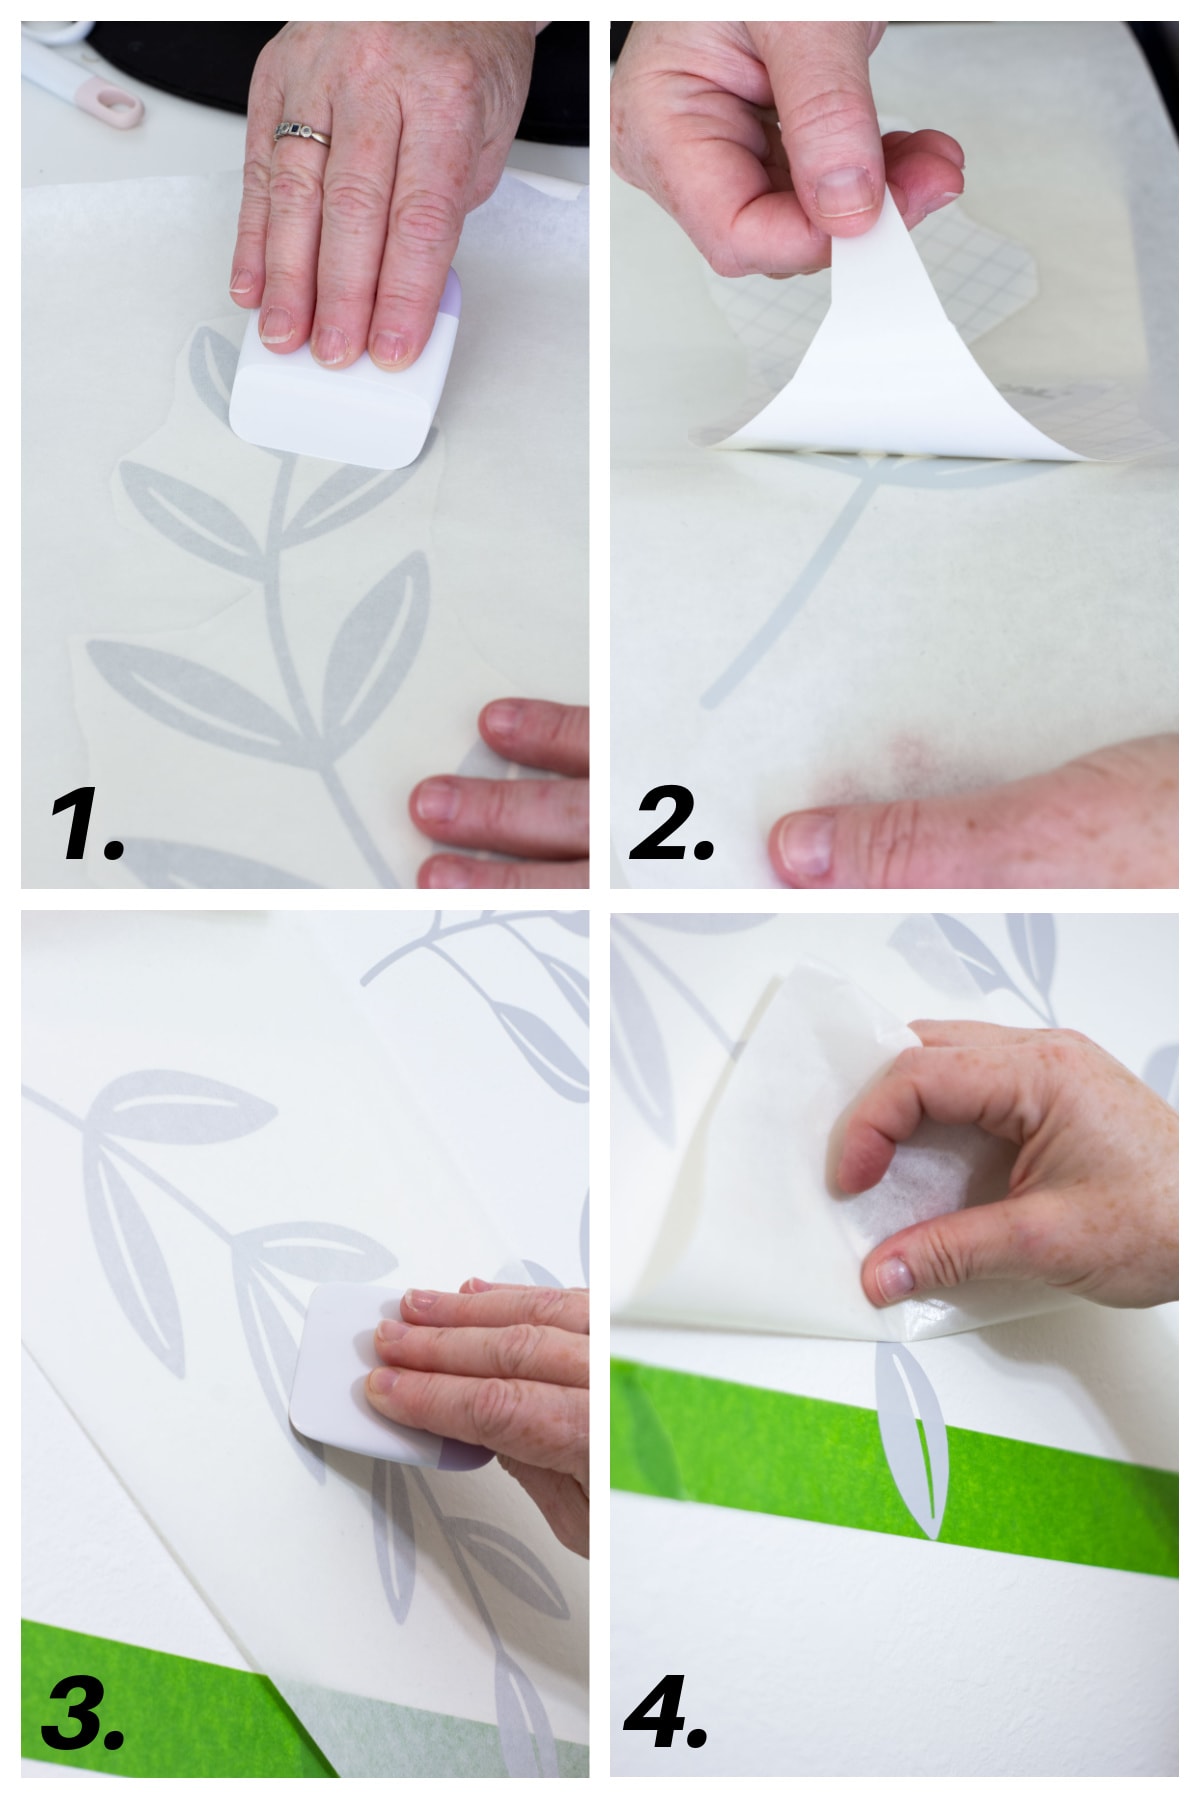
- After printing and trimming your decal, place it on the vinyl transfer tape and use your smoother to get a firm and even ‘grip’ on the decal. (Photo 1)
- Remove the backing of the vinyl so you have the decal’s adhesive side exposed. (Photo 2)
- Take the adhesive side of the decal and place it on the wall and firmly smooth onto the wall. (Photo 3)
- Pull away the vinyl transfer tape from the decal. Be sure to pull the tape away as flat against the wall as possible. This will keep the decal from lifting off the wall. (Photo 4)
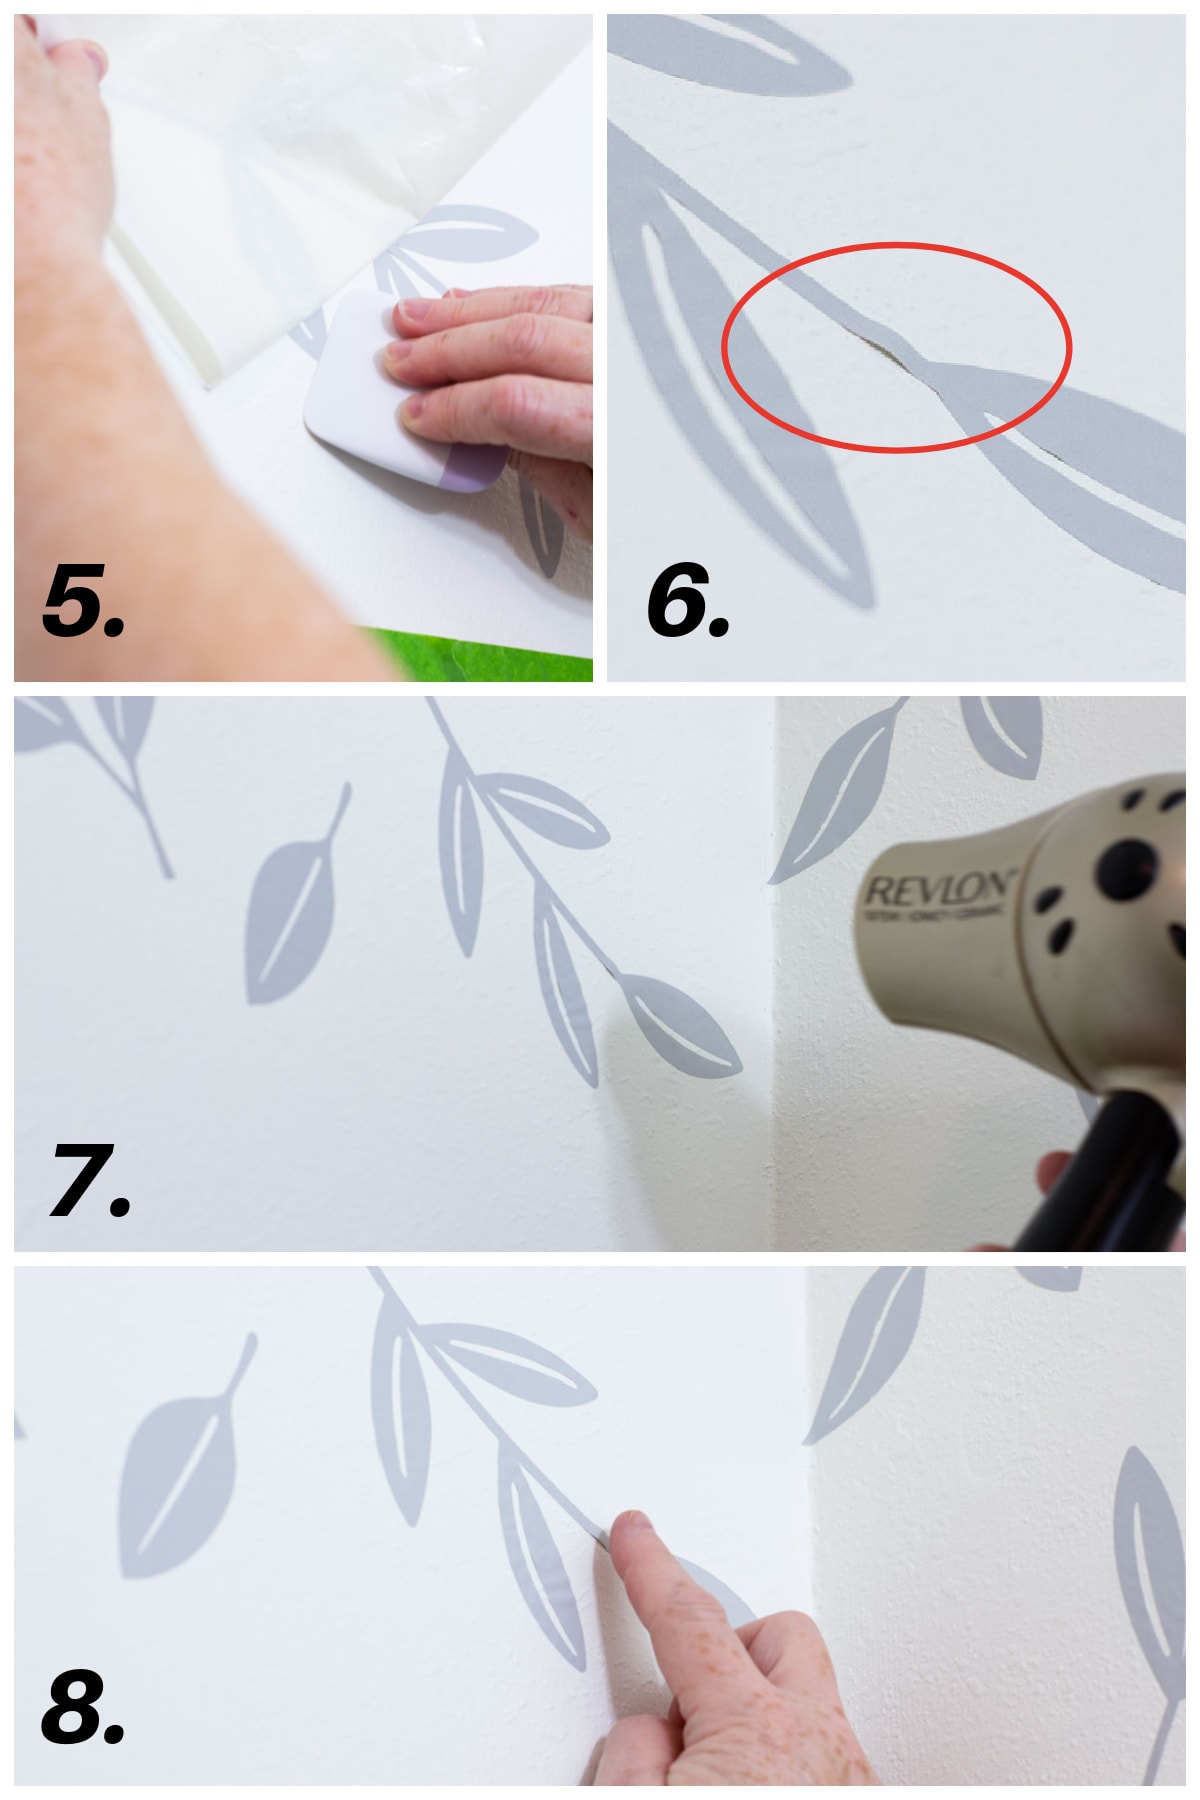
- As you pull away the tape, smooth the decal with the smoothing tool. (Photo 5)
- Sometimes, you may have some lifting of the decal. If this happens, use a hairdryer to ‘warm’ the decal, then smooth with your finger. (Photos 6-8)
The Finished Wall Treatment with Vinyl Decals
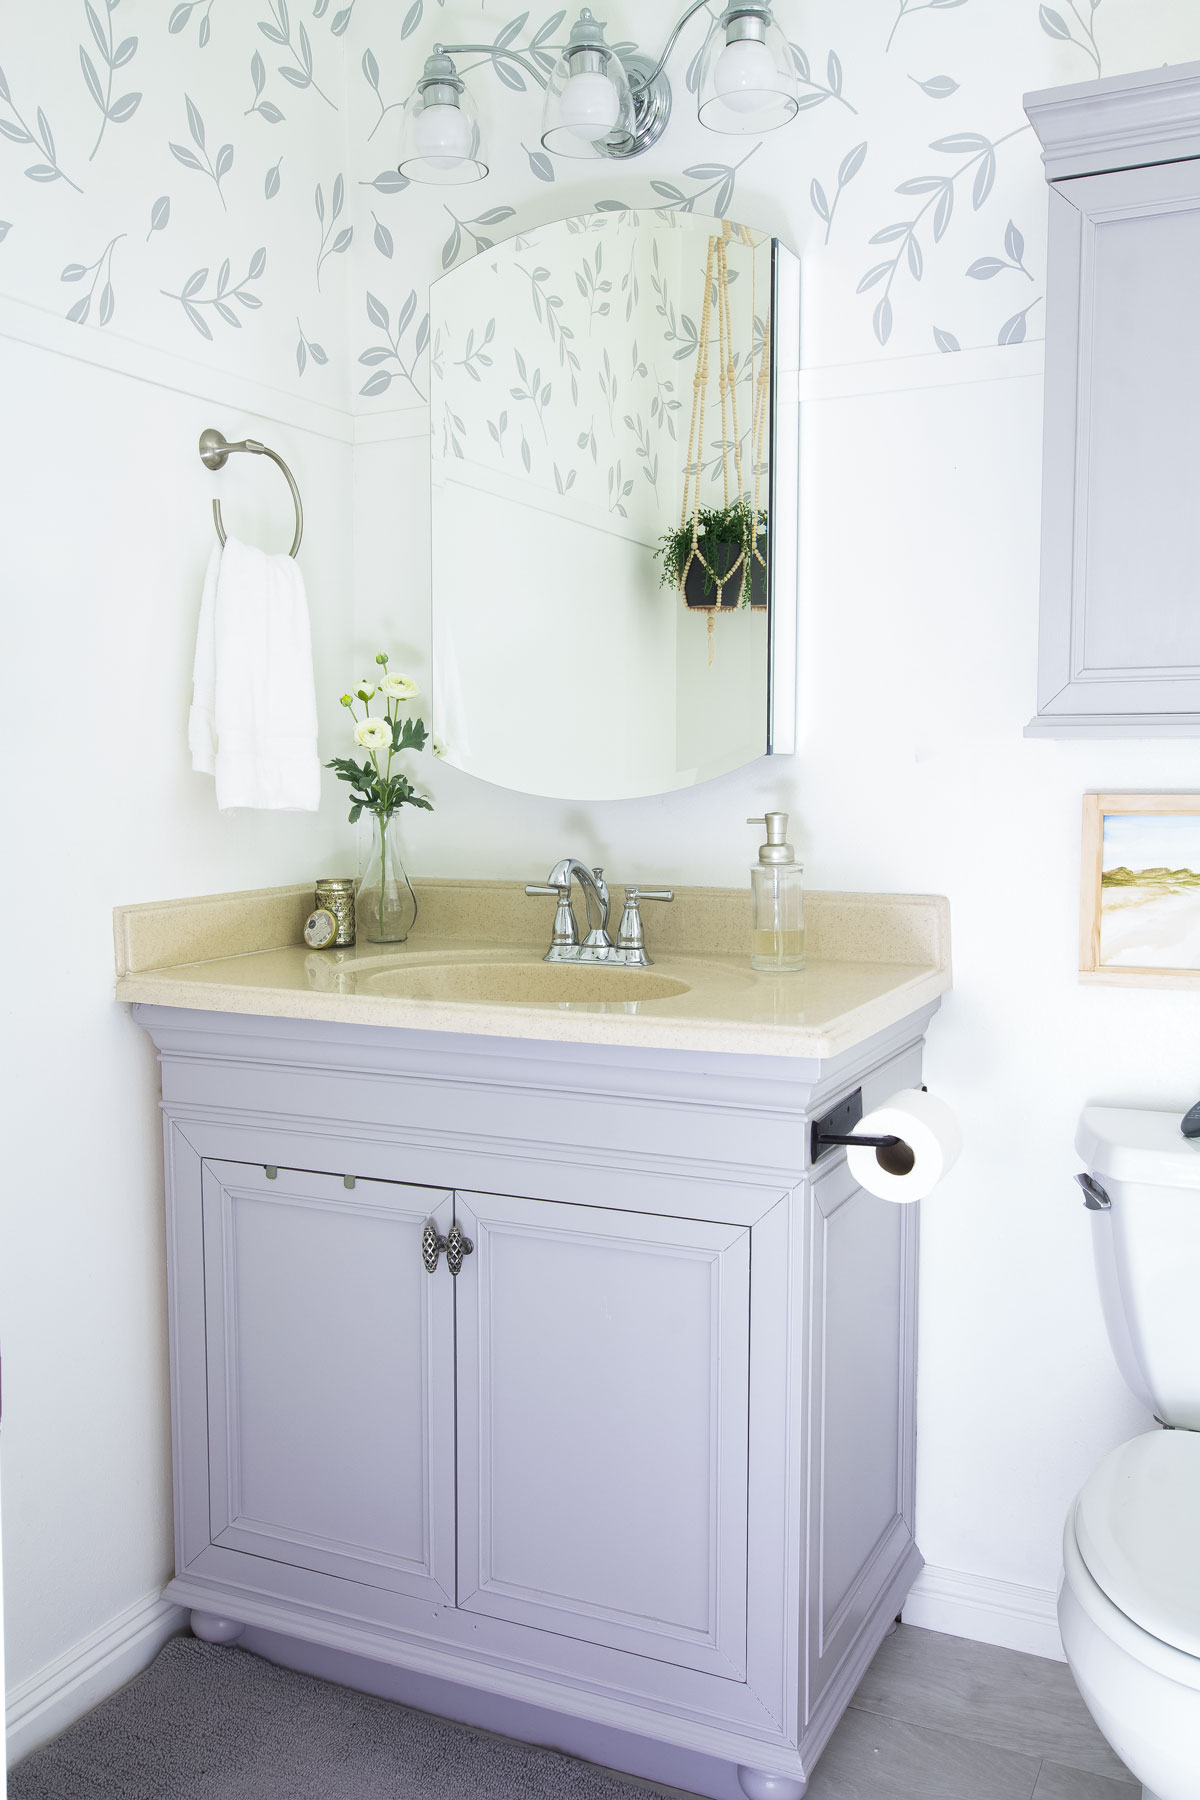
After all was said and done, and I added the painted wood trim, I think the walls looked like they were wallpapered (or at least stenciled).
What do you think?
Even close-up… it looks great!
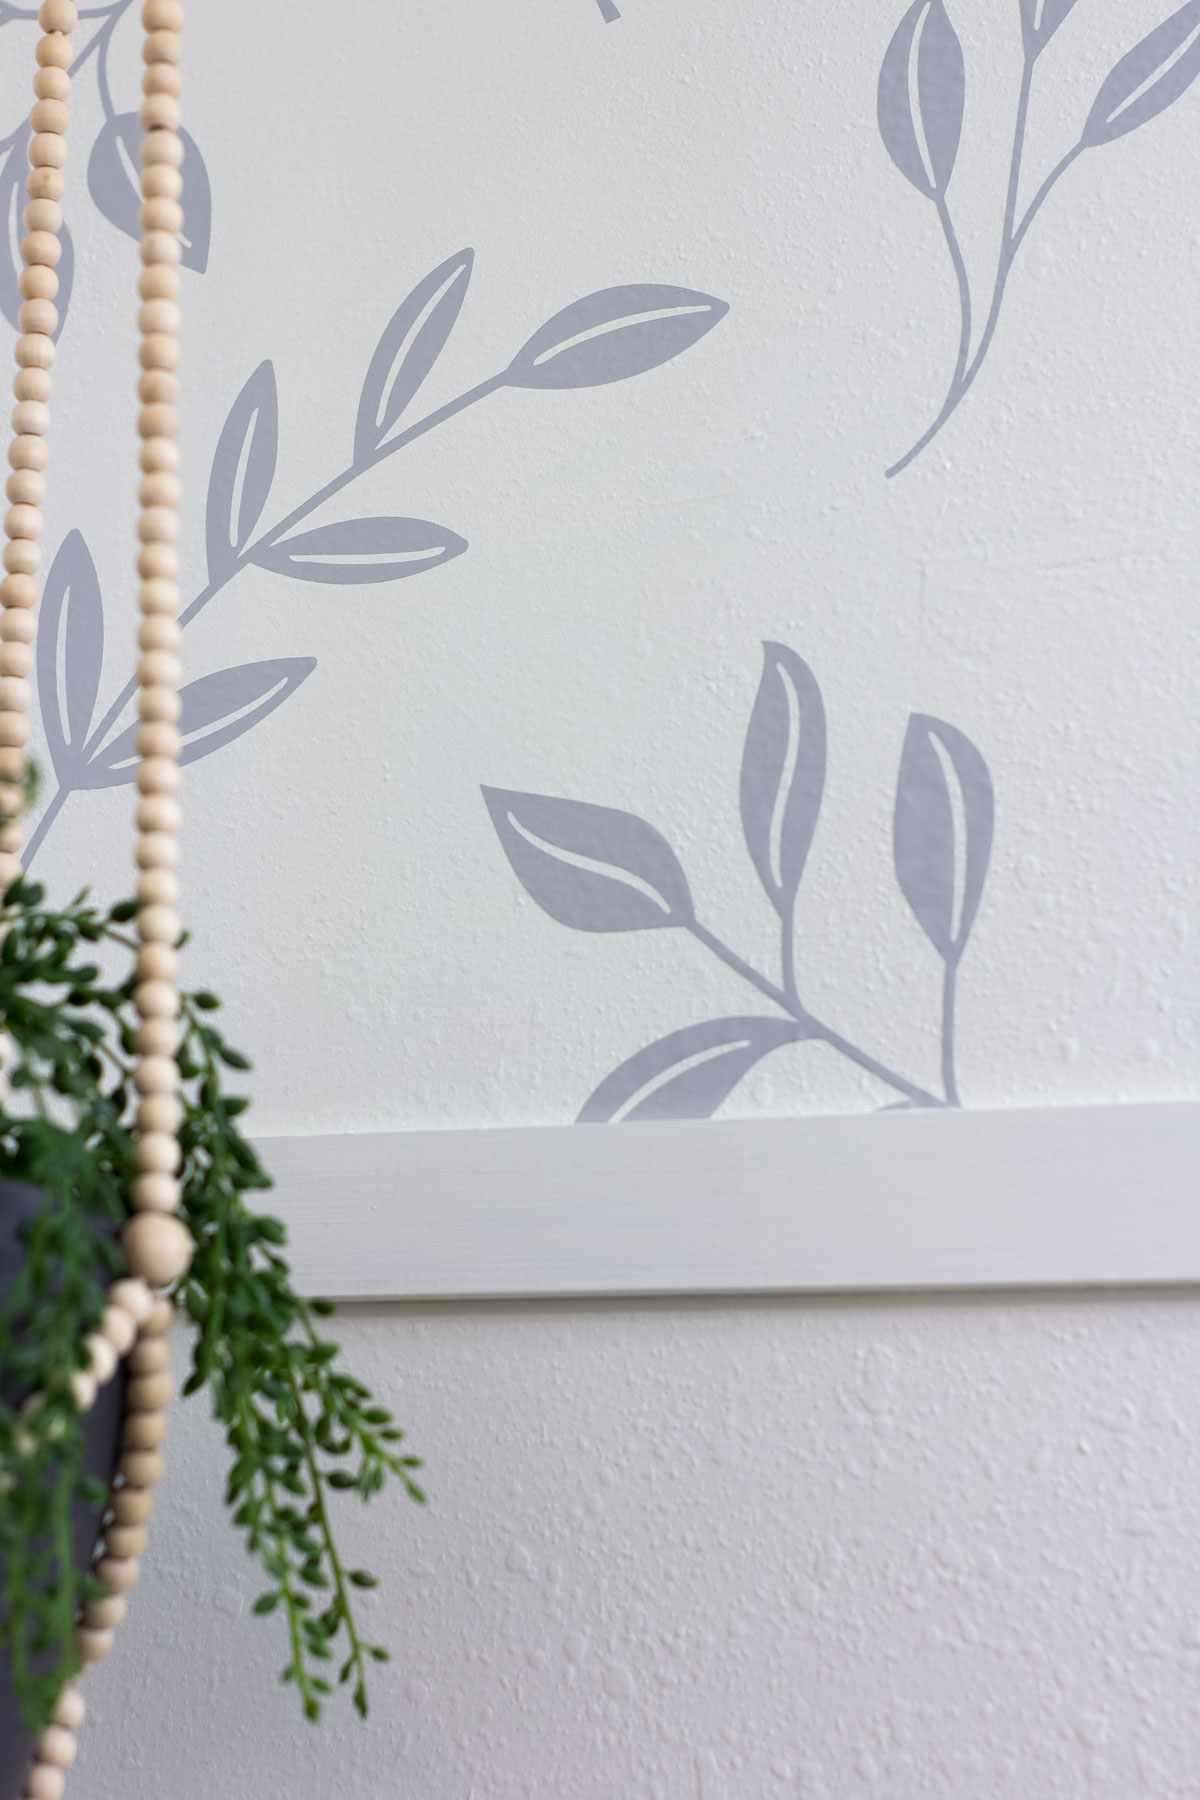
And after six months, I’m happy to say, it looks as good as it did the first day!
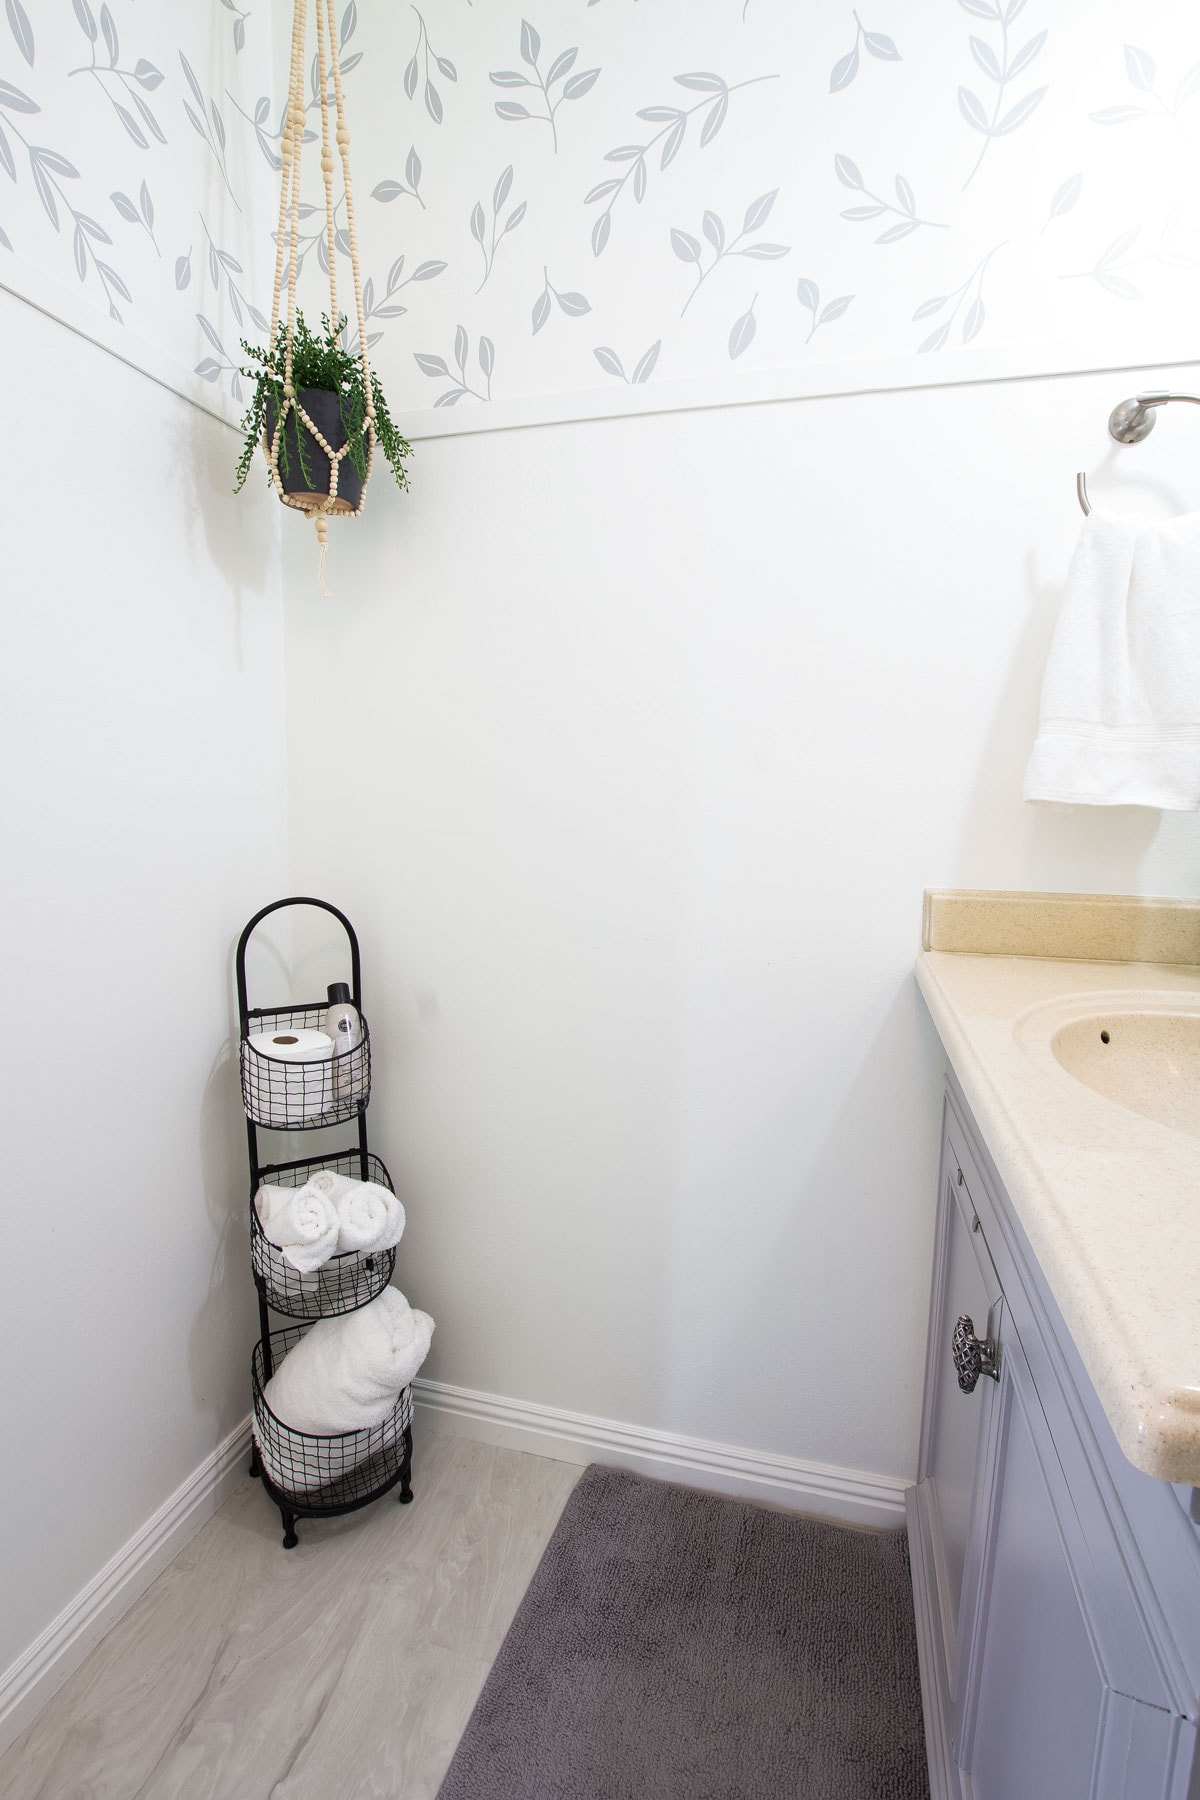
Would you consider this wall treatment technique? This vinyl wall decal process took about two days total.
Do you have any questions that I may not have covered here? Let me know in the comments!
And for more tips and tricks on creating a vinyl decal wallpaper look, check out this post from Driven by Decor!
I might just be looking to create me some vinyl car decals or bumper stickers. If you’re thinking about doing the same, you may want to look into the best vinyl for car decals.


Julie, that looks awesome! Wow, just wonderful. I absolutely love it!
Thank you, sweet friend! It took a bit of time… but it was worth it. And a lot easier than stenciling!
It turned out so great, and I’m featuring this post today at TFT. 🙂
Thank you so much, Pam! So kind of you!
Absolutely beautiful! I have the same kind of walls but I don’t have a cricut… would love to copy this idea! Great job!
Feel free to try it out. The Cricut is good for so many projects. I’m looking forward to doing more!
I love it! Thanks for sparking an idea for adding some color and excitement to a space that I have been needing something for! Look forward to your posts each week!!
Oh, so glad you are inspired, Edna! And thank you for the encouragement! Hugs and hearts!
You are so creative, Julie! You did a fabulous job with the decals! It looks so pretty. Enjoy!
Your detailed instructions are great.
Thanks for sharing your “new” bathroom with us!
Thank you so much, Mary-Ann! So good to hear from you! Hugs and hearts!
This is such a great idea and it looks so beautiful, I love the print you picked out!
Thanks, Kristin. I am very happy with how it turned out, and already thinking of another temporary option to try for a wall treatment!
Great idea, Julie. I’ve been on a wallpaper and decal kick and love the look. Your placement of the decals and boarder draws the eye up. It really looks wonderful in you bathroom. You must be so happy with the finished look!
I really do like how it came out… but I’m actually already thinking of another technique I would like to try! 😉 Crazy, I know! #bloggerlife
Juli, your walls look amazing! I have not done any wall treatments since we moved into this house because of the orange peel walls! I can’t stand the textured finish! Thought I would get used to it, but not so far! I am going to pin this and try it someday! Thanks, Donna
Yeah… I wish orange peel finish had never been thought of! I just really don’t get it! 😉 You know, another wall treatment that you can use on orange peel is fabric. I’m hoping to try that technique out soon!
Wow Julie, this looks fantastic.
It looks like wallpaper.
You did a great job
Aw, thanks, Cindy! I’m glad you think it looks like wallpaper, too! 😉
Congrats! Your space looks great! I’ve been considering a similar look in my home’s downstairs bathroom.
Thanks, Lauren! I can’t wait to see what you do with your space!
It is a stellar treatment! Very beautiful. Your landlord must love you for all the improvements and upgrades you have done.
Janet
She hasn’t seen the bathroom yet. They were going to do the annual inspection, but postponed because they were a bit concerned about Covid (beginning of the year). I’m excited to show her. Thanks, Janet!
Love how this turned out, Julie! I think many people will want to try this since it’s such a budget-friendly and low-risk project compared to real wallpaper! Thanks for sharing all your tips and tricks. Pinning!
I’m going to add some of your keywords that you used in your comment! LOL! You are amazing!
Oh my goodness! This is genius! It looks so great, Julie! I have a Cricut, but never thought to make a wall treatment. Pinning!
Oh! Fun that you were ‘inspired’! 😉
Your decals are gorgeous. I love the hairdryer trick!!!
Happy Spring,
Kippi
Thanks, Kippi! It was a fun project to figure out! 😉
Julie, don’t you love your Cricut! You will have so much fun using it. Your leaf design is lovely and perfect for your bathroom. Great tutorial.
Yes… I’m looking forward to using it on more projects… now to just find the time! Thanks for the love! 😉
Wow, those look fantastic. Never would have thought to do that but I love it. Makes such a huge difference! pinned.
Thank you, Cindy! It’s been nice to have a pretty update in the bathroom.
Wow – that looks like a lot of work, but the result is AMAZING! Beautifully done and a wonderful transformation!
It actually was a lot of work, but less than using a stencil… at least for me! 😉
Your bathroom is fabulous and I love how you created such an eye catching look with vinyl decals!
Thank you so much, Joanne! I’m actually already thinking about changes! LOL!
Cricut for the win! Wow, a lot of work but the results are stunning. I never would have thought to use my Cricut Maker to make wallpaper decals.
Yes it was a lot of work! I might try something different with my new bathroom. 😉
Julie, you definitely found the perfect solution for your bathroom. It looks amazing and I would never have guessed they were vinyl decals. You must be so pleased with the results.
Thank you for sharing your fabulous decorating DIY at Create, Bake, Grow & Gather this week. I’m delighted to be featuring your wallpaper look at tonight’s party and pinning too.
Hugs,
Kerryanne
Thank you so much, Kerryanne… always blessed when you let me know I’m being featured at your lovely party!
It’s amazing!!! I love it!!!
Could you tell me exactly what design is that? I look at design space, but I didn’t find it!!!
Thank You!!!
Thank you, Allison! Of course… there are A LOT of ‘leaves’ files, for sure! The numbers I used are #M14791AC2,M14791AF8,M14791AB9,M29C39. Hope that helps!
Oh!!! Thank You! I found almost all the drawings except the last one. Would you mind checking the number again, please? I’d greatly appreciate it!!! 🙂
Yep… I made a mistake. Should be #M39C39. Let me know how it comes out!
Hi Julie!
Unfortunately, it doesn’t work!! 🙁
I can’t find the two leaves and the one leave as well.
Sorry to bother you…
Thank You!
The two-leaf is the M39C39… it shows as green, but it still works. Also, there is another two leaf that I ‘cut away’ from one of the other files. Same with the one leaf. 🙂 Does that help, Allison?
Thanks Julie!!!!
Of course! Let me know how it comes out!